model_catalog_json-Katalogdatei, um jederzeit aus der /model-Liste zu wechseln).
Installation
Offizieller Download (macOS-Version)
https://openai.com/en/codex/Installation per Kommandozeile
Konfiguration der Umgebungsvariablen
Konfiguration über Konfigurationsdateien
- Bearbeiten Sie die Konfigurationsdatei
~/.codex/config.tomlund fügen Sie die folgenden Einstellungen hinzu:
- Bearbeiten Sie die Konfigurationsdatei
~/.codex/auth.jsonund ändern Sie die folgenden Einstellungen:
Konfiguration via cc-switch
- Starten Sie CC-Switch und fügen Sie den Anbieter hinzu.
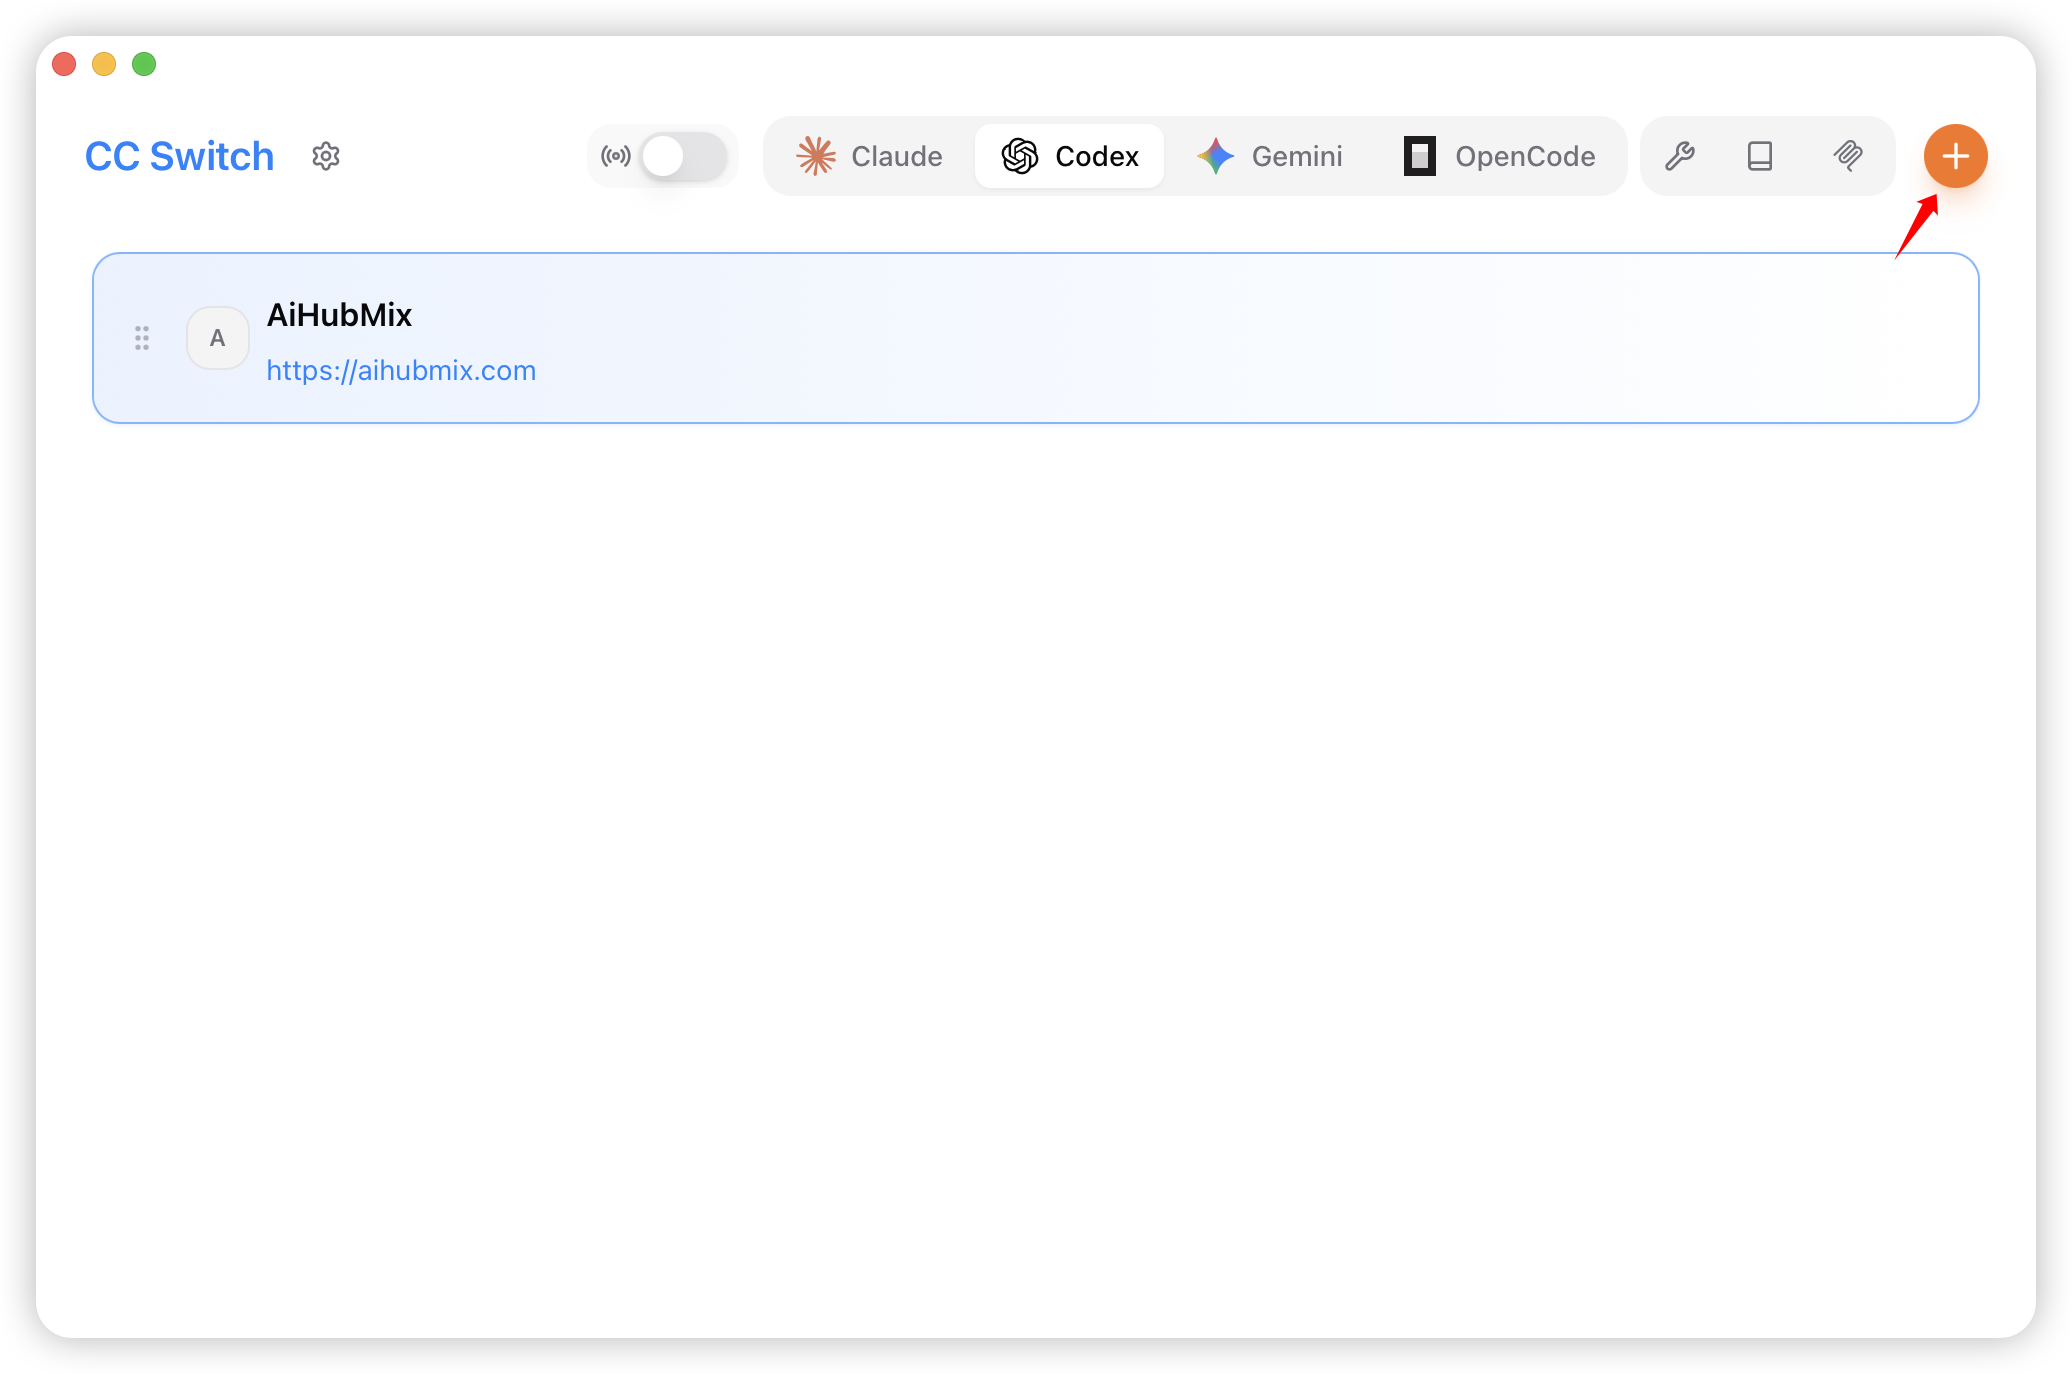
- Wählen Sie aus der Voreinstellungsliste „AiHubMix”.
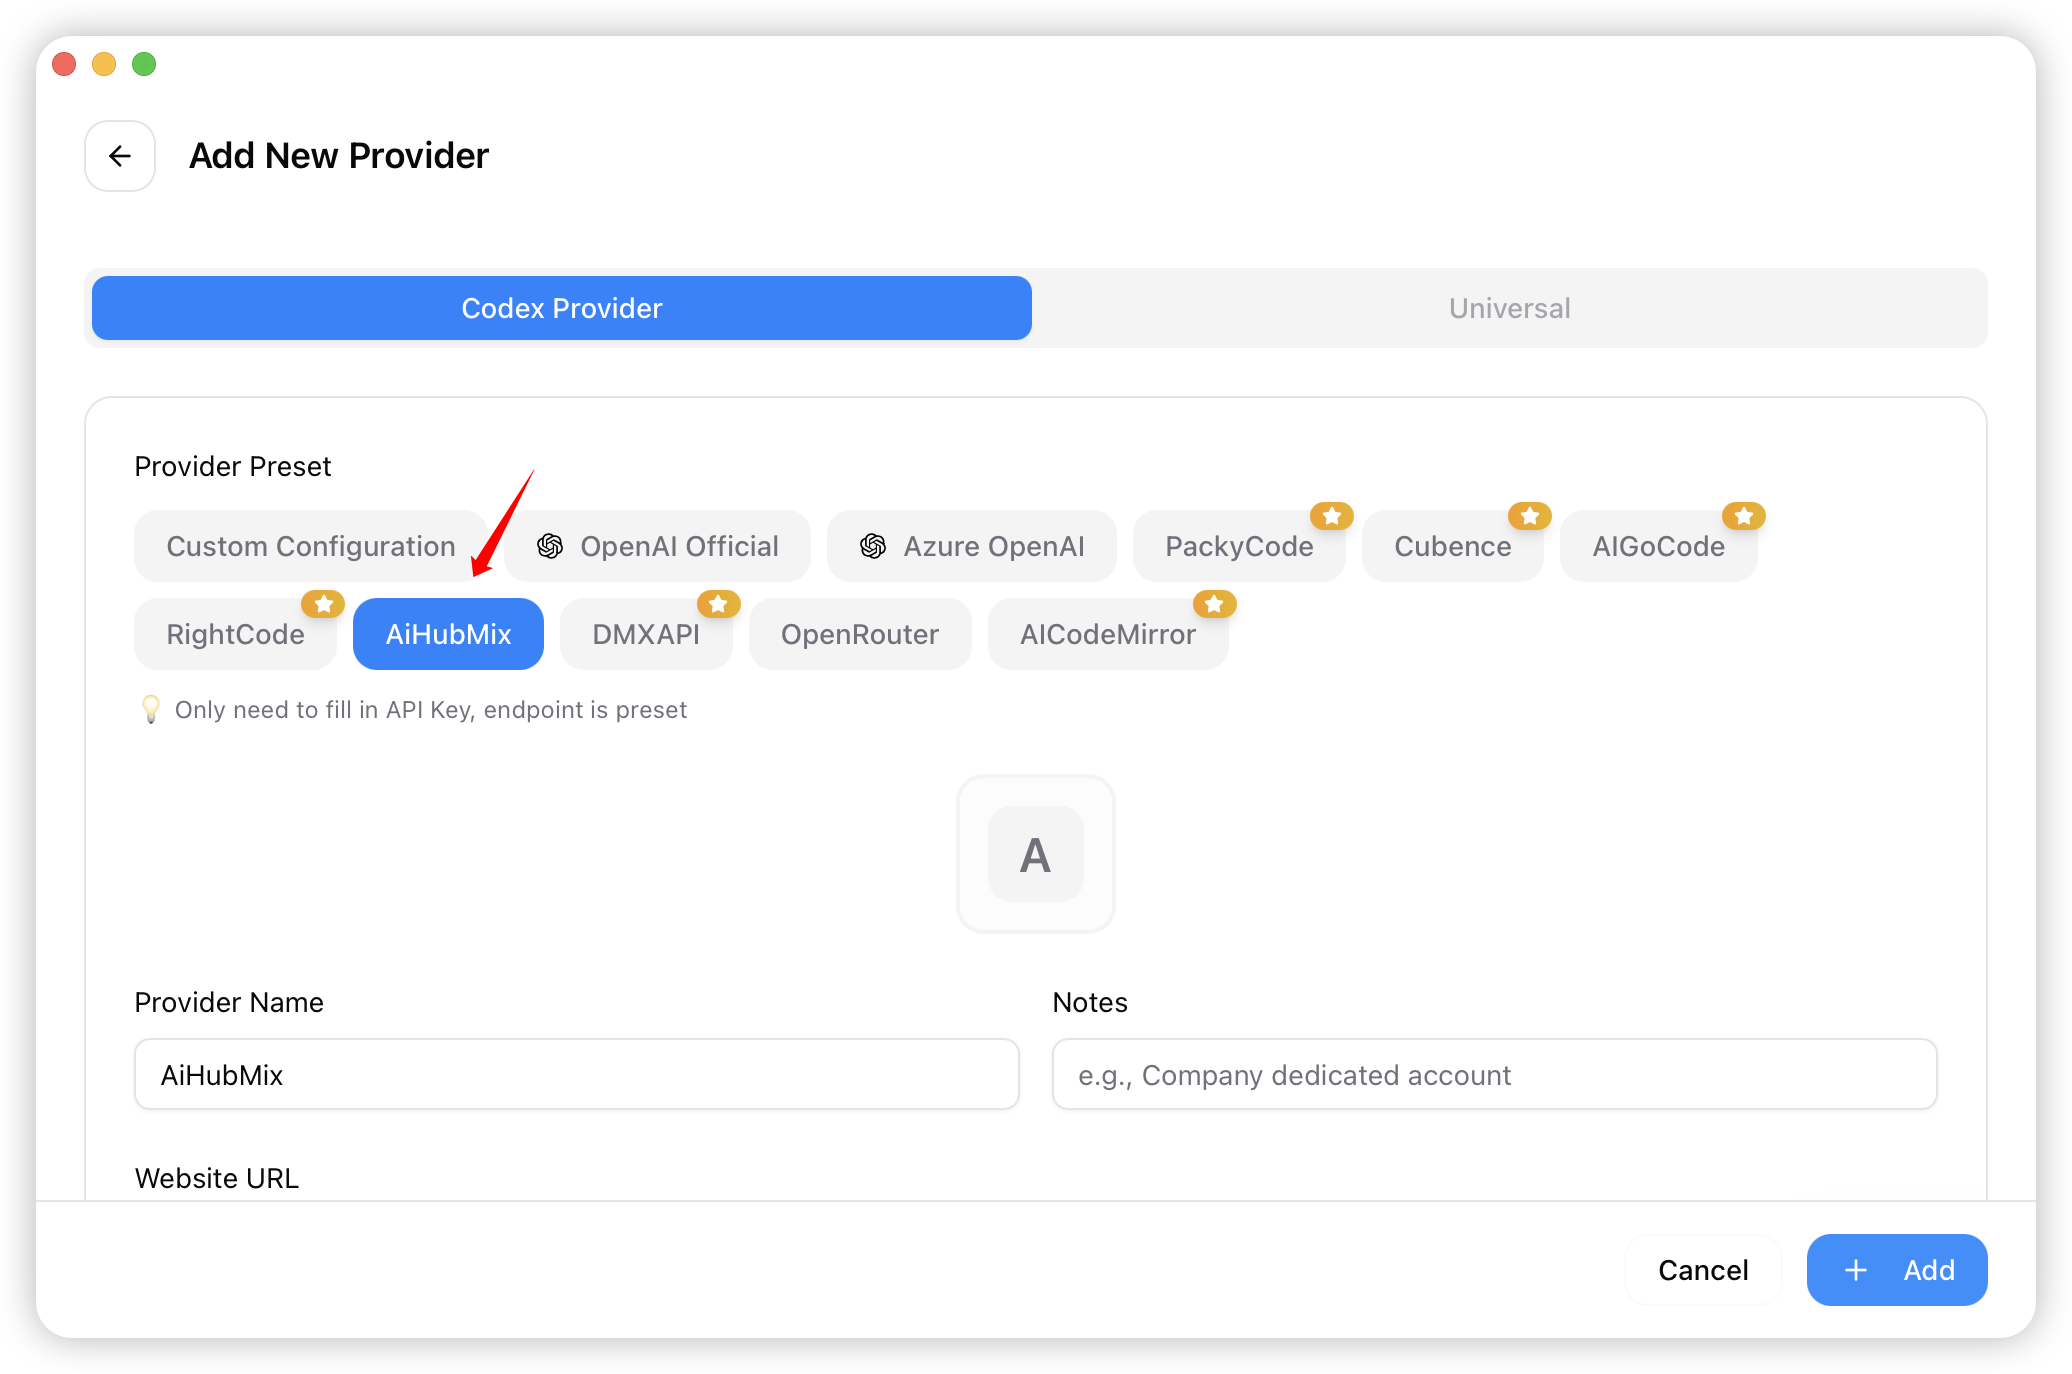
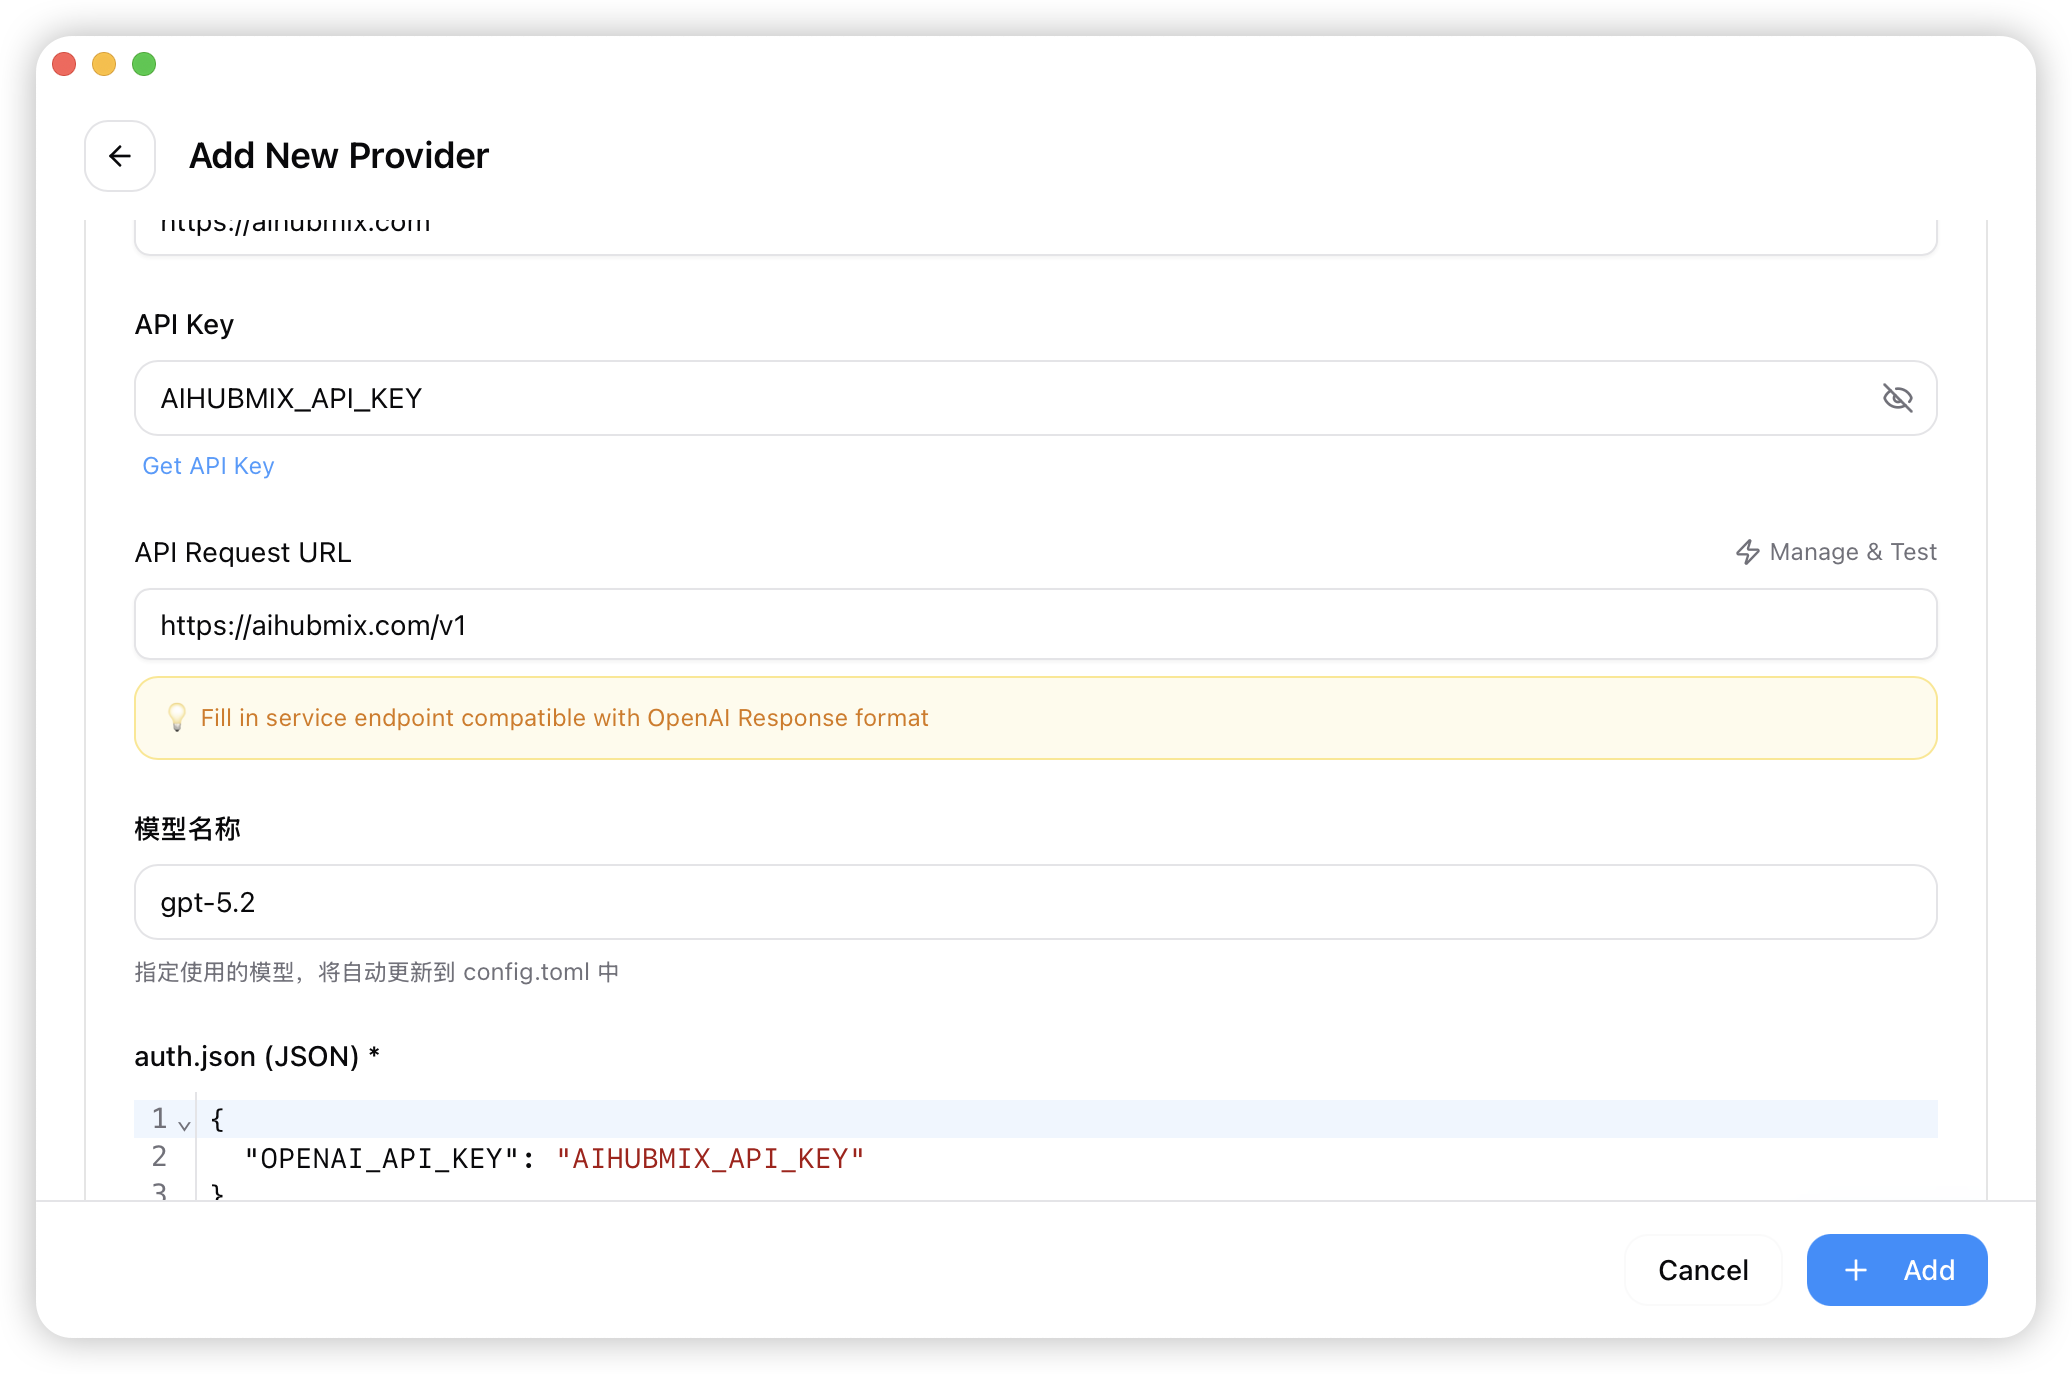
- Geben Sie Ihren Key in das Feld „API Key” ein und klicken Sie auf „Add”, um die Einstellungen zu speichern.
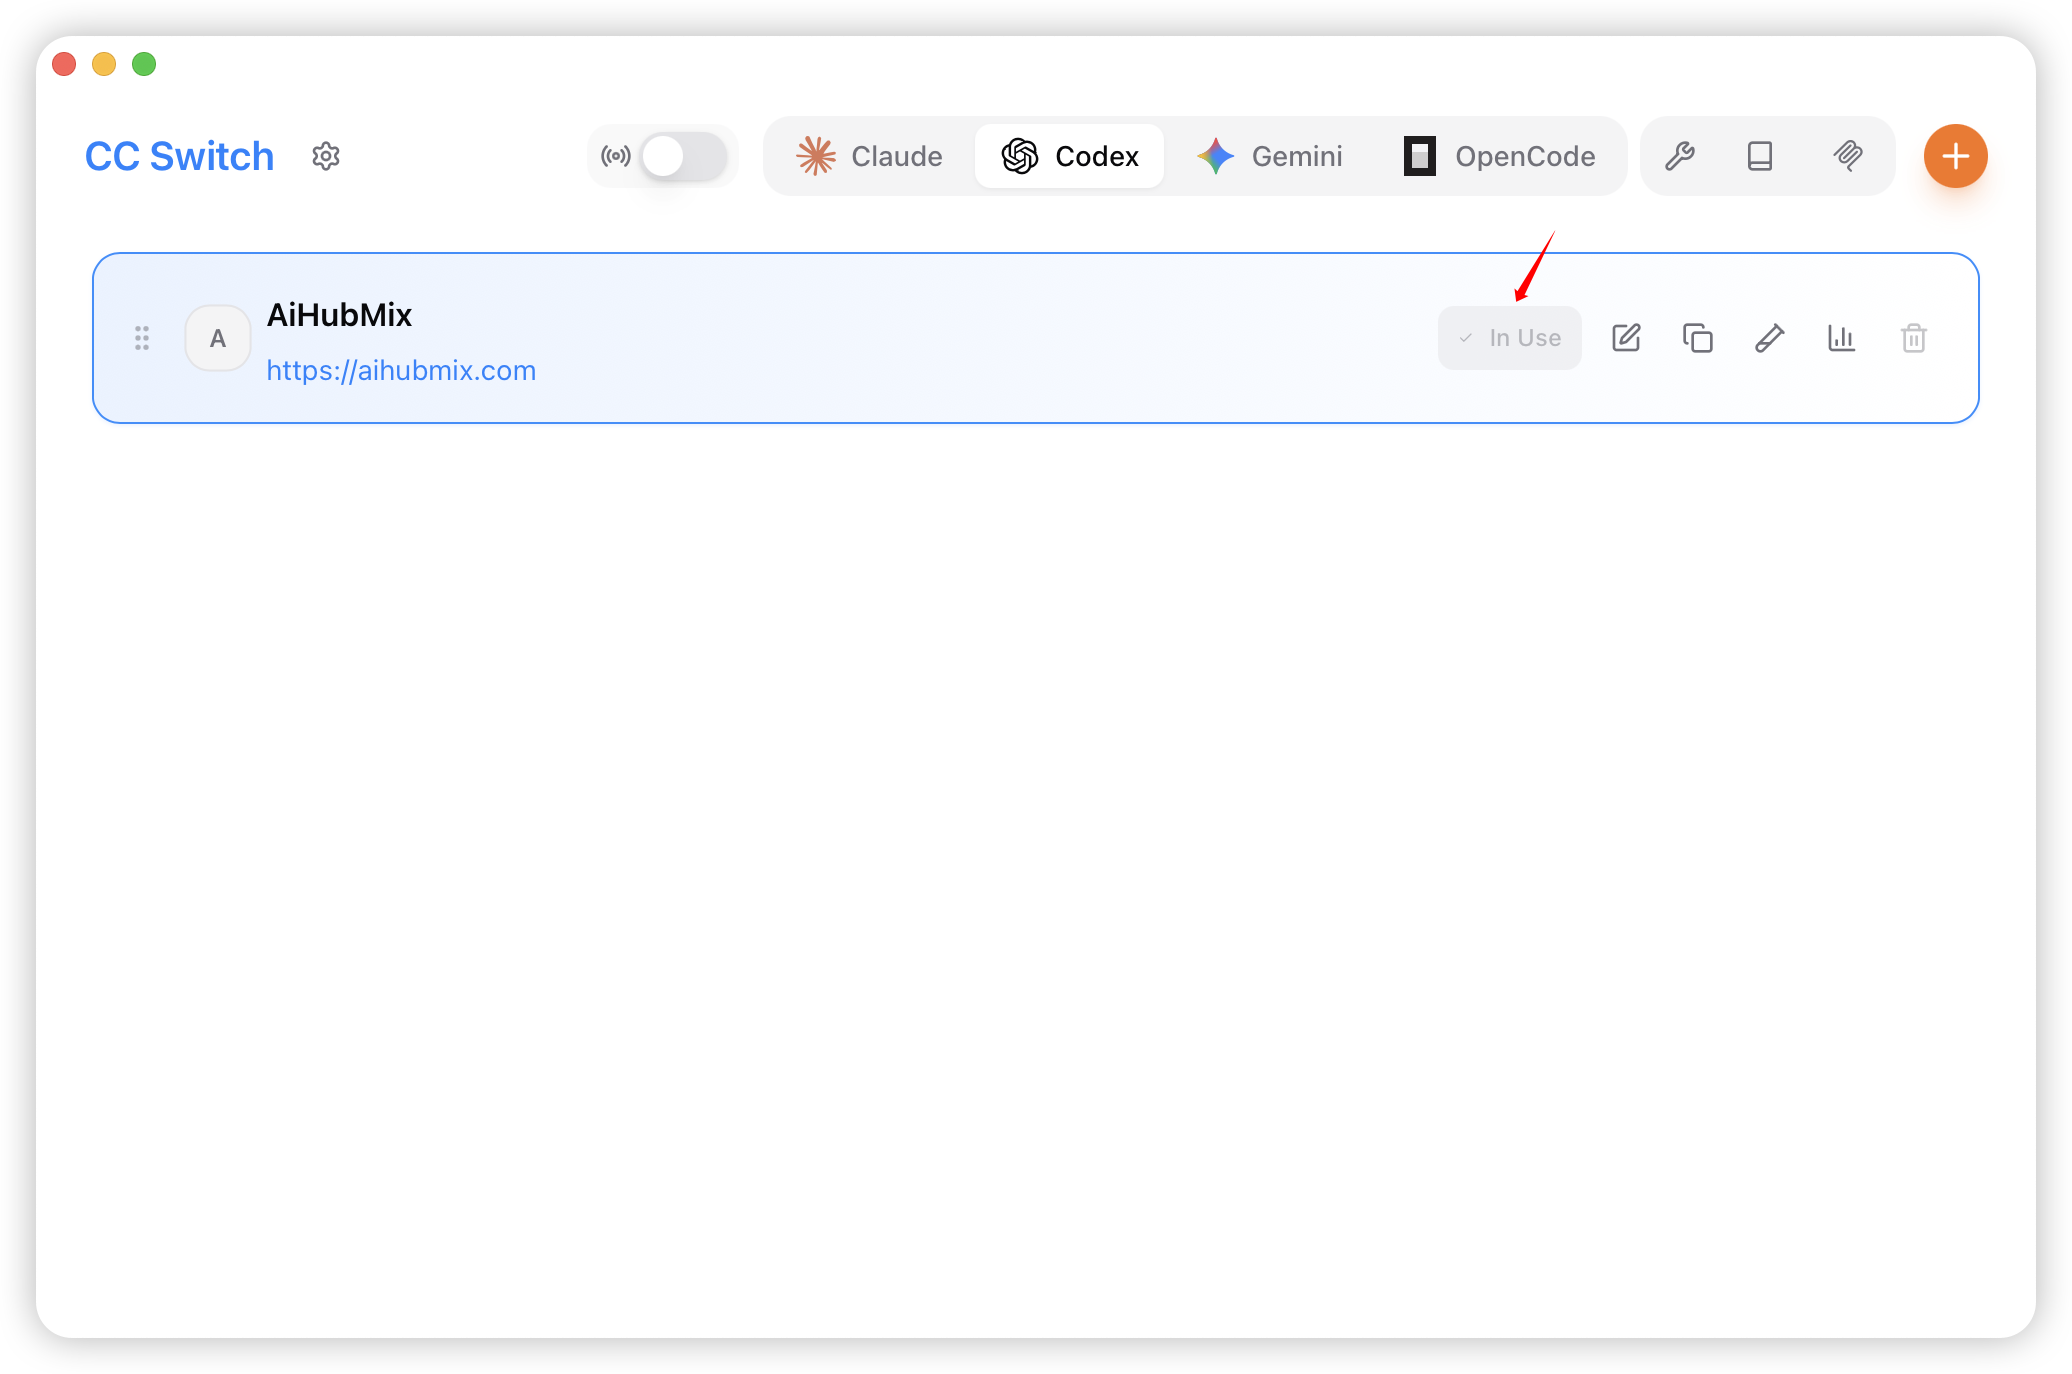
- Kehren Sie zur Startseite zurück, wählen Sie „AiHubMix” aus der Anbieterliste und klicken Sie auf „Enable”, um es zu verwenden.
Codex verwenden
Verwendung im Terminal
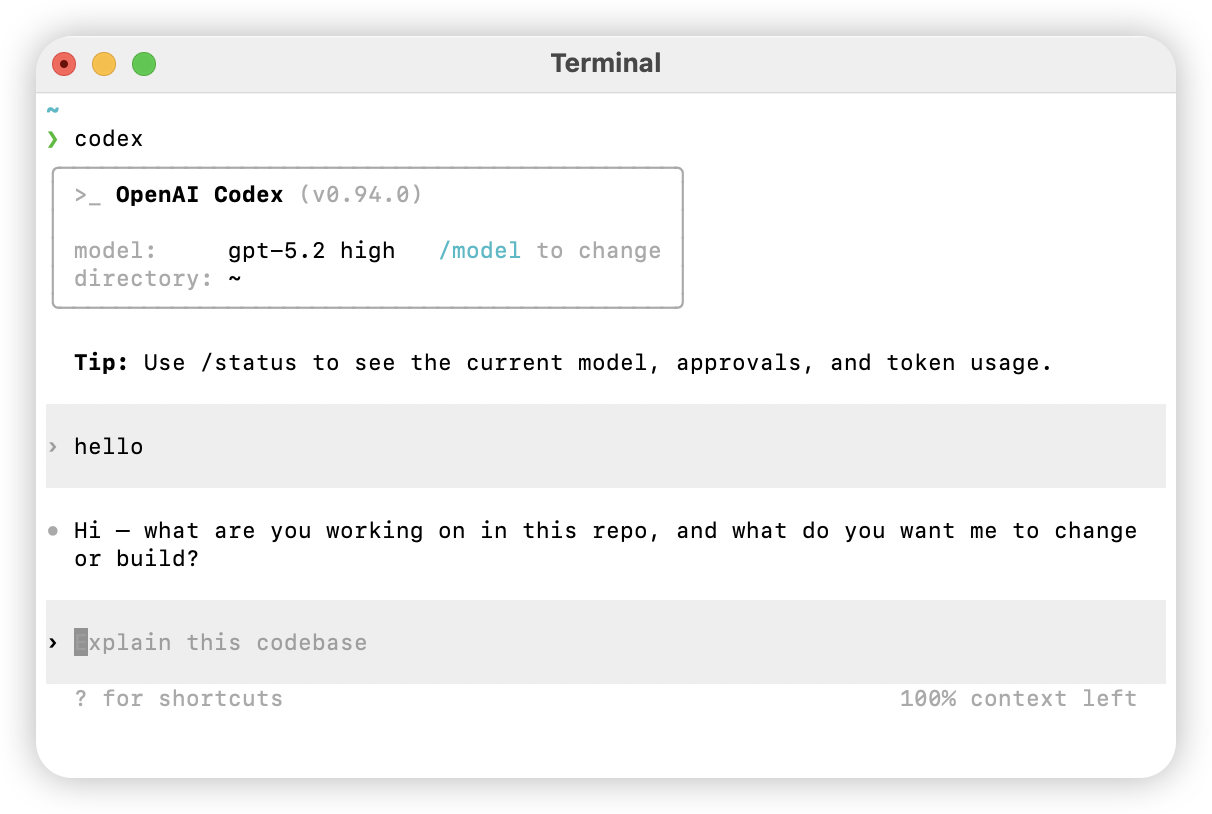
- Öffnen Sie das Terminal, navigieren Sie in Ihr Projektverzeichnis und führen Sie den Befehl
codexaus.
- Legen Sie die Berechtigungen nach Bedarf fest.
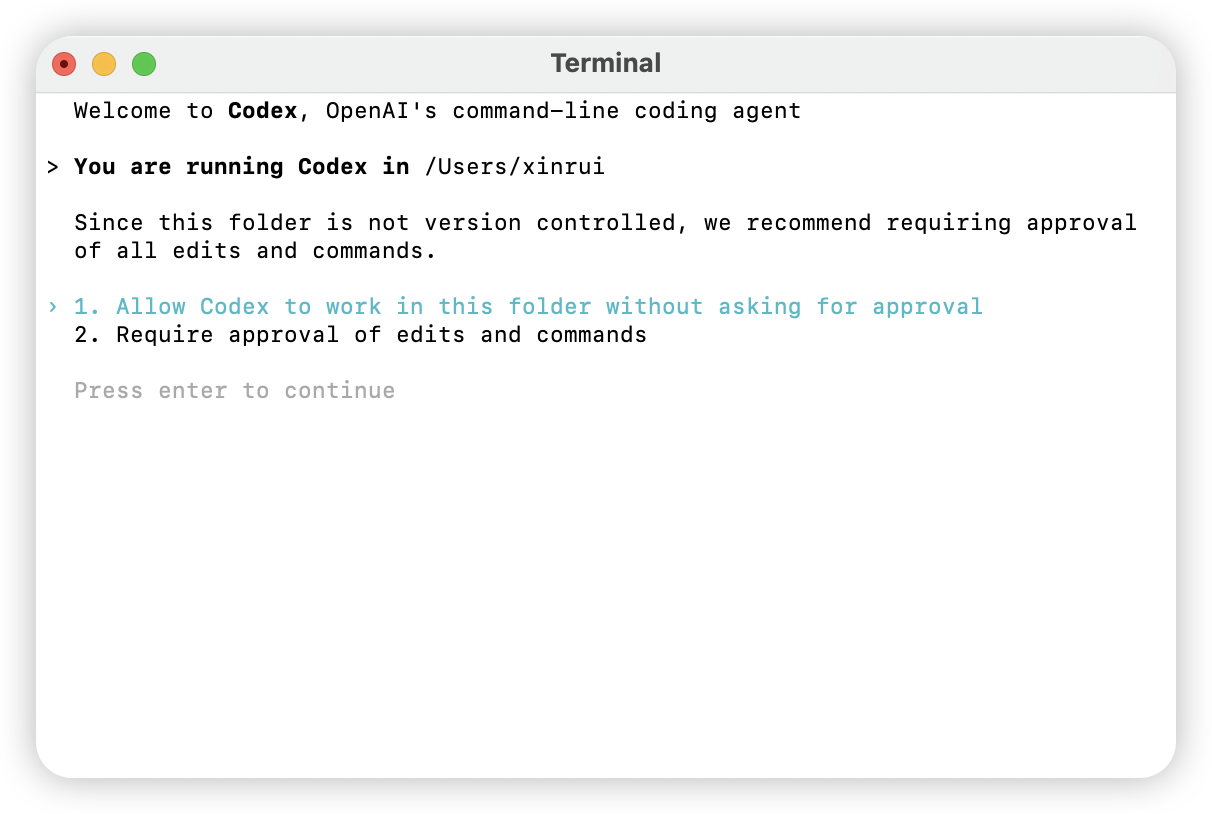
- Wählen Sie das benötigte Modell anhand Ihrer Anforderungen.
- Geben Sie natürliche Sprache ein; wenn Sie eine normale Antwort erhalten, war die Konfiguration erfolgreich.
Verwendung in der Codex-Desktop-App
- Öffnen Sie die Codex-Desktop-App und wählen Sie das Arbeitsverzeichnis.
- Geben Sie die Aufgabe in das Eingabefeld ein; wenn Sie eine normale Antwort erhalten, war die Konfiguration erfolgreich.

Nützliche Befehlsreferenzen
Hilfe-Befehl
Vollständige Befehlsoptionen
Benutzerdefinierte Modelle in Codex verwenden
Standardmäßig zeigt Codex in der/model-Liste nur die offiziellen OpenAI-Modelle an. Wenn Sie direkt aus der Liste ein beliebiges Modell auf AIHubMix auswählen möchten (GLM, Claude, Gemini, DeepSeek, Kimi, Qwen …), können Sie den offiziell unterstützten Mechanismus für „benutzerdefinierte Modelle” nutzen: Sie deklarieren die auswählbaren Modelle über eine lokale JSON-Datei (model_catalog_json) und leiten die Anfragen mit [model_providers.aihubmix] an AIHubMix weiter.
Offizielle Dokumentation: Advanced Configuration · OSS mode / local providers
Zwei Anbindungswege
Der Abschnitt „Konfiguration der Umgebungsvariablen” weiter oben beschreibt den grundlegenden Weg, dieser Abschnitt beschreibt den Weg über benutzerdefinierte Modelle. Die Unterschiede sind wie folgt – wählen Sie nach Bedarf:
Der gesamte Ablauf besteht aus nur 4 Schritten: Katalogdatei erzeugen →
config.toml anpassen → Umgebungsvariable setzen → neu starten und Modell auswählen.
Schritt 1: Modellkatalog-Datei erzeugen
Die Katalogdatei hat die Struktur{ "models": [ ... ] }, wobei jedes Element im Array ein Modell beschreibt, das in /model ausgewählt werden kann. Im Folgenden erklären wir zunächst die Felder anhand eines festen Modells und geben anschließend ein Skript zum Batch-Generieren der Top 30.
1.1 Zuerst das Format verstehen: ein festes Modell
Im Folgenden sehen Sie einen nachweislich von Codex parsbaren minimalen vollständigen Katalog (enthält nur das eine Modellglm-5.2). Speichern Sie ihn einfach als ~/.codex/model-catalogs/custom-models.json, dann ist er einsatzbereit; für weitere Modelle hängen Sie einfach weitere Einträge mit derselben Struktur an das models-Array an.
Zu
base_instructions: Dies ist der System-Prompt des jeweiligen Modells. Im Beispiel steht ein Platzhaltersatz, mit dem das Modell normal läuft; wenn Sie ein Codierverhalten möglichst nah am nativen Codex möchten, ersetzen Sie ihn durch die vollständigen base_instructions eines beliebigen integrierten Modells aus codex debug models --bundled (genau das macht das Batch-Skript im nächsten Abschnitt).
Der offizielle Katalog verwendet snake_case-Felder (
display_name, supported_in_api, visibility). Zwei Fehlerarten führen dazu, dass der gesamte Katalog verworfen wird und in /model keine Modelle erscheinen: fehlende Pflichtfelder melden missing field ...; veraltete camelCase-Formate wie displayName, hidden oder unbekannte Werte melden unknown variant .... Halten Sie sich einfach an den Feldsatz in diesem Artikel, um beides zu vermeiden.1.2 Top 30 im Batch generieren
Mehrere Einträge von Hand zu schreiben, führt leicht zu fehlenden Feldern. Um die ersten 30 LLMs aus der AIHubMix-Modelllisten-API auf einen Schlag in den Katalog zu schreiben, verwenden Sie das folgende Skript – es klont ein integriertes Modell als Vorlage, sodass die Pflichtfelder (einschließlich der korrektenbase_instructions) von Haus aus vollständig sind und über alle Codex-Versionen hinweg nicht fehlen. Benötigt werden curl, python3 und die installierte codex-CLI:
slug, display_name, description, context_window usw.), alle übrigen Pflichtfelder werden aus der integrierten Vorlage geklont – genau der Feldsatz aus Abschnitt 1.1, nur dass base_instructions der vollständige offizielle Prompt ist.
Die erzeugte Datei ist relativ groß (jeder Eintrag enthält die vollständigenbase_instructions, etwa 1–2 MB), das ist normal. Prüfen Sie nach dem Ausführen mitcodex debug models, ob sie korrekt geparst wird (siehe Schritt 5).
Die Zeile mit demimage_generation-Filter im Skript ist bewusst beibehalten: In der Antwort vontype=llmtragen einige wenige Modelle gleichzeitig dasimage_generation-Label (z. B.gpt-image-2), die nicht für Dialoge geeignet sind; das Skript überspringt diese automatisch und nimmt dann die ersten 30.
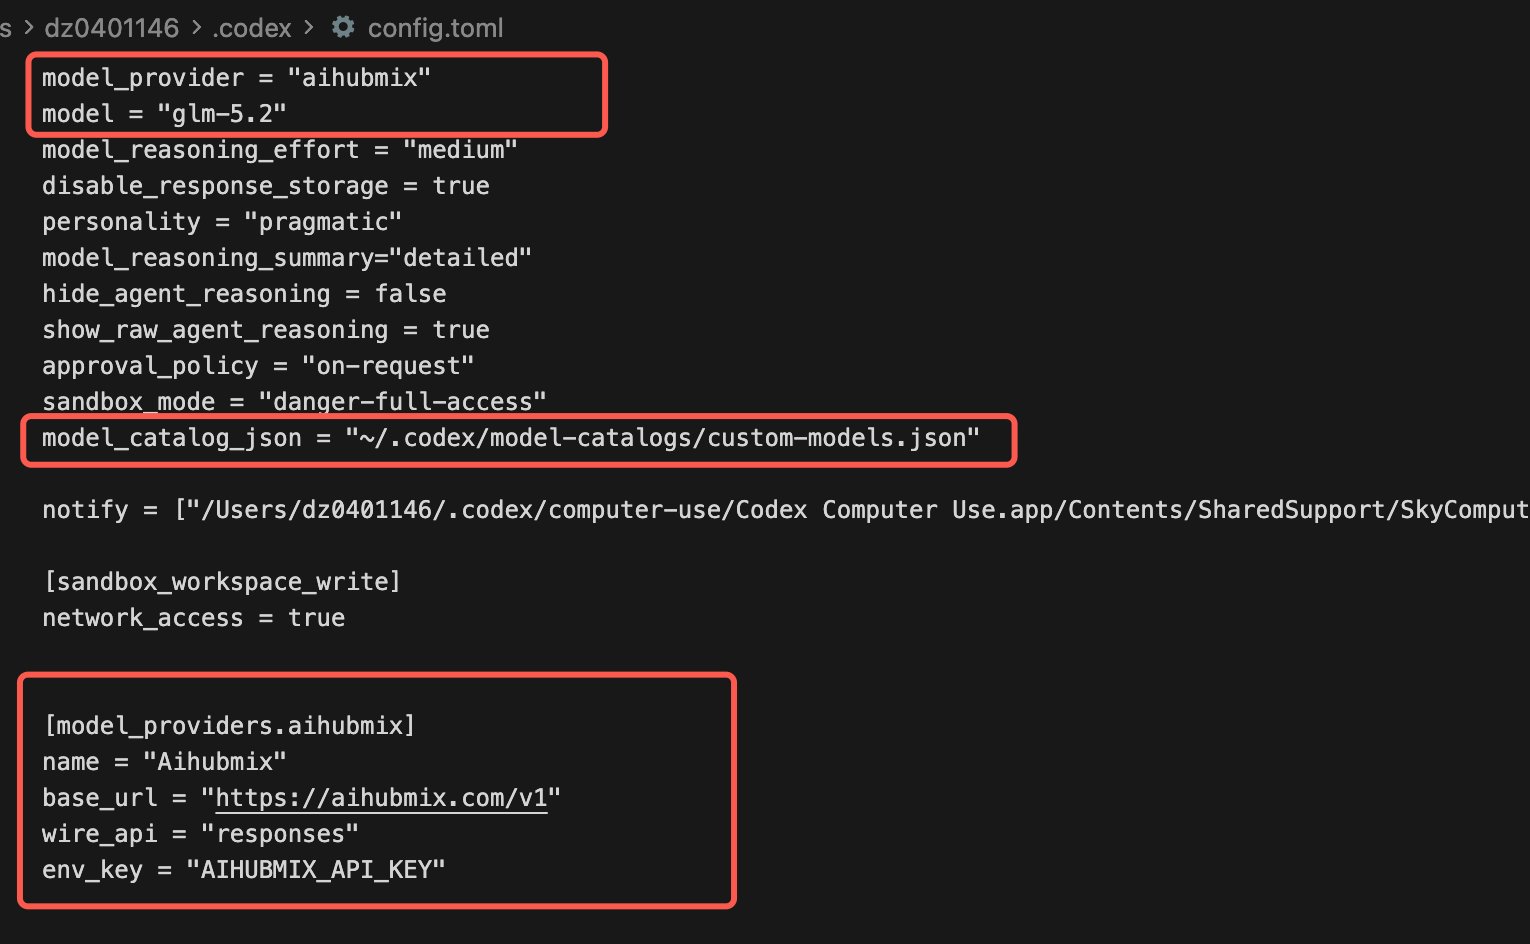
Schritt 2: config.toml anpassen
Bearbeiten Sie ~/.codex/config.toml, fügen Sie auf Wurzelebene model_catalog_json hinzu und definieren Sie den aihubmix-Provider:
wire_api = "responses" ist entscheidend; fehlt es oder steht dort chat, kommt keine Verbindung zustande. Neuere Codex-Versionen nutzen ausschließlich OpenAIs Responses API (/v1/responses), und AIHubMix ist nativ mit der Responses API kompatibel – daher genügt es, direkt auf https://aihubmix.com/v1 zu verweisen, ohne einen eigenen Konvertierungs-Proxy aufzusetzen.config.toml ungefähr so aus (die roten Rahmen markieren die Kernpunkte dieses Schritts: die model / model_provider / model_catalog_json auf Wurzelebene sowie den Abschnitt [model_providers.aihubmix]):
Schritt 3: Umgebungsvariable setzen
Setzen Sie die oben mitenv_key angegebene Umgebungsvariable (achten Sie darauf, dass um das = herum keine Leerzeichen stehen):
~/.zshrc / ~/.bashrc einzutragen. Den Key erhalten Sie in der AIHubMix-Konsole.
Schritt 4: Neu starten und Modell auswählen
Starten Sie die Codex-App / das TUI neu, damit die Katalogdatei wirksam wird, dann:/model werden alle in der Katalogdatei deklarierten Modelle aufgelistet; mit den Pfeiltasten auswählen und mit Enter bestätigen:
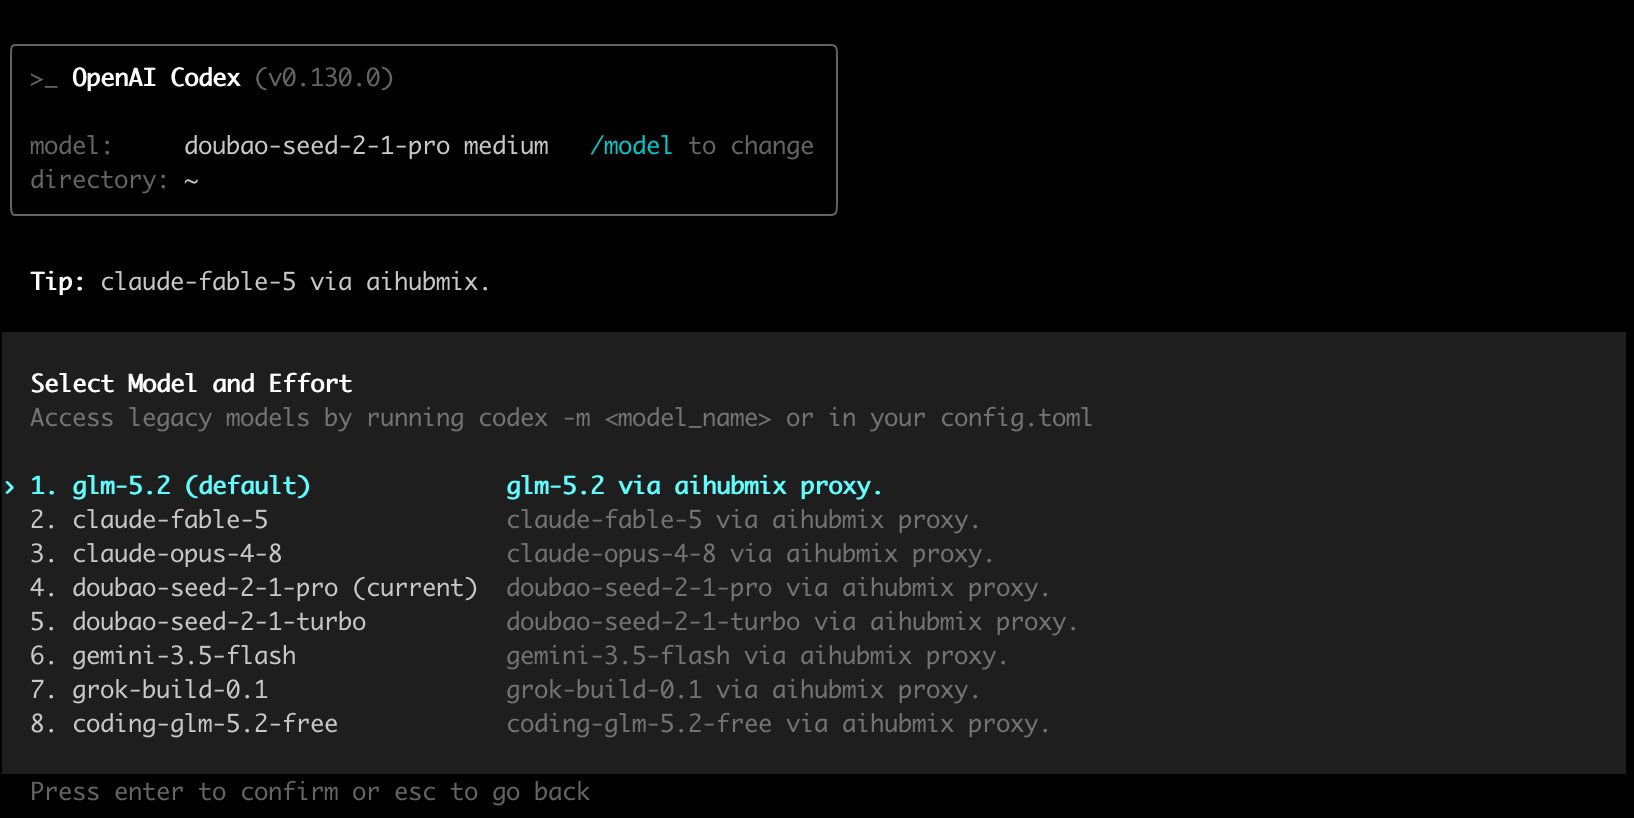
/model Sie zusätzlich die Reasoning-Stufe (Effort) wählen; wählen Sie je nach Bedarf low / medium / high.
Schritt 5: Überprüfen, ob es wirkt
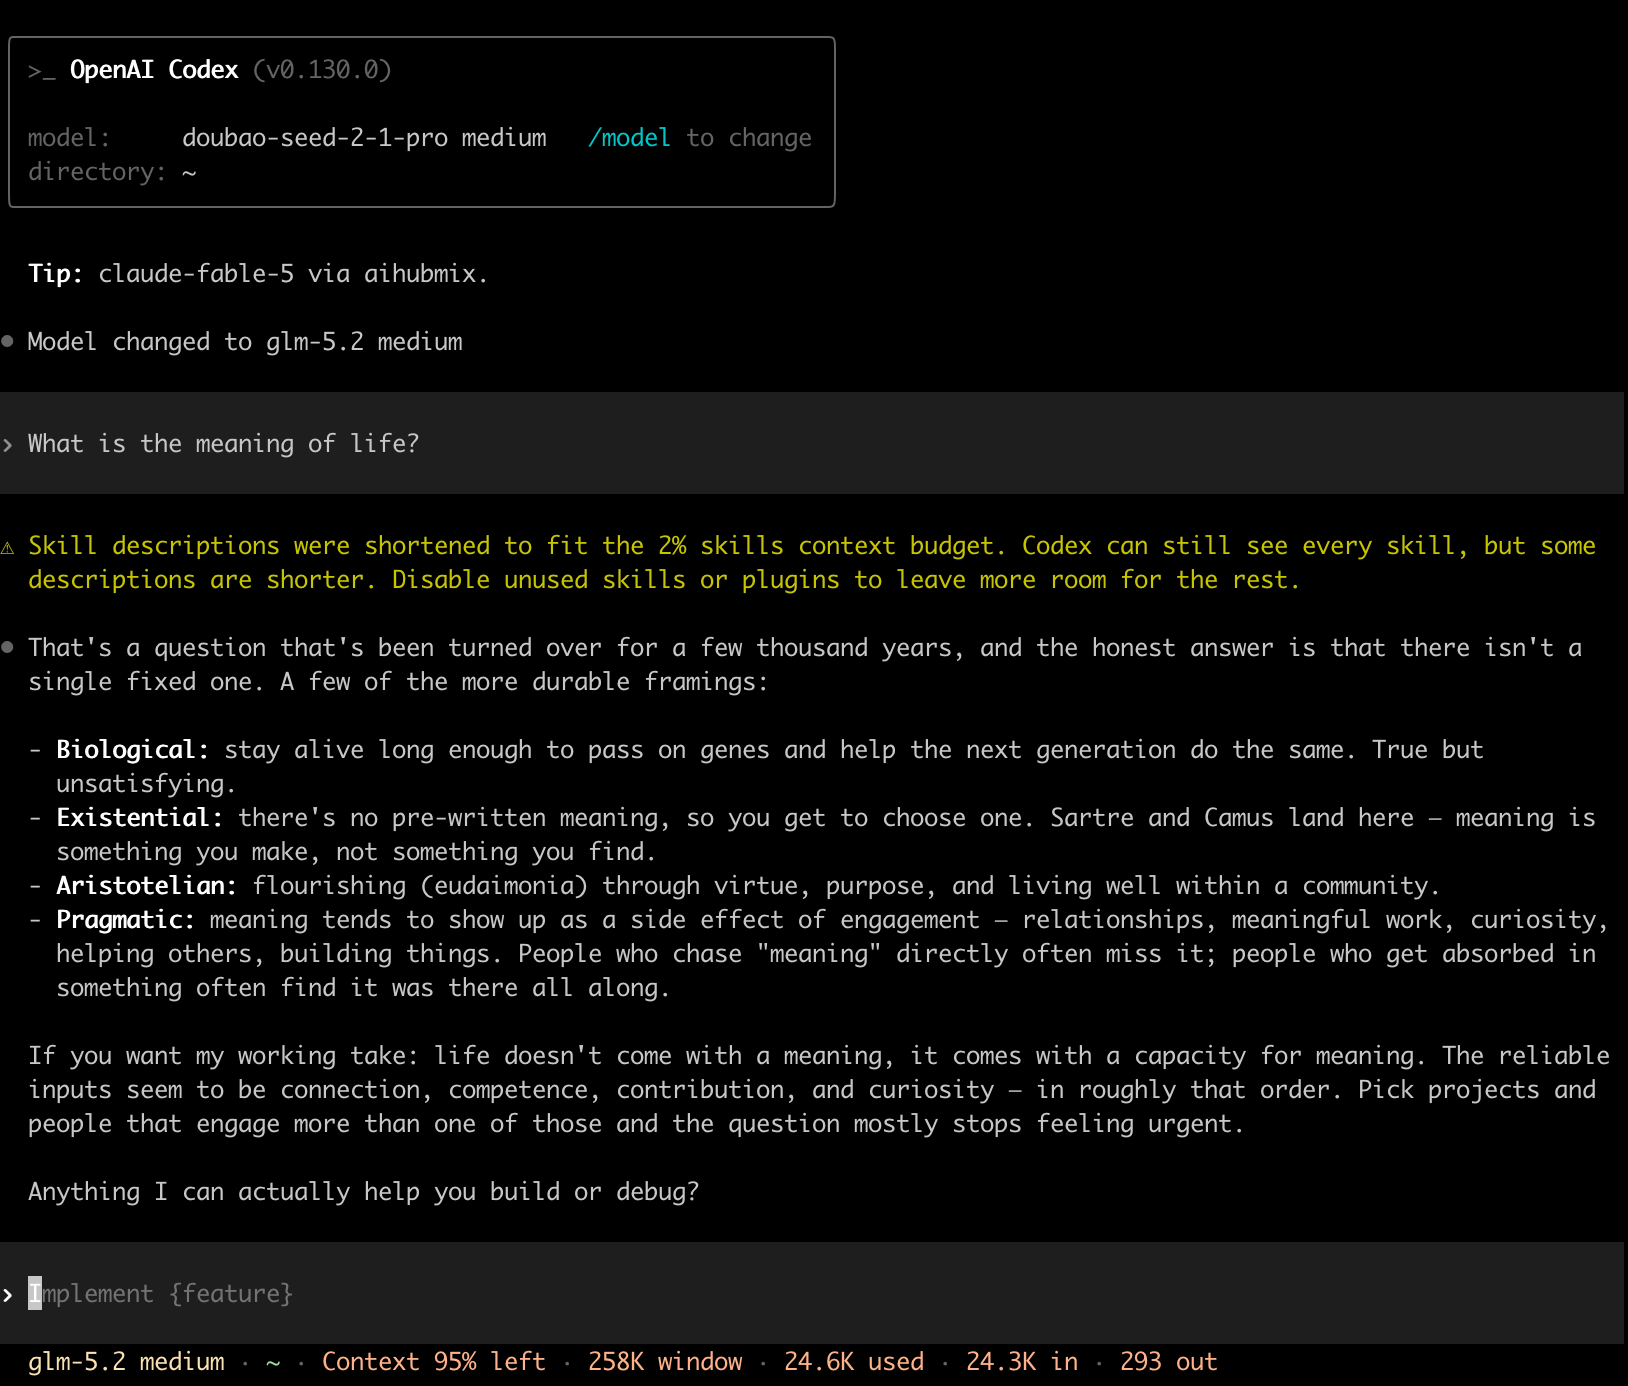
- Geben Sie nach dem Start von Codex
/modelein, vergewissern Sie sich, dass die in der Katalogdatei deklarierten Modelle sichtbar sind, und wechseln Sie zu einem davon (z. B.glm-5.2). - Stellen Sie eine beliebige Frage, um die Verbindung zu prüfen. Beachten Sie: Verlassen Sie sich nicht auf „Welches Modell bist du?” – in
base_instructionssteht „You are Codex… based on GPT-5”, sodass sich alle Modelle entsprechend als GPT-5 ausgeben; die Frage gibt also keinen Aufschluss über das tatsächliche Modell. Um das wirklich aufgerufene Modell zu bestätigen, melden Sie sich in der AIHubMix-Konsole an und sehen Sie auf der Seite „Logs” diemodel_iddieses Anfrageeintrags – das ist die Wahrheit.
Model changed to ..., und die Statusleiste unten zeigt ebenfalls das aktuelle Modell und das Kontextfenster an (im Bild unten wurde zu glm-5.2 gewechselt, Fenster 258K):
Häufige Fragen zu benutzerdefinierten Modellen
-
In
/modelsind die benutzerdefinierten Modelle nicht zu sehen? Gehen Sie der Reihe nach vor:- Führen Sie zuerst
codex debug modelsaus. Meldet esmissing field ...(am häufigsten, fehlendes Pflichtfeld) oderunknown variant ...(falscher Feldname / Wert), ist der gesamte Katalog beim Parsen fehlgeschlagen und wurde verworfen – erzeugen Sie ihn mit dem Skript „integrierte Vorlage klonen” aus Schritt 1 einfach neu. - Vergewissern Sie sich, dass
model_catalog_jsoninconfig.tomlauf Wurzelebene steht und nicht in einem[model_providers.*]-Abschnitt; - Vergewissern Sie sich, dass das JSON die offiziellen snake_case-Felder verwendet und
visibilityaufliststeht; - Wenn
codex debug modelsbereits alle Modelle anzeigt, in der Desktop-App aber nur ein oder zwei übrig bleiben und das aktuelle Modell als „benutzerdefiniert” erscheint – das ist ein bekannter Bug der Desktop-App: Sie legt über den lokalen Katalog hinaus noch eine Whitelist-Filterung auf offizielle Slugs und entfernt nicht-offizielle Modelle aus dem Auswahlmenü (siehe GitHub Issue #19694, #15138). Das Modell wird dabei tatsächlich weiterhin gemäß demmodel = "..."inconfig.tomlkorrekt aufgerufen (in den AIHubMix-Logs nachweisbar), nur der Name wird nicht angezeigt. Für die korrekte Anzeige verwenden Sie die Terminal-codex-CLI / das TUI; in der Desktop-App können Sie nur direkt inconfig.tomlein festesmodel = "Ihr gewünschtes Modell"eintragen, bis es offiziell behoben ist.
- Führen Sie zuerst
-
Der Katalog „ersetzt”, nicht „ergänzt”.
model_catalog_jsonersetzt die gesamte Modellliste, statt anzuhängen (in der Praxis getestet: stehen im Katalog nur 2 Modelle, zeigtcodex debug modelsauch nur diese 2 – die integriertengpt-5.xverschwinden alle). Wenn Sie beides möchten, schreiben Sie sie zusammen in den benutzerdefinierten Katalog. -
Anfrage meldet Protokollfehler / keine Verbindung. Meist ist
base_urloderwire_apides Providers falsch konfiguriert. Für AIHubMix muss eswire_api = "responses"+base_url = "https://aihubmix.com/v1"sein. Wenn Sie einen Drittanbieter anbinden, der nur Chat Completions unterstützt, benötigen Sie einen lokalen Konvertierungs-Proxy; AIHubMix-Nutzer brauchen diesen Schritt nicht. -
Häufiges „Reconnecting”. In manchen Netzwerk-/Proxy-Umgebungen funktioniert WebSocket (WSS) nicht; fügen Sie im Provider-Abschnitt
supports_websockets = falsehinzu, um HTTP zu erzwingen. -
Parsing meldet
missing field ...(z. B.missing field base_instructions). Dem Eintrag fehlt ein Pflichtfeld. Neuere Codex-Versionen parsen streng;base_instructions,availability_nux,upgrade,supports_reasoning_summaries,support_verbosity,default_verbosity,apply_patch_tool_type,truncation_policy,supports_parallel_tool_calls,experimental_supported_toolsusw. müssen alle vorhanden sein. Mit dem Skript „integrierte Vorlage klonen” aus Schritt 1 lässt sich das auf einen Schlag ergänzen. -
Parsing meldet
unknown variant. Im Katalog-JSON gibt es einen Feldnamen oder Wert, den Codex nicht kennt (häufig veraltete camelCase-Formate wiedisplayName/hidden). Wechseln Sie einfach zum snake_case-Feldsatz aus diesem Artikel.
Referenzartikel
- Offizielle Dokumentation: Advanced Configuration | Configuration Reference
- Referenz für das offizielle integrierte Katalogformat: codex-rs/models-manager/models.json
- Community-Leitfaden: Codex config.toml: einen beliebigen benutzerdefinierten Provider in 6 Zeilen anbinden
Zuletzt aktualisiert: 2026-06-25