

Start a session
1
Open a new chat
Click New chat at the top of the sidebar, or press
⌘N (Ctrl+N on Windows). If you start from + next to a project in the sidebar or from New task in this project on a project page, that project is selected for you.2
Write what you want done
Describe the task in the input box, for example “Fix the misaligned input field on the sign-in page in Safari, and add tests.” Press
Shift+Enter for a new line. Type / at the start to insert a slash command. For how to write clear tasks, see Write good tasks.3
Confirm the project and run location
The current project and run location appear above the input box. Click them to change, as described below.
4
Adjust permissions and model as needed
Permissions are at the bottom left of the input box. The model and effort are at the bottom right.
5
Send
Press
Enter or click the send button. The session appears in the sidebar, the page opens the session, and the agent starts working.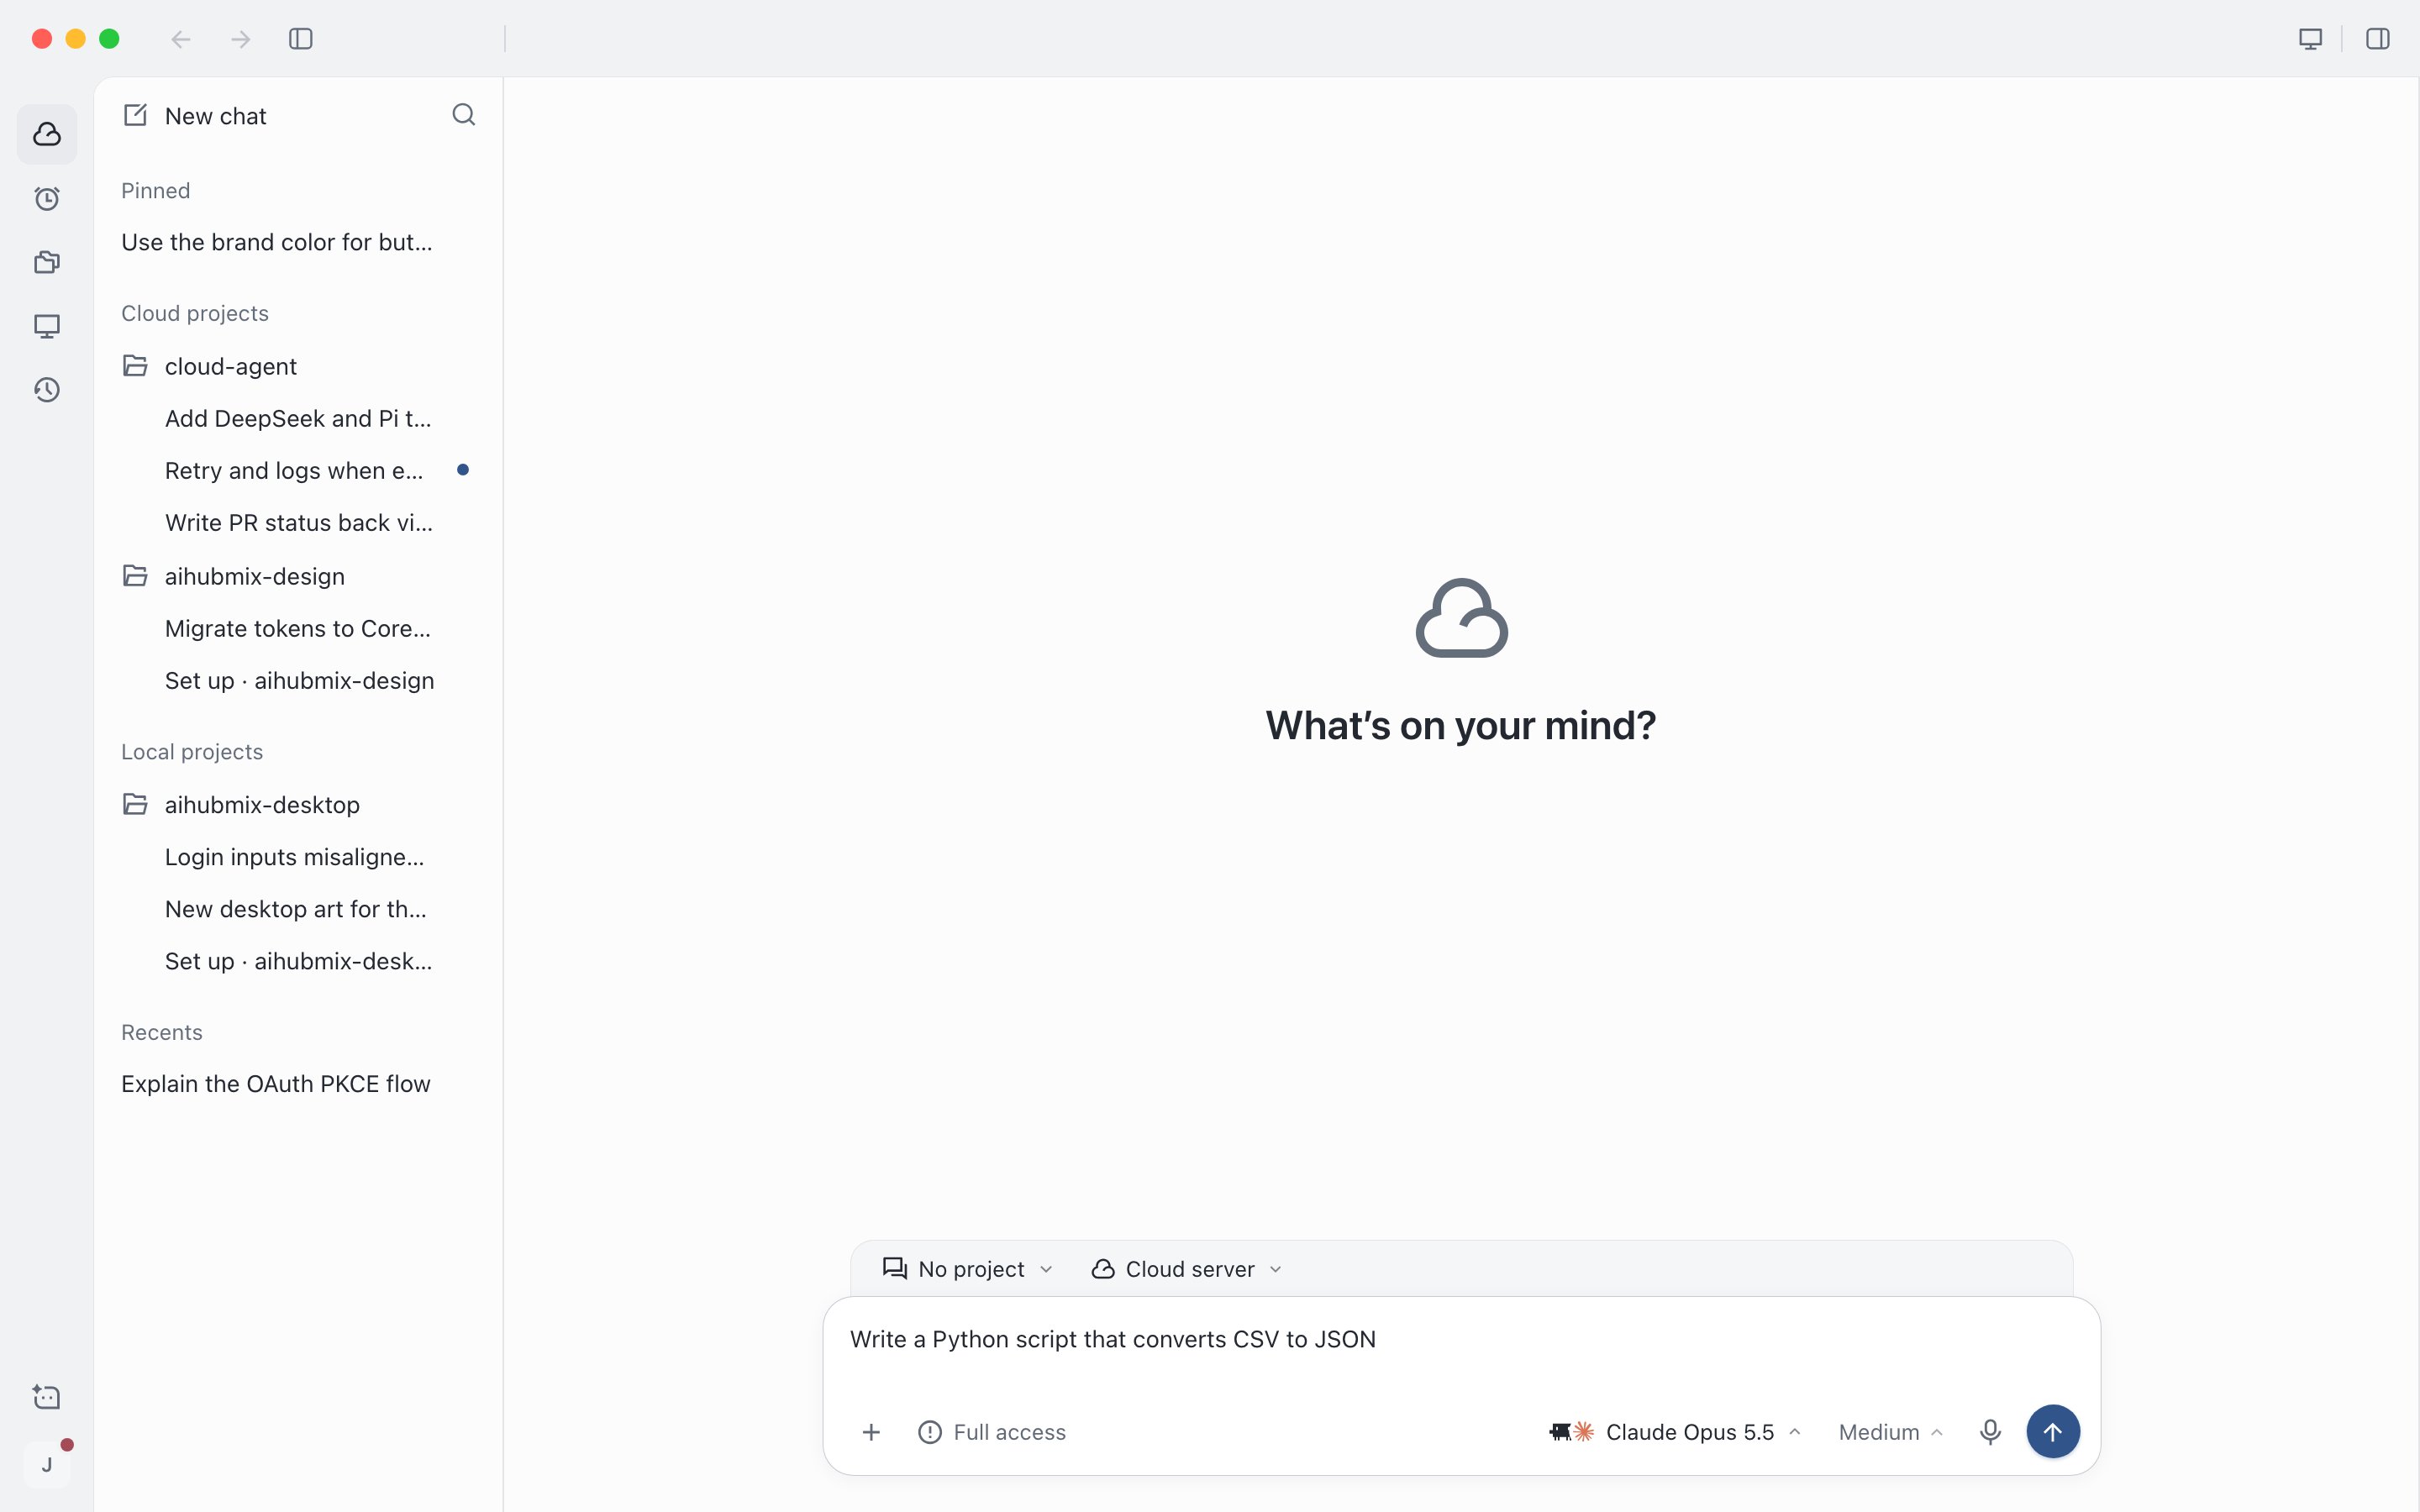
New chat: the project and run location are above the input box, and permissions and model are below it
Sending a session requires Plus. If you haven’t activated it yet, click the upgrade button in the reply to subscribe, and your message is sent automatically. See Plus plan and usage.
Choose a project
Click the project button above the input box to search for and select a project, or click New project. A new chat doesn’t remember your last choice and always starts with No project. Pressing⌥⌘O (Ctrl+Alt+O on Windows) also opens a new chat with no project directly.
- Choose a project: The session starts in the project’s current working directory. For how to create and configure projects, see Projects and environment setup.
- No project: The session runs in a temporary working directory, which suits Q&A, writing a script, or organizing information. You can move it into a project later. See Manage sessions.
Choose a run location
The run location determines which machine the agent reads and writes files and runs commands on. The agent itself always runs in the cloud.- Cloud server: Runs on your cloud server from start to finish without going through your computer, and keeps going when you shut down your computer. New sessions use this by default.
- Run on your device: After you choose a device, the agent in the cloud remotely uses that computer’s environment and files. The computer must be online and allow execution. Local projects run on the device where the project is located by default.
Choose a model
Click the model button at the bottom right of the input box to choose a model. The button next to it adjusts effort (reasoning effort). New sessions use your account’s default choice or the choice from the last session you created. For how the models differ and how to choose, see Choose a model.Choose permissions
Permissions determine whether the agent asks you before taking an action. Click the permissions button at the bottom left of the input box:
New sessions default to Full access and always start from the default without remembering your last choice. You can change it in the same place at any time after the session starts.
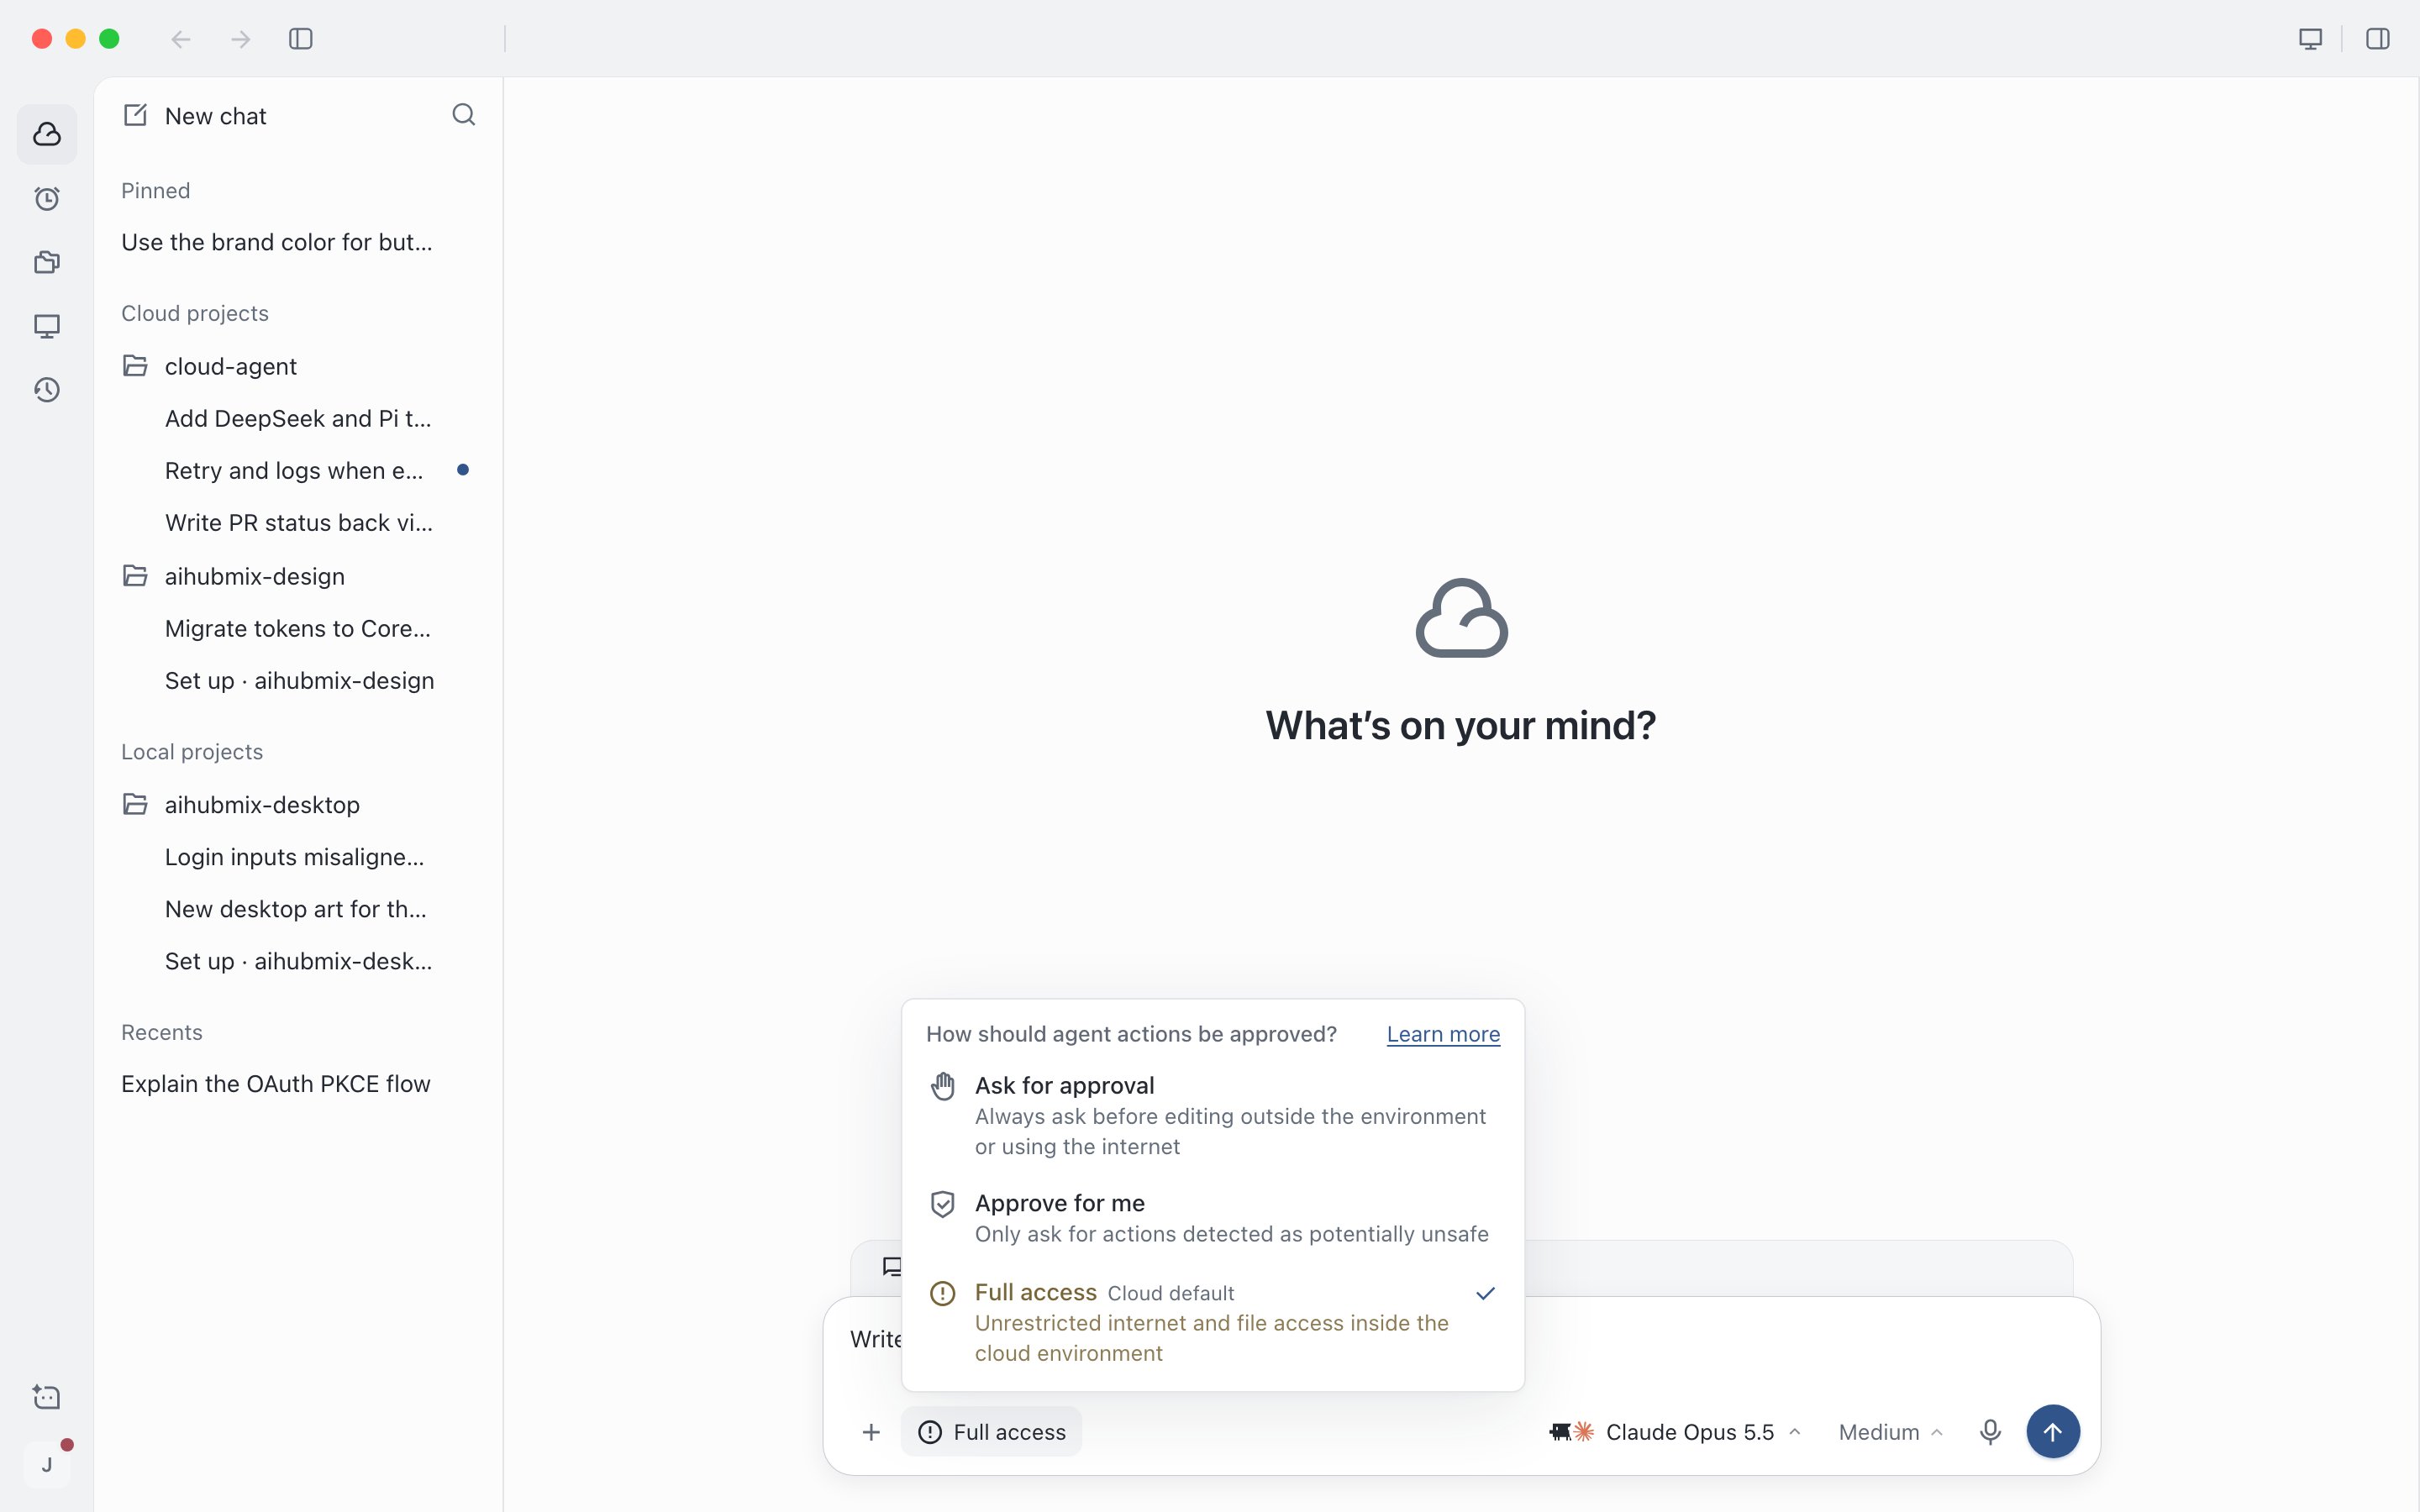
Choose permissions at the bottom left of the input box
About full access
With full access, the agent can run commands, install dependencies, modify files, access the internet and connected services, and read all secrets for this project without asking you. This is the most efficient option, but it carries risks such as sensitive data leaks and prompt injection. For when it’s appropriate, see Write good tasks.- The first time you send with full access, an explanation appears. Click Got it, start the task to send. It doesn’t appear again.
- When running on your device, switching to full access requires clicking Confirm in a dialog first.
- When running on your device, permissions can’t exceed the limit set for that device, and options above it can’t be selected. The limit can only be changed in the desktop app on that device.
- When cloud server admin privileges are turned on, the first time you send on the cloud server you’re asked to confirm. See Cloud server.
Add attachments and screenshots
Click + at the bottom left of the input box (⌘U, Ctrl+U on Windows) and choose Upload files or images or Take a screenshot. You can also drag files onto the input box or paste them. You can send attachments without any text.
Files over the limits and empty files aren’t added. The rest are added as usual. HEIC, HEIF, and TIFF images are converted to JPEG automatically. You can’t send until attachments are ready.
When a session runs on this computer, files added in the desktop app go to the agent directly without uploading and don’t count toward the 100 MB limit. When you add attachments in the web app to a session running on a device, you can only add images. Add files in the desktop app.
- macOS desktop app: Drag to select an area, press the Space bar to capture a window instead, or press
Escto cancel. The first time you capture another app’s window, the system asks you to grant screen recording permission. - Windows desktop app: Captures the screen the app is on.
- Web app: Choose a view in the browser’s screen sharing picker, and a single frame from that moment is captured. If the browser doesn’t support screen sharing, this option is unavailable.