

Cloud projects and local projects
- Cloud project: The code lives on your cloud server. There are three sources: create from scratch, import from GitHub, or upload a local project. Requires Plus.
- Local project: Linked to a folder on one of your computers. Sessions run on that computer. See Run on your device. Files are not uploaded, and no cloud server is needed.
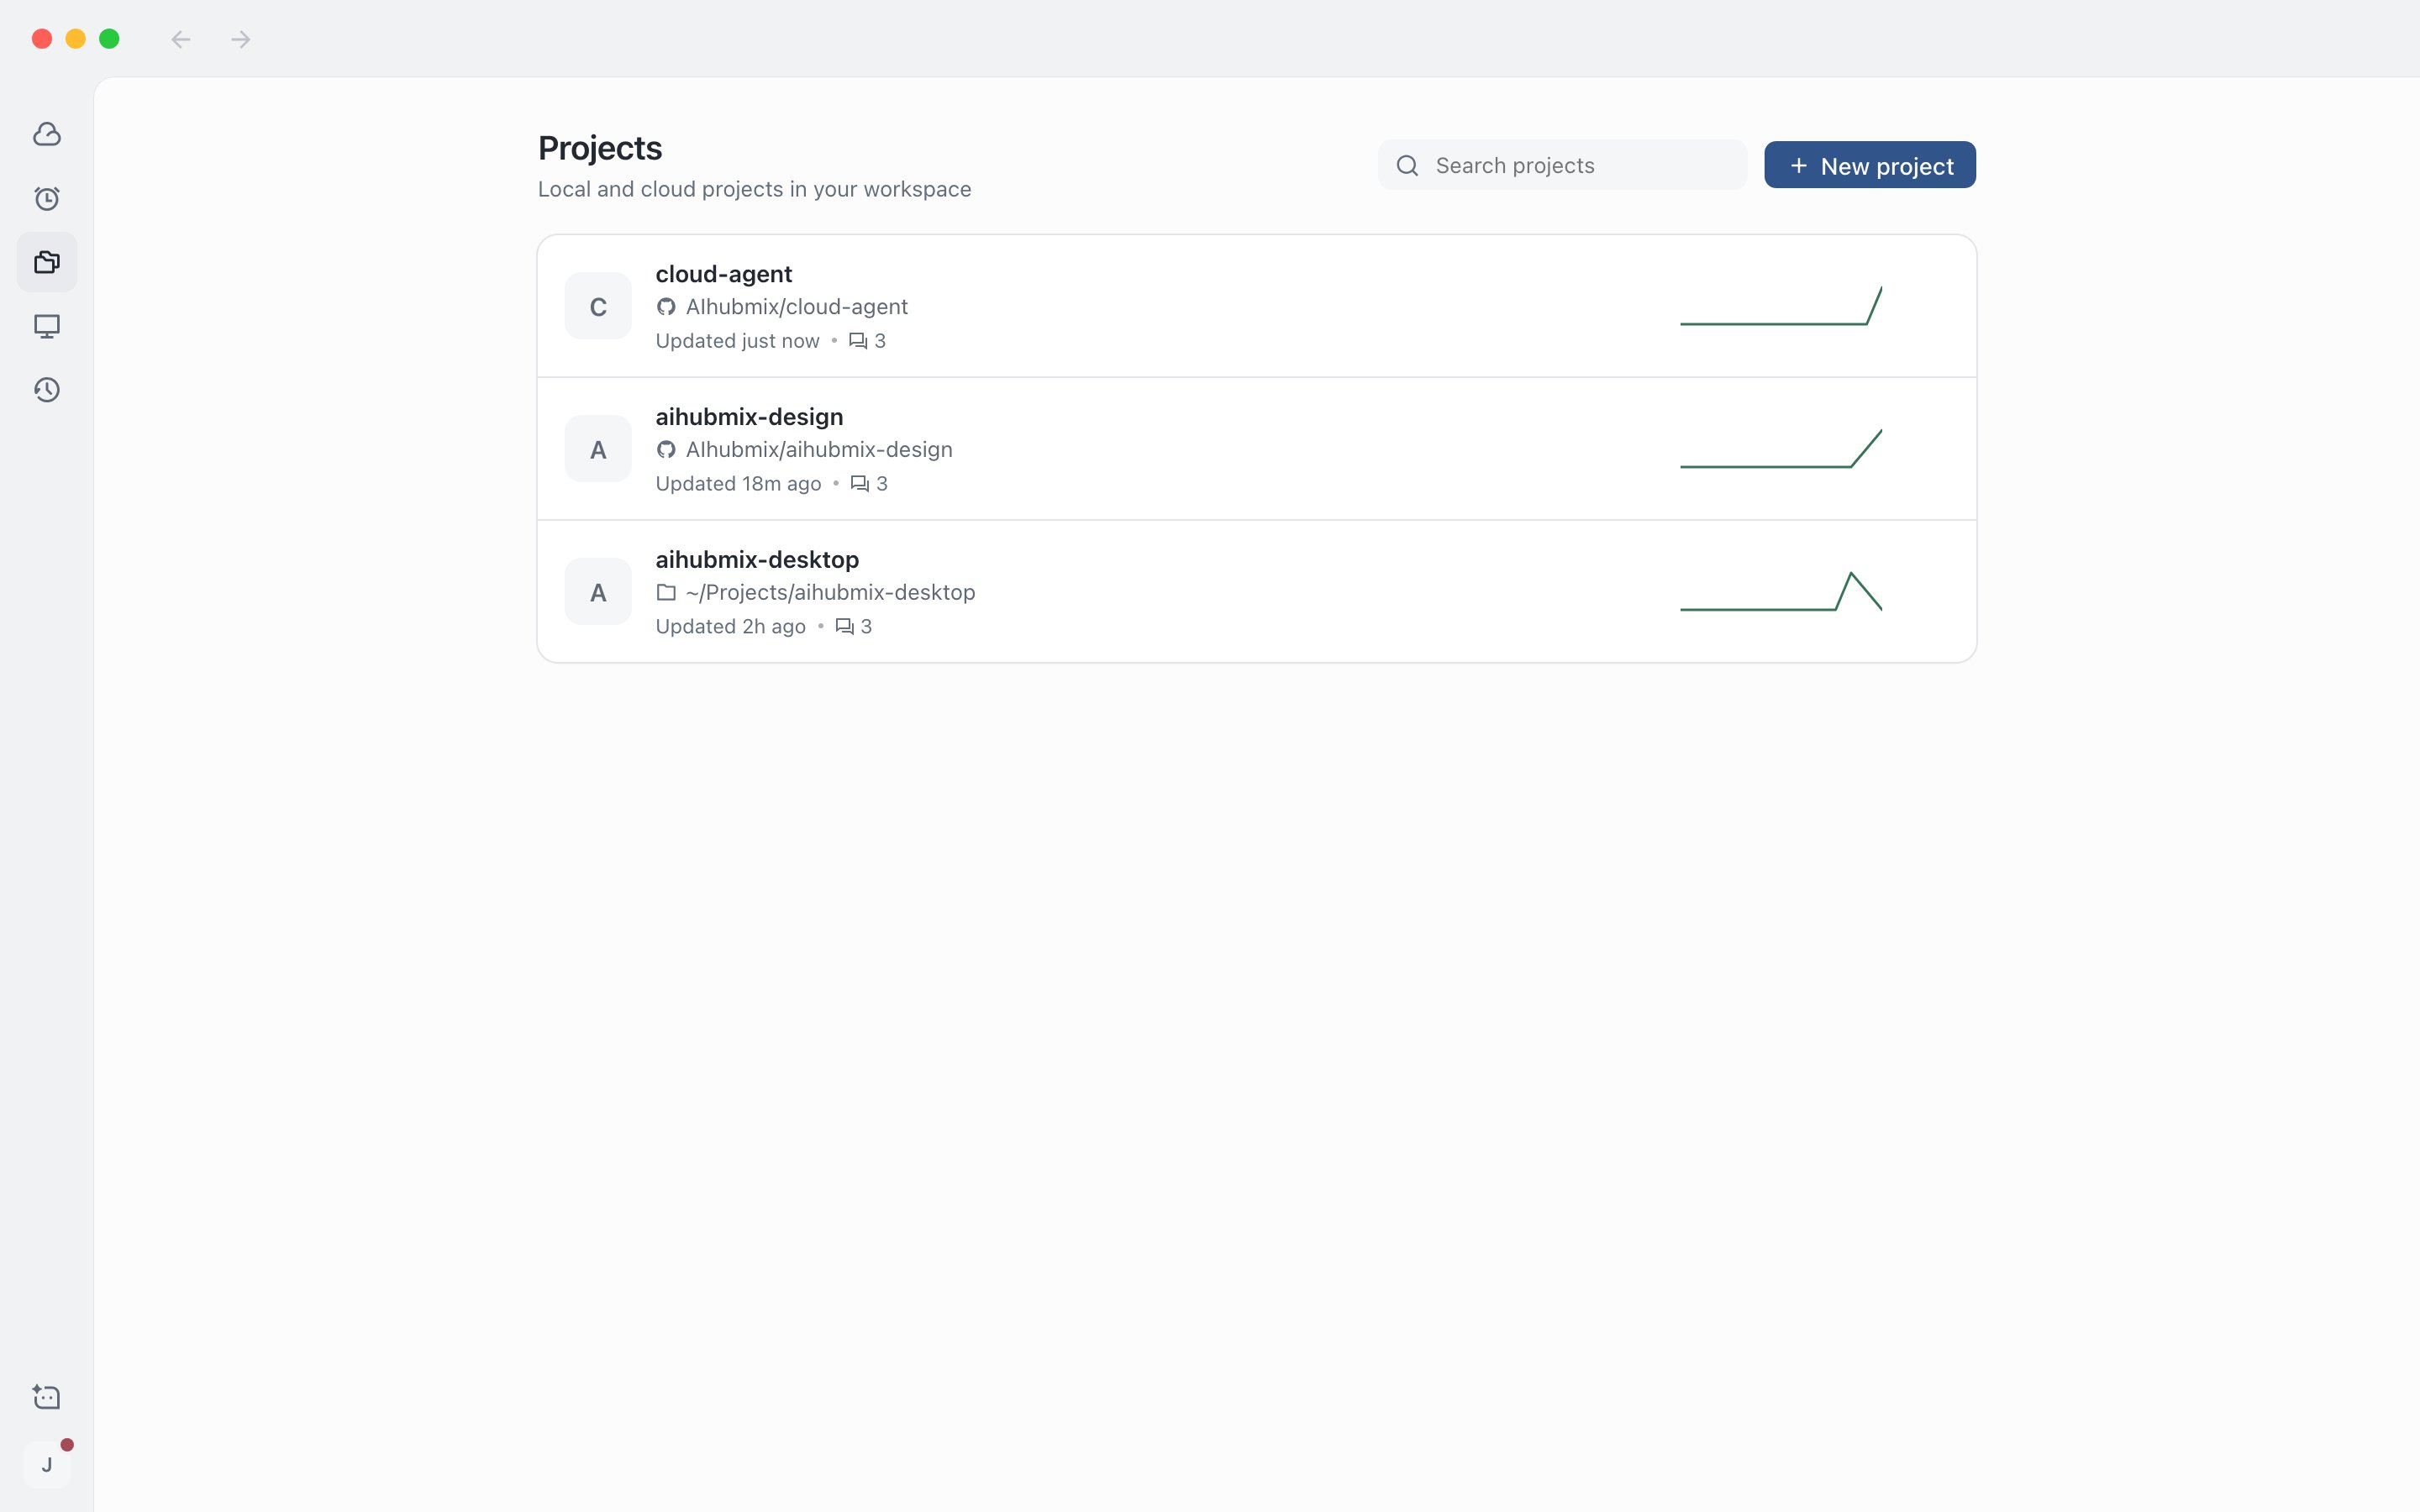
The projects page lists all projects in the workspace
Create a project
Click + on a sidebar section heading, New project on the projects page, or New project in the project menu above the new session input box. If you create a cloud project without Plus, the subscription window opens first. After you subscribe, click Continue to return to the creation window. Repositories you already selected are kept.Create from scratch
1
Enter a name
Up to 64 characters. If left empty,
my-app is used.2
Choose a starter template
For example Blank, Node · TypeScript, Next.js, or Python, as shown in the app.
3
Create
If needed, select Create a private GitHub repository (requires a connected GitHub account), then click Create project.
Import from GitHub
1
Choose repositories
Select one or more repositories. If you select more than one, the first is the main repository and the rest are cloned into the project with it.
2
Start creating
Click Get started. When it finishes, you go to the new session page with this project selected.
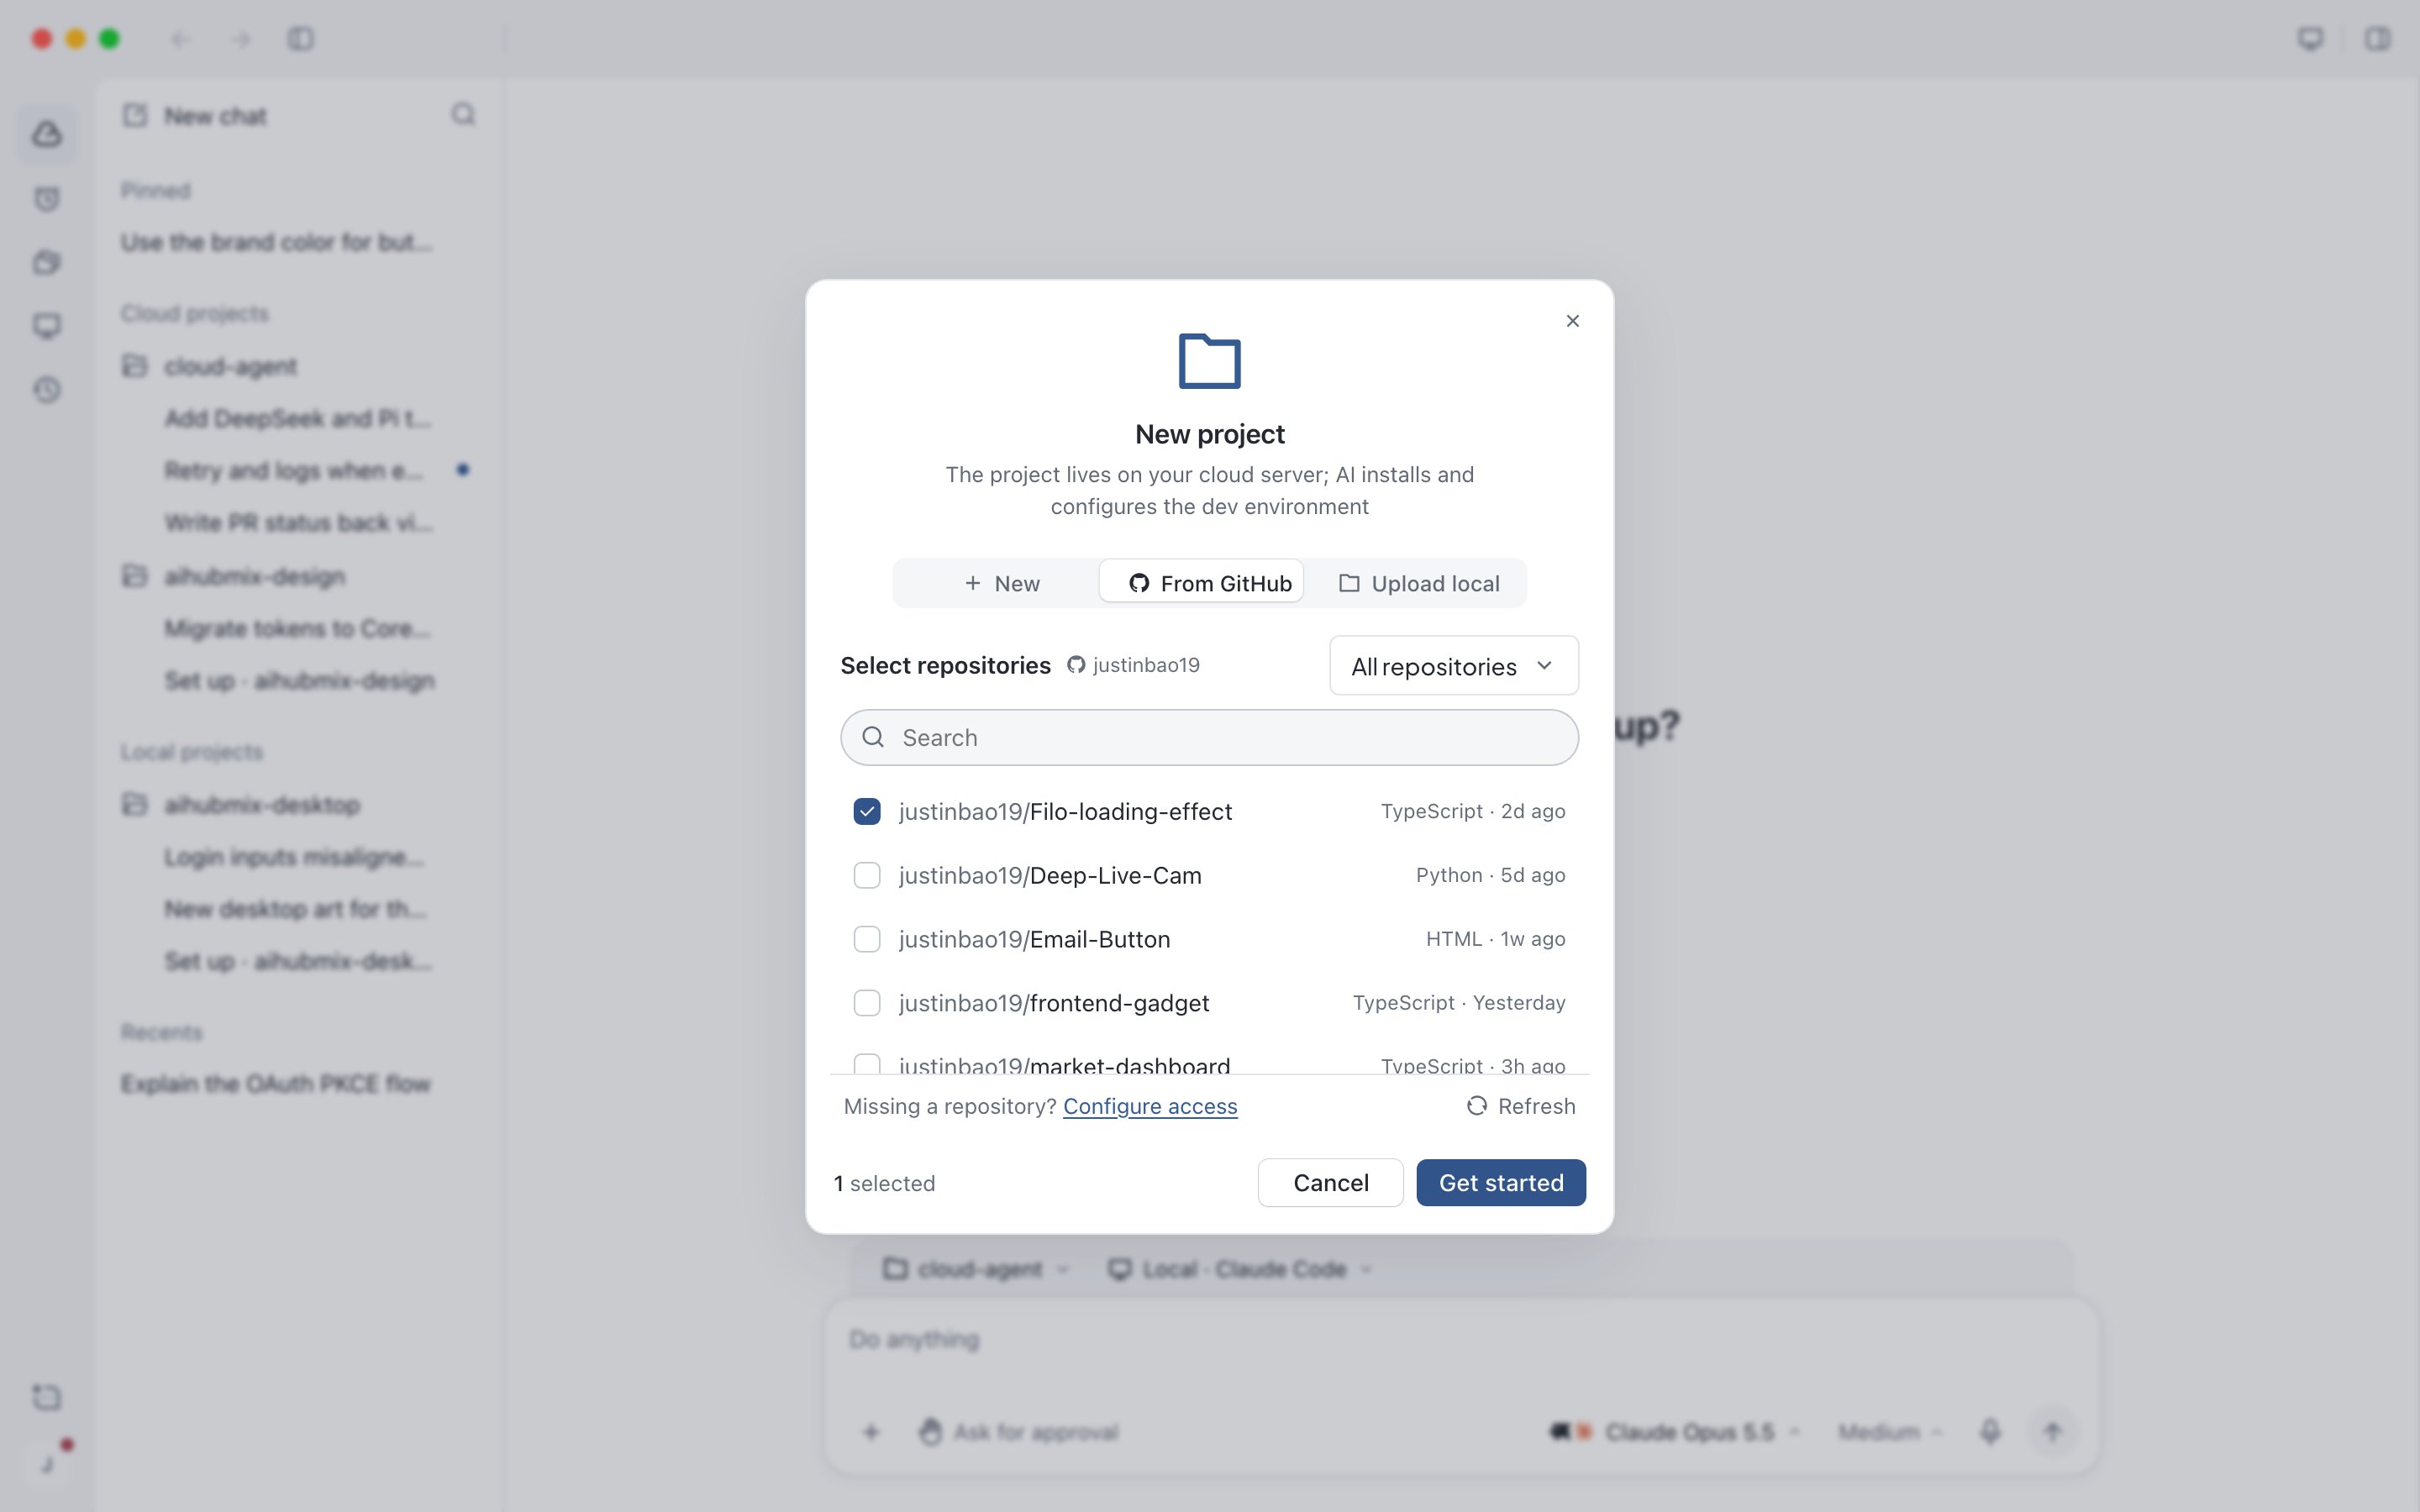
Importing repositories from GitHub
Upload a local project
Drag a folder into the window or click Choose folder…, confirm the file count and size, then click Get started. Uploads have these limits: 2 GiB total, up to 50,000 files, and 100 MiB per file. Content listed in.gitignore, node_modules, .git, .env-style files, and credentials, private keys, and certificates are excluded automatically.
If an upload fails or is canceled, the uploaded part is not kept, and a retry starts from the beginning. Uploaded projects have no remote repository, so changes are delivered as a patch.
Mobile browsers cannot select folders, so you cannot upload a local project from a phone.
Link a folder on your computer
1
Choose a folder
In the new local project window, click Add under the source folder. The project name is filled in with the folder name, and you can change it.
2
Create
Click Create project to go to the new session page. The run location defaults to this computer.
Only the desktop app can create local projects.
Set up a cloud project’s environment
The project environment includes the setup script, the start command, and the secrets and environment variables the project uses. Setup is optional. You can start sessions as soon as the project is created. Local projects use the computer’s own environment and skip this step.1
Open the environment setup page
In Project settings › Environment, click the edit button. The environment setup page is a separate page in the project and does not appear in the session list.
2
Wait for AI to generate a draft
AI reads the repository and generates the setup script, the start command, and the required secrets and variables. No script runs until you finish the review.
3
Complete the three review steps
Confirm the setup script and start command, fill in secrets, and fill in environment variables, in that order. After the required fields are filled, click Finish review. If you do not have the values yet, click Respond later. Values you have entered are kept.
4
Publish
AI runs the setup script on the cloud server. When it passes, click Publish to cloud server, then click Start a task to go to a new session. If it fails, click Retry or Edit environment. A failure does not stop you from starting sessions.
Check progress on the project page
Open a project to see:- Recent sessions: Sessions in progress and waiting for your approval are highlighted. Click View all to see all of this project’s sessions.
- Commits: Recent commits on the current branch. Open one to see the changed files and lines added and removed.
- Files: If a folder contains a README, it is shown directly. Markdown and similar files can switch between preview and source, and can be copied or shared. Sensitive files such as
.envand private keys are not shown. - Website previews: Services this project is listening on from the cloud server, for example
localhost:3000. Click Open to preview in the app. An entry appears once you have the Agent start a development server. Previews are unavailable when the cloud server is not running.
Share a preview or file
1
Open sharing
Click Share in a website preview, or Share file in the file view.
2
Set access and expiration
Choose Only me, Anyone with the link (default), or Public. Expiration is 1 to 30 days (7 days by default).
3
Copy the link
Click Create link, then click Copy link.
Change project settings
Open Project settings in the top right of the project page, or Edit in the project menu. Click Save to apply your changes.- Name and description: Names are 1 to 64 characters.
- Repositories: The main repository cannot be removed. You can pull the latest from GitHub. Click Add repository and enter
owner/nameto clone another repository alongside it. - Base branch: Sessions create working branches from this branch, and pushes and PRs target it.
- Ship behavior: Create a PR (default), push a branch, or custom. Commit author can be AIHubMix Agent (default) or your GitHub account. For commits and PRs, see Review and deliver results.
Manage secrets and environment variables
Add and edit them in Settings › Workspace › Secrets & variables. Each project has its own set, plus one set shared by all projects. When names match, the project value takes precedence.- Secrets are stored encrypted, and AI cannot see the original values. You cannot see the original value when editing either; enter a new value to overwrite it.
- Click Bulk add to paste
.envcontent directly, oneKEY=valueper line. Names containing KEY, TOKEN, SECRET, or PASSWORD are saved as secrets. - Deleting has no second confirmation. Running environments need a restart for changes to take effect.
- When running on your device, the device settings control which workspace secrets are available to that computer. See Run on your device.
Export a project
In project settings, click Export…, then click Export. When packaging finishes, click Download archive. The archive does not include.env, secrets, dependencies, or caches. The cloud server must be running, and only the project owner can export.