

Before you start
- Install and open WorkBuddy.
- Create an API key in the AIHubMix Console. It usually starts with
sk-***. - Copy the model ID you want to use, such as
gpt-5.5,gemini-3.5-flash, ordeepseek-chat, from the AIHubMix model list.
Configure AIHubMix in the interface
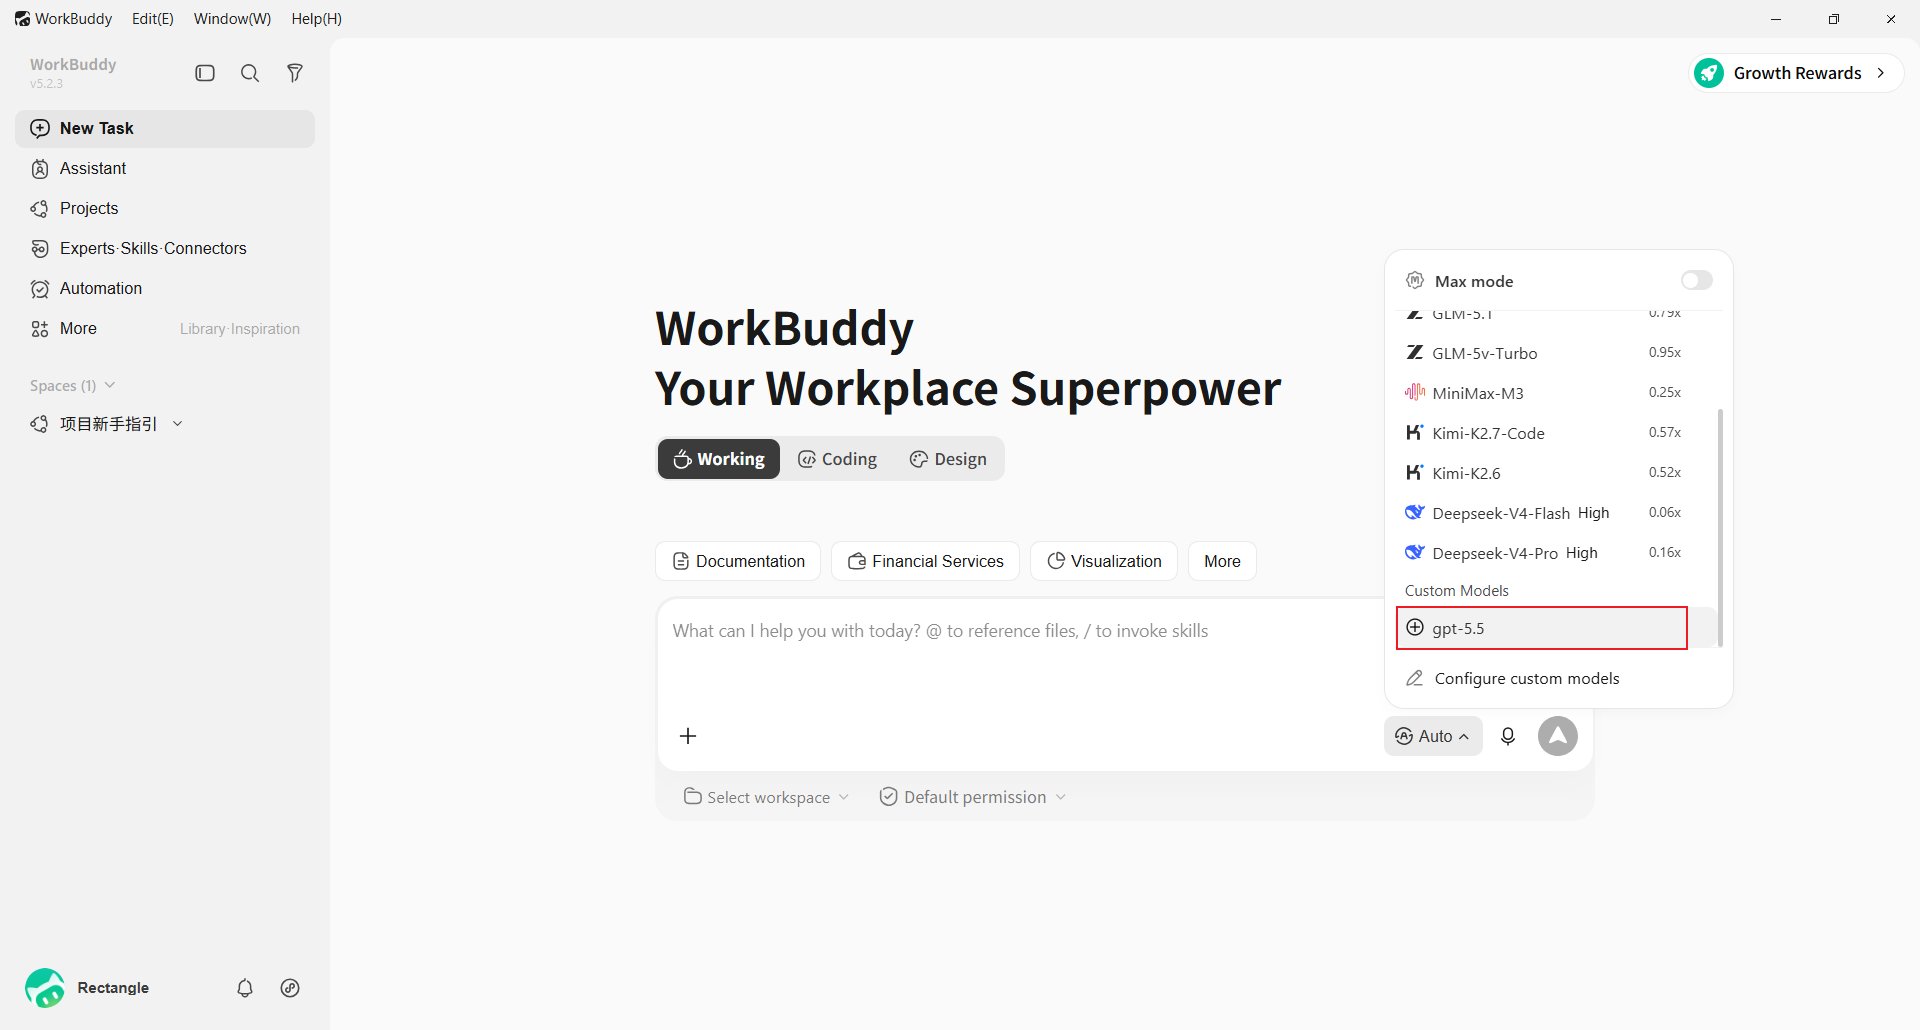
Open WorkBuddy and click the current model picker in the lower-right corner of the input box, for example Auto.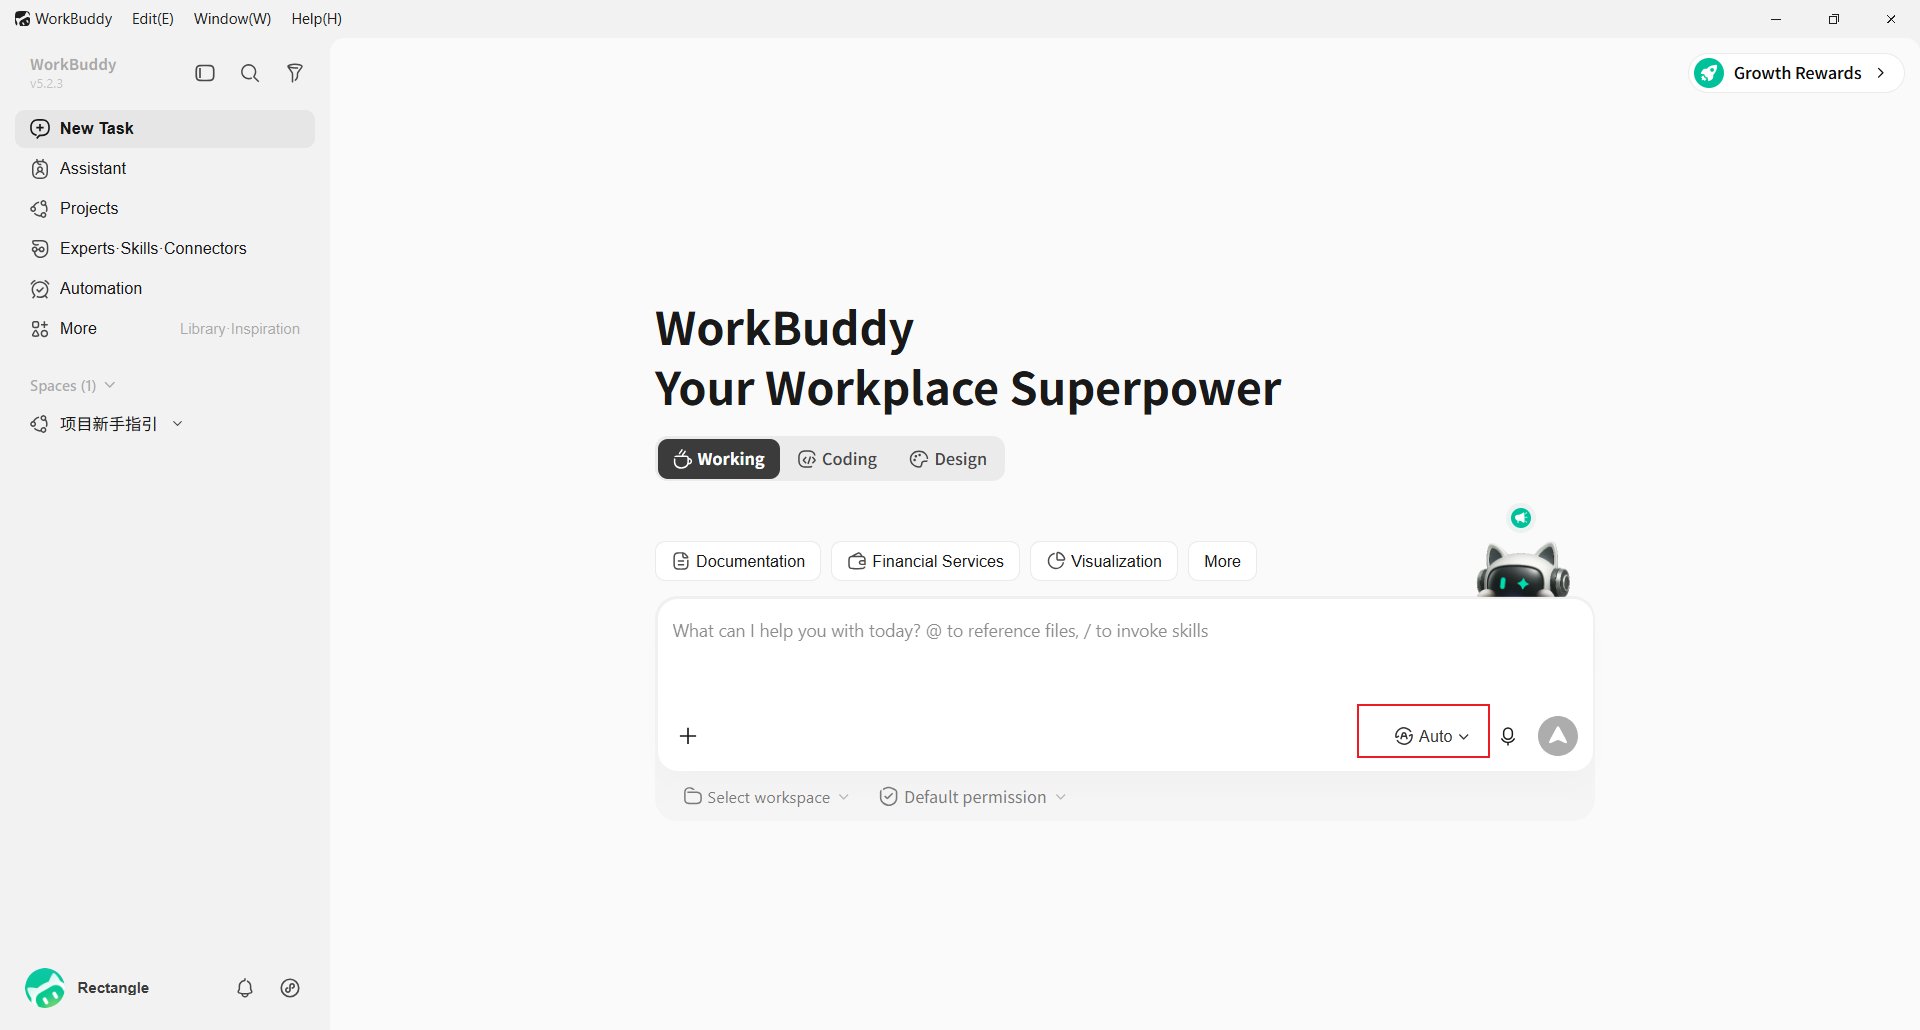
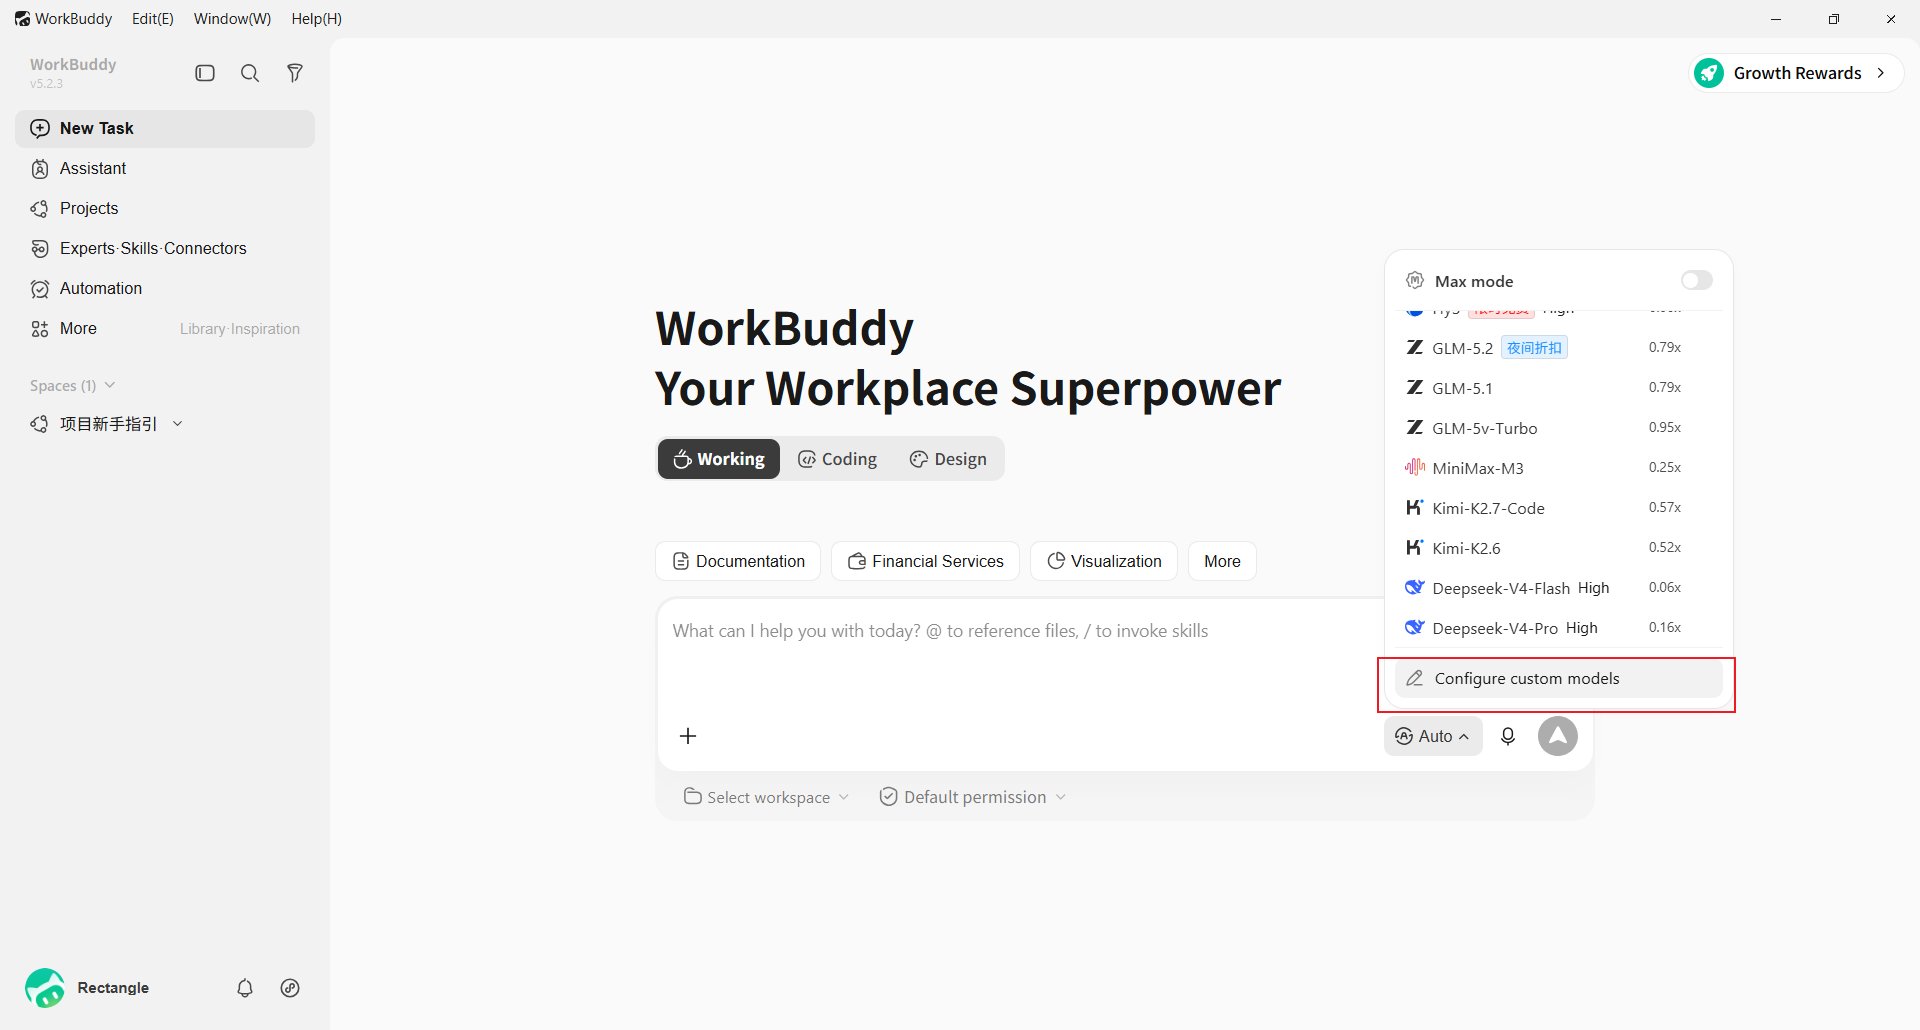
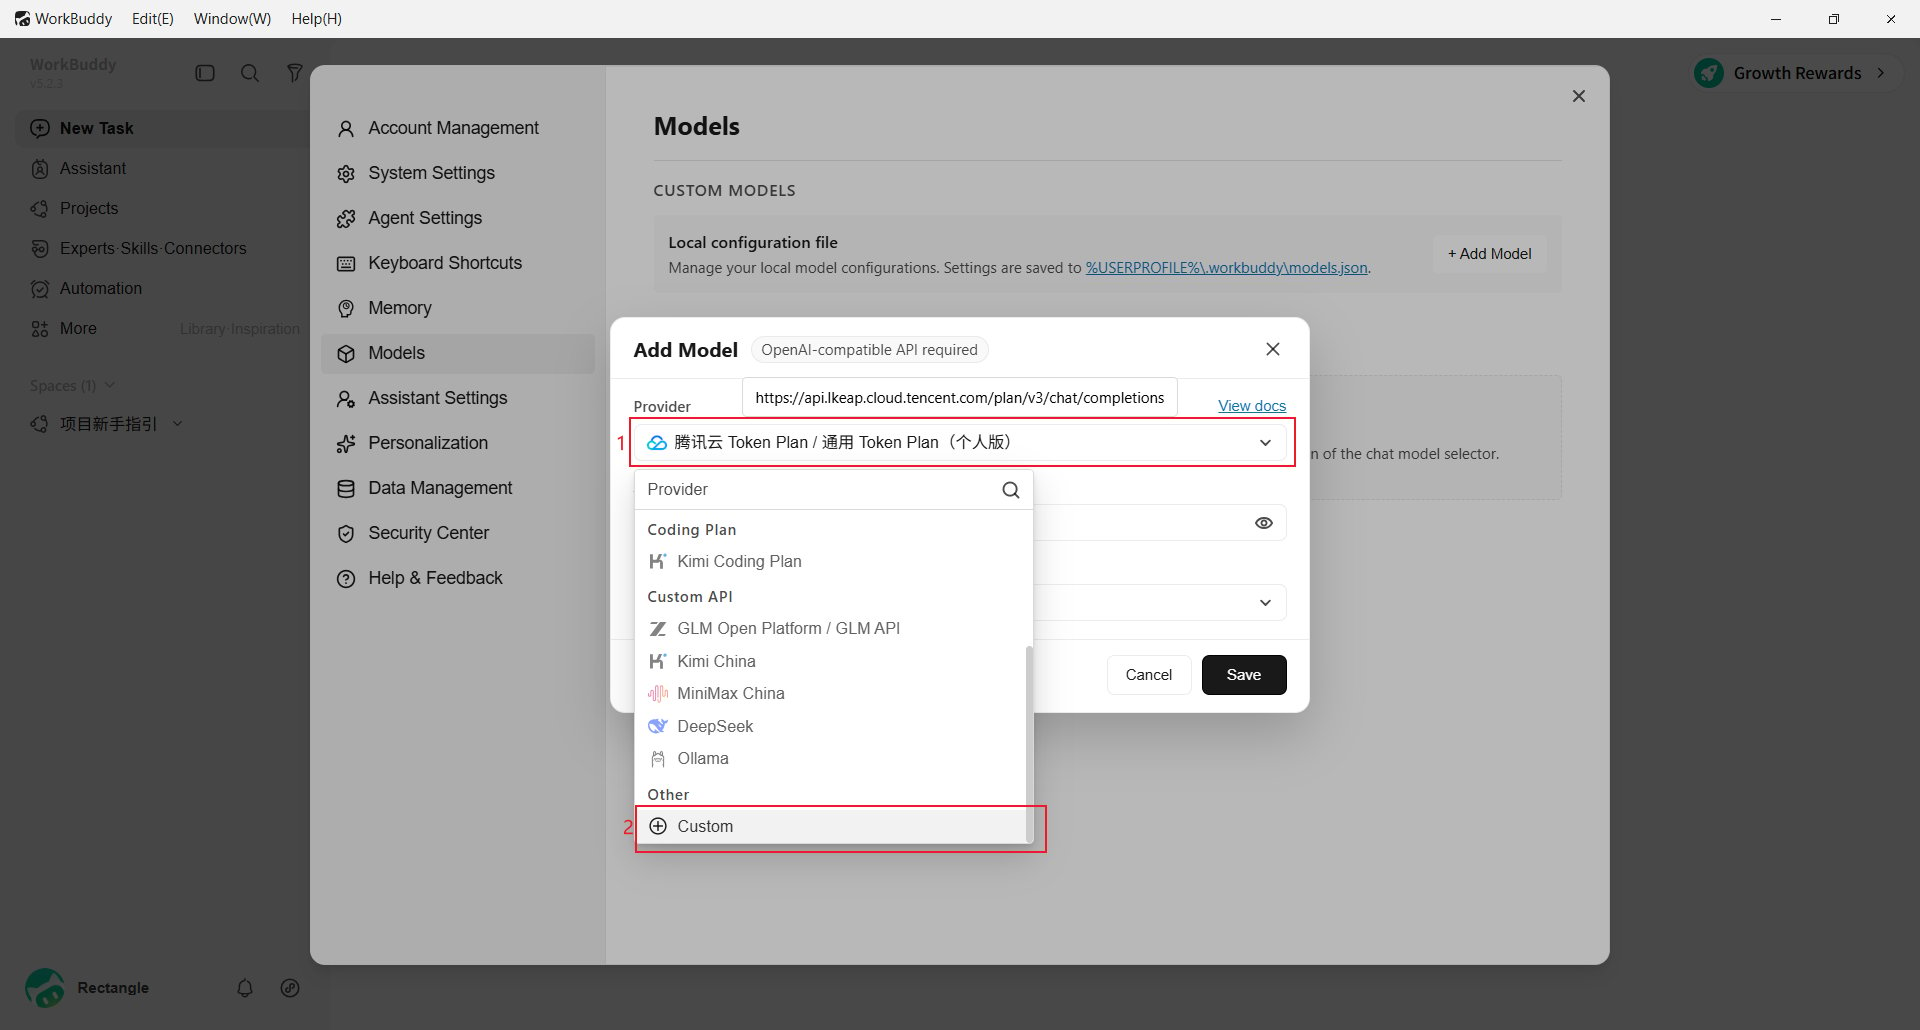
- Endpoint: Use
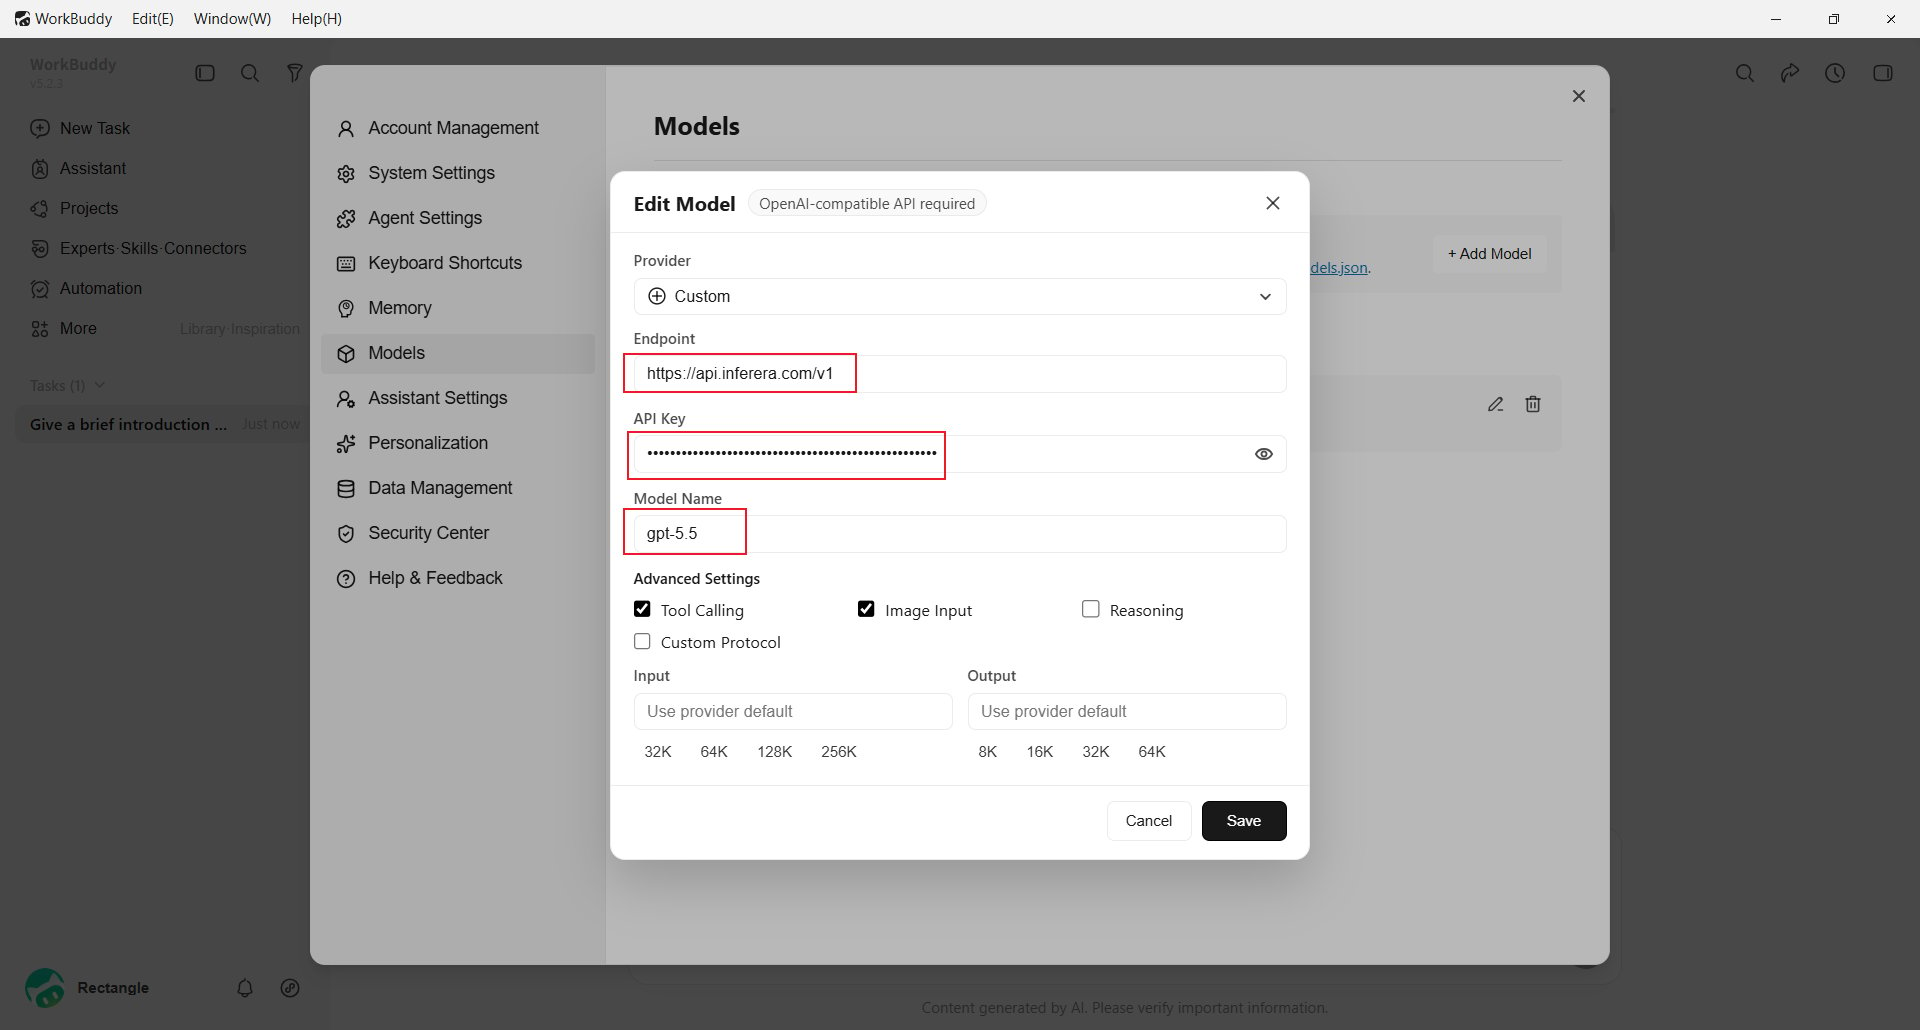
https://aihubmix.com/v1. If it is temporarily unavailable, use the backup endpointhttps://api.inferera.com/v1. - API Key: Enter the key created in the AIHubMix Console.
- Model Name: Enter the model ID, such as
gpt-5.5. - Advanced Settings: Enable Tool Calling, Image Input, or Reasoning only when the selected model supports that capability.
Add a model through a configuration file
WorkBuddy stores custom models in a localmodels.json. Edit this file instead of entering each field in the interface:
url to:
id and name are the model ID, vendor is Custom, and apiKey is your AIHubMix key. supportsImages and supportsToolCall correspond to Image Input and Tool Calling in the interface. Restart WorkBuddy or reopen the model picker after saving.
Verify the setup
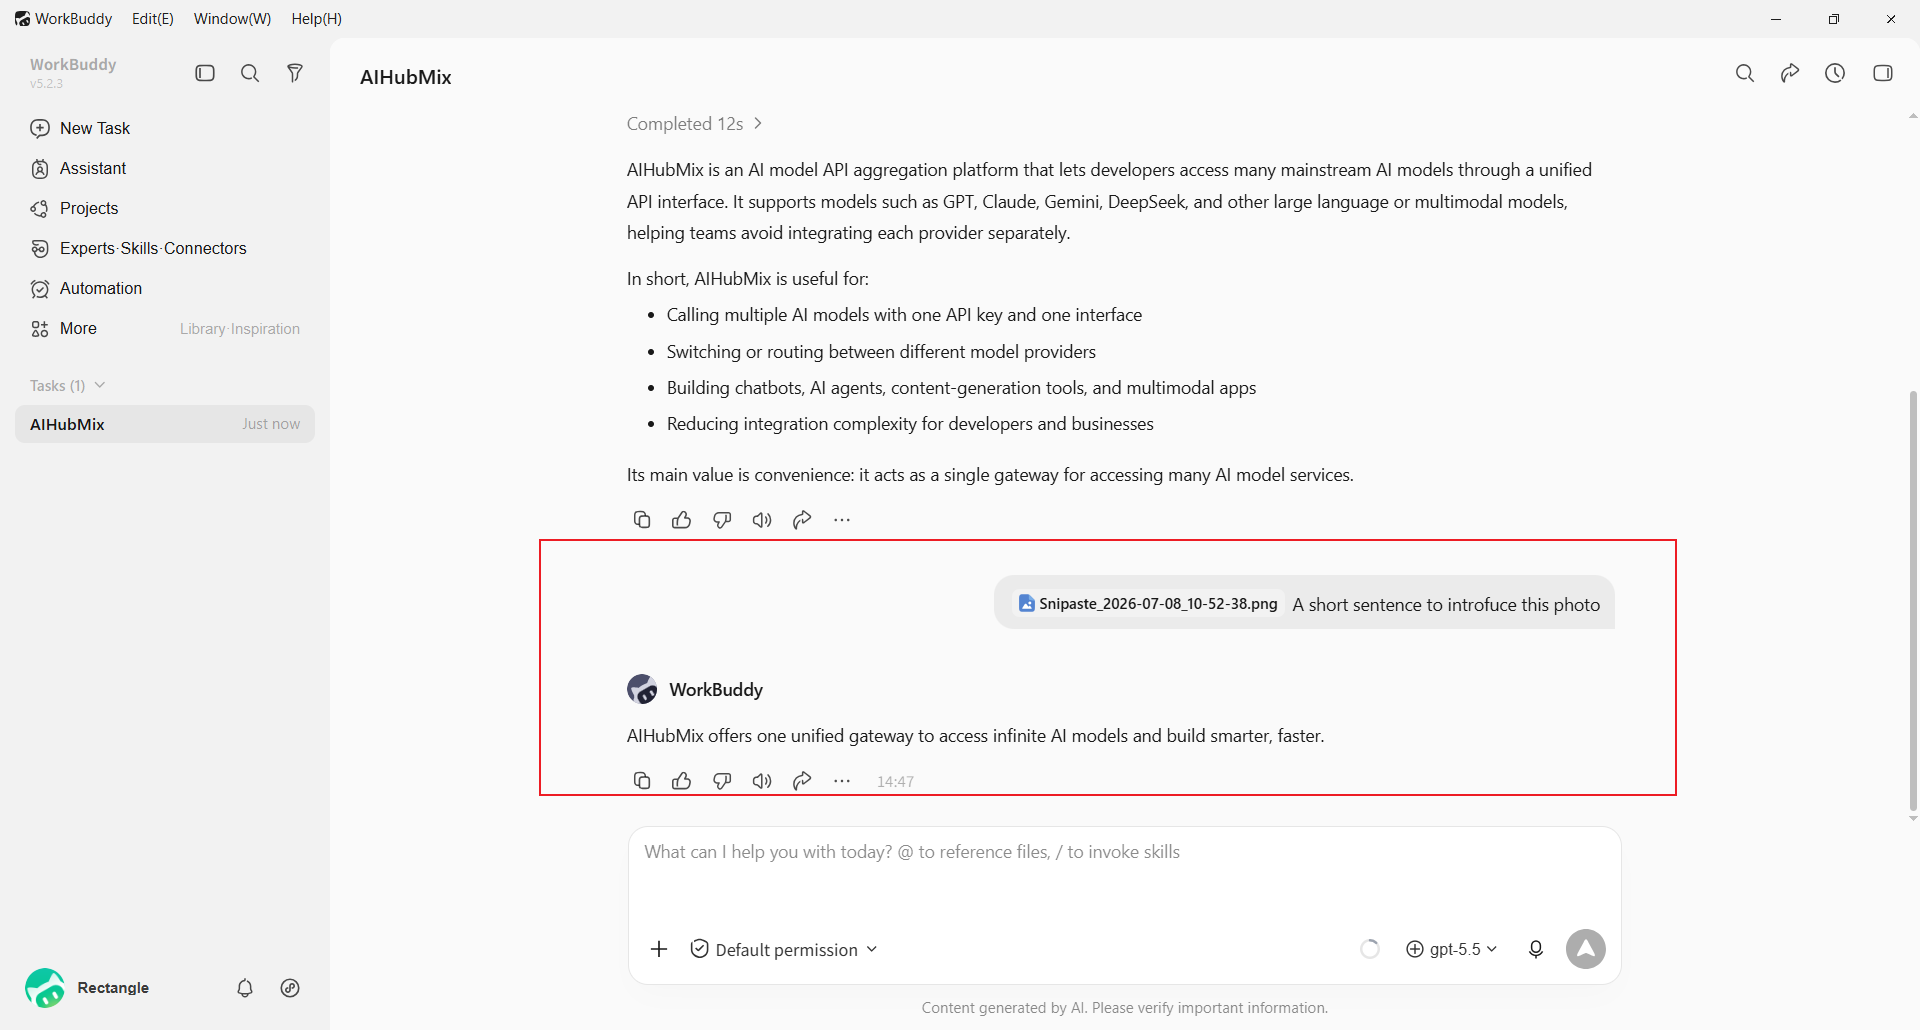
Select the custom model and send a short message, such as asking WorkBuddy to introduce AIHubMix. A successful reply confirms the configuration.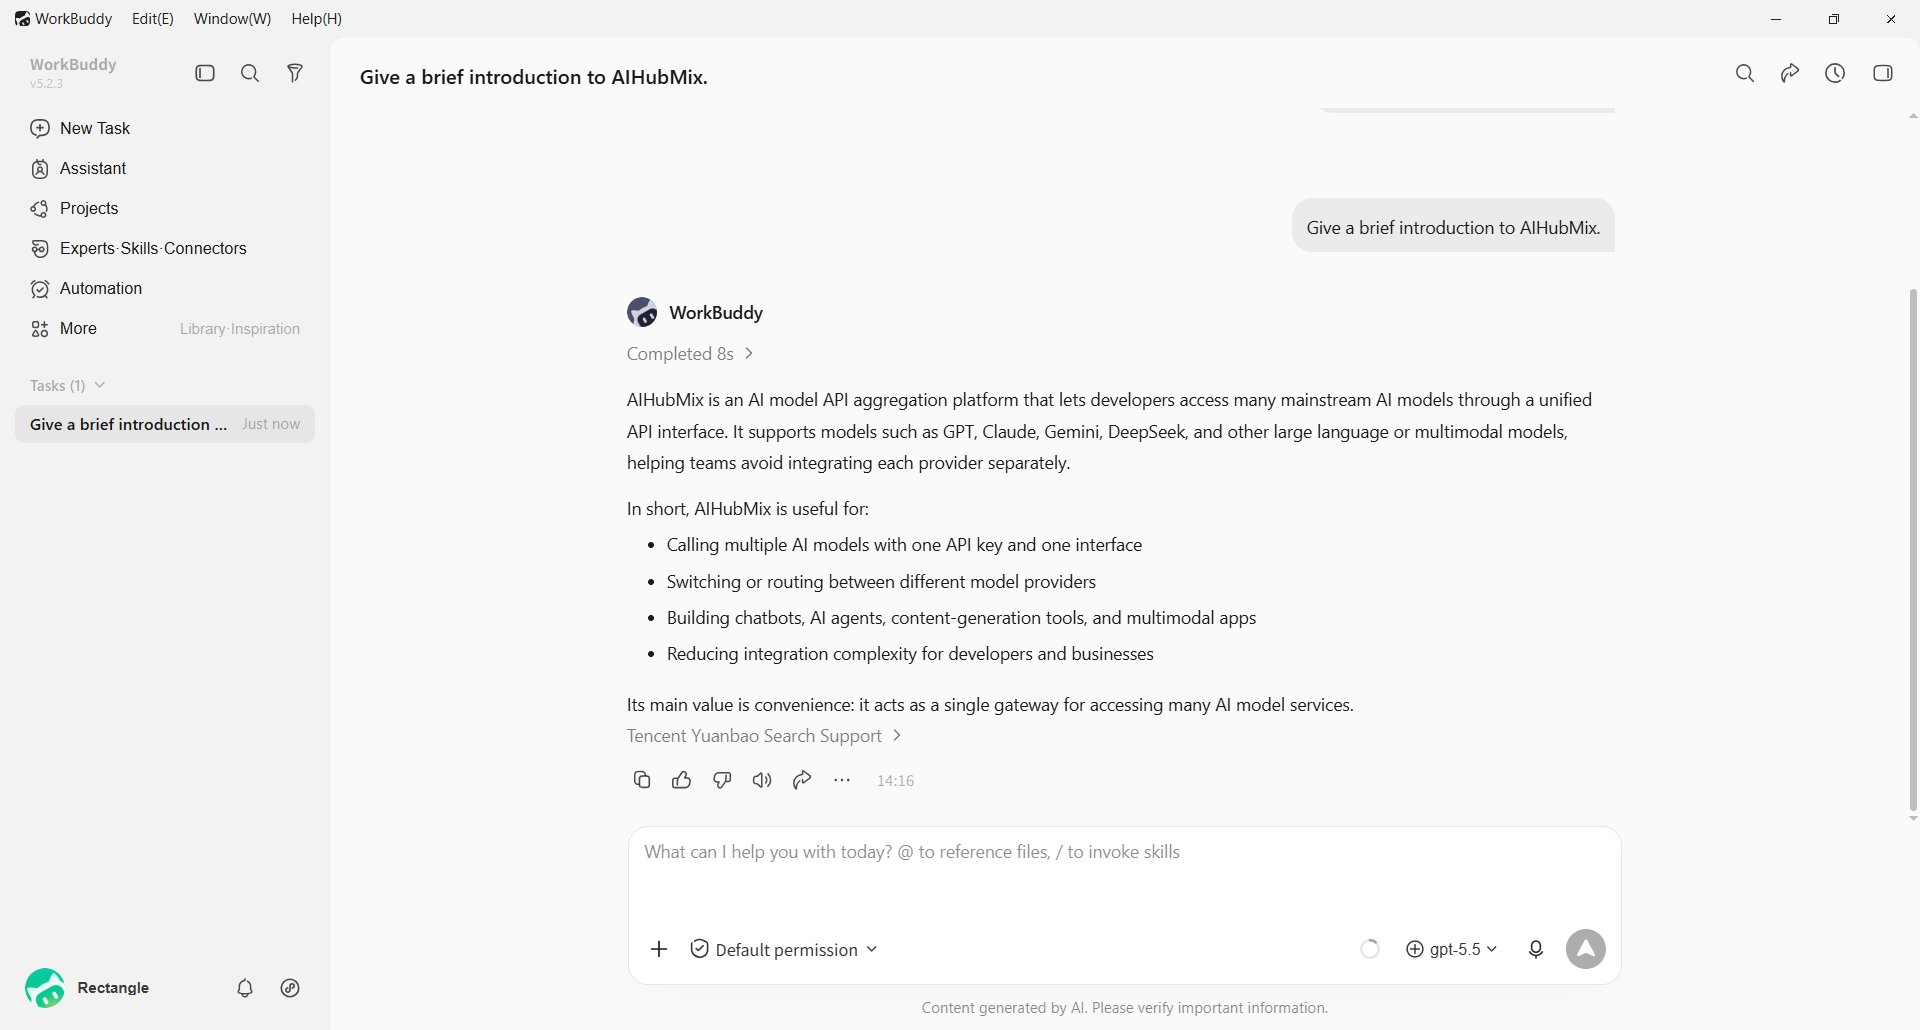
FAQ
Why choose Custom? AIHubMix uses an OpenAI-compatible interface, so you need to enter the endpoint, API key, and model name. Built-in providers may automatically use their own API endpoint. The model does not appear after saving. What should I do? Reopen the model picker and scroll to Custom Models. If it is still missing, confirm that you clicked Save and entered a model name. For file-based configuration, confirm that%USERPROFILE%\.workbuddy\models.json is valid JSON.
What should I check when a request fails?
Confirm that the endpoint includes /v1, the API key is complete, and the model name matches the AIHubMix model ID. If the primary endpoint is unavailable, use https://api.inferera.com/v1.
Last updated: 2026-07-10