

Before you start
- Install and open CodeBuddy.
- Create an API key in the AIHubMix Console. It usually starts with
sk-***. - Copy the model ID you want to use, such as
gpt-5.5,gemini-3.5-flash, ordeepseek-chat, from the AIHubMix model list.
Configure AIHubMix in the interface
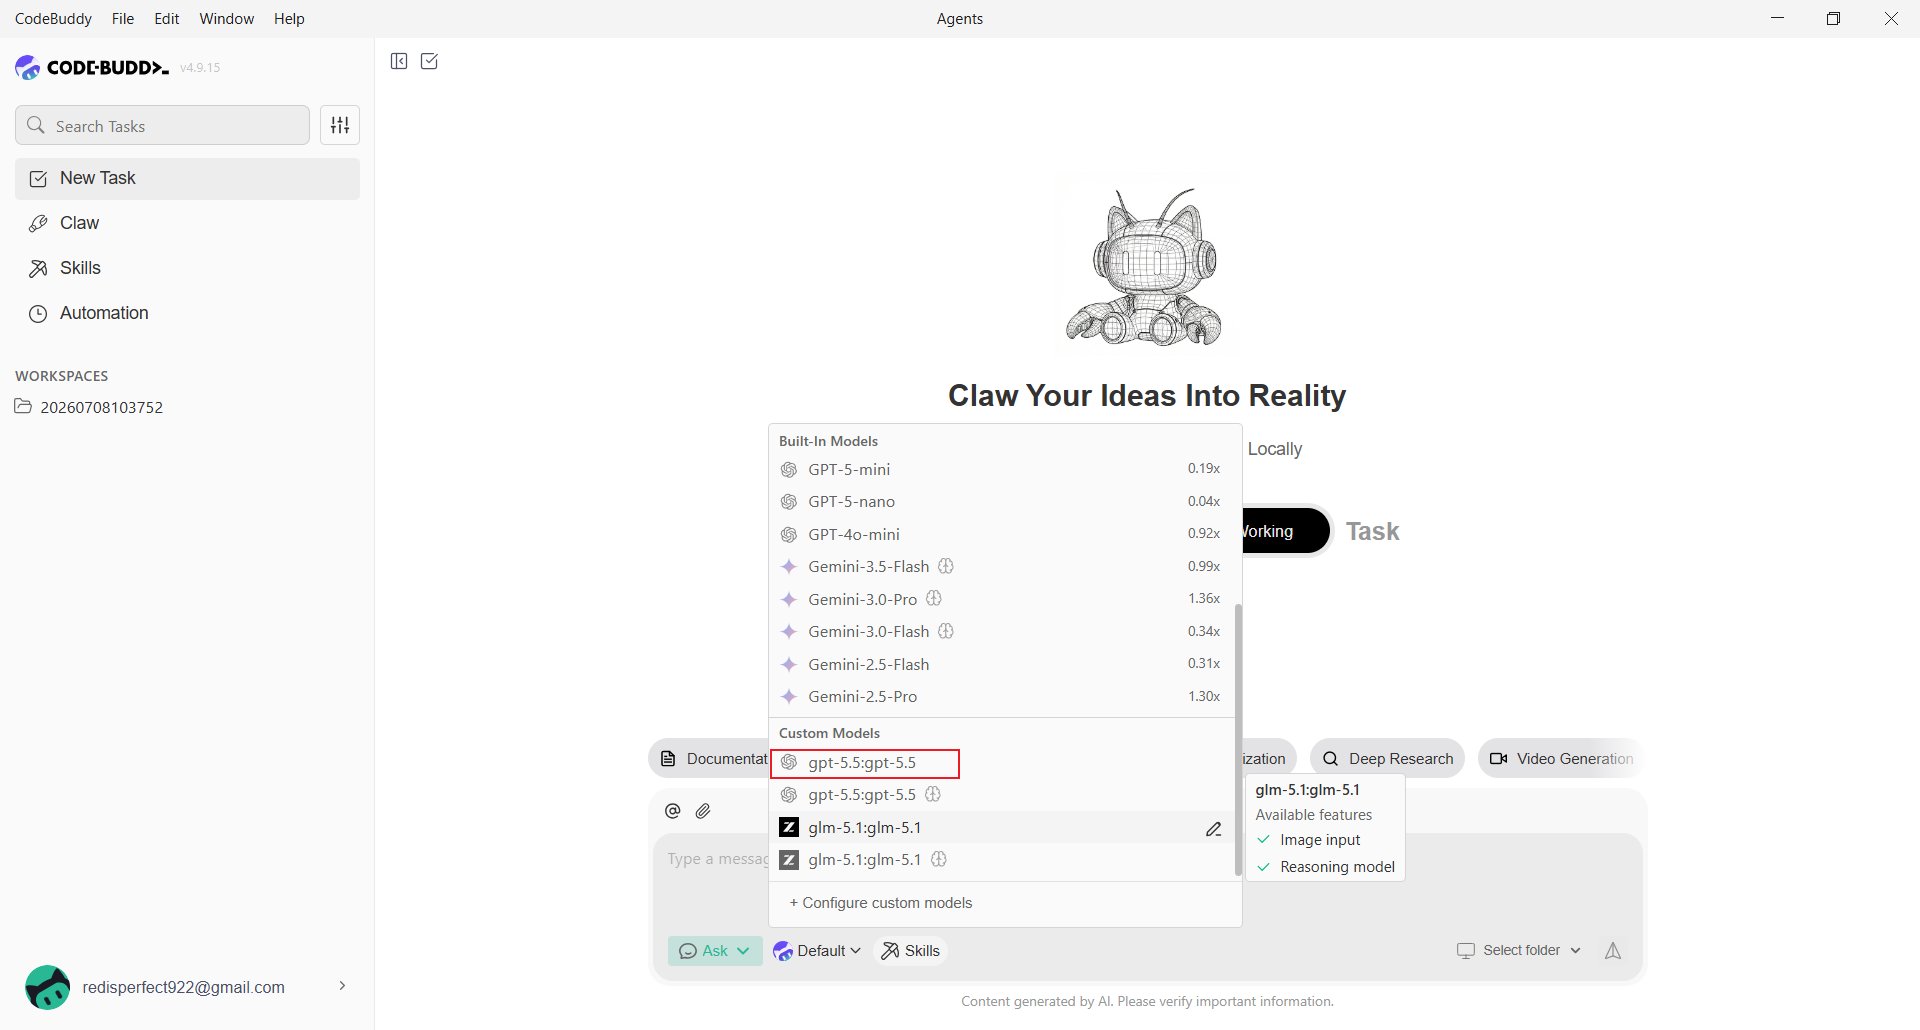
Open CodeBuddy and click the current model name below the input box, for example Default.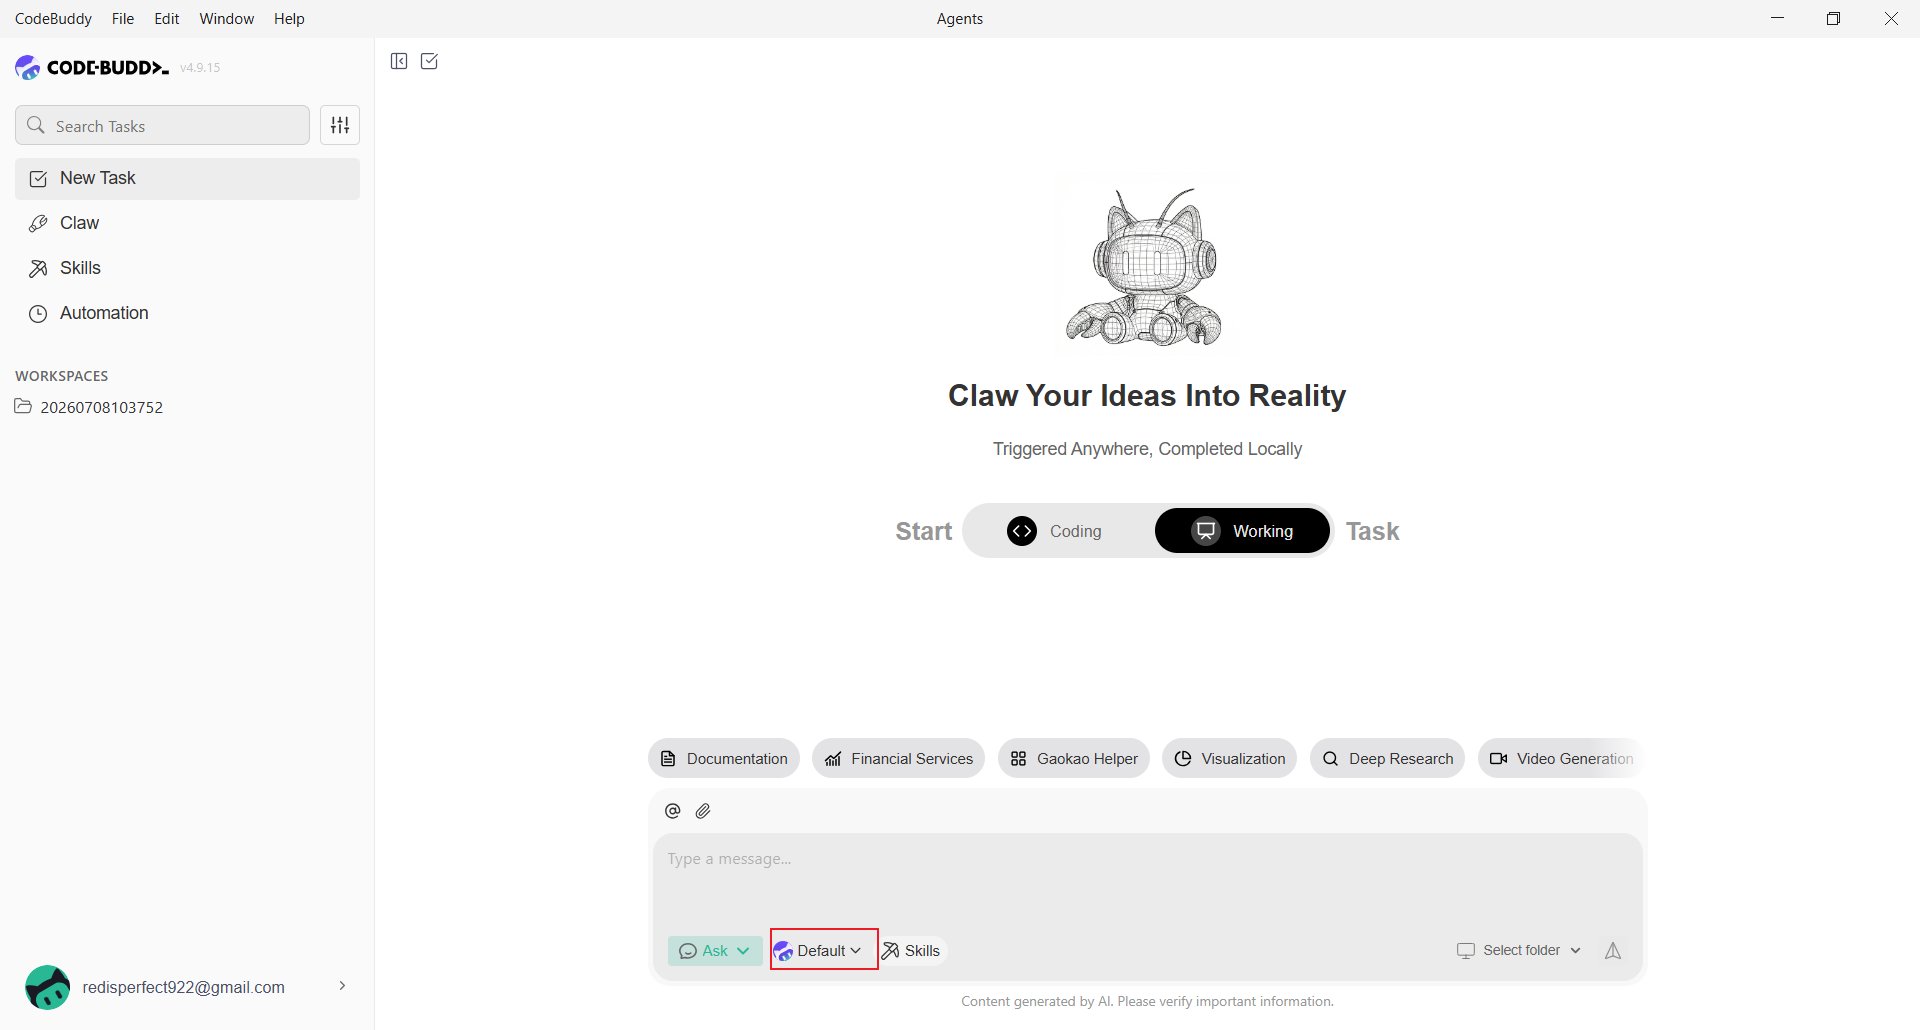
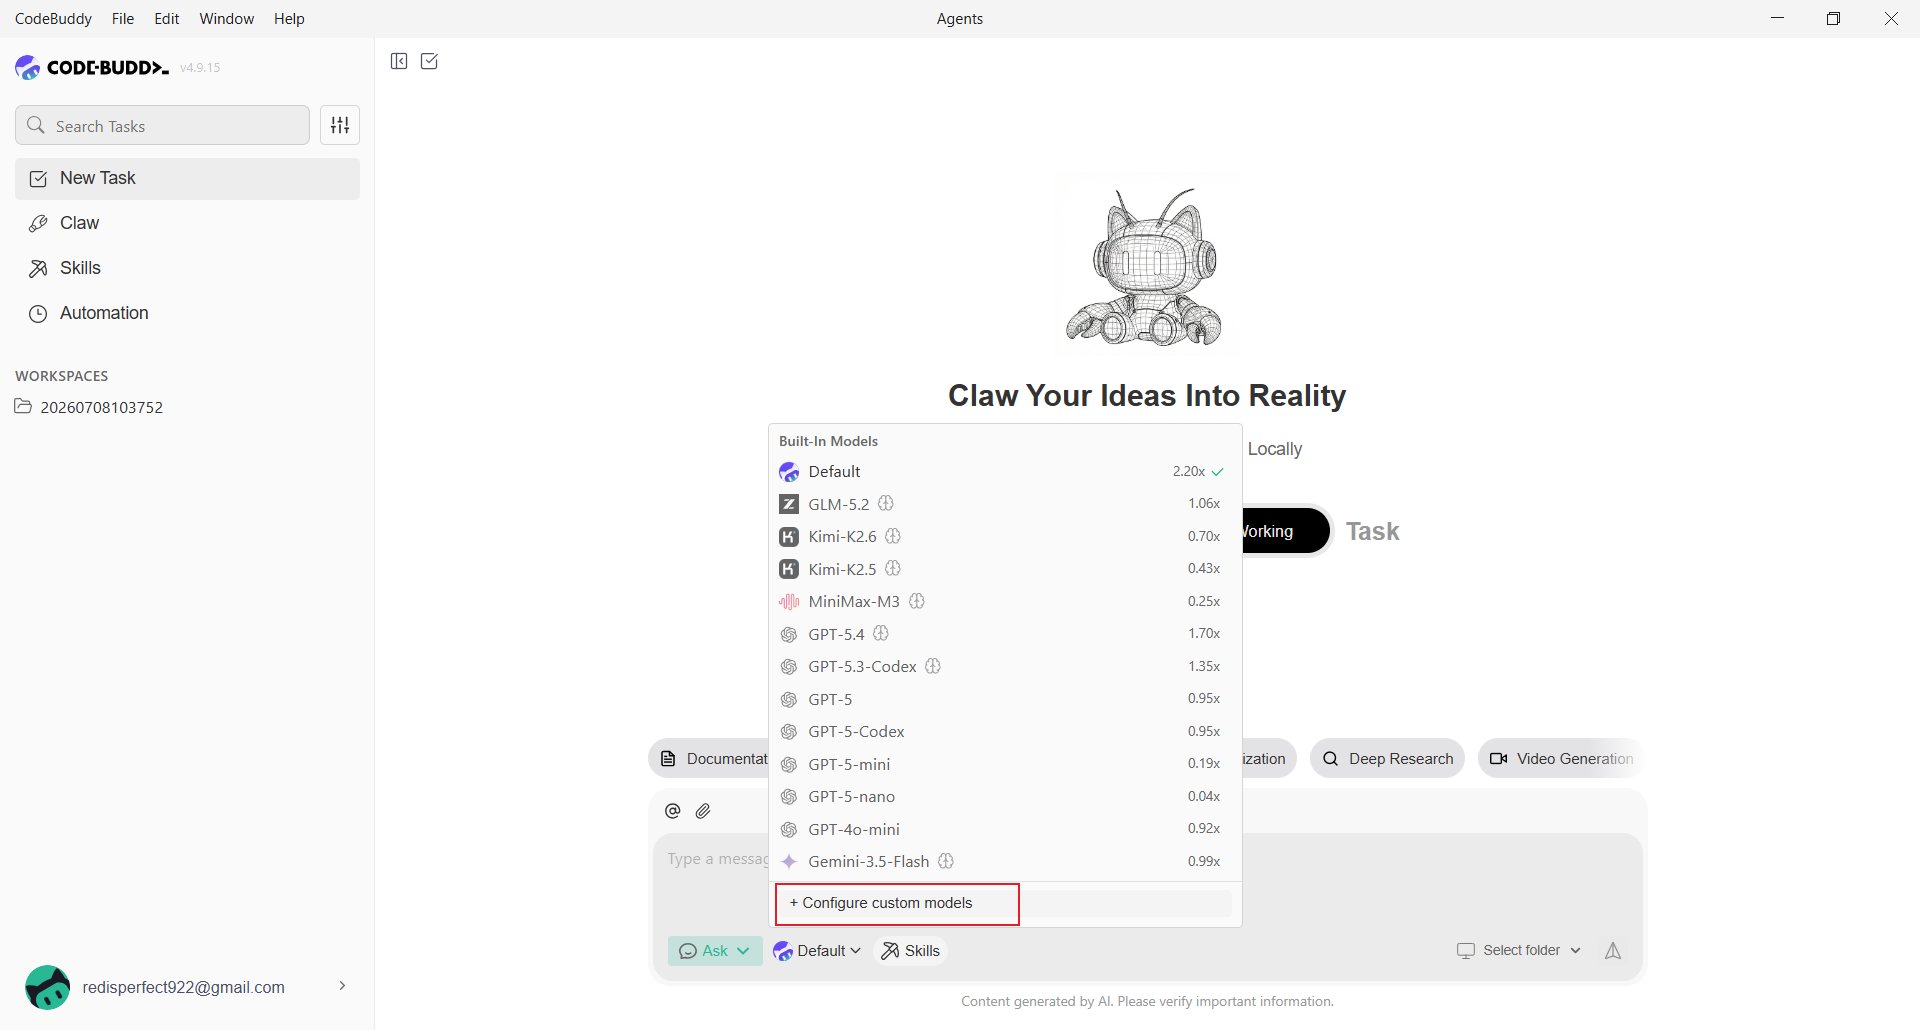
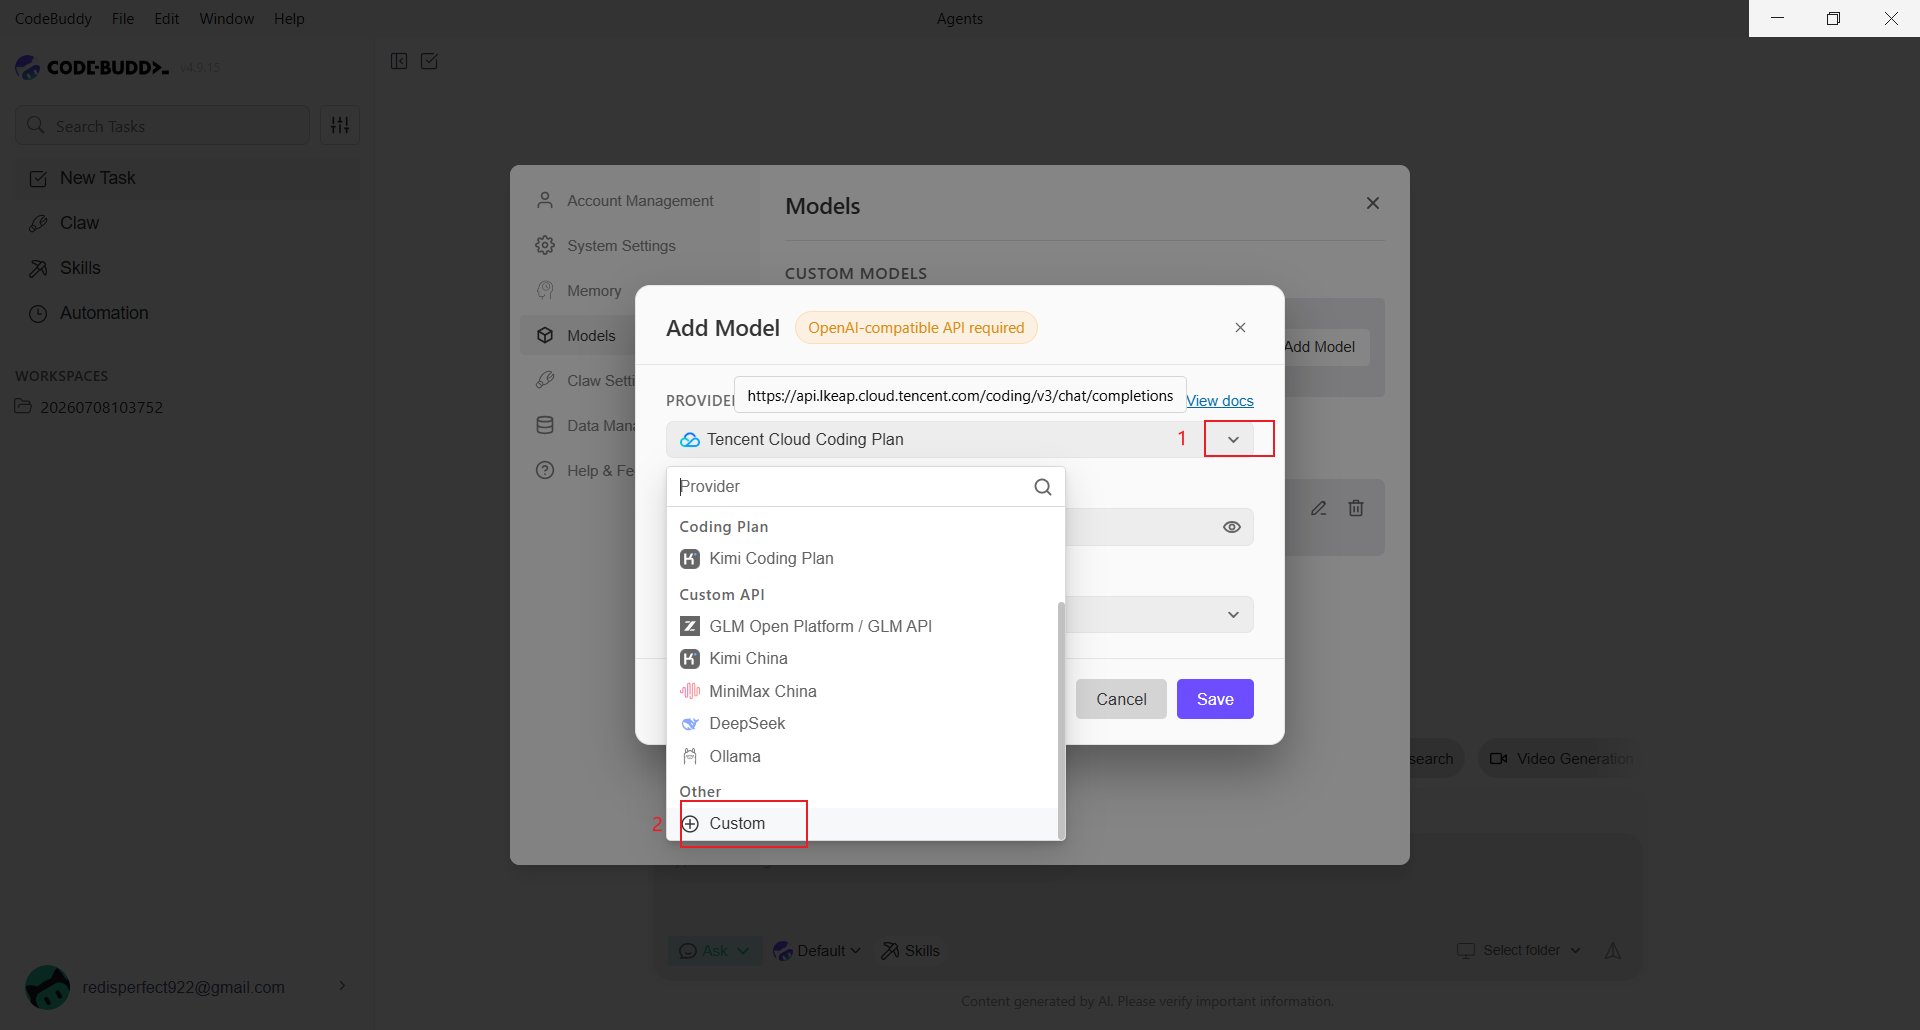
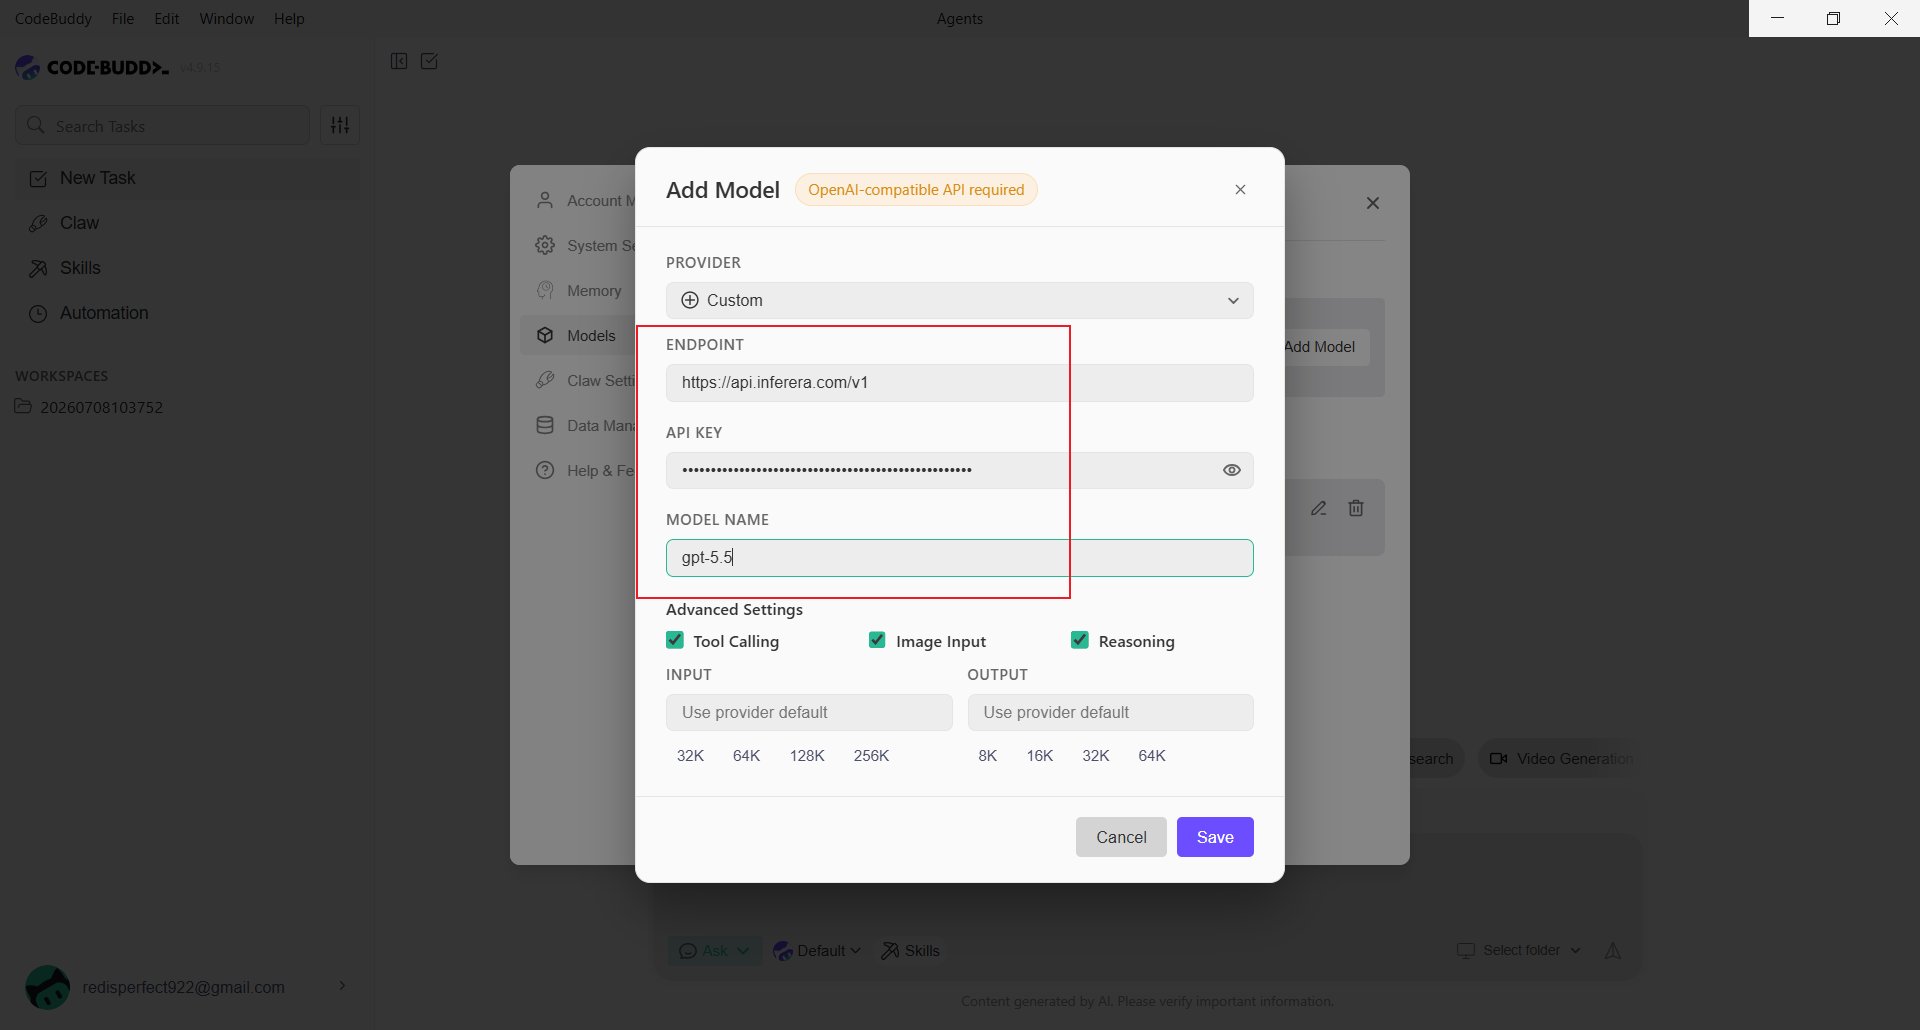
- Endpoint: Use
https://aihubmix.com/v1. If it is temporarily unavailable, use the backup endpointhttps://api.inferera.com/v1. - API Key: Enter the key created in the AIHubMix Console.
- Model Name: Enter the model ID, such as
gpt-5.5. - Advanced Settings: Enable Tool Calling, Image Input, or Reasoning only when the selected model supports that capability.
Add a model through a configuration file
CodeBuddy stores custom models locally. Edit the following file when configuring through the interface is inconvenient:models.json, use the full Chat Completions URL:
url to:
/v1 endpoint; models.json needs the complete /chat/completions path. Restart CodeBuddy or reopen the model picker after saving. To avoid storing the key in plain text, use an environment variable:
CodeBuddy CLI
The command-line version is called CodeBuddy Code. Install it with npm, then runcodebuddy to start it:
CODEBUDDY_BASE_URL:
%USERPROFILE%\.codebuddy\settings.json:
CODEBUDDY_BASE_URL was not set to an OpenAI path such as /v1/chat/completions.
Verify the setup
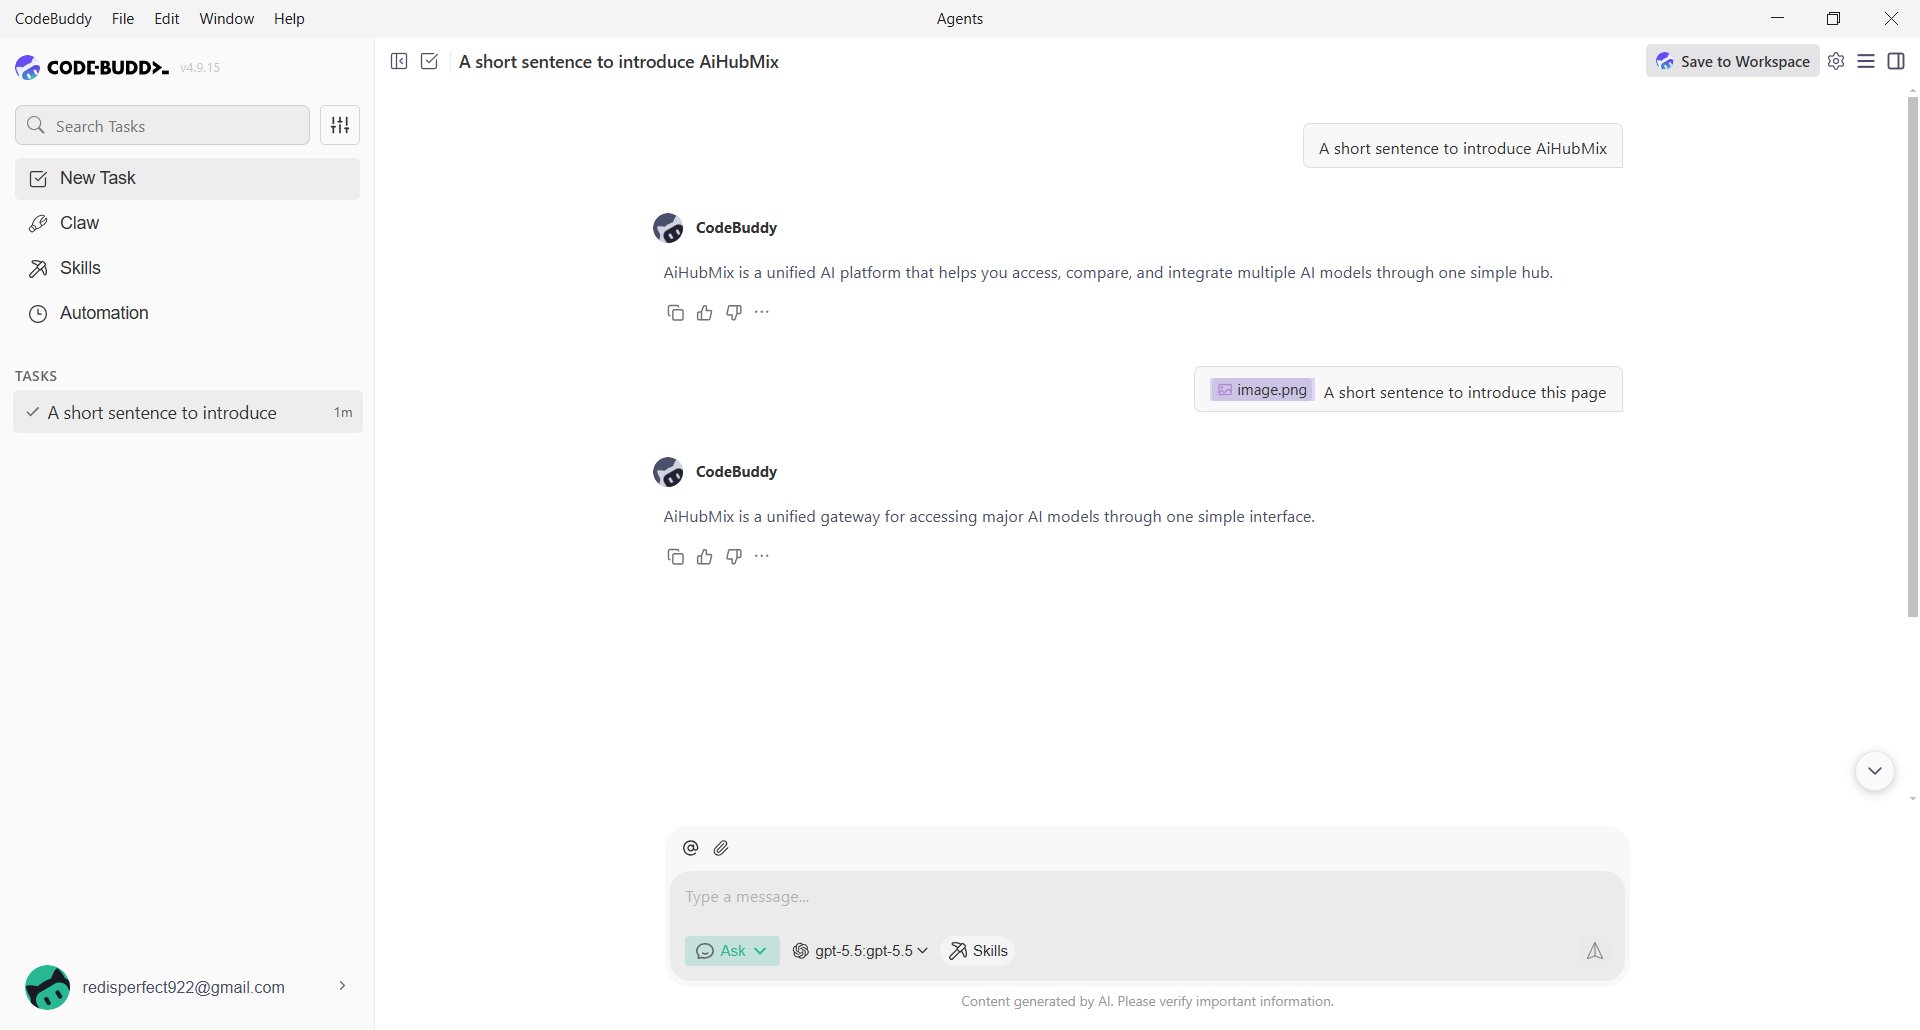
Select the custom model and send a short message, such as asking CodeBuddy to introduce AIHubMix. A successful reply confirms the configuration.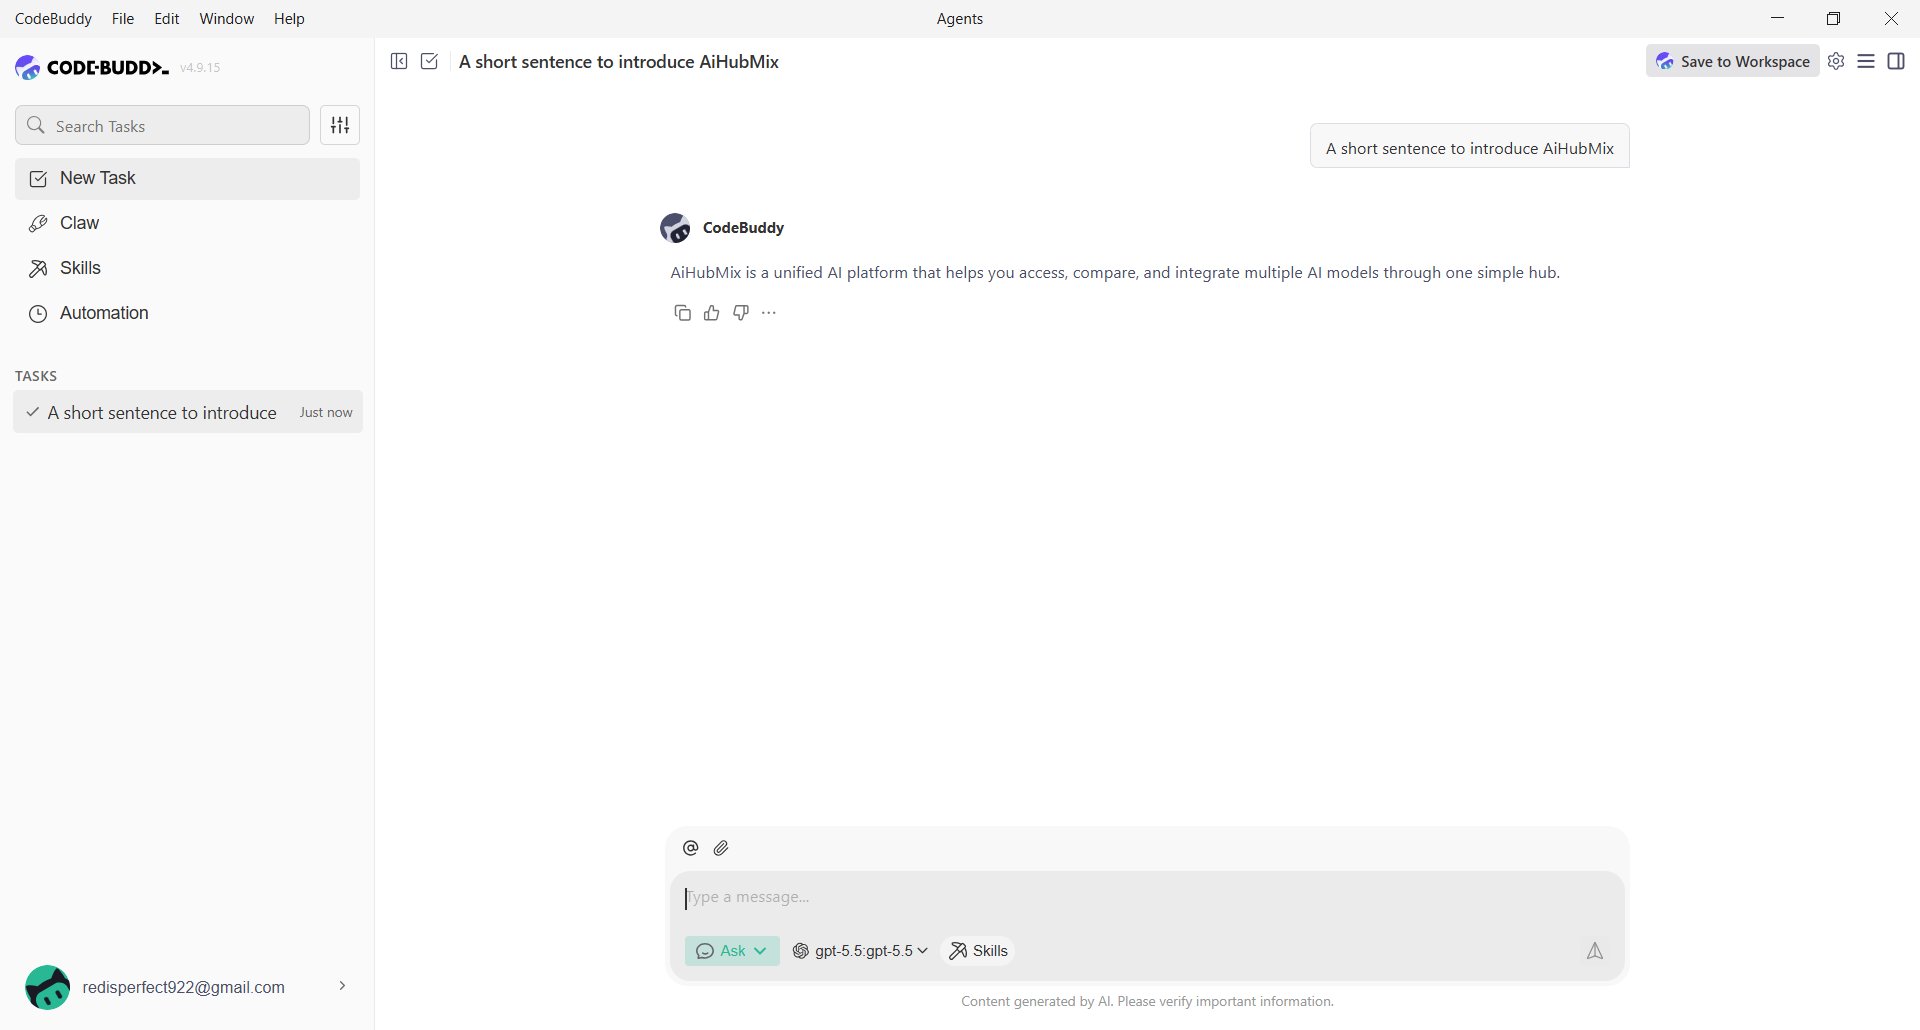
FAQ
The model is unavailable after saving. What should I check? Confirm that the endpoint includes/v1, the API key is complete, and the model name matches the AIHubMix model ID. For models.json, also confirm that url includes /chat/completions.
Why are two similar model names shown?
CodeBuddy may display a custom model as model-name:model-name. This is normal as long as it responds correctly.
Do the CLI and desktop app use the same settings?
Not exactly. Desktop custom models use models.json; the CLI reads environment variables or the env object in settings.json.
Last updated: 2026-07-10