Imagen 가이드

Imagen은 Google에서 개발한 고급 이미지 생성 AI 모델 시리즈로, 텍스트 프롬프트를 바탕으로 고품질의 사실적인 이미지를 생성할 수 있습니다. 이 가이드는 Imagen API를 사용하여 이미지를 생성하는 방법, 매개변수 설정, 모델 선택, 코드 예시를 이해하는 데 도움이 됩니다.

사용 가능한 모델:

  • imagen-4.0-generate-preview-05-20
  • imagen-4.0-ultra-generate-exp-05-20
  • imagen-3.0-generate-002
  1. 현재 Imagen은 영어 프롬프트만 지원합니다. 통합 시 자동 번역을 추가하여 사용자가 언어 장벽 없이 사용할 수 있도록 하는 것을 권장합니다.
  2. 대량의 텍스트 렌더링 시 성능이 불안정합니다. 핵심 키워드만 포함하는 것을 권장합니다.

모델 매개변수

Imagen은 현재 영어 프롬프트만 지원하며 다음과 같은 매개변수를 제공합니다:

  • numberOfImages: 생성할 이미지 수, 1에서 4까지(포함). 기본값은 4입니다.
  • imagen-4.0-ultra-generate-exp-05-20은 한 번에 1개의 이미지만 생성할 수 있습니다.
  • aspectRatio: 생성된 이미지의 종횡비를 변경합니다. 지원되는 값은 “1:1”, “3:4”, “4:3”, “9:16”, “16:9”입니다. 기본값은 “1:1”입니다.
  • personGeneration: 모델이 사람이 포함된 이미지를 생성할 수 있도록 허용합니다. 다음 값을 지원합니다:
    • “DONT_ALLOW”: 사람이 포함된 이미지 생성을 방지합니다.
    • “ALLOW_ADULT”: 성인 이미지는 생성하지만 어린이는 생성하지 않습니다. 이것이 기본값입니다.

사용 요금

Imagen API를 사용하여 이미지를 생성하는 비용은 이미지당 $0.03입니다. 각 API 호출은 1-4개의 이미지를 생성할 수 있으며, 실제로 생성된 이미지 수에 따라 요금이 부과됩니다.

API 호출 예시

다음은 Imagen 3.0을 사용하여 이미지를 생성하는 Python 예시입니다:

import os
import time
from google import genai
from google.genai import types
from PIL import Image
from io import BytesIO

client = genai.Client(
    api_key="sk-***", # 🔑 AiHubMix에서 생성한 키로 교체하세요
    http_options={"base_url": "https://aihubmix.com/gemini"},
)

# 현재 영어 프롬프트만 지원하며, 대량의 텍스트에서 성능이 떨어집니다
response = client.models.generate_images(
    model='imagen-3.0-generate-002',
    prompt='A minimalist logo for a LLM router market company on a solid white background. trident in a circle as the main symbol, with ONLY text \'InferEra\' below.',
    config=types.GenerateImagesConfig(
        number_of_images=1,
        aspect_ratio="1:1", # "1:1", "9:16", "16:9", "3:4", "4:3" 지원
    )
)

script_dir = os.path.dirname(os.path.abspath(__file__))
output_dir = os.path.join(script_dir, "output")

os.makedirs(output_dir, exist_ok=True)

# 파일명 충돌을 피하기 위해 타임스탬프를 파일명 접두사로 생성
timestamp = int(time.time())

# 생성된 이미지 저장 및 표시
for i, generated_image in enumerate(response.generated_images):
  image = Image.open(BytesIO(generated_image.image.image_bytes))
  image.show()
  
  file_name = f"imagen3_{timestamp}_{i+1}.png"
  file_path = os.path.join(output_dir, file_name)
  image.save(file_path)
  
  print(f"이미지가 저장되었습니다: {file_path}")

프롬프트 팁

원하는 이미지를 얻기 위해서는 효과적인 프롬프트 작성이 중요합니다:

  • 주제, 스타일, 조명, 앵글 등을 포함한 상세한 설명을 사용하세요.
  • 예술적 스타일을 명시하세요(영화적, 사실적, 애니메이션 스타일 등).
  • 기술적 세부사항을 포함하세요(DSLR, 고화질, 세부사항이 풍부한 등).
  • 부정적이거나 금지된 콘텐츠는 피하세요.
  • 프롬프트에 대량의 텍스트를 포함하지 마세요, 더 안정적인 결과를 위해 핵심 키워드만 사용하세요.

Gemini 이미지 생성

Gemini는 대안으로 이미지 생성 기능도 제공합니다. Imagen과 비교하여 Gemini의 이미지 생성은 궁극적인 예술적 표현과 시각적 품질을 추구하기보다는 맥락적 이해와 추론이 필요한 시나리오에 더 적합합니다.

지침:

  • 모델 id: gemini-2.0-flash-preview-image-generation
  • 입력/출력 요금: 0.10.1→0.4/M 토큰
  • 새로운 기능을 경험하려면 매개변수를 추가해야 합니다: "modalities":["text","image"]
  • 이미지는 Base64 인코딩으로 전달되고 출력됩니다
  • 실험적 모델로서 “출력 이미지”를 명시적으로 지정하는 것을 권장하며, 그렇지 않으면 텍스트만 출력될 수 있습니다
  • 출력 이미지의 기본 높이는 1024px입니다
  • Python 호출에는 최신 OpenAI SDK가 필요하며, 먼저 pip install -U openai를 실행하세요
  • 자세한 정보는 Gemini 공식 문서를 참조하세요

입력 참조 구조:

"modalities": ["text","image"]
{
    "model": "gemini-2.0-flash-preview-image-generation",
    "messages": [
      {
        "role": "user",
        "content": "Generate a landscape painting and provide a poem to describe it"
      }
    ],
    "modalities":["text","image"], //이미지 추가 필요
    "temperature": 0.7
  }'

출력 참조 구조:

"choices":
    [
        {
            "index": 0,
            "message":
            {
                "role": "assistant",
                "content": "Hello! How can I assist you today?",
                "refusal": null,
                "multi_mod_content": //📍 새로 추가
                [
                    {
                        "text": "",
                        "inlineData":
                        {
                          "data":"base64 str",
                          "mimeType":"png"
                        }
                    },
                    {
                        "text": "hello",
                        "inlineData":
                        {
                        }
                    }
                ],
                "annotations":
                []
            },
            "logprobs": null,
            "finish_reason": "stop"
        }
    ],

텍스트-이미지 생성

입력: 텍스트 출력: 텍스트 + 이미지

IMG_PATH="/your_path/image.jpg"

if [[ "$(base64 --version 2>&1)" = *"FreeBSD"* ]]; then
  B64FLAGS="--input"
else
  B64FLAGS="-w0"
fi

IMG_BASE64=$(base64 "$B64FLAGS" "$IMG_PATH" 2>&1)

curl https://aihubmix.com/v1/chat/completions \
  -H "Content-Type: application/json" \
  -H "Authorization: Bearer sk-***" \
  -d '{
    "model": "gemini-2.0-flash-preview-image-generation",
    "messages": [
      {
        "role": "user",
        "content": [
          {
            "type":"text",
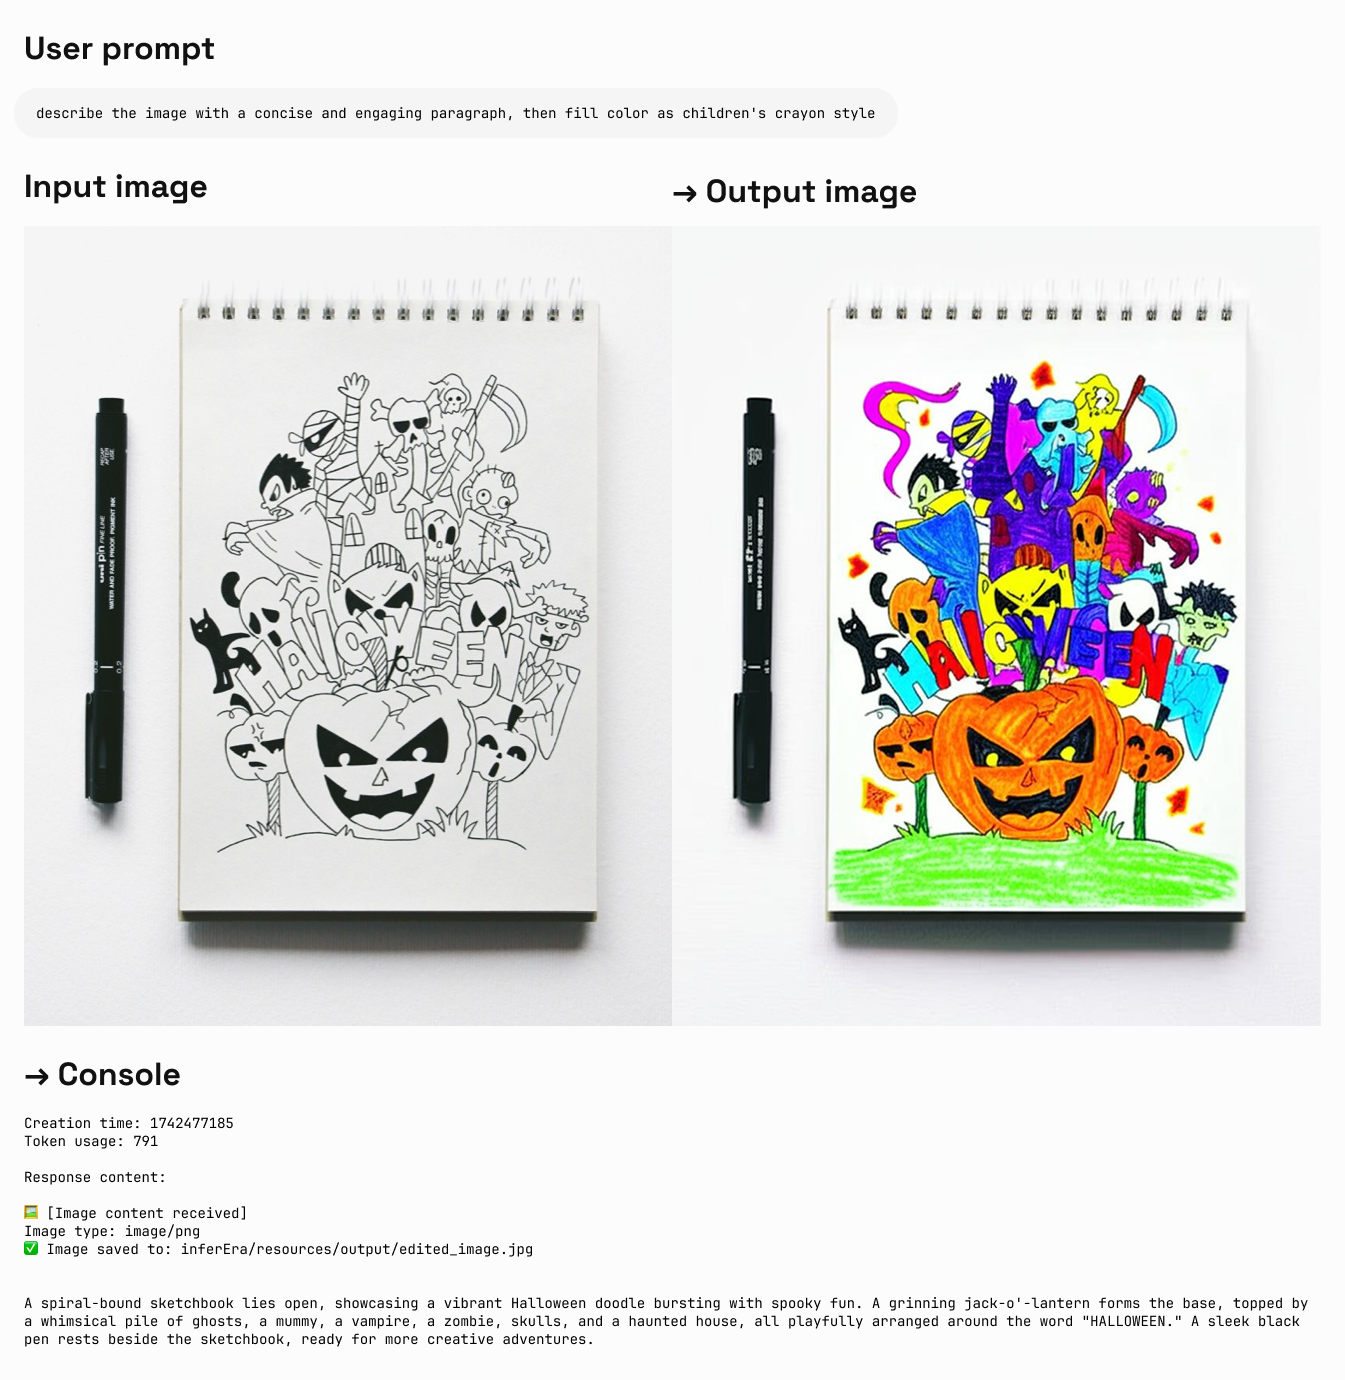
            "text":"describe the image with a concise and engaging paragraph, then fill color as children's crayon style"
          },
          {
            "type": "image_url",
            "image_url": {
              "url": "data:image/jpeg;base64,'$IMG_BASE64'"
            }
          }
        ]
      }
    ],
    "modalities": ["text","image"],
    "temperature": 0.7
}' \
  | grep -o '"data":"[^"]*"' \
  | cut -d'"' -f4 \
  | base64 --decode > /your_path/imageGen.jpg

출력 예시:

이미지 편집

입력: 텍스트 + 이미지
출력: 텍스트 + 이미지

import os
from openai import OpenAI
from PIL import Image
from io import BytesIO
import base64

client = OpenAI(
    api_key="sk-***", # 🔑 AiHubMix에서 생성한 키로 교체하세요
    base_url="https://aihubmix.com/v1",
)

project_root = os.path.dirname(os.path.dirname(os.path.abspath(__file__)))

image_path = os.path.join(os.path.dirname(os.path.abspath(__file__)), "resources", "filled.jpg")
if not os.path.exists(image_path):
    raise FileNotFoundError(f"이미지 {image_path}가 존재하지 않습니다")

def encode_image(image_path):
    with open(image_path, "rb") as image_file:
        return base64.b64encode(image_file.read()).decode("utf-8")

base64_image = encode_image(image_path)

response = client.chat.completions.create(
    model="gemini-2.0-flash-preview-image-generation",
    messages=[
        {
            "role": "user",
            "content": [
                {
                    "type": "text",
                    "text": "describe the image with a concise and engaging paragraph, then fill color as children's crayon style",
                },
                {
                    "type": "image_url", 
                    "image_url": {"url": f"data:image/jpeg;base64,{base64_image}"},
                },     
            ],
        },
    ],
    modalities=["text", "image"],
    temperature=0.7,
)
try:
    # base64 데이터 없이 기본 응답 정보 출력
    print(f"생성 시간: {response.created}")
    print(f"토큰 사용량: {response.usage.total_tokens}")
    
    # multi_mod_content 필드가 존재하는지 확인
    if (
        hasattr(response.choices[0].message, "multi_mod_content")
        and response.choices[0].message.multi_mod_content is not None
    ):
        print("\n응답 내용:")
        for part in response.choices[0].message.multi_mod_content:
            if "text" in part and part["text"] is not None:
                print(part["text"])
            
            # 이미지 내용 처리
            elif "inline_data" in part and part["inline_data"] is not None:
                print("\n🖼️ [이미지 내용 수신됨]")
                image_data = base64.b64decode(part["inline_data"]["data"])
                mime_type = part["inline_data"].get("mime_type", "image/png")
                print(f"이미지 유형: {mime_type}")
                
                image = Image.open(BytesIO(image_data))
                image.show()
                
                # 이미지 저장
                output_dir = os.path.join(os.path.dirname(image_path), "output")
                os.makedirs(output_dir, exist_ok=True)
                output_path = os.path.join(output_dir, "edited_image.jpg")
                image.save(output_path)
                print(f"✅ 이미지가 저장되었습니다: {output_path}")
            
    else:
        print("유효한 멀티모달 응답을 받지 못했습니다. 응답 구조를 확인하세요")
except Exception as e:
    print(f"응답 처리 중 오류 발생: {str(e)}")

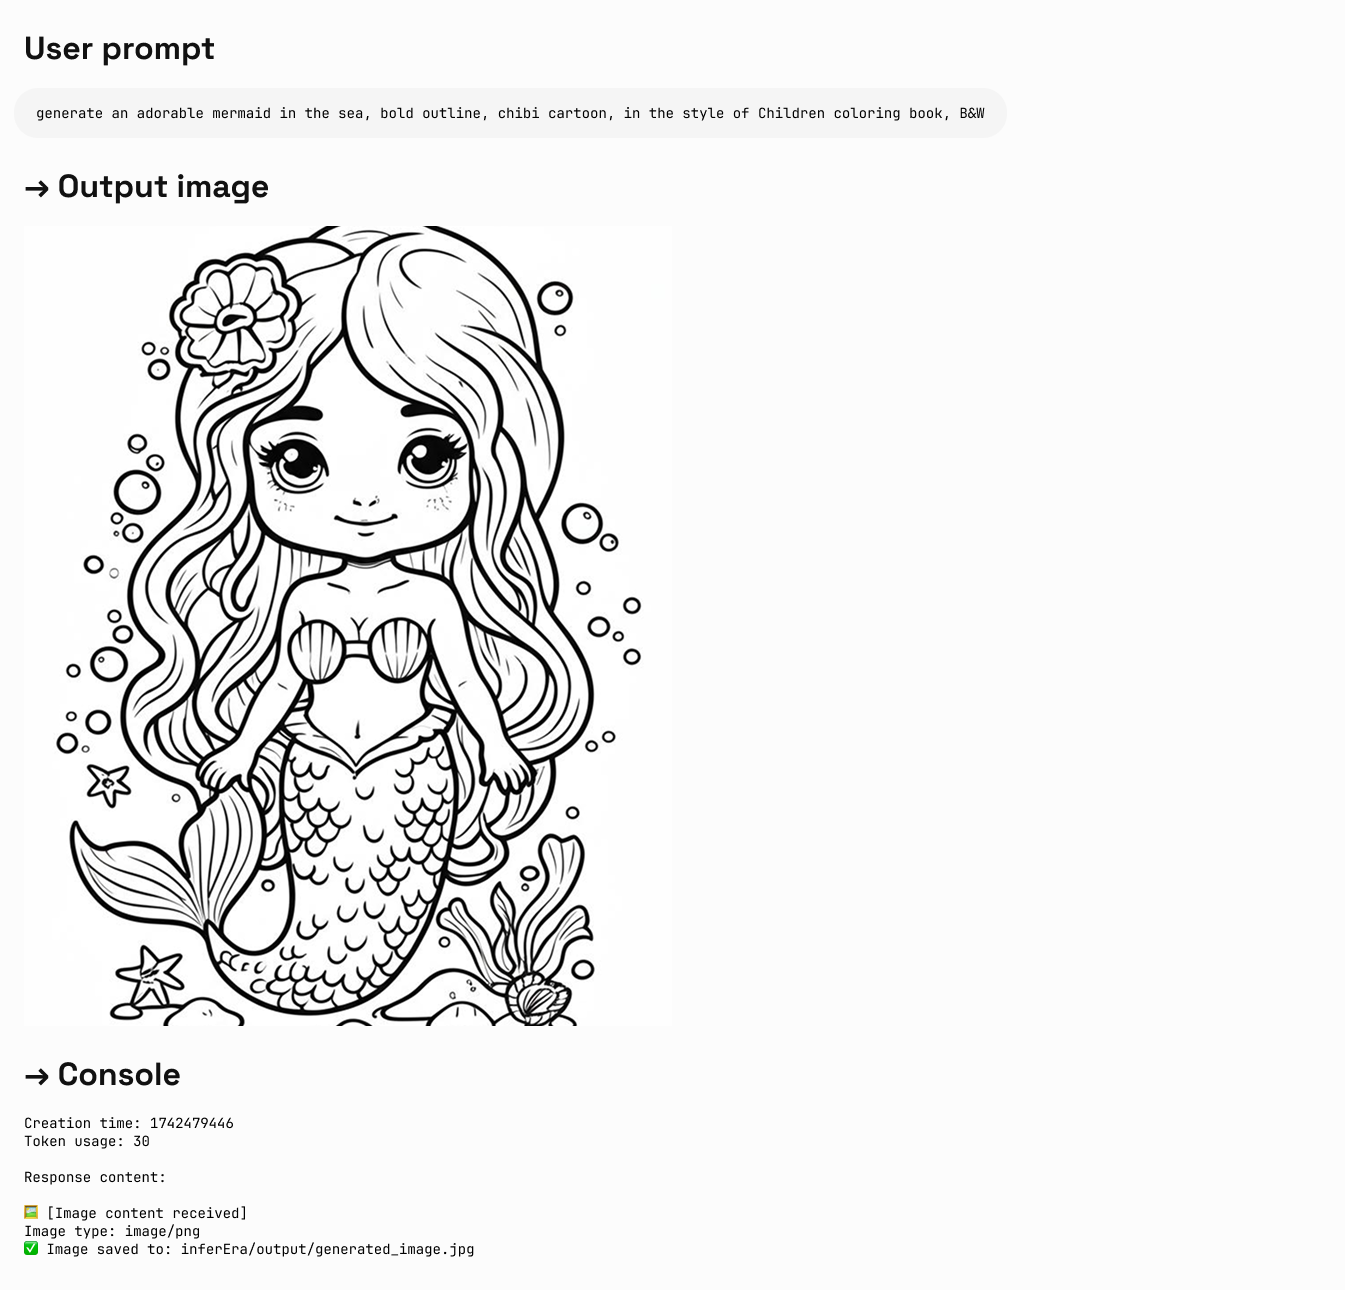
출력 예시:

적절한 모델 선택

Gemini를 선택해야 하는 경우:

  • 세계 지식과 추론 능력을 활용하여 맥락적으로 관련된 이미지를 생성해야 할 때.
  • 텍스트와 이미지의 원활한 통합이 필요할 때.
  • 긴 텍스트 시퀀스에 정확한 시각적 콘텐츠를 포함시키고 싶을 때.
  • 맥락을 유지하면서 대화형으로 이미지를 편집하고 싶을 때.

Imagen을 선택해야 하는 경우:

  • 이미지 품질, 사실성, 예술적 세부사항 또는 특정 스타일(인상파, 애니메이션 등)이 주요 고려사항일 때.
  • 제품 배경 업데이트나 이미지 확대와 같은 전문적인 편집 작업을 수행할 때.
  • 브랜딩, 스타일을 주입하거나 로고 및 제품 디자인을 생성할 때.

모범 사례

  1. 프롬프트 최적화: 고품질 출력을 얻기 위해서는 프롬프트를 신중하게 작성하는 것이 핵심입니다.
  2. 매개변수 실험: 다양한 종횡비와 설정을 시도하여 필요에 가장 적합한 구성을 찾으세요.
  3. 배치 생성: 이상적인 결과를 얻을 확률을 높이기 위해 여러 이미지를 생성하세요.
  4. 메타데이터 저장: 성공적인 결과를 추적하고 재현하기 위해 프롬프트와 타임스탬프를 이미지와 함께 저장하세요.
  5. 사용 정책 준수: 사용이 Google의 콘텐츠 정책 및 서비스 약관을 준수하는지 확인하세요.

Veo 3.0 비디오 생성

VEO 3.0은 Google DeepMind에서 개발한 최신 고급 비디오 생성 모델입니다. VEO 3.0을 사용하면 다음과 같은 기능을 가진 비디오를 생성할 수 있습니다:

  • 텍스트 및 이미지 프롬프트로부터 향상된 품질
  • 대화 및 내레이션과 같은 음성
  • 음악 및 음향 효과와 같은 오디오
  1. 현재 VEO 3.0은 영어 프롬프트만 지원하므로, 통합 시 자동 번역을 권장합니다
  2. 비디오는 보통 몇 분 내에 생성되지만, 피크 시간에는 더 오래 걸릴 수 있습니다
  3. 현재 이미지 기반 대화에서의 비디오 생성은 지원되지 않습니다

알려진 제한사항

현재 VEO 3.0 매개변수는 고정되어 있으며 변경할 수 없습니다:

  • 해상도: 720p (가로형)
  • 프레임 레이트: 24fps
  • 비디오 길이: 8초

요금

VEO 3.0 API의 비용은 $0.675/초입니다 (Aihubmix는 10% 한정 할인을 제공합니다)

사용 예시

VEO 3.0은 현재 curl 명령어 호출만 지원하며, 2단계 프로세스를 사용합니다: 참고: sk-***는 AiHubMix에서 생성한 키입니다.

curl "https://aihubmix.com/gemini/v1beta/models/veo-3.0-generate-preview:predictLongRunning?key=sk-***" \
  -H "Content-Type: application/json" \
  -X "POST" \
  -d '{
    "instances":
    [
        {
            "prompt": "A cat playing with a ball"
        }
    ],
    "parameters":
    {
        "numberOfVideos": 1,
        "durationSeconds": 8,
        "aspectRatio": "16:9",
        "personGeneration": "dont_allow"
    }
}'

응답 예시

1단계 응답:

{
  "name": "models/veo-3.0-generate-preview/operations/ff5***"
}

2단계 응답 (생성 완료):

{
  "name": "projects/ahm-gemini-03/locations/us-central1/publishers/google/models/veo-3.0-generate-preview/operations/ff5***",
  "done": true,
  "response": {
    "@type": "type.googleapis.com/cloud.ai.large_models.vision.GenerateVideoResponse",
    "raiMediaFilteredCount": 0,
    "videos": [
      {
        "bytesBase64Encoded": "AAA...2xl",
        "mimeType": "video/mp4"
      }
    ]
  }
}

2단계 응답 (아직 처리 중):

{
  "name": "projects/ahm-gemini-03/locations/us-central1/publishers/google/models/veo-3.0-generate-preview/operations/777***"
}

처리 중 응답을 받으면 몇 분 기다린 후 2단계 요청을 다시 보내주세요.

비디오 효과:

모범 사례

  1. 인내심: 비디오 생성에는 보통 몇 분이 걸리며, 피크 시간에는 더 오래 걸립니다
  2. 상태 확인: 응답에 done: true가 포함되지 않으면 아직 처리 중입니다
  3. Operation ID 저장: 후속 쿼리를 위해 1단계에서 반환된 operation ID를 반드시 저장하세요
  4. 사용 정책 준수: 사용이 Google의 콘텐츠 정책 및 서비스 약관을 준수하는지 확인하세요

자세한 정보는 Vertex AI 공식 문서를 참조하세요

Veo 3.0 역방향 API 액세스

AIhubmix는 공식 API와 동일한 출력 품질을 제공하지만 더 낮은 요율인 요청당 $0.41의 역방향 액세스 방법을 제공합니다. 하지만 모든 역방향 방법은 안정적인 생성을 보장할 수 없다는 점을 유의하세요. 개발 환경에서 초기 실험이나 개인적인 탐구용으로만 사용하는 것을 권장합니다.

알려진 제한사항은 공식 API와 일치합니다. 위의 “Veo 3.0 비디오 생성” 섹션을 참조하세요.

응답 예시

VEO 3.0 역방향 API는 OpenAI 호환됩니다. 비디오 프롬프트와 함께 모델 ID veo-3만 지정하면 됩니다.

from openai import OpenAI

client = OpenAI(
    api_key="sk-***", # 🔑 AiHubMix의 API 키로 교체하세요
    base_url="https://aihubmix.com/v1",
)

completion = client.chat.completions.create(
    model="veo-3",
    messages=[
        {
            "role": "user",
            "content": "a mechanical butterfly flying in the futuristic garden"
        }
    ],
    stream=False
)

print(completion.choices[0].message.content)

예시 응답

출력은 비디오 URL입니다. 제시간에 로컬로 저장해주세요.

{
  "prompt": "A sleek, metallic mechanical butterfly with intricate, glowing blue circuitry patterns on its wings flies gracefully through a futuristic garden. The garden is filled with bioluminescent plants, floating orbs of light, and holographic flowers that change colors. The butterfly's wings reflect the ambient light, creating a mesmerizing shimmer as it moves. The background features a sleek, minimalist cityscape with towering glass structures and hovering drones. The scene is bathed in a soft, ethereal glow from a setting sun, casting long shadows and enhancing the futuristic ambiance. The camera follows the butterfly in a smooth, cinematic motion, capturing the delicate movements of its wings and the vibrant, otherworldly beauty of the garden."
}
> 비디오 생성 작업 생성됨
> 작업 ID: `8167db37-2b7c-4794-9232-891d02ca7fa3`
> 작업 중단을 방지하기 위해 다음 링크에서 지속적으로 진행 상황을 추적할 수 있습니다:
> [데이터 미리보기](https://asyncdata.net/web/8167db37-2b7c-4794-9232-891d02ca7fa3) | [소스 데이터](https://asyncdata.net/source/8167db37-2b7c-4794-9232-891d02ca7fa3)
> 처리 대기 중

> 유형: 텍스트-비디오 생성
> 🎬 비디오 생성 시작...................

> ⚠️ 재시도 중 (0/3)

> 유형: 텍스트-비디오 생성
> 🎬 비디오 생성 시작.....................

> 🔄 비디오 품질 최적화 중.................

> 🎉 고품질 비디오 생성됨

[▶️ 온라인 시청](https://filesystem.site/cdn/20250615/T7yfqW229fox4gJA1ys0eMAGLkcSfd.mp4) | [⏬ 비디오 다운로드](https://filesystem.site/cdn/download/20250615/T7yfqW229fox4gJA1ys0eMAGLkcSfd.mp4)

Veo 2.0 비디오 생성

VEO 2.0은 Google에서 출시한 고급 비디오 생성 AI 모델로, 텍스트 프롬프트를 바탕으로 고품질의 사실적인 단편 비디오를 생성할 수 있습니다. 이 부분은 VEO 2.0 API를 사용하여 비디오를 생성하는 방법, 매개변수 설정, 모델 선택, 코드 예시를 이해하는 데 도움이 됩니다.

  1. 현재 VEO 2.0은 영어 프롬프트만 지원합니다
  2. 비디오 생성에는 약 2-3분이 소요되므로 인내심을 가지세요

모델 매개변수

VEO 2.0은 다음과 같은 매개변수를 제공합니다:

  • numberOfVideos: 생성할 비디오 수, 1 또는 2 선택 가능. 기본값은 2입니다.
  • aspectRatio: 생성된 비디오의 종횡비. 지원되는 값은 “16:9”와 “9:16”입니다.
  • durationSeconds: 비디오 길이, 5초 또는 8초 선택 가능. 기본값은 8초입니다.
  • personGeneration: 사람이 포함된 비디오 생성을 허용할지 제어합니다. 다음 값을 지원합니다:
    • “dont_allow”: 사람이 포함된 비디오 생성을 방지합니다.
    • “allow_adult”: 성인이 포함된 비디오 생성을 허용하지만, 어린이는 허용하지 않습니다.

요금

VEO 2.0 API의 비용은 $0.35/초입니다

사용 예시

다음은 VEO 2.0을 사용하여 비디오를 생성하는 Python 예시입니다:

import os
import time
from google import genai
from google.genai import types

client = genai.Client(
    api_key="sk-***", # 🔑 AiHubMix에서 생성한 키로 교체하세요
    http_options={"base_url": "https://aihubmix.com/gemini"},
)

operation = client.models.generate_videos(
    model="veo-2.0-generate-001",
    prompt="Panning wide shot of a calico kitten sleeping in the sunshine",
    config=types.GenerateVideosConfig(
        person_generation="dont_allow",  # "dont_allow" 또는 "allow_adult"
        aspect_ratio="16:9",  # "16:9" 또는 "9:16"
        number_of_videos=1, # 정수, 1 또는 2 선택, 기본값은 2
        durationSeconds=5, # 정수, 5 또는 8 선택, 기본값은 8
    ),
)

# 2-3분 소요, 비디오 길이는 5-8초
while not operation.done:
    time.sleep(20)
    operation = client.operations.get(operation)

for n, generated_video in enumerate(operation.response.generated_videos):
    client.files.download(file=generated_video.video)
    generated_video.video.save(f"video{n}.mp4")  # 비디오 저장

프롬프트 팁

원하는 비디오를 얻기 위해서는 효과적인 프롬프트 작성이 중요합니다:

  • 명확한 장면, 동작, 분위기를 묘사하세요
  • 촬영 스타일을 명시하세요(파노라마, 클로즈업, 추적 샷 등)
  • 조명 조건을 설명하세요(햇빛, 황혼, 실내 조명 등)
  • 주요 피사체와 그 동작을 명시하세요(예: “햇빛 속에서 잠자고 있는 새끼 고양이”)
  • 지나치게 복잡한 내러티브나 빠르게 변하는 장면은 피하세요
  • 부정적이거나 금지된 콘텐츠는 피하세요

모범 사례

  1. 명확하고 간결한 프롬프트: 비디오 생성을 안내하기 위해 명확하고 구체적인 설명을 사용하세요.
  2. 인내심이 핵심: 비디오 생성에는 2-3분이 걸리므로 완료될 때까지 기다리세요.
  3. 다양한 매개변수 테스트: 다양한 종횡비와 길이를 시도하여 필요에 가장 적합한 설정을 찾으세요.
  4. 생성 기록 저장: 성공적인 결과를 추적하기 위해 생성된 비디오와 함께 프롬프트를 기록하세요.
  5. 사용 정책 준수: 사용이 Google의 콘텐츠 정책 및 서비스 약관을 준수하는지 확인하세요.