> ## Documentation Index
> Fetch the complete documentation index at: https://docs.aihubmix.com/llms.txt
> Use this file to discover all available pages before exploring further.
# OpenClaw
## 安裝
安裝前請確認 Node >= 22。
執行安裝指令
```shellscript theme={null}
npm install -g openclaw@latest
```
安裝完成後,後續命令可以在任意目錄執行,不需要先切換到 OpenClaw 安裝目錄。如果終端機能識別 `openclaw`,直接複製文件中的命令即可。
```powershell theme={null}
openclaw models status
```
如果 Windows 終端機提示找不到 `openclaw`,請把命令開頭的 `openclaw` 替換成本機可執行檔路徑:
```powershell theme={null}
& "你的安裝路徑\OpenClaw\openclaw.cmd" models status
```
`你的安裝路徑` 是佔位符,請替換為你實際安裝 OpenClaw 的上層目錄。例如 OpenClaw 位於 `D:\Apps\OpenClaw` 時,應寫成 `& "D:\Apps\OpenClaw\openclaw.cmd" models status`。
### 終端機設定
開啟終端機並執行下列指令以啟動設定
```shellscript theme={null}
openclaw onboard
```
選擇 `Yes`
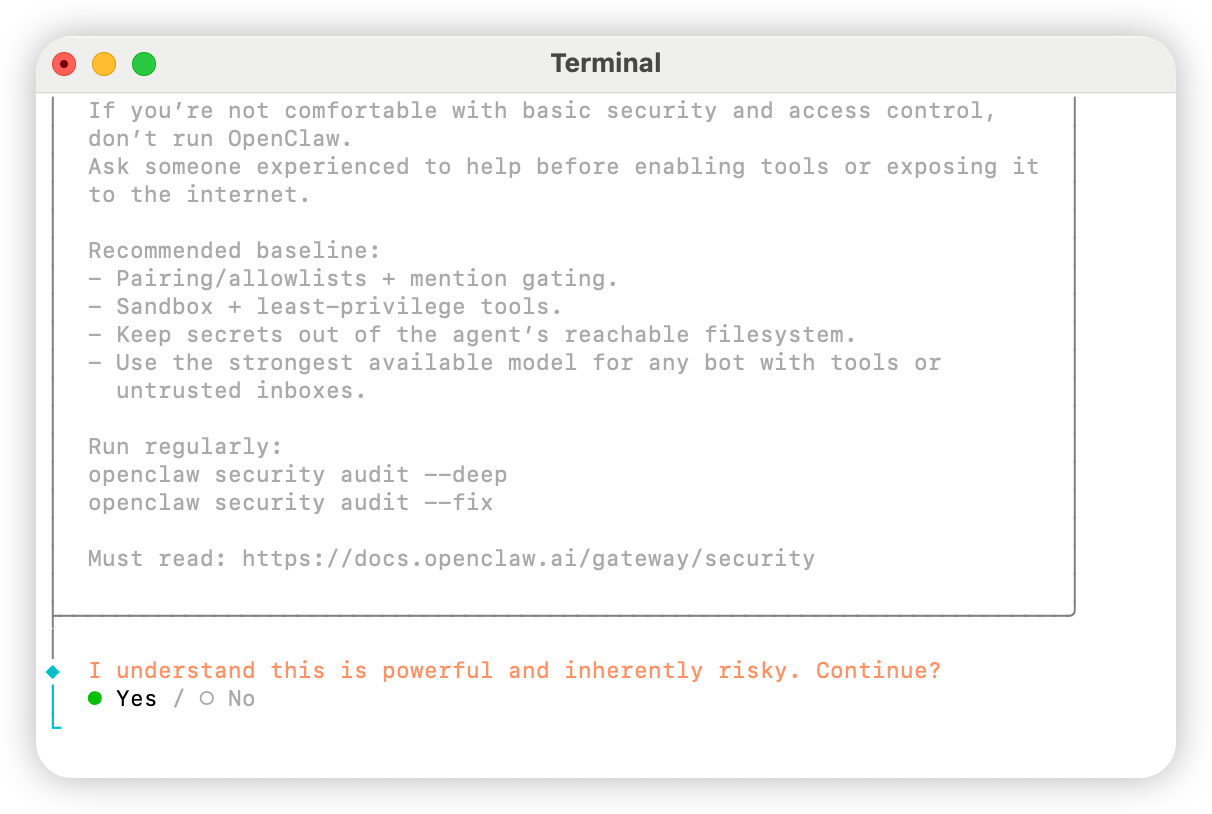 選擇 `QuickStart`
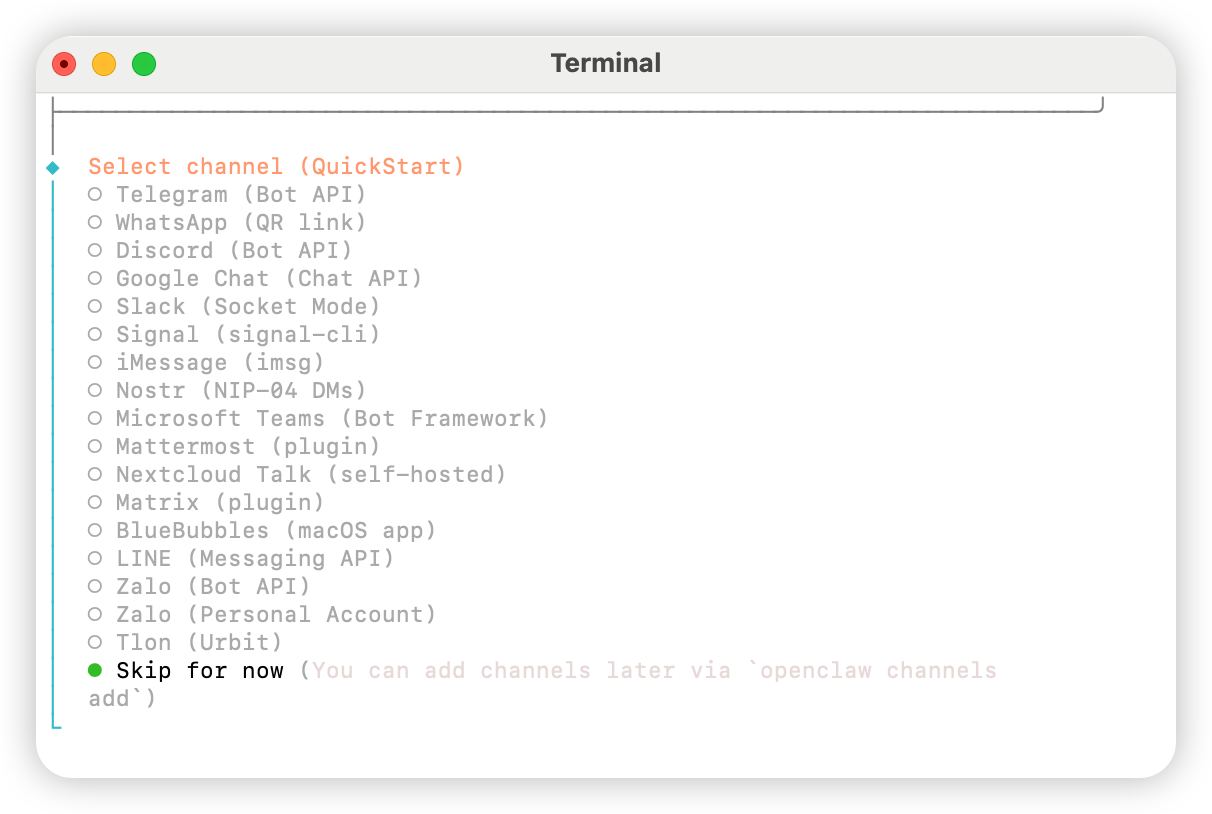
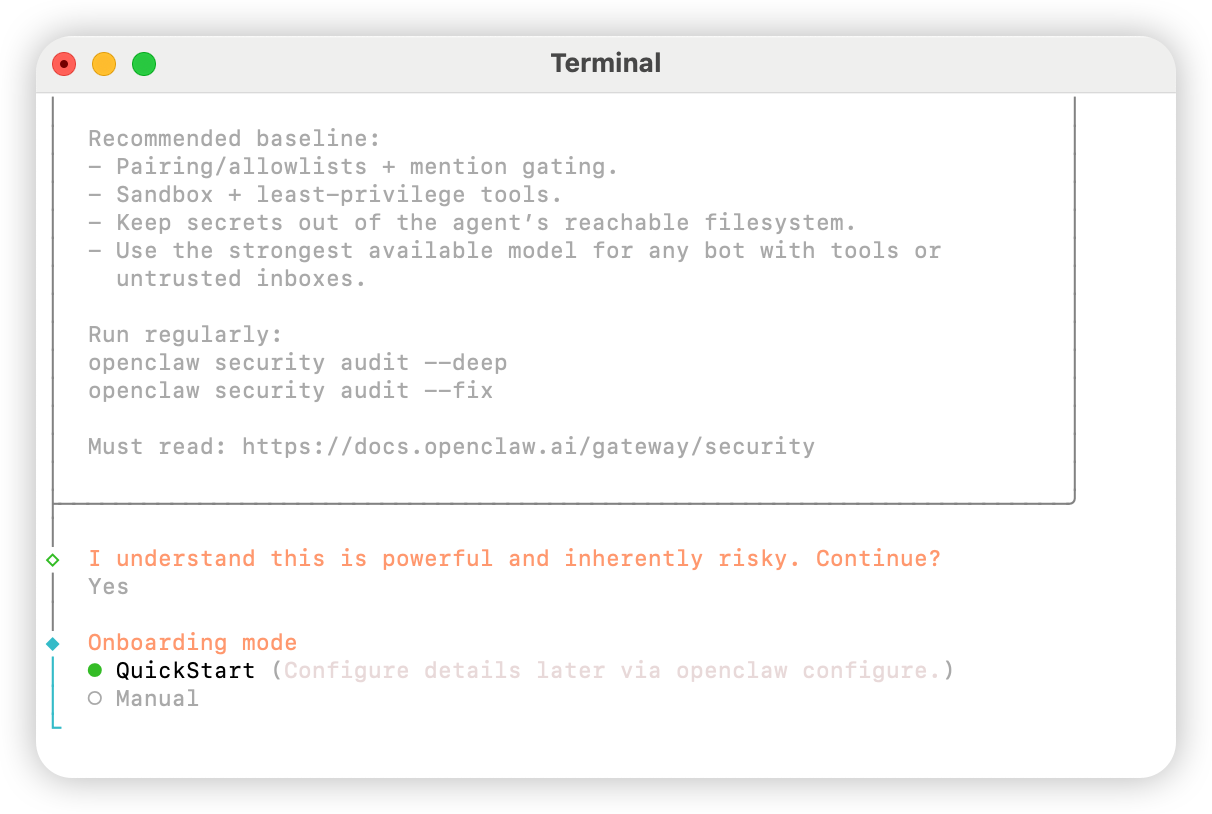 選擇 `Skip for now`
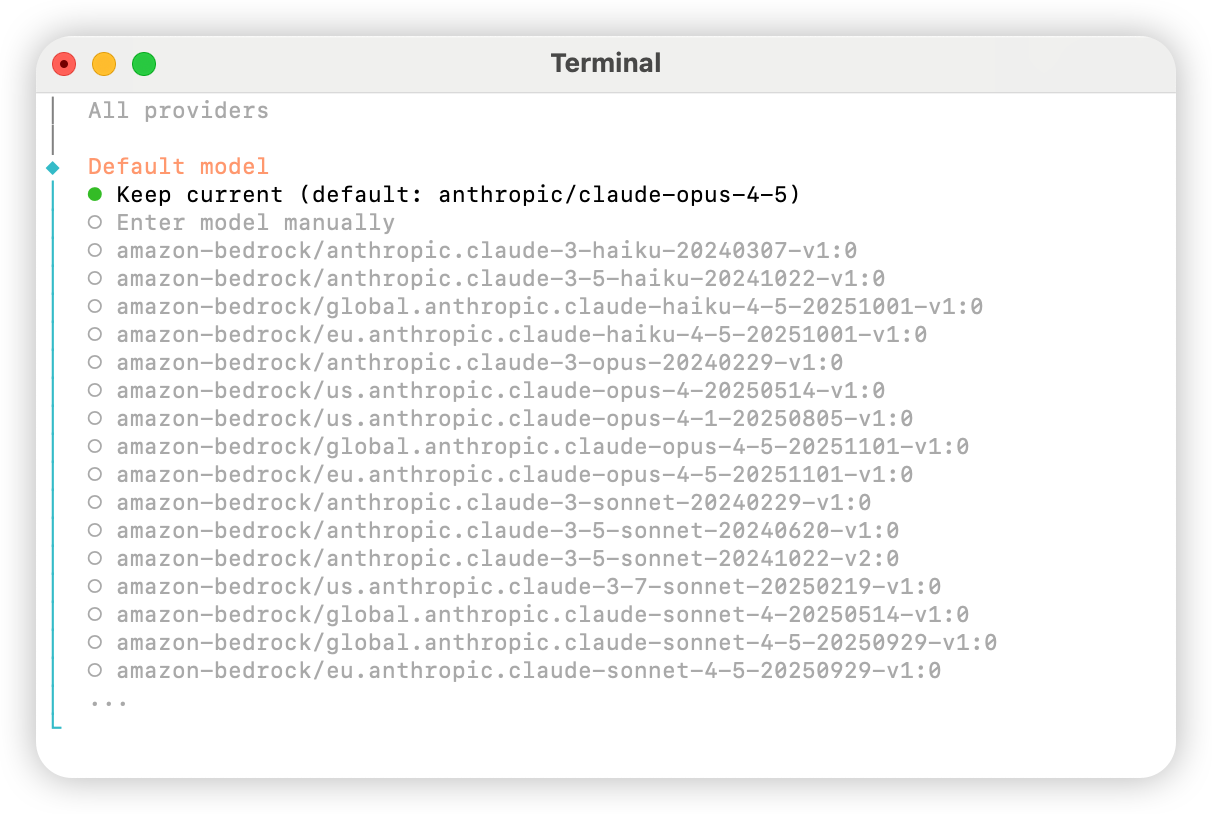
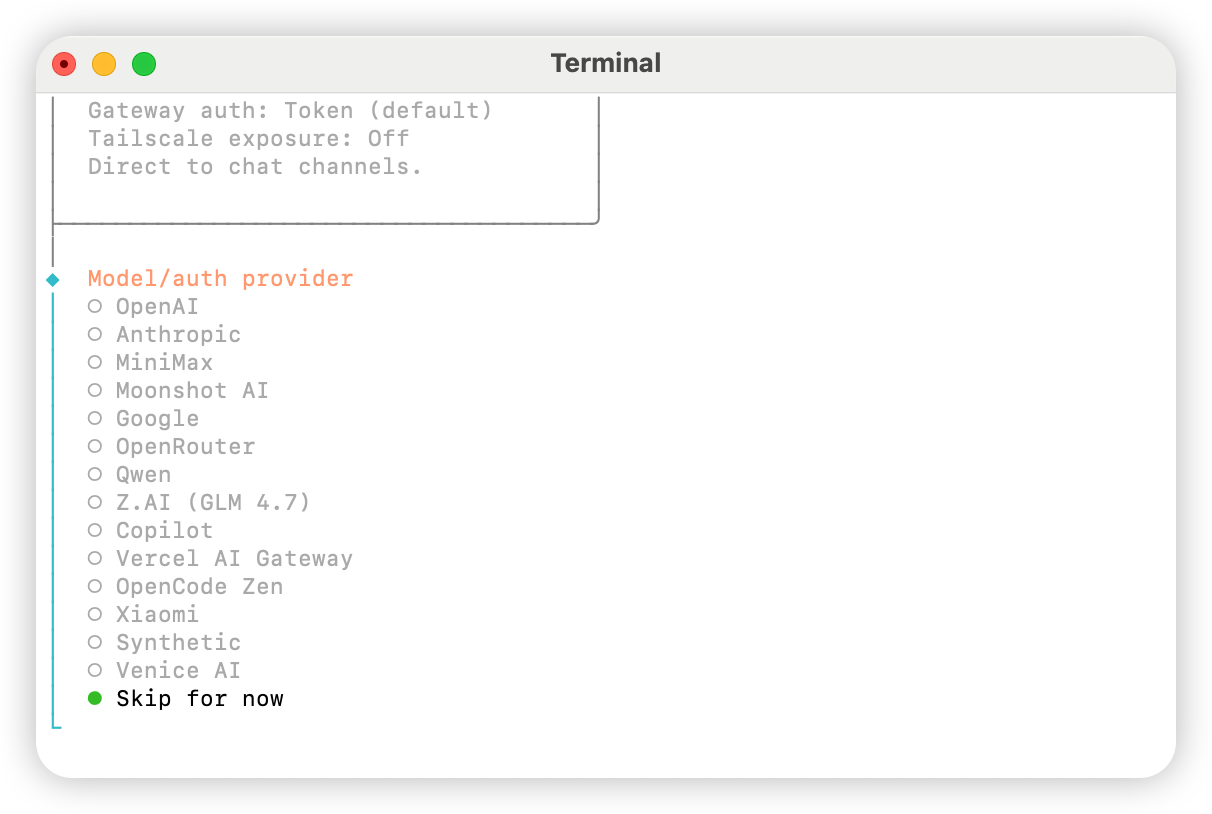 選擇 `All providers`
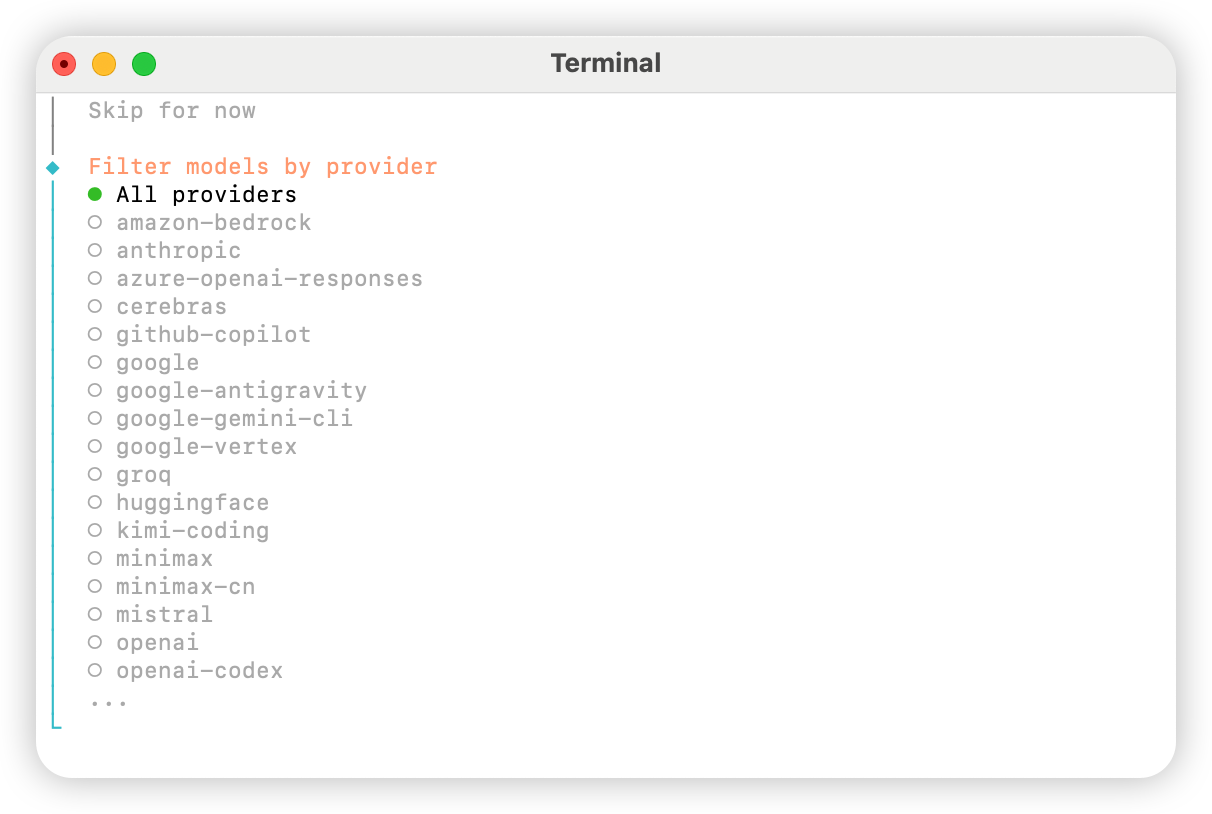 依需求選擇預設模型;您可以先選擇 `Keep current`(如使用「方法 2:手動設定」,後續步驟可在設定檔中修改)。
 依需求連結您的個人帳戶;如不需要,請選擇 `Skip for now`。
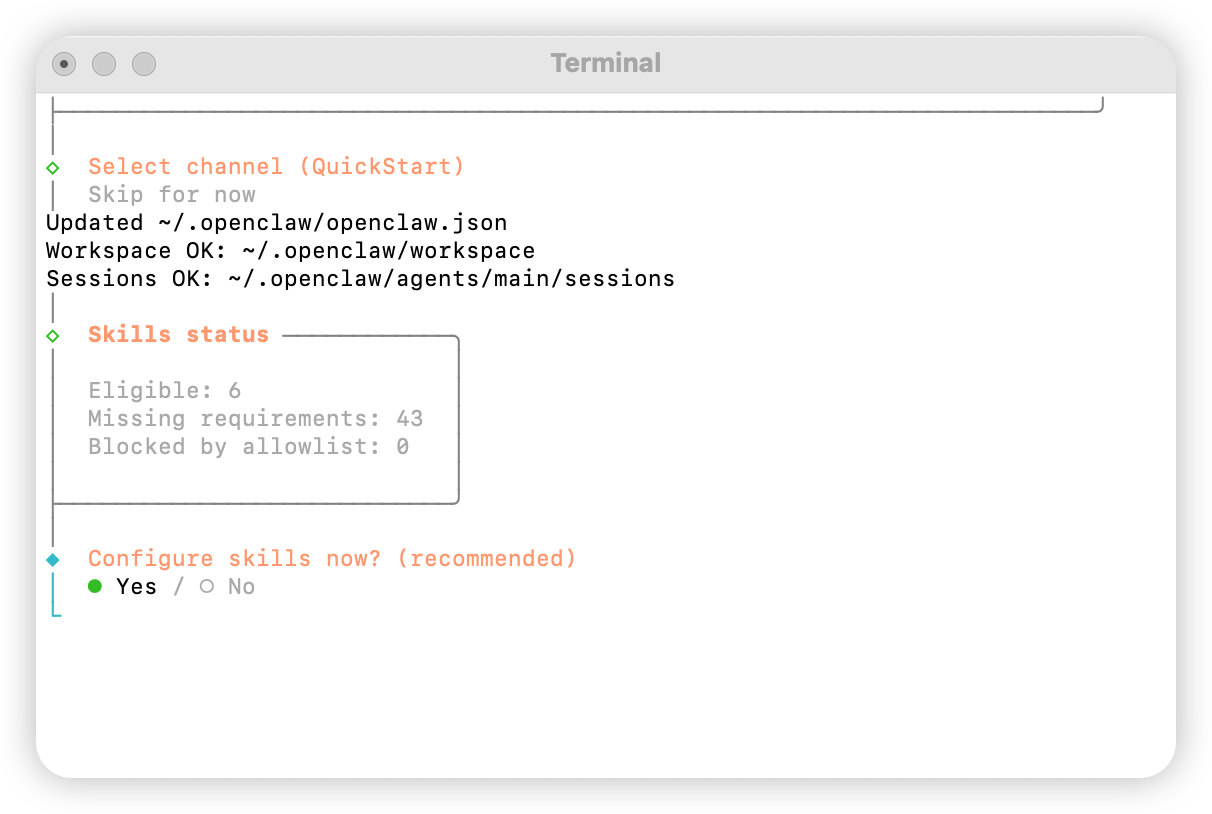
 設定技能時請選擇 `Yes`。
 選擇 `npm`
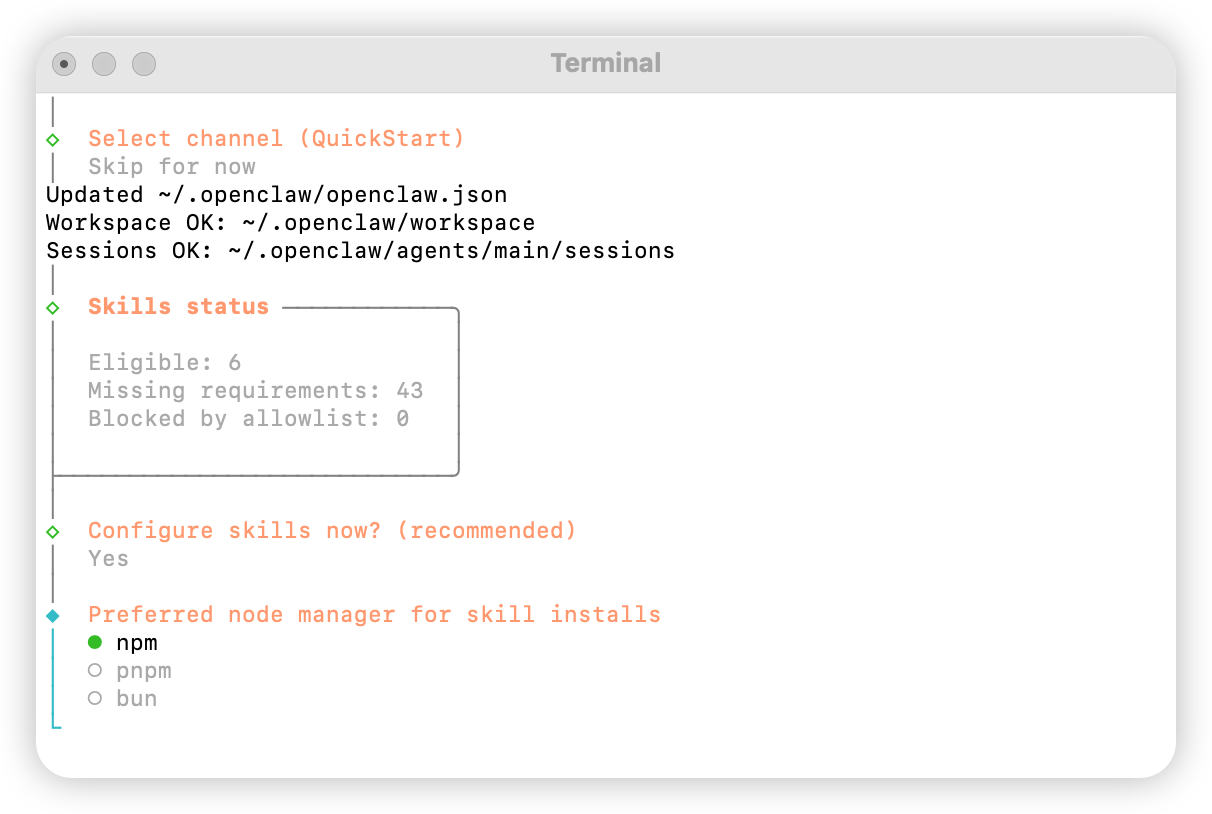 依需求設定技能選擇。
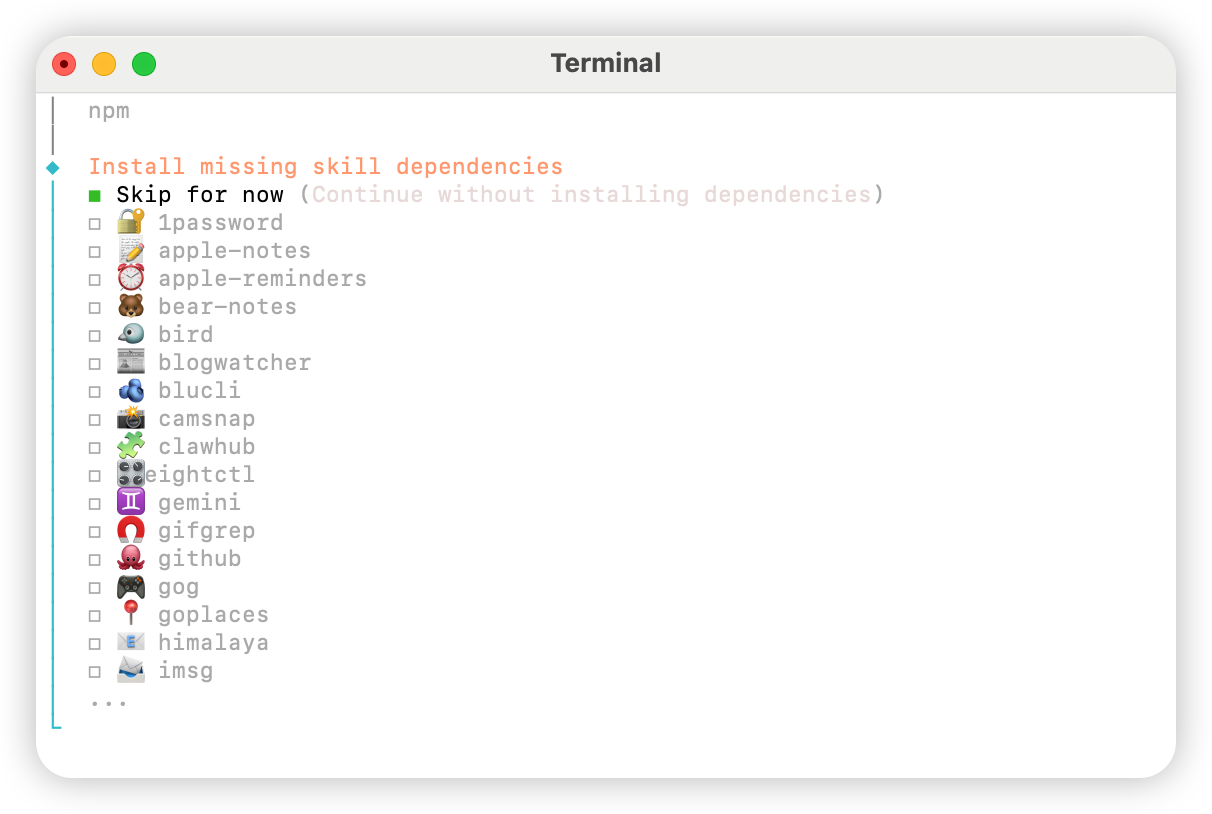 所有選項皆選擇 `No`。
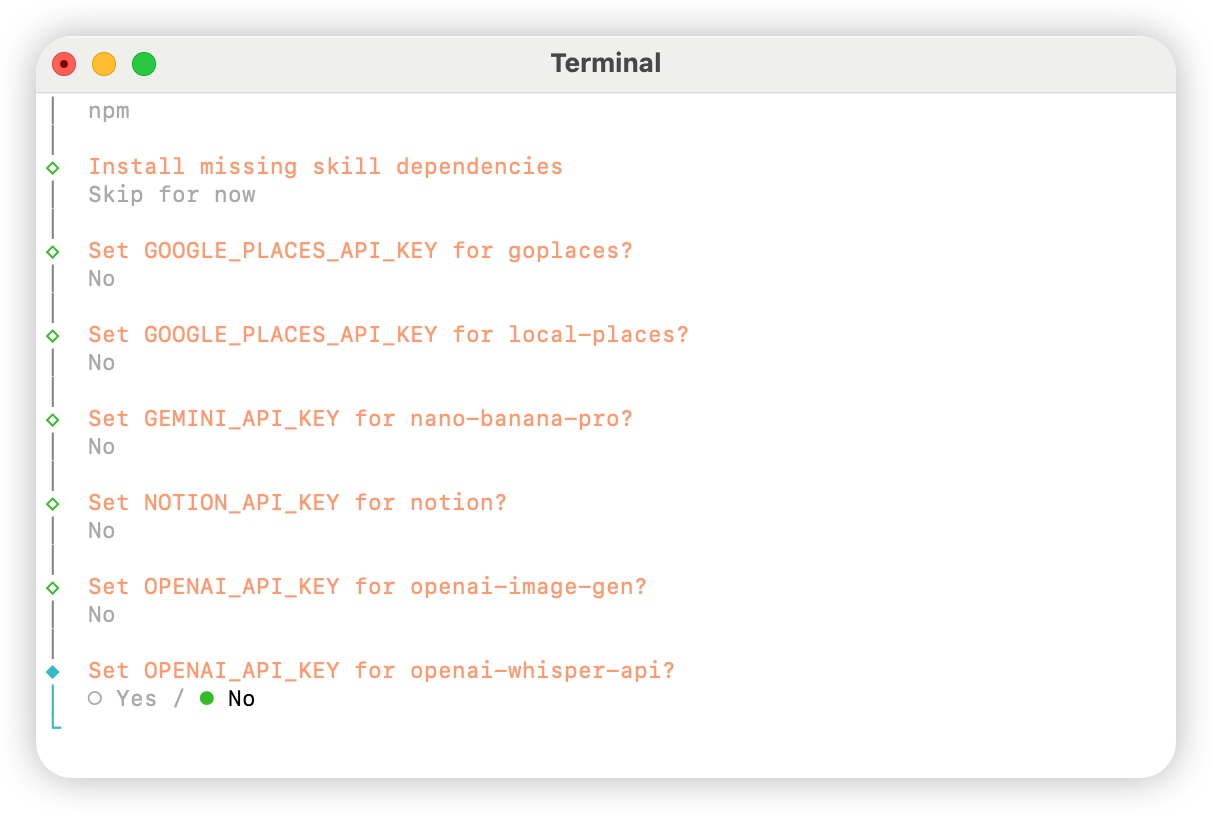 選擇 `Skip for now`。
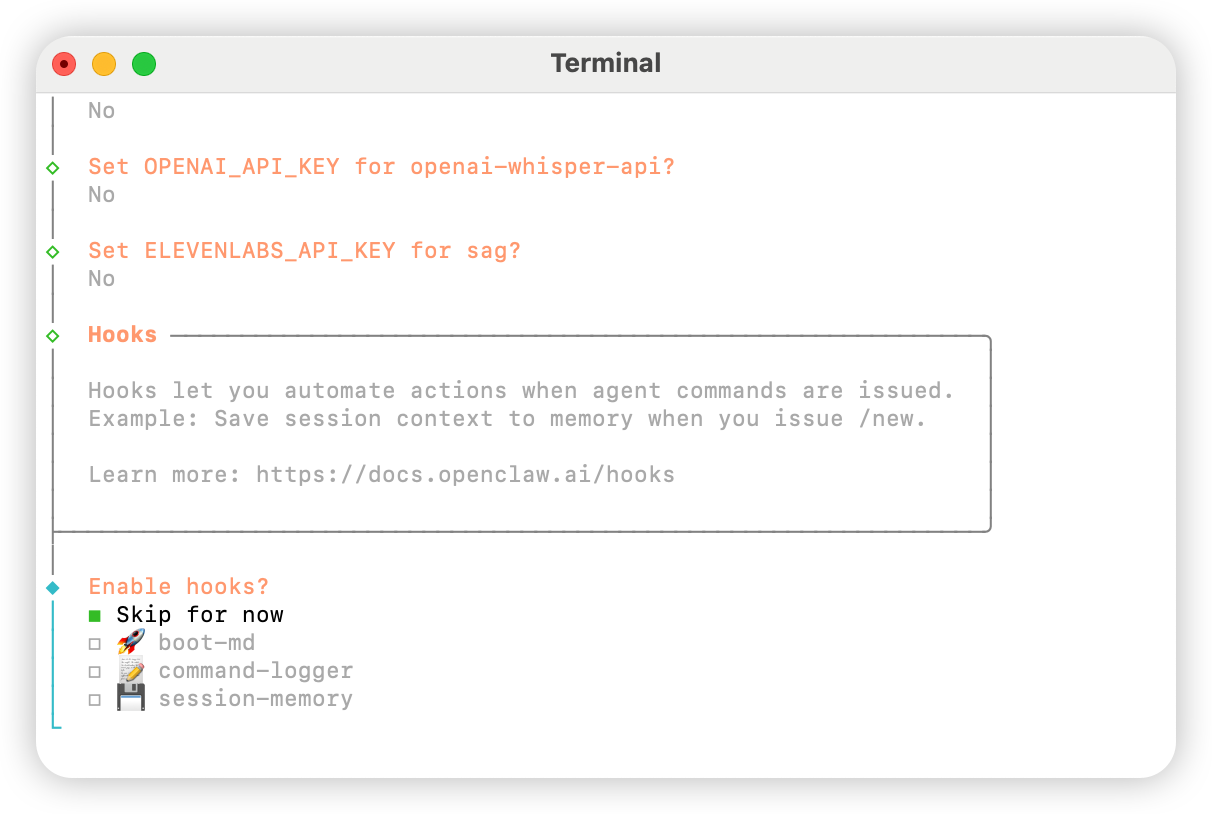 選擇 `Hatch in UI`。
## 設定 AIHubMix
### 方法 1:透過外掛快速設定(推薦)
外掛原始碼:[aihubmix-auth](https://github.com/akakenle/aihubmix-auth)
安裝 AIHubMix auth 外掛並重新啟動 Gateway:
```shellscript theme={null}
openclaw plugins install @akakenle/aihubmix-auth
openclaw gateway restart
```
執行 auth 指令。在提示時輸入您的 AIHubMix API Key。只需對四個 provider 任選其一執行一次以下指令即可——外掛透過 `providerAuthAliases` 讓同一把 key 同時生效到全部 transport:
```shellscript theme={null}
openclaw models auth login --provider aihubmix-openai --method api-key --set-default
```
外掛會將模型分為以下群組:
* **aihubmix-openai** — `gpt-*` / `o1-*` / `o3-*` / `o4-*`,`https://aihubmix.com/v1`(`openai-completions`)
* **aihubmix-anthropic** — `claude-*`,`https://aihubmix.com`(`anthropic-messages`)
* **aihubmix-google** — `gemini-*`,`https://aihubmix.com/gemini/v1beta`(`google-generative-ai`)
* **aihubmix-other** — 其他模型,`https://aihubmix.com/v1`(`openai-completions`)
簡寫 id(如 `claude-sonnet-4-5`)會由外掛的 `resolveDynamicModel` hook 自動路由到對應 transport,不需要寫完整 `provider/model`。
> 不想走互動式登入:先 `export AIHUBMIX_API_KEY=sk-...` 再 install,外掛會把 key 作為 inline `apiKey` 寫入 provider 設定(互動式登入則由 SDK 存入 auth-profile)。
設定完成後,跳轉至[啟動](#啟動)區段即可開始使用。
### 方法 2:手動設定
開啟 `~/.openclaw/openclaw.json` 檔案並加入下列設定:
```json theme={null}
{
"models": {
"mode": "merge",
"providers": {
"aihubmix-openai": {
"baseUrl": "https://aihubmix.com/v1",
"api": "openai-completions",
"models": [
{
"id": "gpt-4o",
"name": "gpt-4o",
"reasoning": false,
"input": ["text"],
"cost": {
"input": 0,
"output": 0,
"cacheRead": 0,
"cacheWrite": 0
},
"contextWindow": 128000,
"maxTokens": 16384
}
]
},
"aihubmix-anthropic": {
"baseUrl": "https://aihubmix.com",
"api": "anthropic-messages",
"models": [
{
"id": "claude-sonnet-4-5",
"name": "claude-sonnet-4-5",
"reasoning": false,
"input": ["text"],
"cost": {
"input": 0,
"output": 0,
"cacheRead": 0,
"cacheWrite": 0
},
"contextWindow": 200000,
"maxTokens": 64000
}
]
},
"aihubmix-google": {
"baseUrl": "https://aihubmix.com/gemini/v1beta",
"api": "google-generative-ai",
"models": []
},
"aihubmix-other": {
"baseUrl": "https://aihubmix.com/v1",
"api": "openai-completions",
"models": []
}
}
},
"agents": {
"defaults": {
"model": {
"primary": "aihubmix-anthropic/claude-sonnet-4-5"
},
"workspace": "your_workspace_path",
"compaction": {
"mode": "safeguard"
},
"maxConcurrent": 4,
"subagents": {
"maxConcurrent": 8
}
}
}
}
```
### 方法 3:使用動態模型命令切換預設模型
AIHubMix OpenClaw 外掛支援動態模型路由。只要模型在你的 AIHubMix 帳號中可用,就可以按 `provider/model-id` 的格式直接呼叫;模型可用性以 AIHubMix 控制台和 API 實際返回為準。
常用 provider 選擇規則如下:
* `aihubmix-openai`:OpenAI 相容模型,例如 `gpt-*`、`o1-*`、`o3-*`、`o4-*`
* `aihubmix-anthropic`:Claude 模型,例如 `claude-*`
* `aihubmix-google`:Gemini 模型,例如 `gemini-*`
* `aihubmix-other`:其他透過 OpenAI 相容介面呼叫的模型,例如 `glm-5.2`
下面以將 `gpt-5.4` 設定為 OpenClaw 預設模型為例:
```powershell theme={null}
openclaw models set aihubmix-openai/gpt-5.4
```
如果 Windows 終端機提示找不到 `openclaw`,使用本機路徑寫法:
```powershell theme={null}
& "你的安裝路徑\OpenClaw\openclaw.cmd" models set aihubmix-openai/gpt-5.4
```
查看目前預設模型和認證狀態:
```powershell theme={null}
openclaw models status
```
真實呼叫測試:
```powershell theme={null}
openclaw infer model run --local --json --model aihubmix-openai/gpt-5.4 --prompt "只回覆 OK"
```
如果需要呼叫非 OpenAI / Claude / Gemini 分組的模型,可使用 `aihubmix-other`,例如:
```powershell theme={null}
openclaw infer model run --local --json --model aihubmix-other/glm-5.2 --prompt "只回覆 OK"
```
查看 OpenClaw 目前已載入的模型目錄:
```powershell theme={null}
openclaw infer model list --json
```
## 啟動
```shellscript theme={null}
openclaw gateway
```
## 測試
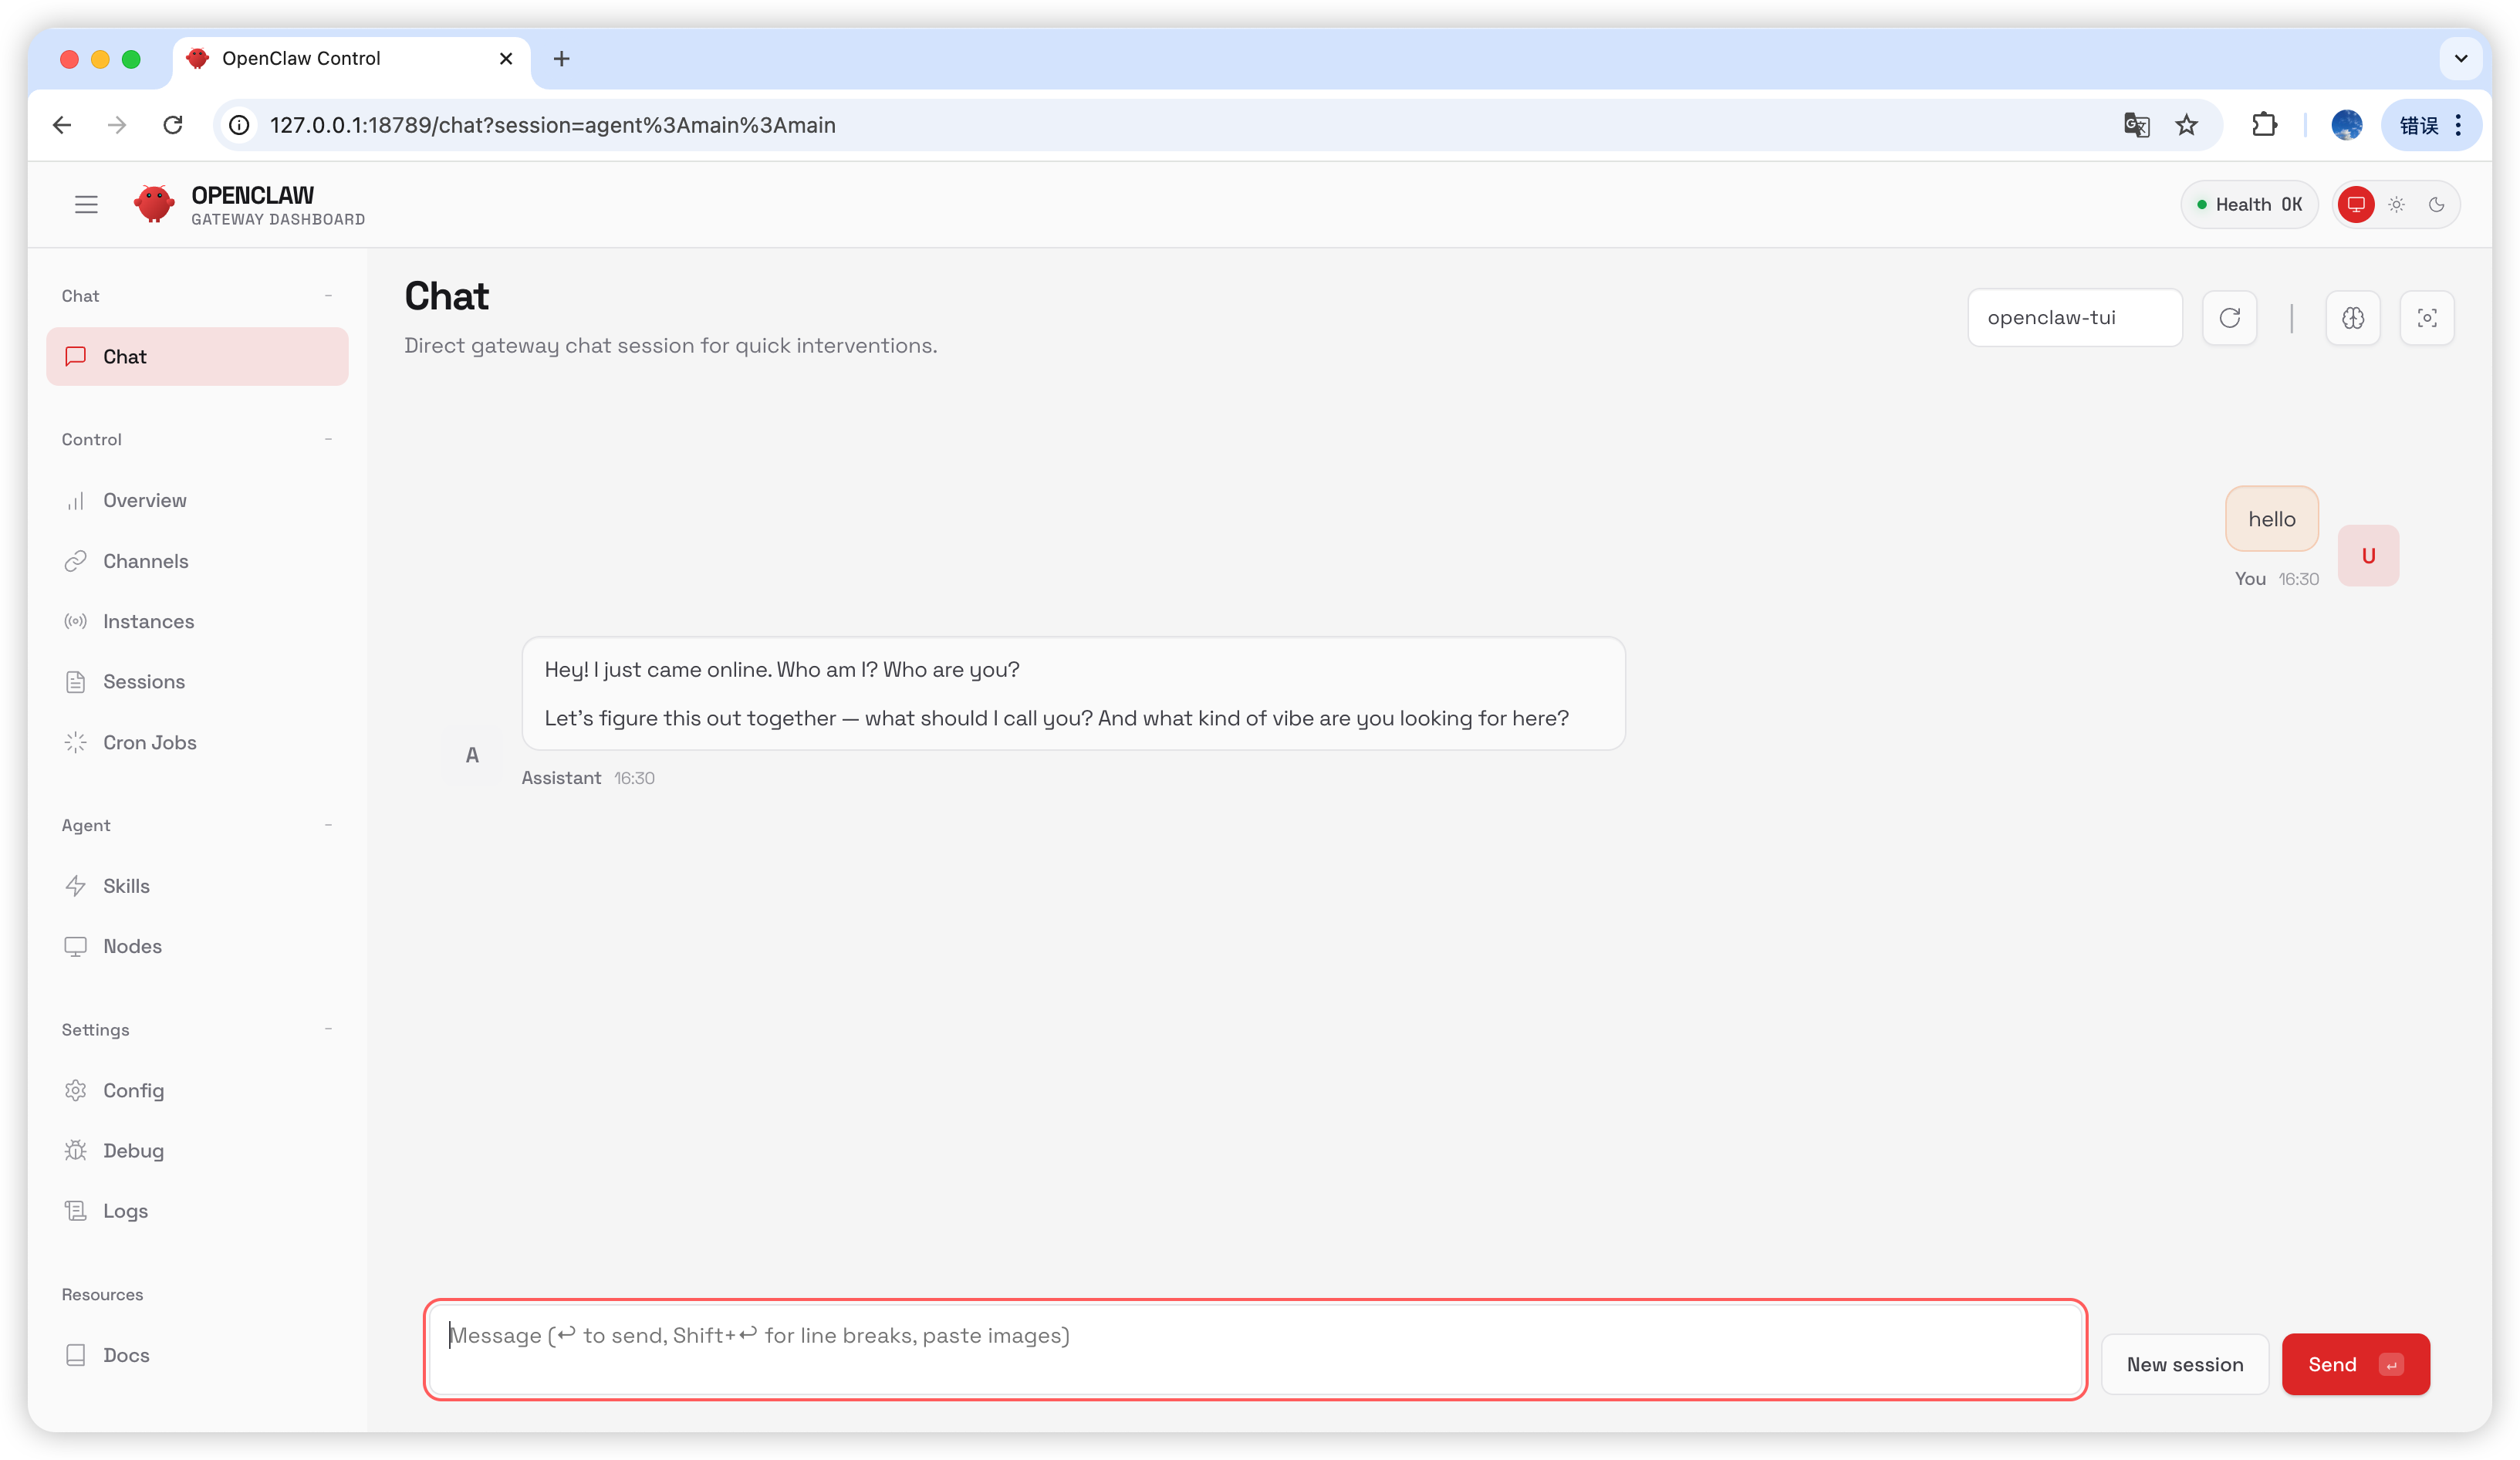
在聊天頁面輸入 `hello`;若收到回覆,即代表設定成功。
選擇 `Hatch in UI`。
## 設定 AIHubMix
### 方法 1:透過外掛快速設定(推薦)
外掛原始碼:[aihubmix-auth](https://github.com/akakenle/aihubmix-auth)
安裝 AIHubMix auth 外掛並重新啟動 Gateway:
```shellscript theme={null}
openclaw plugins install @akakenle/aihubmix-auth
openclaw gateway restart
```
執行 auth 指令。在提示時輸入您的 AIHubMix API Key。只需對四個 provider 任選其一執行一次以下指令即可——外掛透過 `providerAuthAliases` 讓同一把 key 同時生效到全部 transport:
```shellscript theme={null}
openclaw models auth login --provider aihubmix-openai --method api-key --set-default
```
外掛會將模型分為以下群組:
* **aihubmix-openai** — `gpt-*` / `o1-*` / `o3-*` / `o4-*`,`https://aihubmix.com/v1`(`openai-completions`)
* **aihubmix-anthropic** — `claude-*`,`https://aihubmix.com`(`anthropic-messages`)
* **aihubmix-google** — `gemini-*`,`https://aihubmix.com/gemini/v1beta`(`google-generative-ai`)
* **aihubmix-other** — 其他模型,`https://aihubmix.com/v1`(`openai-completions`)
簡寫 id(如 `claude-sonnet-4-5`)會由外掛的 `resolveDynamicModel` hook 自動路由到對應 transport,不需要寫完整 `provider/model`。
> 不想走互動式登入:先 `export AIHUBMIX_API_KEY=sk-...` 再 install,外掛會把 key 作為 inline `apiKey` 寫入 provider 設定(互動式登入則由 SDK 存入 auth-profile)。
設定完成後,跳轉至[啟動](#啟動)區段即可開始使用。
### 方法 2:手動設定
開啟 `~/.openclaw/openclaw.json` 檔案並加入下列設定:
```json theme={null}
{
"models": {
"mode": "merge",
"providers": {
"aihubmix-openai": {
"baseUrl": "https://aihubmix.com/v1",
"api": "openai-completions",
"models": [
{
"id": "gpt-4o",
"name": "gpt-4o",
"reasoning": false,
"input": ["text"],
"cost": {
"input": 0,
"output": 0,
"cacheRead": 0,
"cacheWrite": 0
},
"contextWindow": 128000,
"maxTokens": 16384
}
]
},
"aihubmix-anthropic": {
"baseUrl": "https://aihubmix.com",
"api": "anthropic-messages",
"models": [
{
"id": "claude-sonnet-4-5",
"name": "claude-sonnet-4-5",
"reasoning": false,
"input": ["text"],
"cost": {
"input": 0,
"output": 0,
"cacheRead": 0,
"cacheWrite": 0
},
"contextWindow": 200000,
"maxTokens": 64000
}
]
},
"aihubmix-google": {
"baseUrl": "https://aihubmix.com/gemini/v1beta",
"api": "google-generative-ai",
"models": []
},
"aihubmix-other": {
"baseUrl": "https://aihubmix.com/v1",
"api": "openai-completions",
"models": []
}
}
},
"agents": {
"defaults": {
"model": {
"primary": "aihubmix-anthropic/claude-sonnet-4-5"
},
"workspace": "your_workspace_path",
"compaction": {
"mode": "safeguard"
},
"maxConcurrent": 4,
"subagents": {
"maxConcurrent": 8
}
}
}
}
```
### 方法 3:使用動態模型命令切換預設模型
AIHubMix OpenClaw 外掛支援動態模型路由。只要模型在你的 AIHubMix 帳號中可用,就可以按 `provider/model-id` 的格式直接呼叫;模型可用性以 AIHubMix 控制台和 API 實際返回為準。
常用 provider 選擇規則如下:
* `aihubmix-openai`:OpenAI 相容模型,例如 `gpt-*`、`o1-*`、`o3-*`、`o4-*`
* `aihubmix-anthropic`:Claude 模型,例如 `claude-*`
* `aihubmix-google`:Gemini 模型,例如 `gemini-*`
* `aihubmix-other`:其他透過 OpenAI 相容介面呼叫的模型,例如 `glm-5.2`
下面以將 `gpt-5.4` 設定為 OpenClaw 預設模型為例:
```powershell theme={null}
openclaw models set aihubmix-openai/gpt-5.4
```
如果 Windows 終端機提示找不到 `openclaw`,使用本機路徑寫法:
```powershell theme={null}
& "你的安裝路徑\OpenClaw\openclaw.cmd" models set aihubmix-openai/gpt-5.4
```
查看目前預設模型和認證狀態:
```powershell theme={null}
openclaw models status
```
真實呼叫測試:
```powershell theme={null}
openclaw infer model run --local --json --model aihubmix-openai/gpt-5.4 --prompt "只回覆 OK"
```
如果需要呼叫非 OpenAI / Claude / Gemini 分組的模型,可使用 `aihubmix-other`,例如:
```powershell theme={null}
openclaw infer model run --local --json --model aihubmix-other/glm-5.2 --prompt "只回覆 OK"
```
查看 OpenClaw 目前已載入的模型目錄:
```powershell theme={null}
openclaw infer model list --json
```
## 啟動
```shellscript theme={null}
openclaw gateway
```
## 測試
在聊天頁面輸入 `hello`;若收到回覆,即代表設定成功。
 ## 常見問題
### 版本升級
```shellscript theme={null}
openclaw plugins update @akakenle/aihubmix-auth
openclaw gateway restart
```
### Gateway 處理程序被佔用
```shellscript theme={null}
openclaw gateway stop
openclaw gateway
```
***
最後更新:2026-07-03
## 常見問題
### 版本升級
```shellscript theme={null}
openclaw plugins update @akakenle/aihubmix-auth
openclaw gateway restart
```
### Gateway 處理程序被佔用
```shellscript theme={null}
openclaw gateway stop
openclaw gateway
```
***
最後更新:2026-07-03