> ## Documentation Index
> Fetch the complete documentation index at: https://docs.aihubmix.com/llms.txt
> Use this file to discover all available pages before exploring further.
# Dify
## Large Language Model
## Standard Usage (Using OpenAI Models)
Clique your username no top right corner of the webpage to enter the settings interface.\
Selecione OpenAI no model provider section and abra settings.
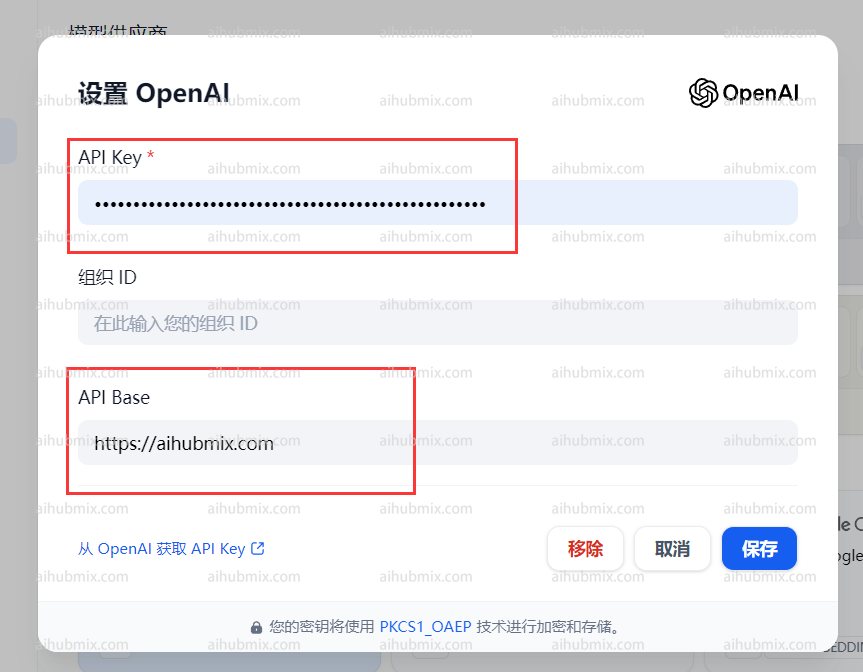
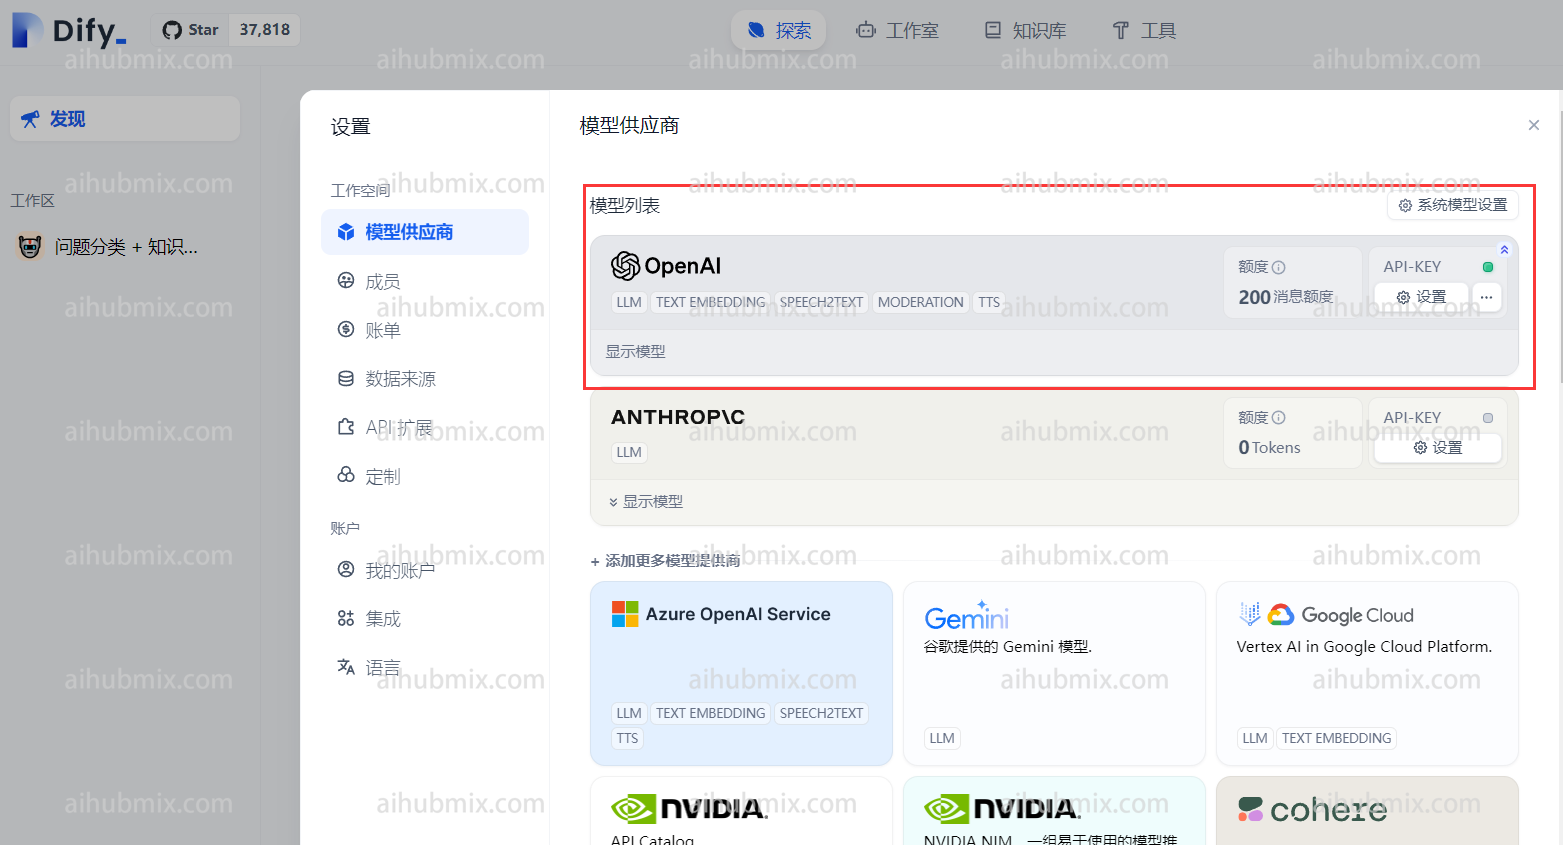 * Insira o [Key from our site](https://aihubmix.com/token) in a chave de API field.
* Insira o following no API Base field:
```
https://aihubmix.com
```
* Insira o [Key from our site](https://aihubmix.com/token) in a chave de API field.
* Insira o following no API Base field:
```
https://aihubmix.com
```
 ## Using Non-OpenAI Models
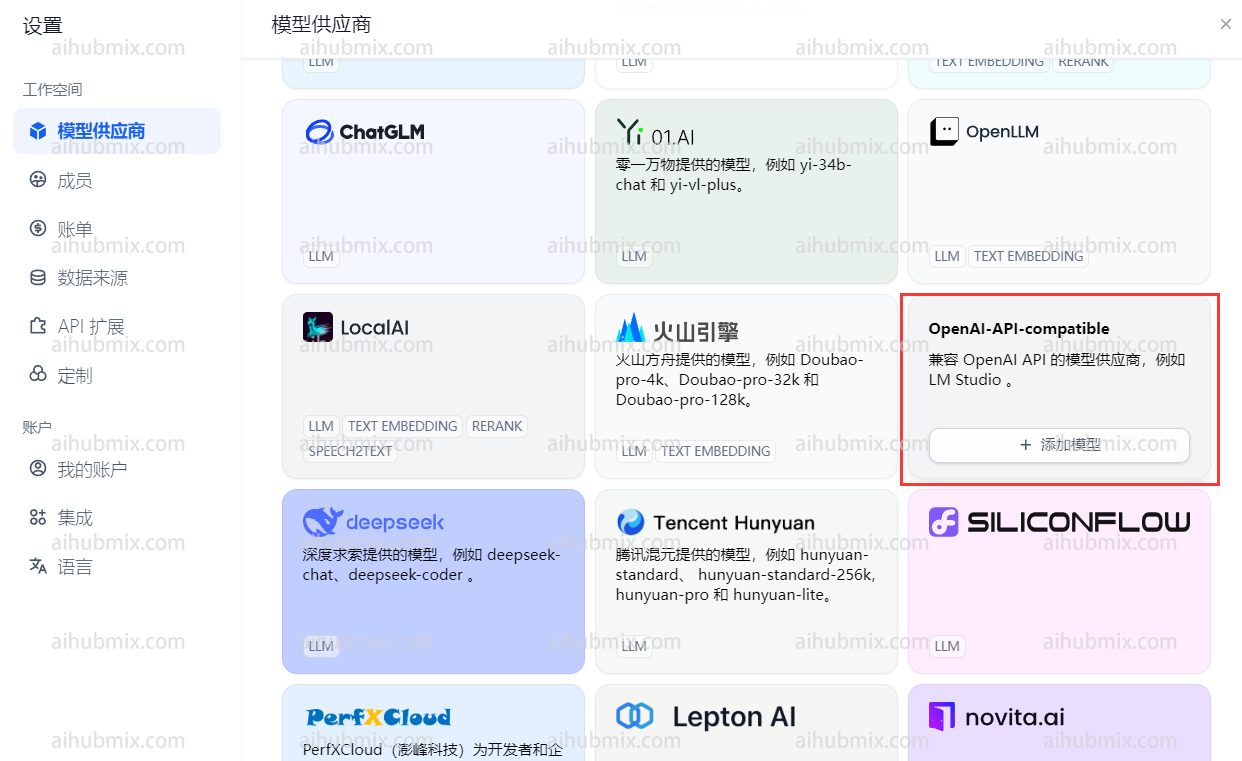
Não model provider dropdown, find OpenAI-API-compatible and clique to add a model.\\
## Using Non-OpenAI Models
Não model provider dropdown, find OpenAI-API-compatible and clique to add a model.\\
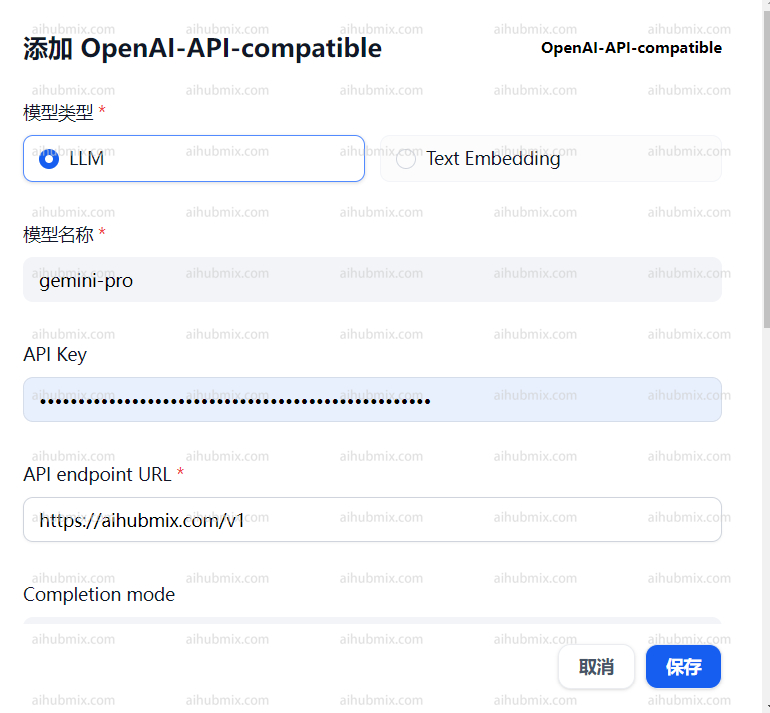
 * Abra o website's backend settings page and find the model list.
* Copy the name of the model you want to use (p. ex., gemini-pro or claude-3-opus-20240229).
* Insira o [Key from our site](https://aihubmix.com/token) in a chave de API field.
* Insira o following no API endpoint URL field:
```
https://aihubmix.com/v1
```
* Abra o website's backend settings page and find the model list.
* Copy the name of the model you want to use (p. ex., gemini-pro or claude-3-opus-20240229).
* Insira o [Key from our site](https://aihubmix.com/token) in a chave de API field.
* Insira o following no API endpoint URL field:
```
https://aihubmix.com/v1
```
 ## Image Generation Models
The platform currently suporta o seguinte image generation models:
* **Nano Banana Pro**
* **GPT-Image**
* **Google Imagen 4 Series**
* **Flux Kontext**
### How to Use
#### 1. Instale o Plugin
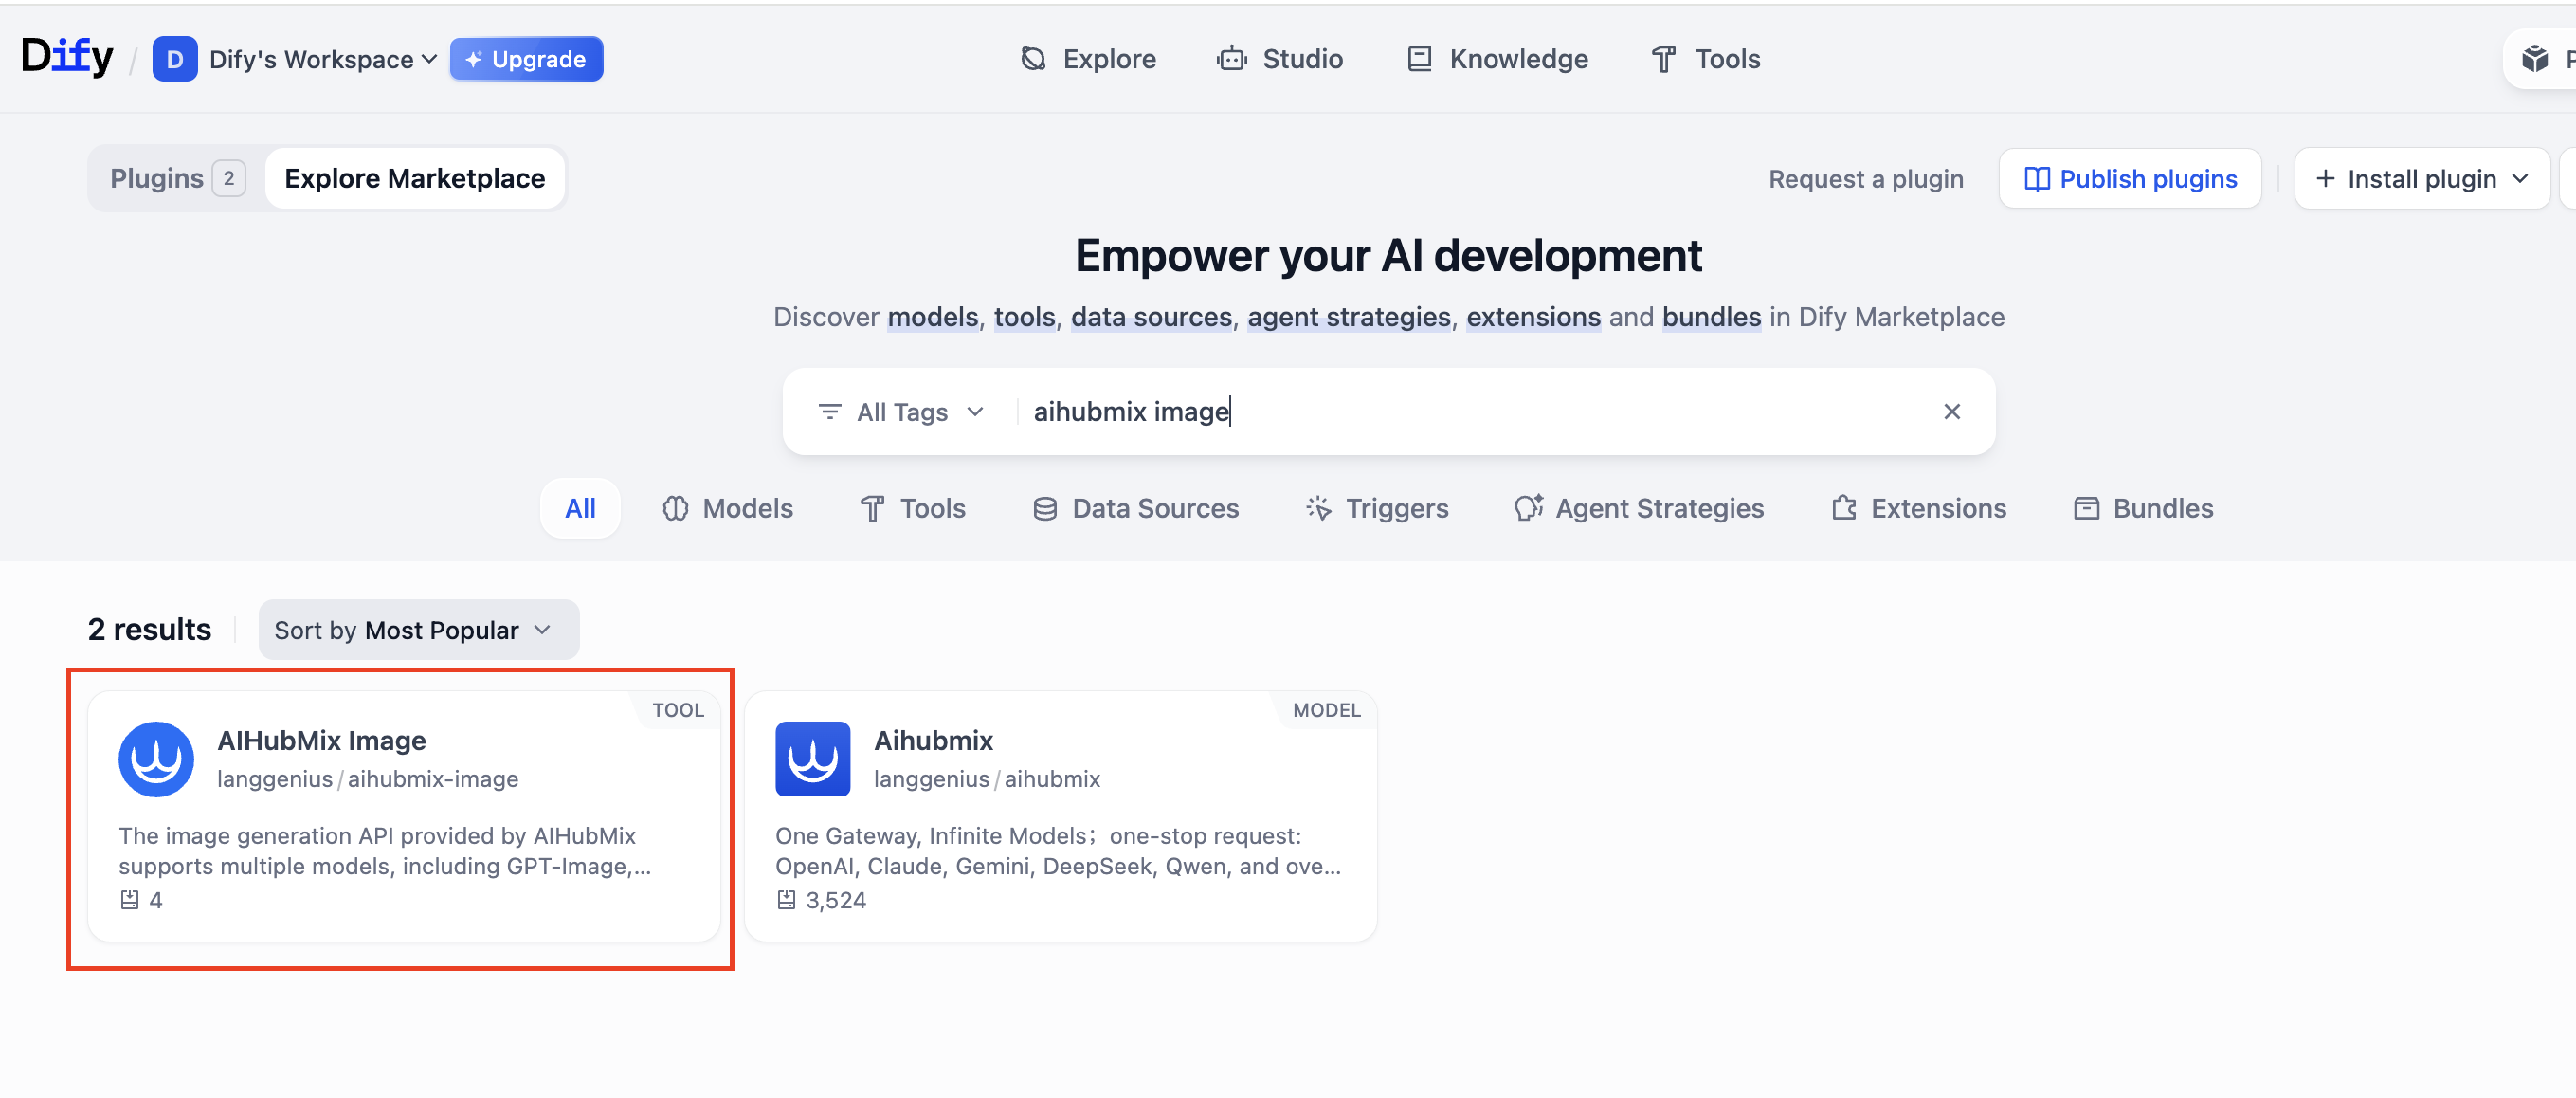
Search for and instale o plugin: [**AIHubMix Image**](https://marketplace.dify.ai/plugins/langgenius/aihubmix-image?source=https%253A%252F%252Fcloud.dify.ai\&language=en-US\&theme=system)
## Image Generation Models
The platform currently suporta o seguinte image generation models:
* **Nano Banana Pro**
* **GPT-Image**
* **Google Imagen 4 Series**
* **Flux Kontext**
### How to Use
#### 1. Instale o Plugin
Search for and instale o plugin: [**AIHubMix Image**](https://marketplace.dify.ai/plugins/langgenius/aihubmix-image?source=https%253A%252F%252Fcloud.dify.ai\&language=en-US\&theme=system)
 #### 2. Configure o AIHUBMIX chave de API
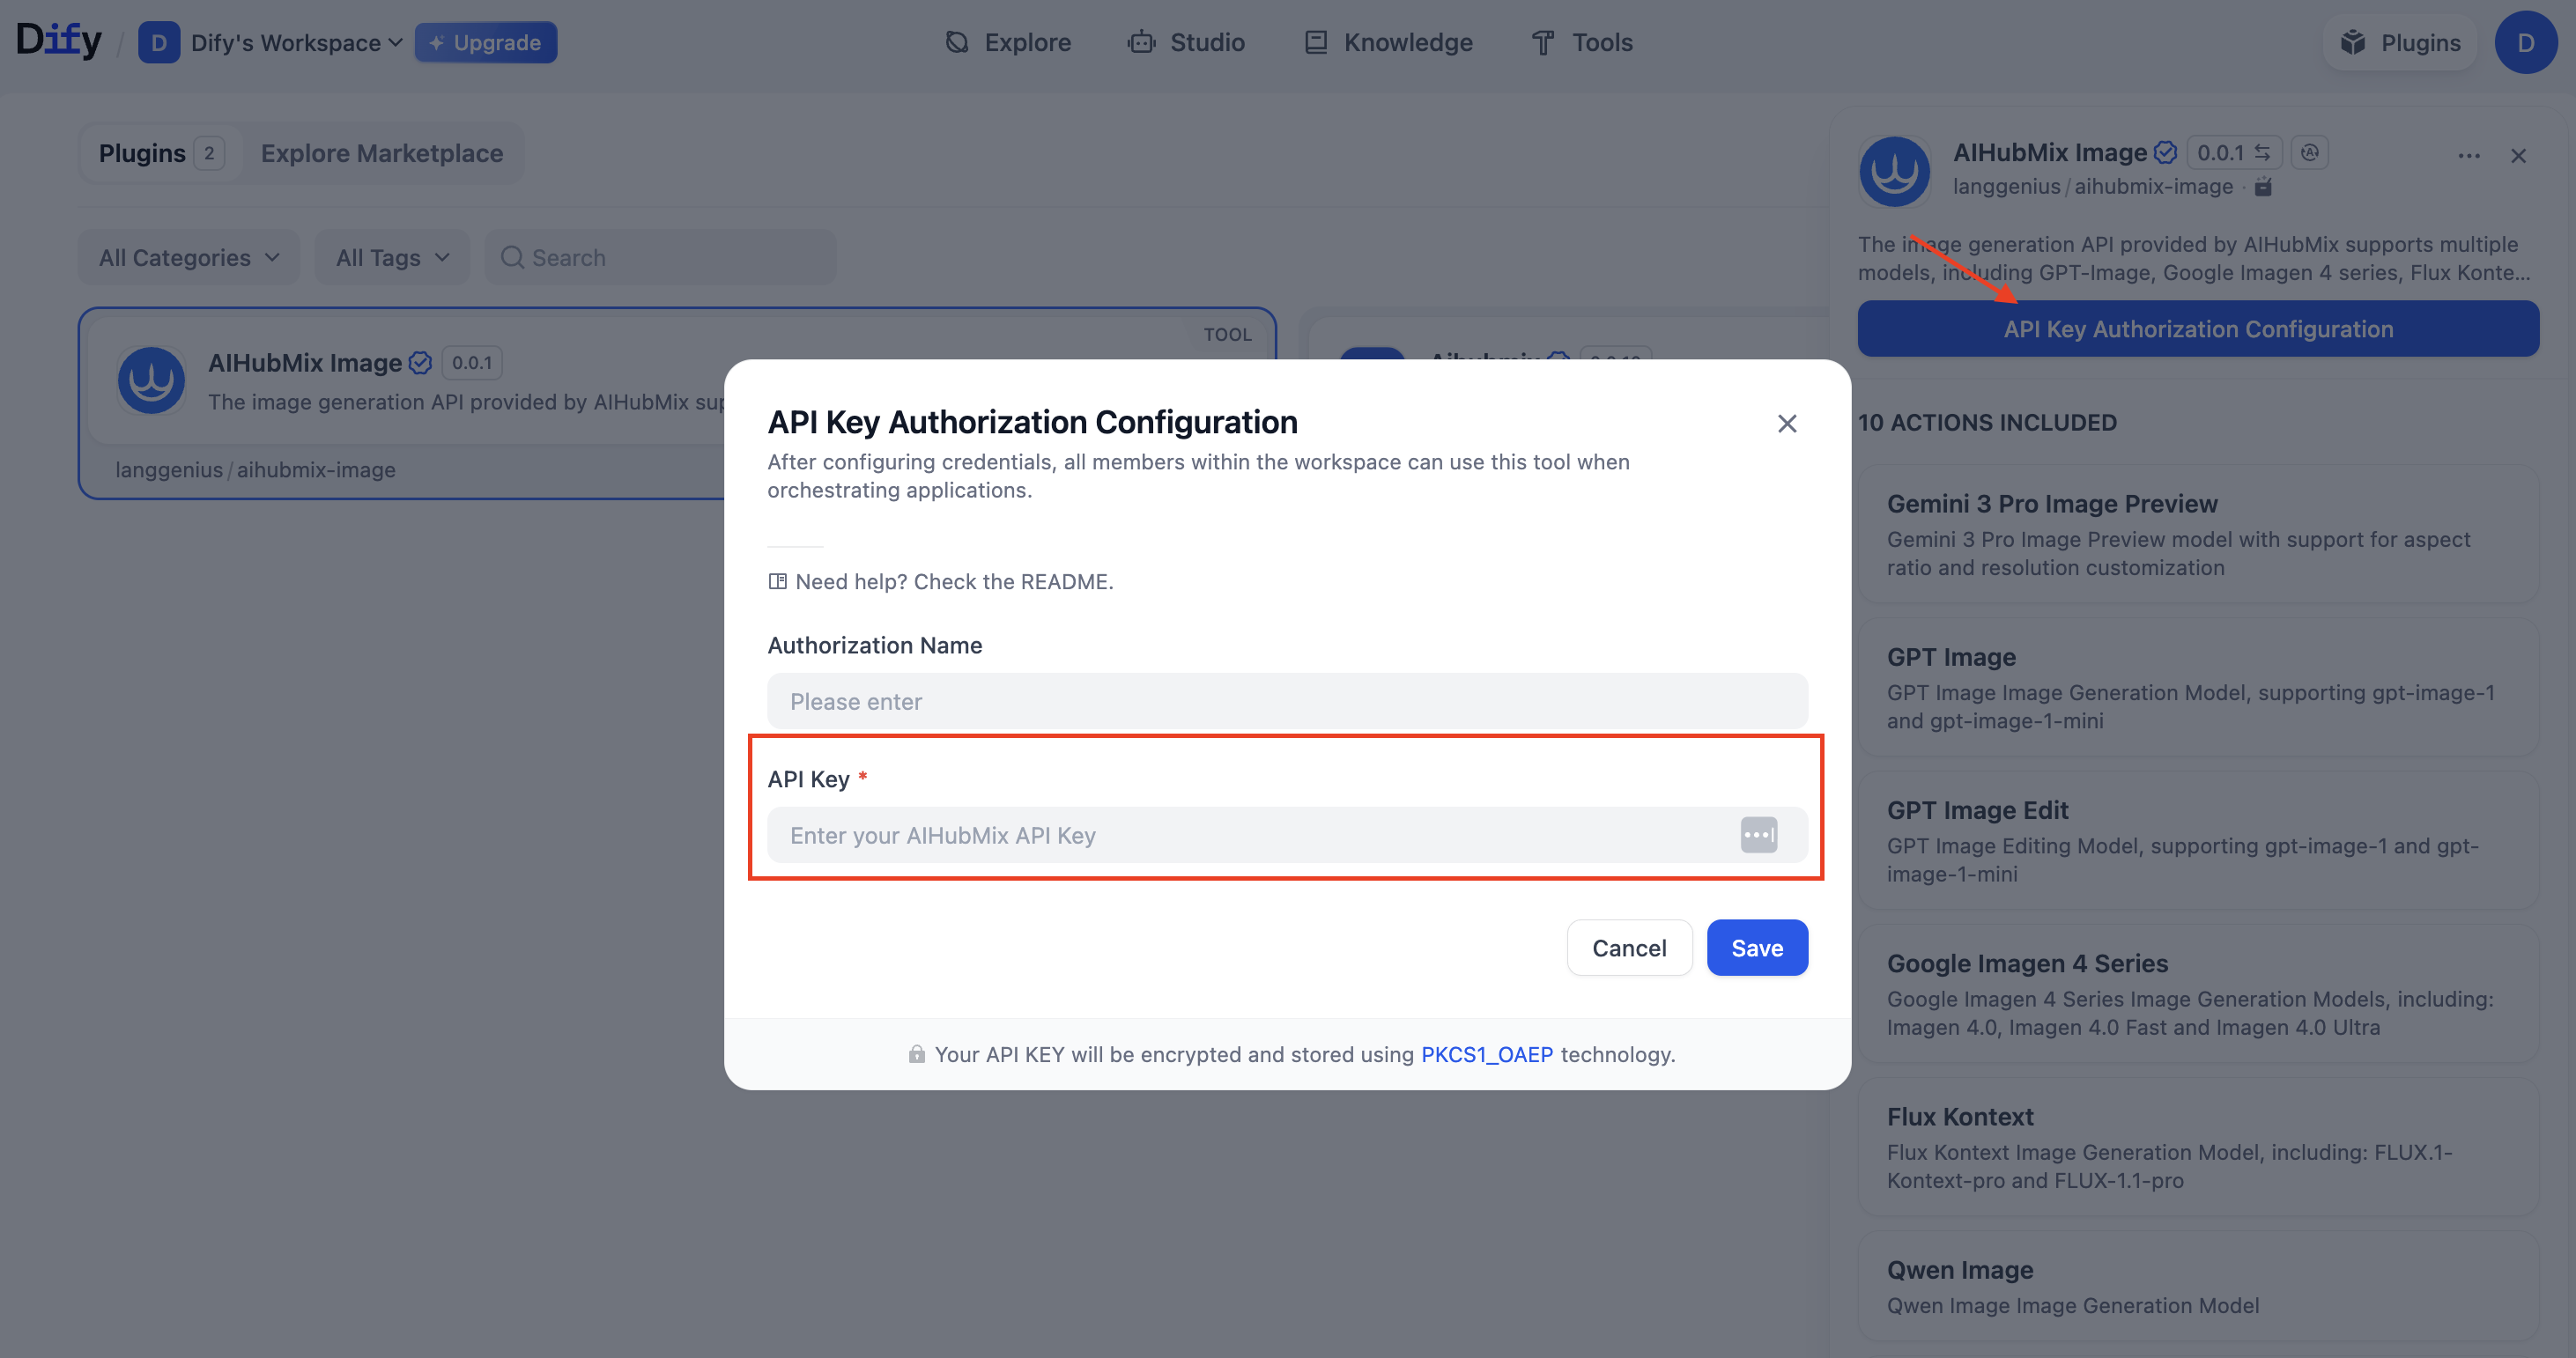
Enter your **chave de API** no plugin configuration page.
#### 2. Configure o AIHUBMIX chave de API
Enter your **chave de API** no plugin configuration page.
 #### 3. Add a Node
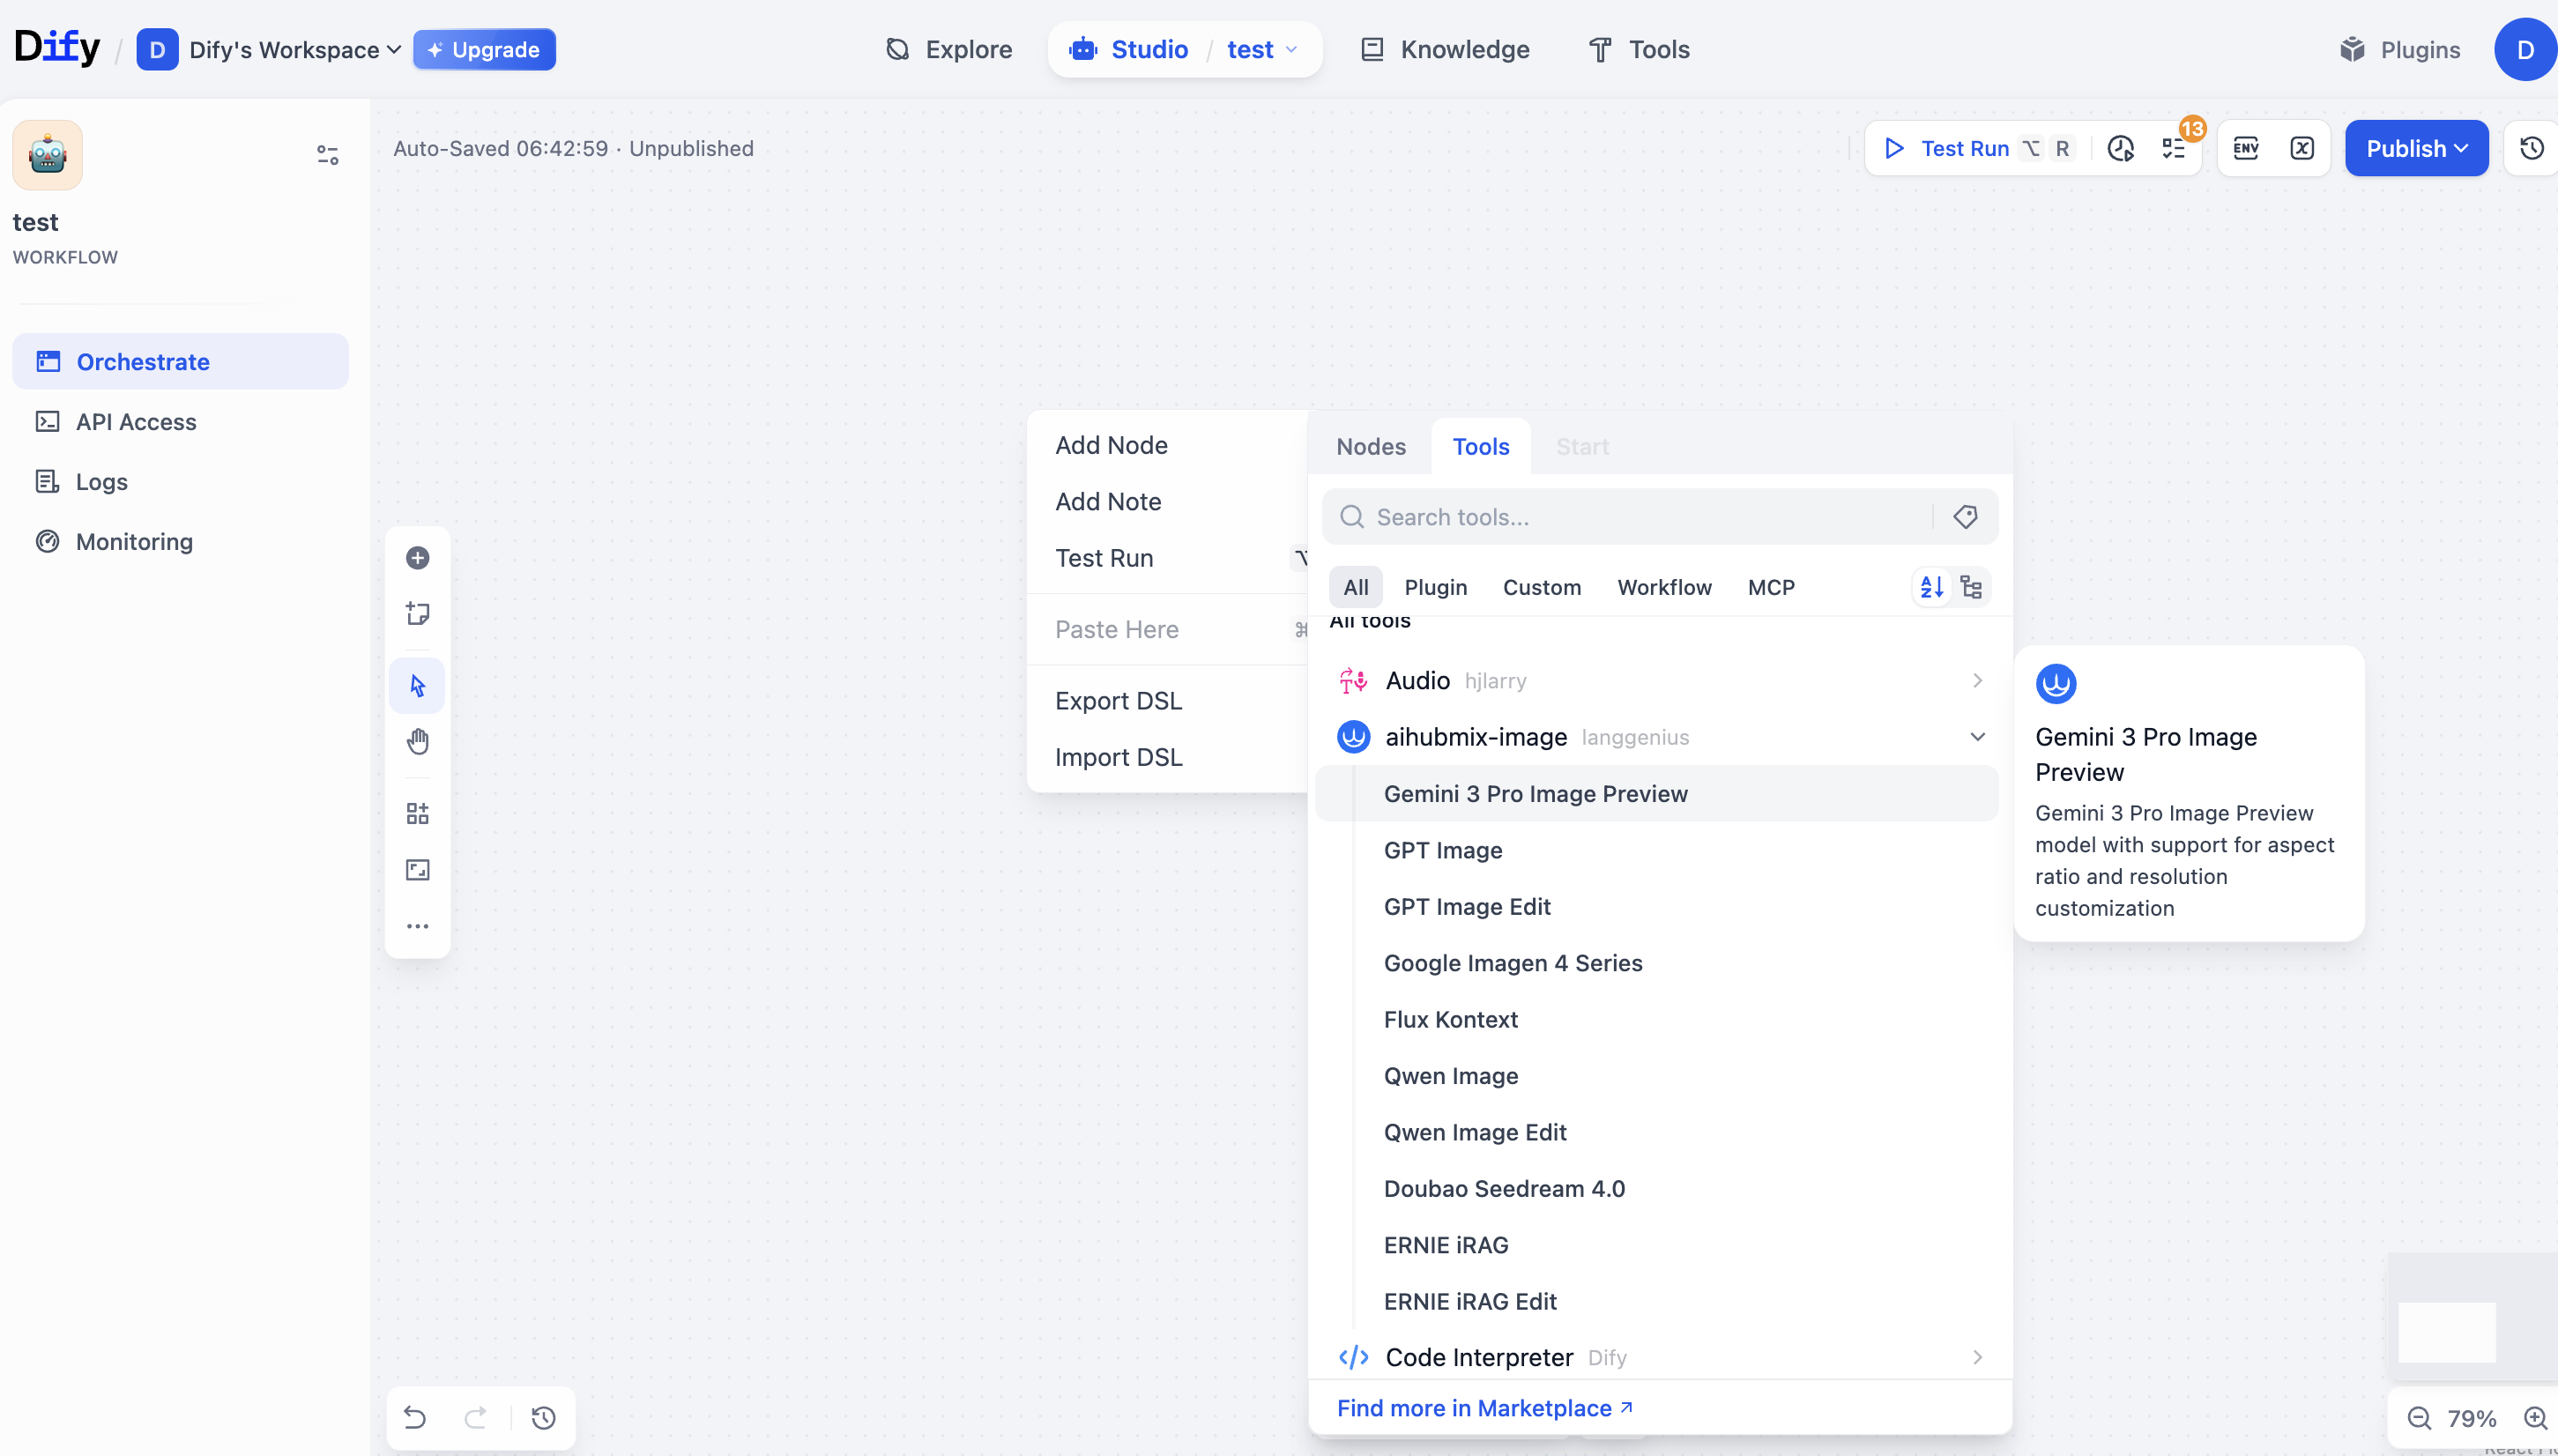
Go to: **Workspace → Add Node → Tools → aihubmix-image**, then selecione the model you want to use.
#### 3. Add a Node
Go to: **Workspace → Add Node → Tools → aihubmix-image**, then selecione the model you want to use.
 #### 4. Model Configuration
Adjust the parameters based on your use case (p. ex., prompt, resolution, aspect ratio, etc.).
#### 5. Run the Workflow
After the configuration is complete, run the workflow to call the **AIHUBMIX Image Generation API** and generate images.
The API returns images in **URL** and **Base64** formats. Please convert the format based on your use case.
***
Última atualização: 2026-06-01
#### 4. Model Configuration
Adjust the parameters based on your use case (p. ex., prompt, resolution, aspect ratio, etc.).
#### 5. Run the Workflow
After the configuration is complete, run the workflow to call the **AIHUBMIX Image Generation API** and generate images.
The API returns images in **URL** and **Base64** formats. Please convert the format based on your use case.
***
Última atualização: 2026-06-01