> ## Documentation Index
> Fetch the complete documentation index at: https://docs.aihubmix.com/llms.txt
> Use this file to discover all available pages before exploring further.
# OpenClaw
## インストール
インストール前に Node >= 22 であることを確認してください。
インストールコマンドを実行します。
```shellscript theme={null}
npm install -g openclaw@latest
```
インストール後、以降のコマンドは任意のディレクトリから実行できます。先に OpenClaw のインストール先へ移動する必要はありません。ターミナルが `openclaw` を認識する場合は、このガイドのコマンドをそのままコピーして実行できます。
```powershell theme={null}
openclaw models status
```
Windows で `openclaw` が見つからないと表示される場合は、コマンド先頭の `openclaw` をローカルの実行ファイルパスに置き換えてください。
```powershell theme={null}
& "インストール先のパス\OpenClaw\openclaw.cmd" models status
```
`インストール先のパス` はプレースホルダーです。実際に OpenClaw を配置した親ディレクトリに置き換えてください。たとえば OpenClaw が `D:\Apps\OpenClaw` にある場合は、`& "D:\Apps\OpenClaw\openclaw.cmd" models status` と書きます。
### ターミナル設定
ターミナルを開き、以下のコマンドを実行して設定を開始します。
```shellscript theme={null}
openclaw onboard
```
`Yes` を選びます。
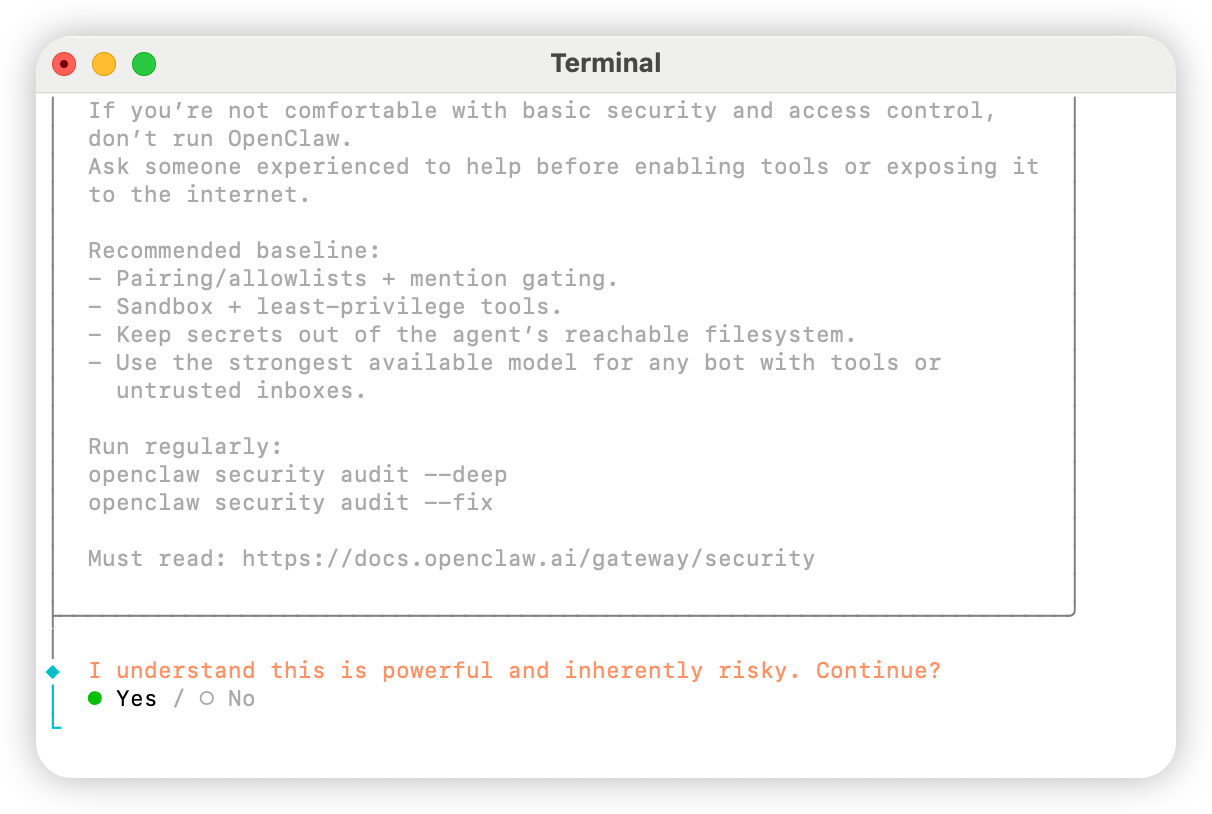 `QuickStart` を選びます。
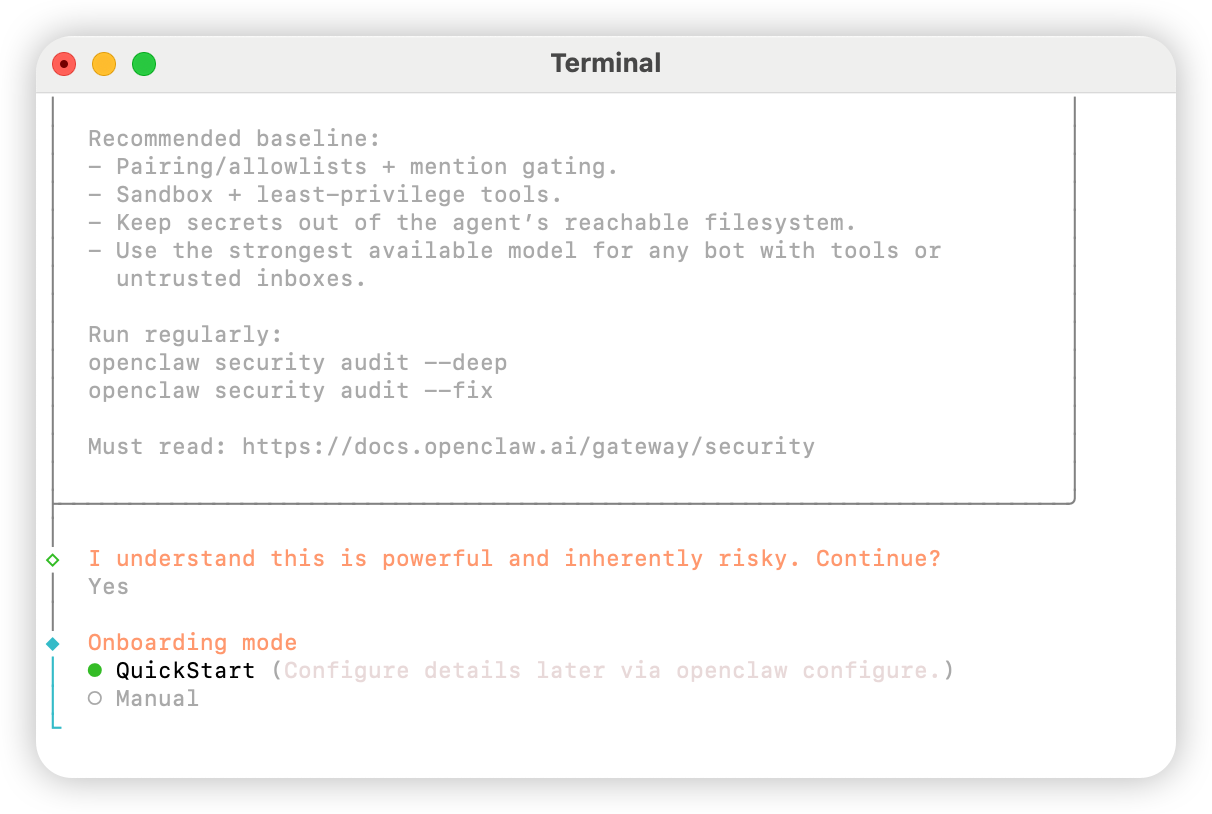 `Skip for now` を選びます。
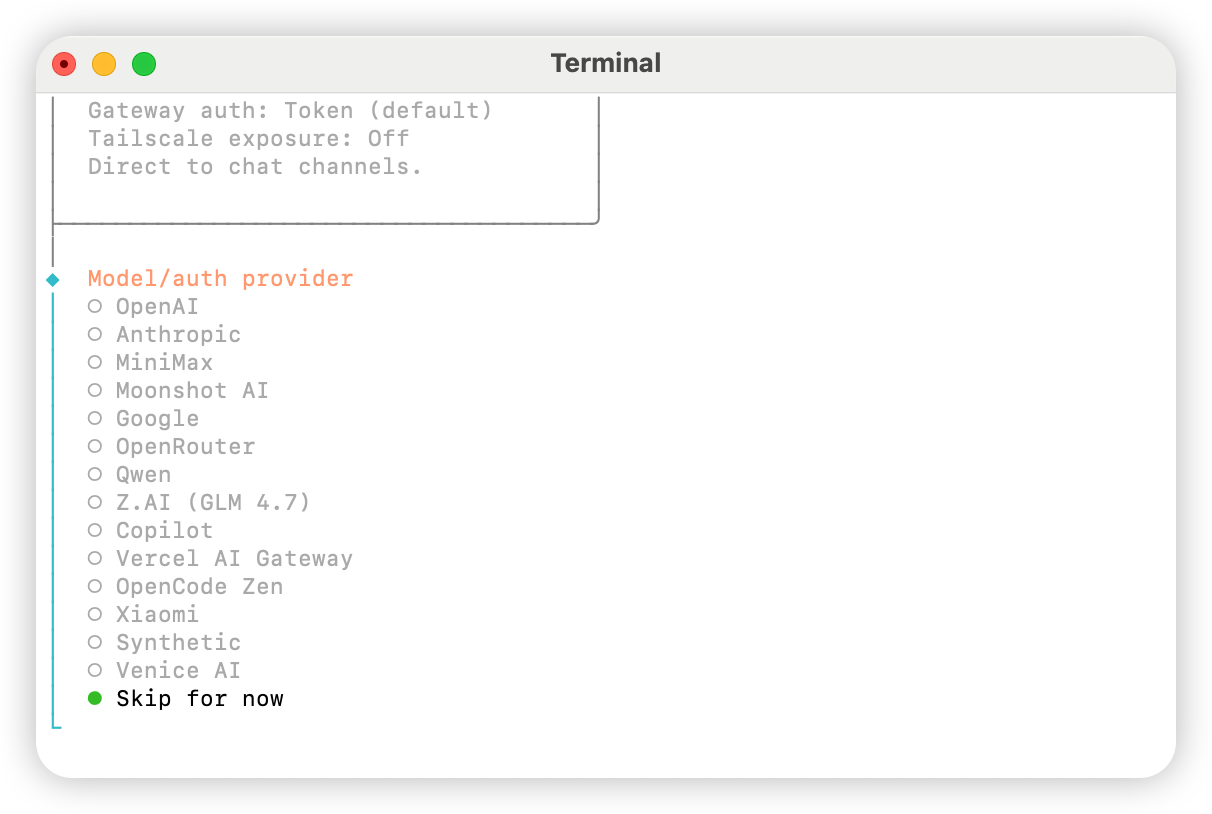 `All providers` を選びます。
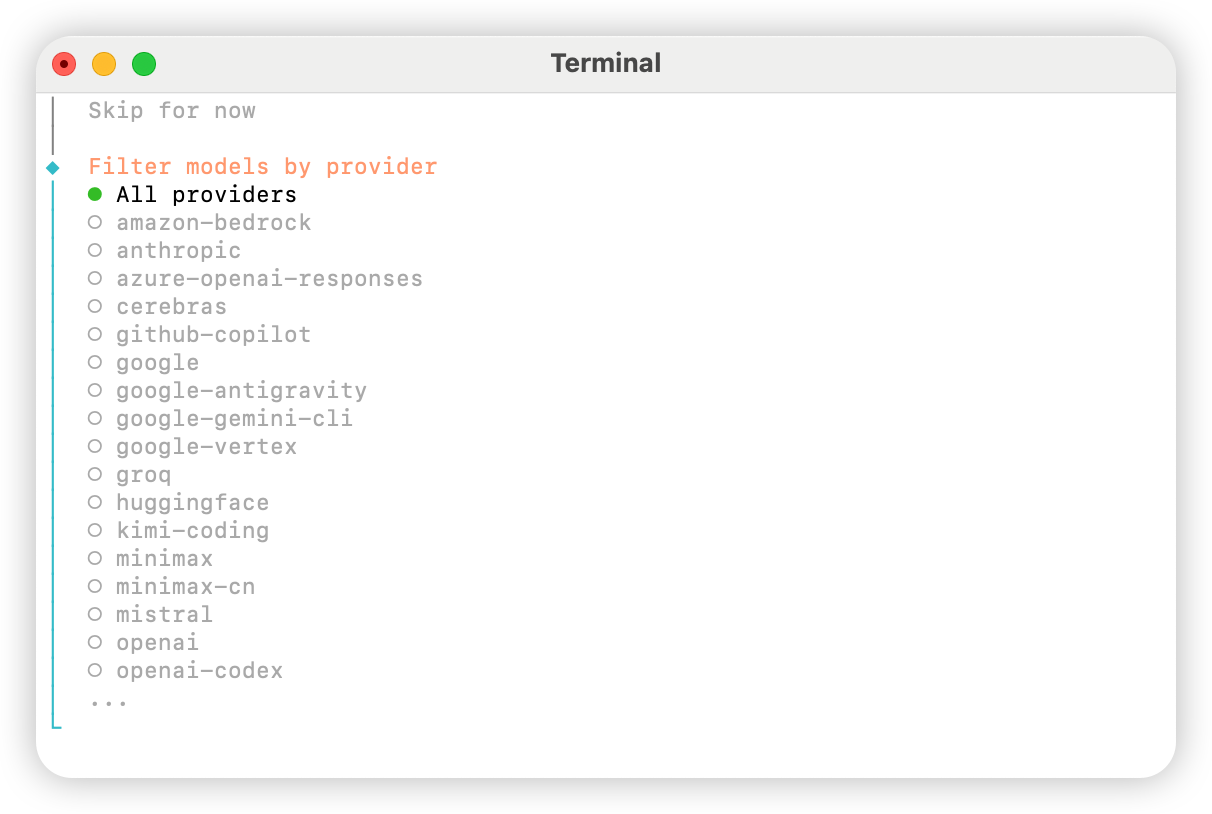 必要に応じてデフォルトモデルを選択してください。最初は `Keep current` を選択できます(「方法 2:手動設定」を使用する場合、次の手順で設定ファイルから変更できます)。
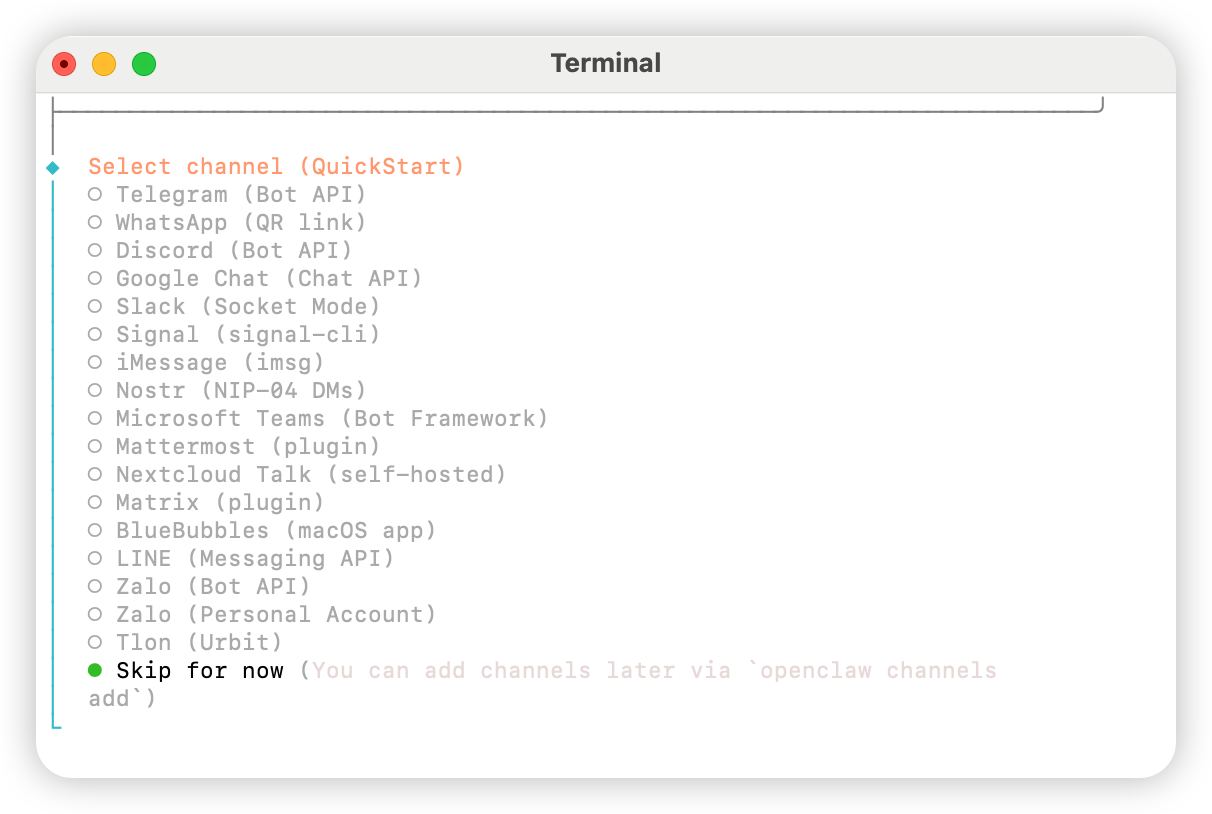
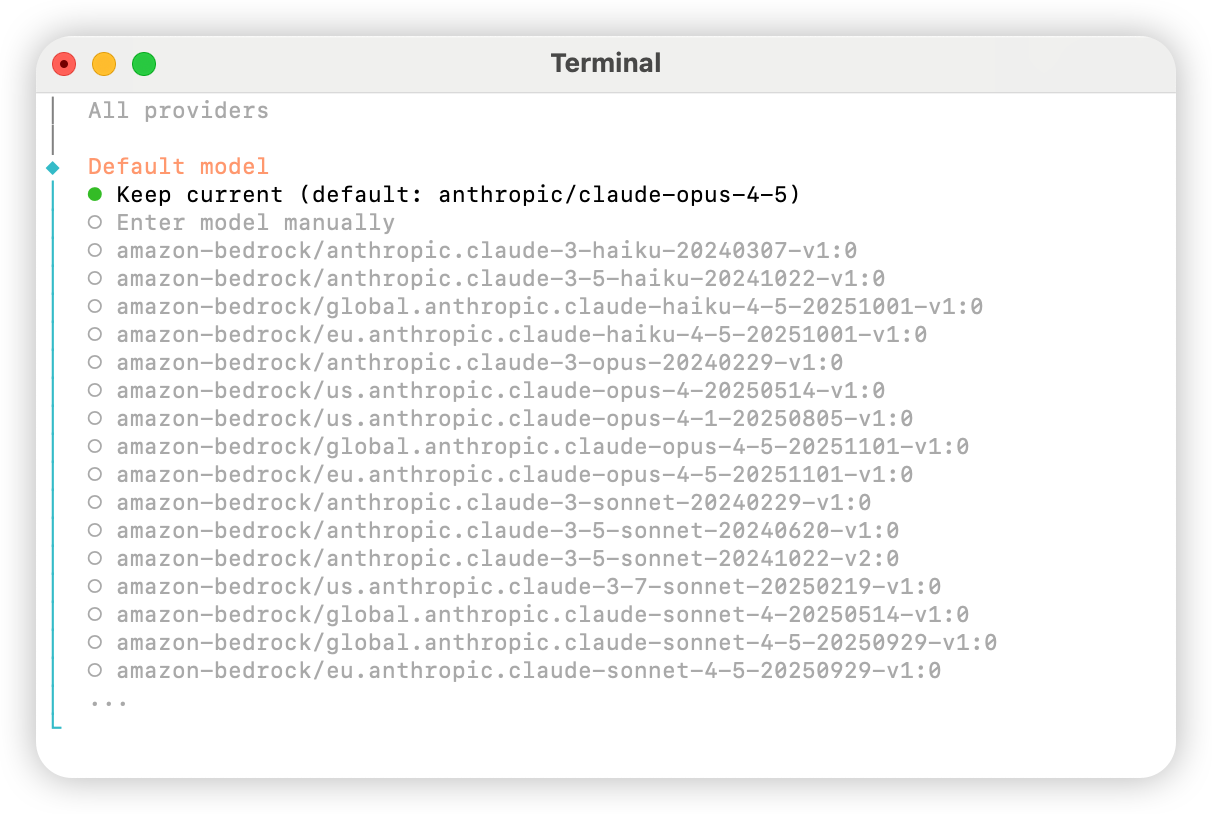 必要に応じて個人アカウントをリンクしてください。不要な場合は `Skip for now` を選びます。
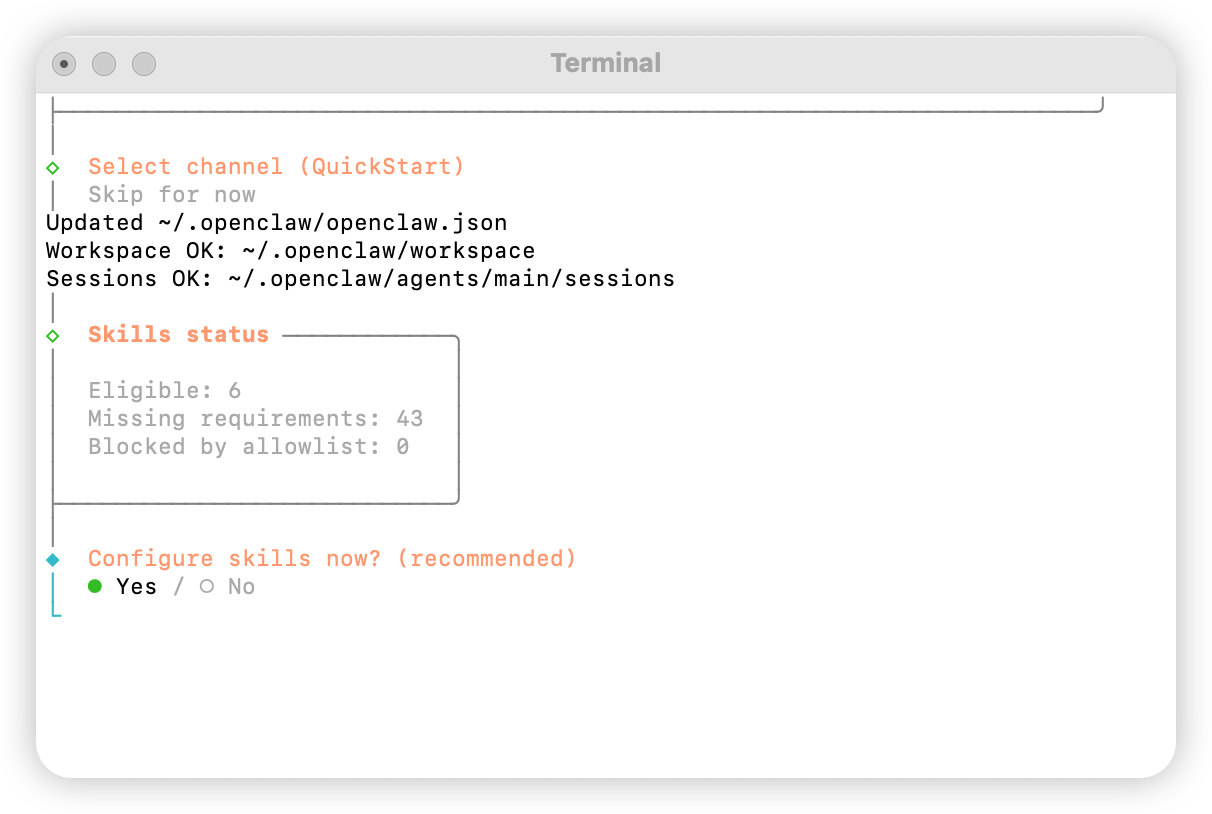
 スキルを設定するには `Yes` を選びます。
 `npm` を選びます。
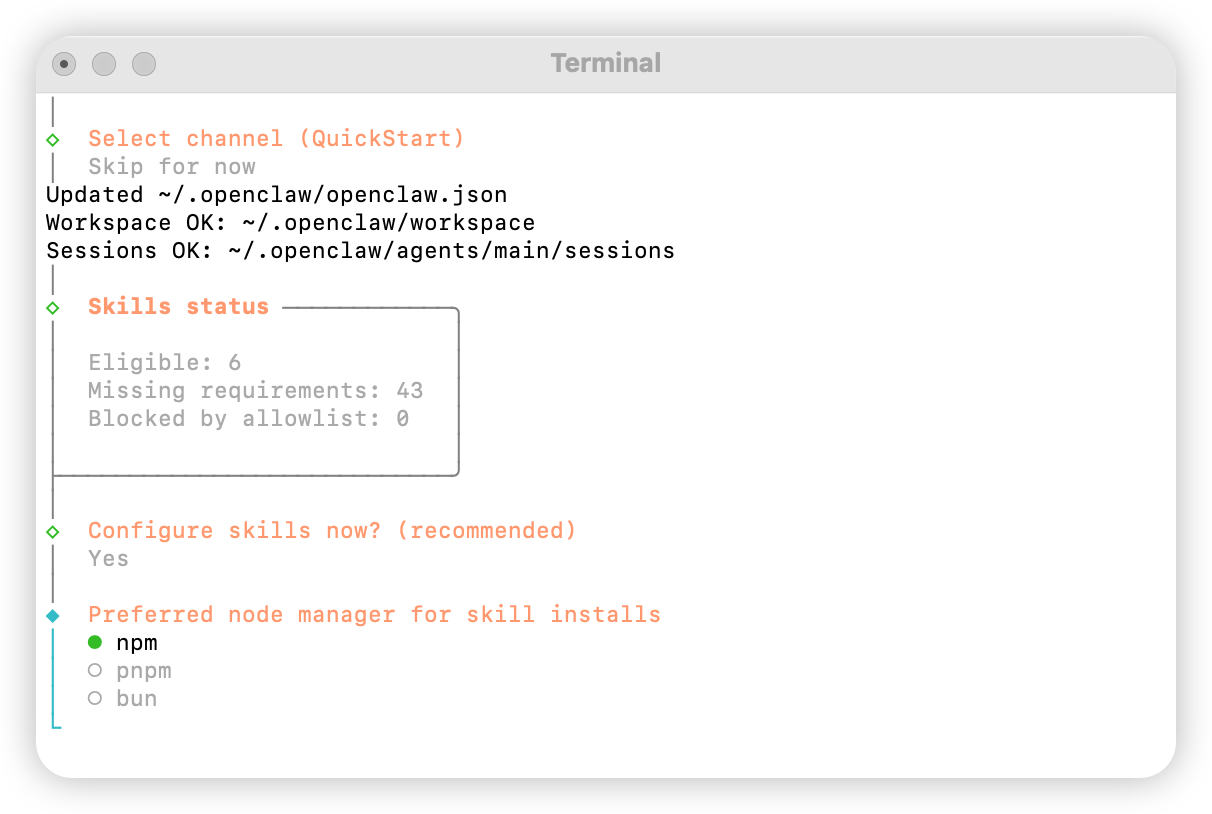 必要に応じてスキルを選択して設定します。
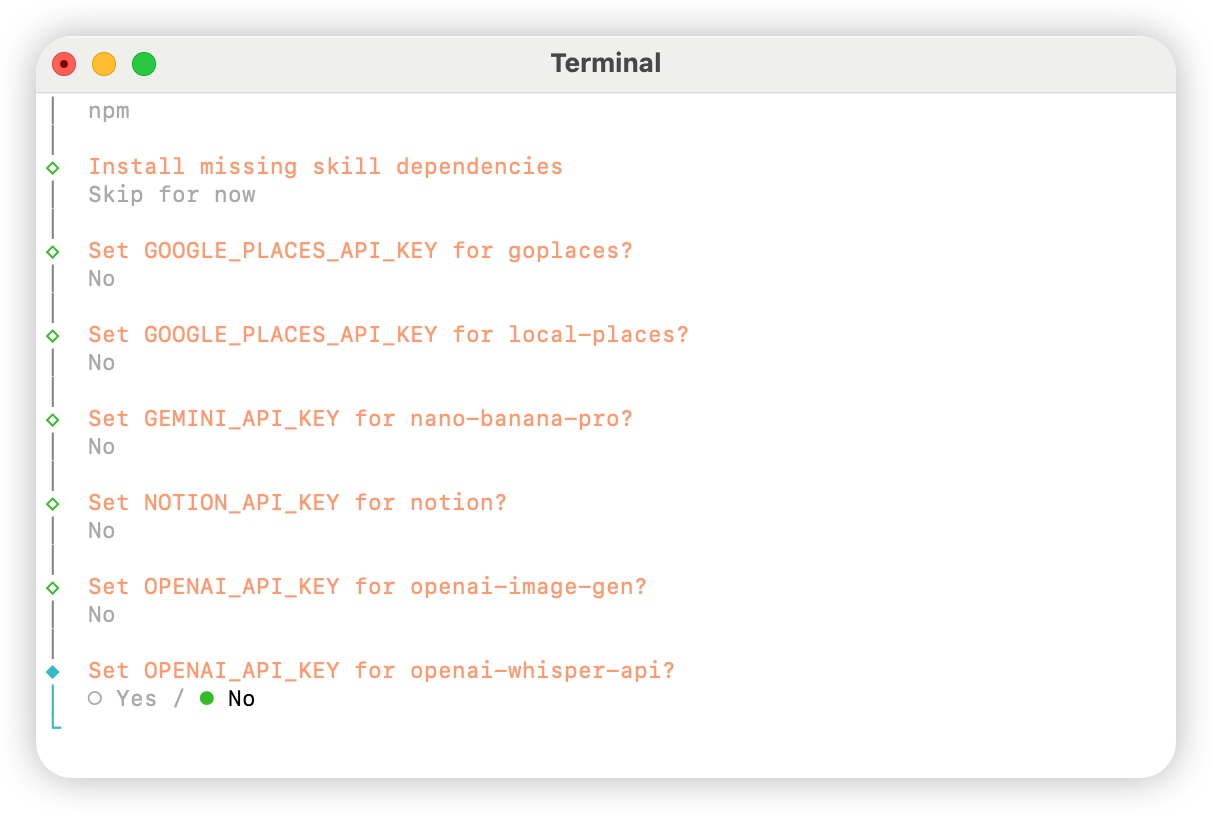
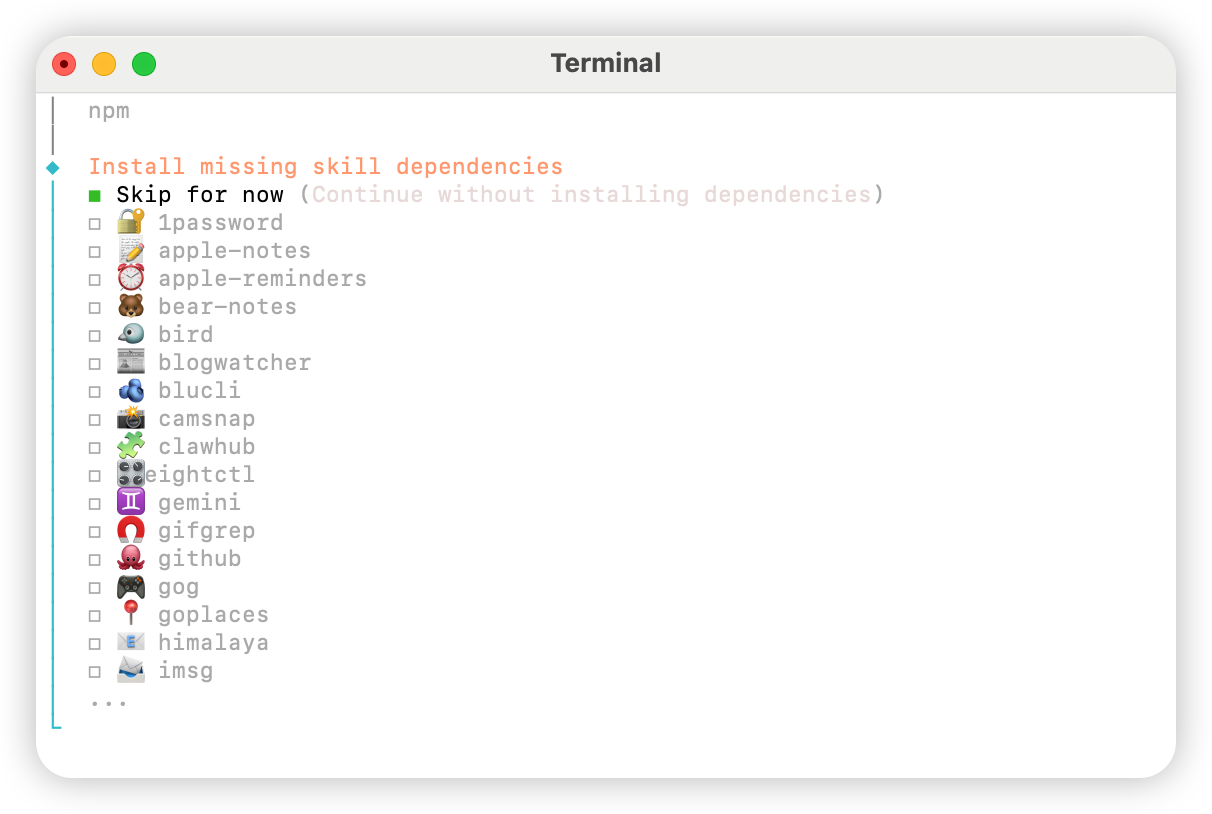 すべてのオプションで `No` を選びます。
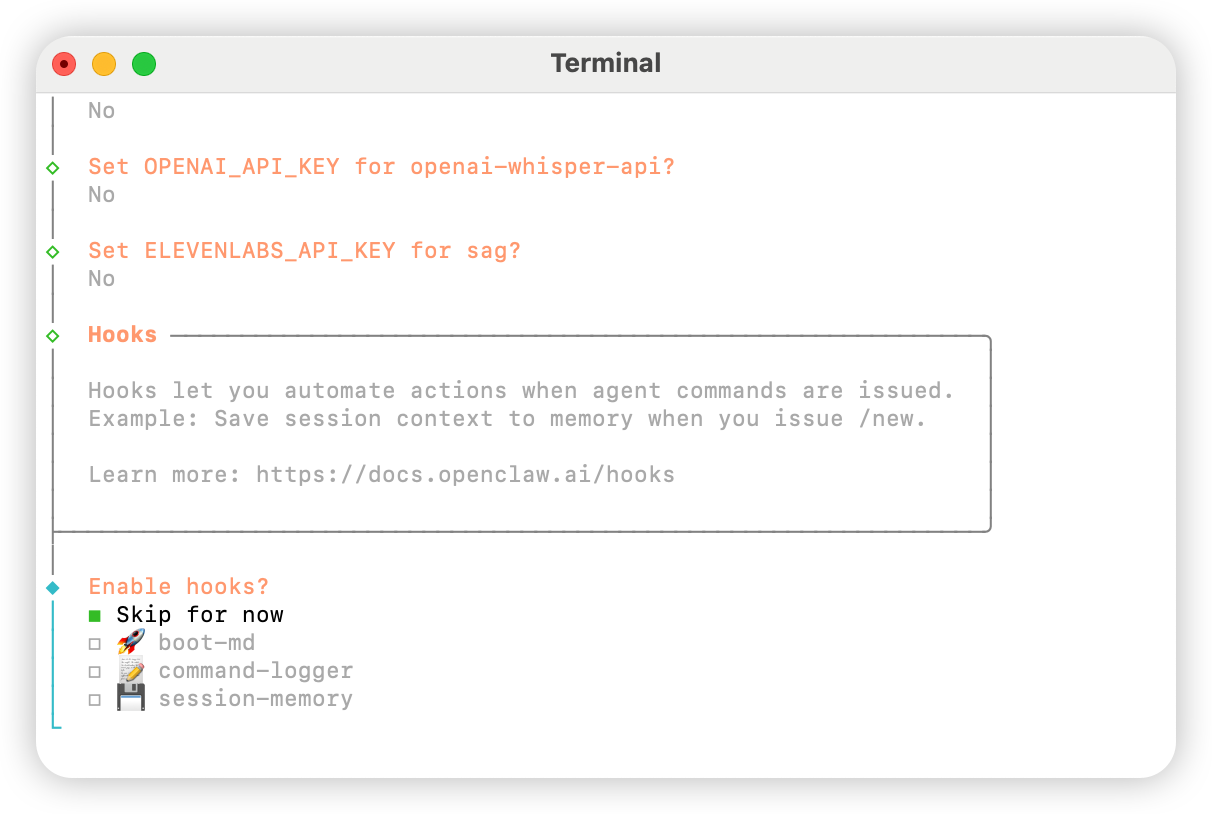
 `Skip for now` を選びます。
 `Hatch in UI` を選びます。
## AIHubMix の設定
### 方法 1:プラグインによるクイック設定(推奨)
プラグインのソースコード:[aihubmix-auth](https://github.com/akakenle/aihubmix-auth)
AIHubMix auth プラグインをインストールし、Gateway を再起動します:
```shellscript theme={null}
openclaw plugins install @akakenle/aihubmix-auth
openclaw gateway restart
```
auth コマンドを実行します。プロンプトが表示されたら AIHubMix の API キーを入力します。以下のコマンドは 4 つの provider のいずれか 1 つに対して一度だけ実行すれば OK です — プラグインは `providerAuthAliases` を使用して、同じキーをすべての transport で有効にします:
```shellscript theme={null}
openclaw models auth login --provider aihubmix-openai --method api-key --set-default
```
プラグインはモデルを以下のグループに整理します:
* **aihubmix-openai** — `gpt-*` / `o1-*` / `o3-*` / `o4-*`, `https://aihubmix.com/v1` (`openai-completions`)
* **aihubmix-anthropic** — `claude-*`, `https://aihubmix.com` (`anthropic-messages`)
* **aihubmix-google** — `gemini-*`, `https://aihubmix.com/gemini/v1beta` (`google-generative-ai`)
* **aihubmix-other** — その他のモデル, `https://aihubmix.com/v1` (`openai-completions`)
省略形のモデル ID(例:`claude-sonnet-4-5`)は、プラグインの `resolveDynamicModel` フックによって自動的に正しい transport にルーティングされます — 完全な `provider/model` を書く必要はありません。
> インタラクティブなログインをスキップしたい場合:インストール前に `export AIHUBMIX_API_KEY=sk-...` を設定してください — プラグインはキーを provider 設定のインライン `apiKey` として書き込みます(インタラクティブなログインは代わりに auth-profile に保存します)。
設定が完了したら、[起動](#起動) セクションに進んで使用を開始してください。
### 方法 2:手動設定
`~/.openclaw/openclaw.json` ファイルを開き、以下の設定を追加します:
```json theme={null}
{
"models": {
"mode": "merge",
"providers": {
"aihubmix-openai": {
"baseUrl": "https://aihubmix.com/v1",
"api": "openai-completions",
"models": [
{
"id": "gpt-4o",
"name": "gpt-4o",
"reasoning": false,
"input": ["text"],
"cost": {
"input": 0,
"output": 0,
"cacheRead": 0,
"cacheWrite": 0
},
"contextWindow": 128000,
"maxTokens": 16384
}
]
},
"aihubmix-anthropic": {
"baseUrl": "https://aihubmix.com",
"api": "anthropic-messages",
"models": [
{
"id": "claude-sonnet-4-5",
"name": "claude-sonnet-4-5",
"reasoning": false,
"input": ["text"],
"cost": {
"input": 0,
"output": 0,
"cacheRead": 0,
"cacheWrite": 0
},
"contextWindow": 200000,
"maxTokens": 64000
}
]
},
"aihubmix-google": {
"baseUrl": "https://aihubmix.com/gemini/v1beta",
"api": "google-generative-ai",
"models": []
},
"aihubmix-other": {
"baseUrl": "https://aihubmix.com/v1",
"api": "openai-completions",
"models": []
}
}
},
"agents": {
"defaults": {
"model": {
"primary": "aihubmix-anthropic/claude-sonnet-4-5"
},
"workspace": "your_workspace_path",
"compaction": {
"mode": "safeguard"
},
"maxConcurrent": 4,
"subagents": {
"maxConcurrent": 8
}
}
}
}
```
### 方法 3:動的モデルコマンドでデフォルトモデルを切り替える
AIHubMix の OpenClaw プラグインは動的モデルルーティングに対応しています。AIHubMix アカウントで利用可能なモデルであれば、`provider/model-id` 形式で呼び出せます。実際に利用できるモデルは、AIHubMix コンソールと API の応答を基準にしてください。
よく使う provider の選び方は次の通りです。
* `aihubmix-openai`:OpenAI 互換モデル。例:`gpt-*`、`o1-*`、`o3-*`、`o4-*`
* `aihubmix-anthropic`:Claude モデル。例:`claude-*`
* `aihubmix-google`:Gemini モデル。例:`gemini-*`
* `aihubmix-other`:OpenAI 互換エンドポイント経由で呼び出すその他のモデル。例:`glm-5.2`
例として、`gpt-5.4` を OpenClaw のデフォルトモデルに設定します。
```powershell theme={null}
openclaw models set aihubmix-openai/gpt-5.4
```
Windows で `openclaw` が見つからない場合は、ローカルパスの形式で実行します。
```powershell theme={null}
& "インストール先のパス\OpenClaw\openclaw.cmd" models set aihubmix-openai/gpt-5.4
```
現在のデフォルトモデルと認証状態を確認します。
```powershell theme={null}
openclaw models status
```
実際の呼び出しで確認します。
```powershell theme={null}
openclaw infer model run --local --json --model aihubmix-openai/gpt-5.4 --prompt "Reply only OK"
```
OpenAI / Claude / Gemini 以外のグループのモデルを呼び出す場合は、`aihubmix-other` を使います。例:
```powershell theme={null}
openclaw infer model run --local --json --model aihubmix-other/glm-5.2 --prompt "Reply only OK"
```
OpenClaw が現在読み込んでいるモデルカタログを確認します。
```powershell theme={null}
openclaw infer model list --json
```
## 起動
```shellscript theme={null}
openclaw gateway
```
## テスト
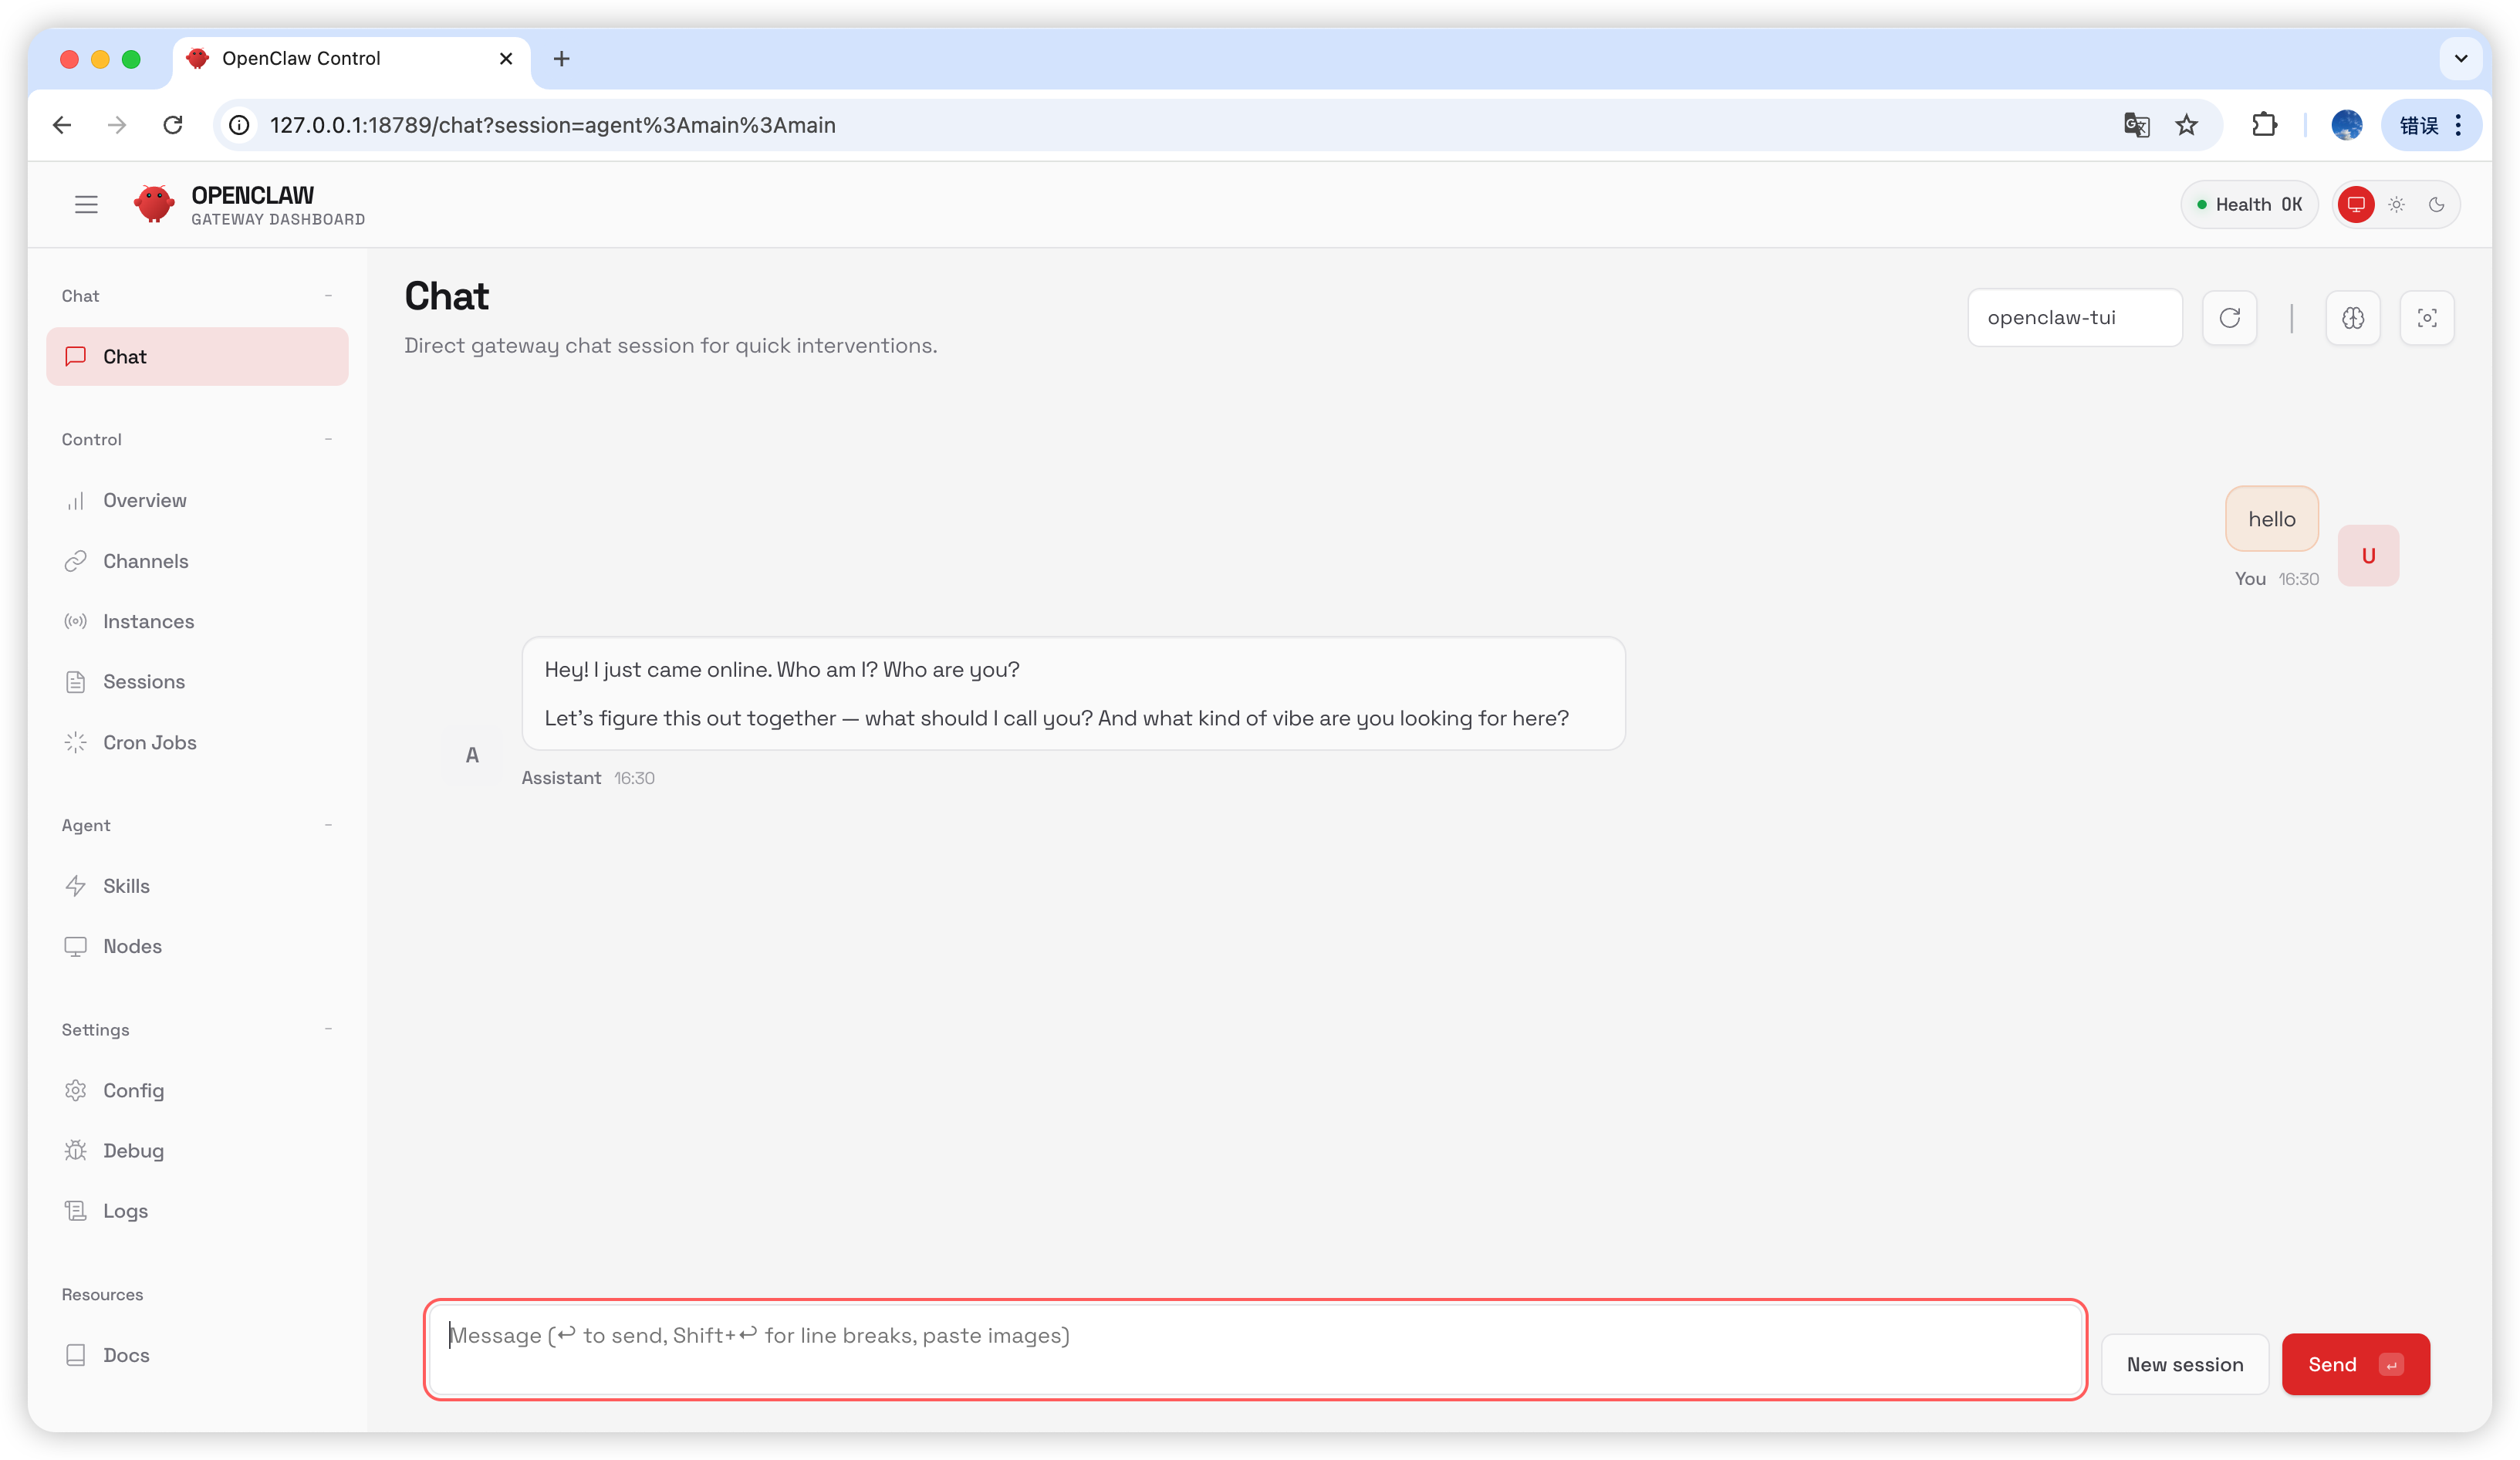
チャットページで `hello` と入力します。返信があれば設定は成功です。
`Hatch in UI` を選びます。
## AIHubMix の設定
### 方法 1:プラグインによるクイック設定(推奨)
プラグインのソースコード:[aihubmix-auth](https://github.com/akakenle/aihubmix-auth)
AIHubMix auth プラグインをインストールし、Gateway を再起動します:
```shellscript theme={null}
openclaw plugins install @akakenle/aihubmix-auth
openclaw gateway restart
```
auth コマンドを実行します。プロンプトが表示されたら AIHubMix の API キーを入力します。以下のコマンドは 4 つの provider のいずれか 1 つに対して一度だけ実行すれば OK です — プラグインは `providerAuthAliases` を使用して、同じキーをすべての transport で有効にします:
```shellscript theme={null}
openclaw models auth login --provider aihubmix-openai --method api-key --set-default
```
プラグインはモデルを以下のグループに整理します:
* **aihubmix-openai** — `gpt-*` / `o1-*` / `o3-*` / `o4-*`, `https://aihubmix.com/v1` (`openai-completions`)
* **aihubmix-anthropic** — `claude-*`, `https://aihubmix.com` (`anthropic-messages`)
* **aihubmix-google** — `gemini-*`, `https://aihubmix.com/gemini/v1beta` (`google-generative-ai`)
* **aihubmix-other** — その他のモデル, `https://aihubmix.com/v1` (`openai-completions`)
省略形のモデル ID(例:`claude-sonnet-4-5`)は、プラグインの `resolveDynamicModel` フックによって自動的に正しい transport にルーティングされます — 完全な `provider/model` を書く必要はありません。
> インタラクティブなログインをスキップしたい場合:インストール前に `export AIHUBMIX_API_KEY=sk-...` を設定してください — プラグインはキーを provider 設定のインライン `apiKey` として書き込みます(インタラクティブなログインは代わりに auth-profile に保存します)。
設定が完了したら、[起動](#起動) セクションに進んで使用を開始してください。
### 方法 2:手動設定
`~/.openclaw/openclaw.json` ファイルを開き、以下の設定を追加します:
```json theme={null}
{
"models": {
"mode": "merge",
"providers": {
"aihubmix-openai": {
"baseUrl": "https://aihubmix.com/v1",
"api": "openai-completions",
"models": [
{
"id": "gpt-4o",
"name": "gpt-4o",
"reasoning": false,
"input": ["text"],
"cost": {
"input": 0,
"output": 0,
"cacheRead": 0,
"cacheWrite": 0
},
"contextWindow": 128000,
"maxTokens": 16384
}
]
},
"aihubmix-anthropic": {
"baseUrl": "https://aihubmix.com",
"api": "anthropic-messages",
"models": [
{
"id": "claude-sonnet-4-5",
"name": "claude-sonnet-4-5",
"reasoning": false,
"input": ["text"],
"cost": {
"input": 0,
"output": 0,
"cacheRead": 0,
"cacheWrite": 0
},
"contextWindow": 200000,
"maxTokens": 64000
}
]
},
"aihubmix-google": {
"baseUrl": "https://aihubmix.com/gemini/v1beta",
"api": "google-generative-ai",
"models": []
},
"aihubmix-other": {
"baseUrl": "https://aihubmix.com/v1",
"api": "openai-completions",
"models": []
}
}
},
"agents": {
"defaults": {
"model": {
"primary": "aihubmix-anthropic/claude-sonnet-4-5"
},
"workspace": "your_workspace_path",
"compaction": {
"mode": "safeguard"
},
"maxConcurrent": 4,
"subagents": {
"maxConcurrent": 8
}
}
}
}
```
### 方法 3:動的モデルコマンドでデフォルトモデルを切り替える
AIHubMix の OpenClaw プラグインは動的モデルルーティングに対応しています。AIHubMix アカウントで利用可能なモデルであれば、`provider/model-id` 形式で呼び出せます。実際に利用できるモデルは、AIHubMix コンソールと API の応答を基準にしてください。
よく使う provider の選び方は次の通りです。
* `aihubmix-openai`:OpenAI 互換モデル。例:`gpt-*`、`o1-*`、`o3-*`、`o4-*`
* `aihubmix-anthropic`:Claude モデル。例:`claude-*`
* `aihubmix-google`:Gemini モデル。例:`gemini-*`
* `aihubmix-other`:OpenAI 互換エンドポイント経由で呼び出すその他のモデル。例:`glm-5.2`
例として、`gpt-5.4` を OpenClaw のデフォルトモデルに設定します。
```powershell theme={null}
openclaw models set aihubmix-openai/gpt-5.4
```
Windows で `openclaw` が見つからない場合は、ローカルパスの形式で実行します。
```powershell theme={null}
& "インストール先のパス\OpenClaw\openclaw.cmd" models set aihubmix-openai/gpt-5.4
```
現在のデフォルトモデルと認証状態を確認します。
```powershell theme={null}
openclaw models status
```
実際の呼び出しで確認します。
```powershell theme={null}
openclaw infer model run --local --json --model aihubmix-openai/gpt-5.4 --prompt "Reply only OK"
```
OpenAI / Claude / Gemini 以外のグループのモデルを呼び出す場合は、`aihubmix-other` を使います。例:
```powershell theme={null}
openclaw infer model run --local --json --model aihubmix-other/glm-5.2 --prompt "Reply only OK"
```
OpenClaw が現在読み込んでいるモデルカタログを確認します。
```powershell theme={null}
openclaw infer model list --json
```
## 起動
```shellscript theme={null}
openclaw gateway
```
## テスト
チャットページで `hello` と入力します。返信があれば設定は成功です。
 ## よくある質問
### バージョンアップグレード
```shellscript theme={null}
openclaw plugins update @akakenle/aihubmix-auth
openclaw gateway restart
```
### Gateway プロセスが使用中の場合
```shellscript theme={null}
openclaw gateway stop
openclaw gateway
```
***
最終更新日:2026-07-03
## よくある質問
### バージョンアップグレード
```shellscript theme={null}
openclaw plugins update @akakenle/aihubmix-auth
openclaw gateway restart
```
### Gateway プロセスが使用中の場合
```shellscript theme={null}
openclaw gateway stop
openclaw gateway
```
***
最終更新日:2026-07-03