> ## Documentation Index
> Fetch the complete documentation index at: https://docs.aihubmix.com/llms.txt
> Use this file to discover all available pages before exploring further.
# OpenClaw
## Installation
Assurez-vous d'avoir Node >= 22 avant l'installation.
Exécutez la commande d'installation
```shellscript theme={null}
npm install -g openclaw@latest
```
Après l'installation, les commandes suivantes peuvent être exécutées depuis n'importe quel répertoire. Il n'est pas nécessaire de se placer d'abord dans le dossier d'installation d'OpenClaw. Si votre terminal reconnaît `openclaw`, vous pouvez copier directement les commandes de ce guide.
```powershell theme={null}
openclaw models status
```
Si Windows indique que `openclaw` est introuvable, remplacez le début de la commande par le chemin local de l'exécutable :
```powershell theme={null}
& "votre-chemin-installation\OpenClaw\openclaw.cmd" models status
```
`votre-chemin-installation` est un espace réservé. Remplacez-le par le dossier parent où OpenClaw est installé. Par exemple, si OpenClaw se trouve dans `D:\Apps\OpenClaw`, utilisez `& "D:\Apps\OpenClaw\openclaw.cmd" models status`.
### Configuration du terminal
Ouvrez le terminal et exécutez la commande suivante pour démarrer la configuration
```shellscript theme={null}
openclaw onboard
```
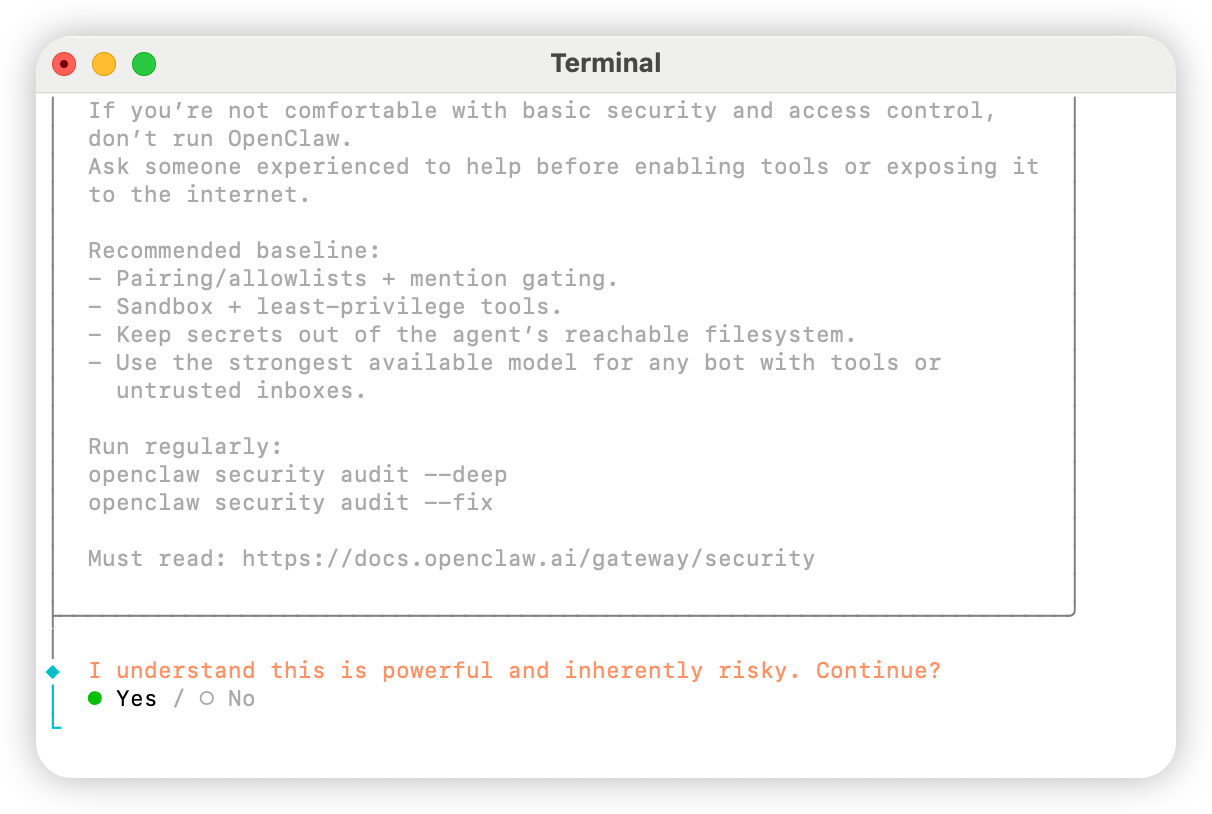
Sélectionnez `Yes`
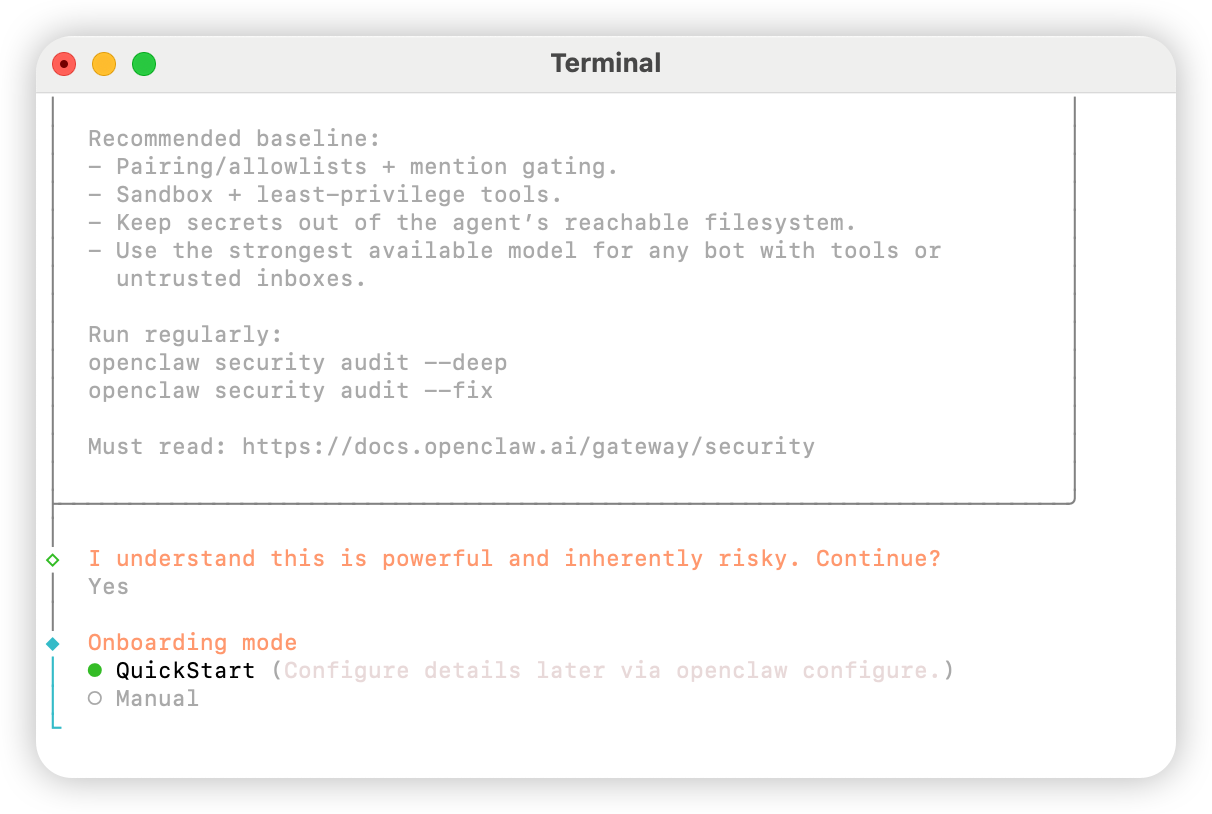
 Sélectionnez `QuickStart`
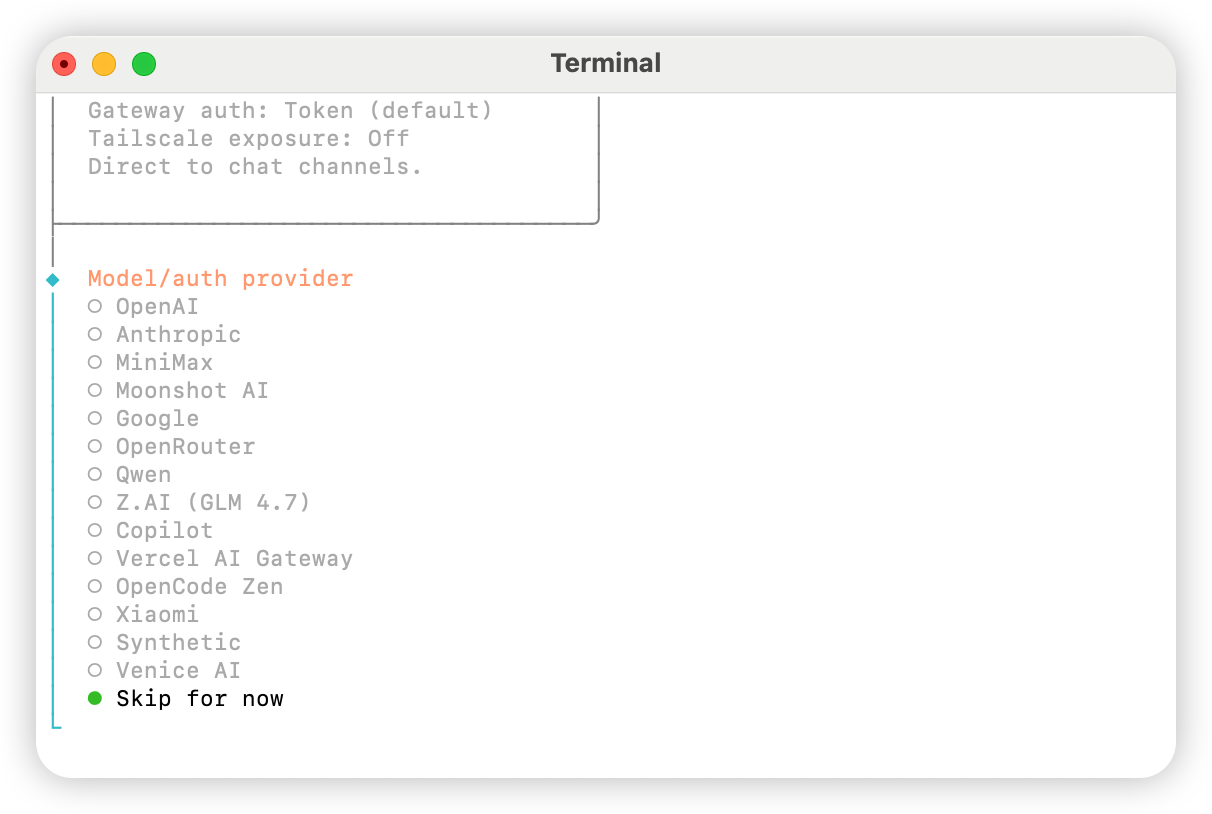
 Sélectionnez `Skip for now`
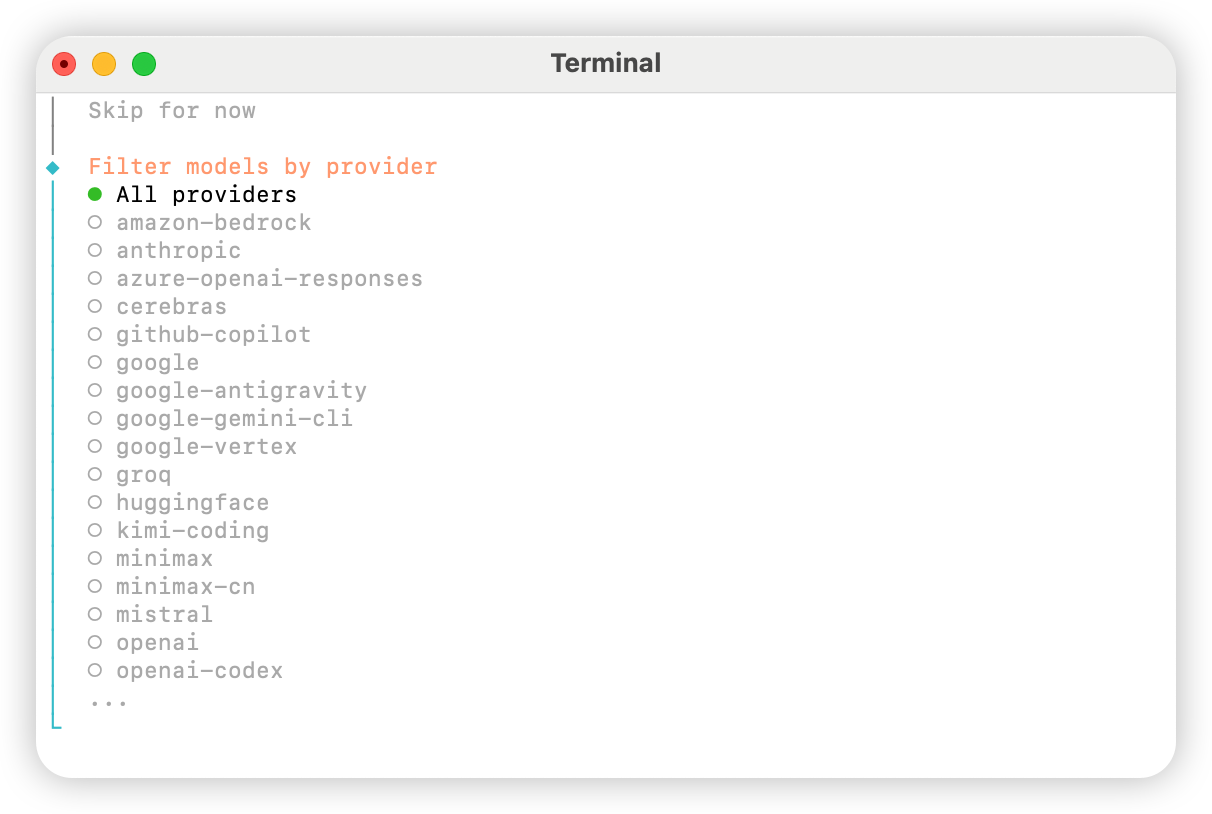
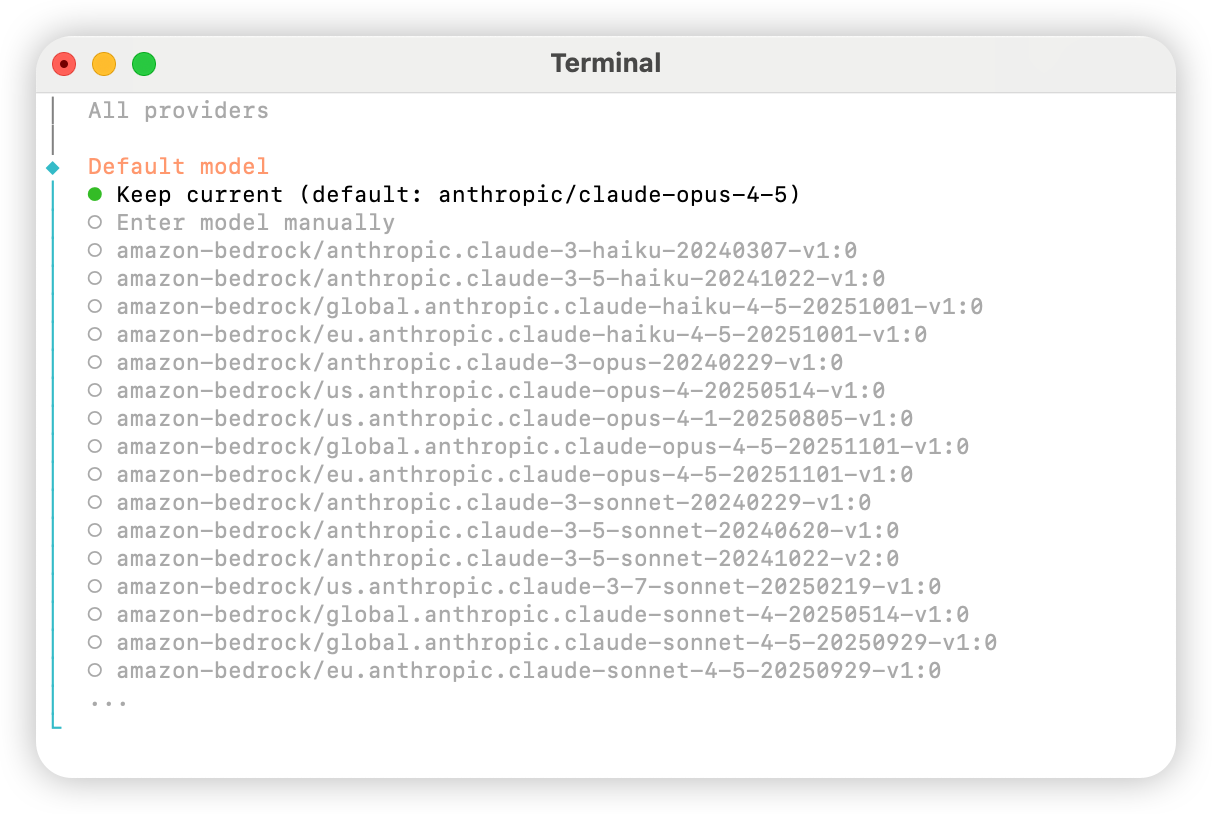
 Sélectionnez `All providers`
 Choisissez le modèle par défaut selon vos besoins ; vous pouvez initialement sélectionner `Keep current` (si vous utilisez la « Méthode 2 : configuration manuelle », vous pourrez le modifier dans le fichier de configuration à l'étape suivante).
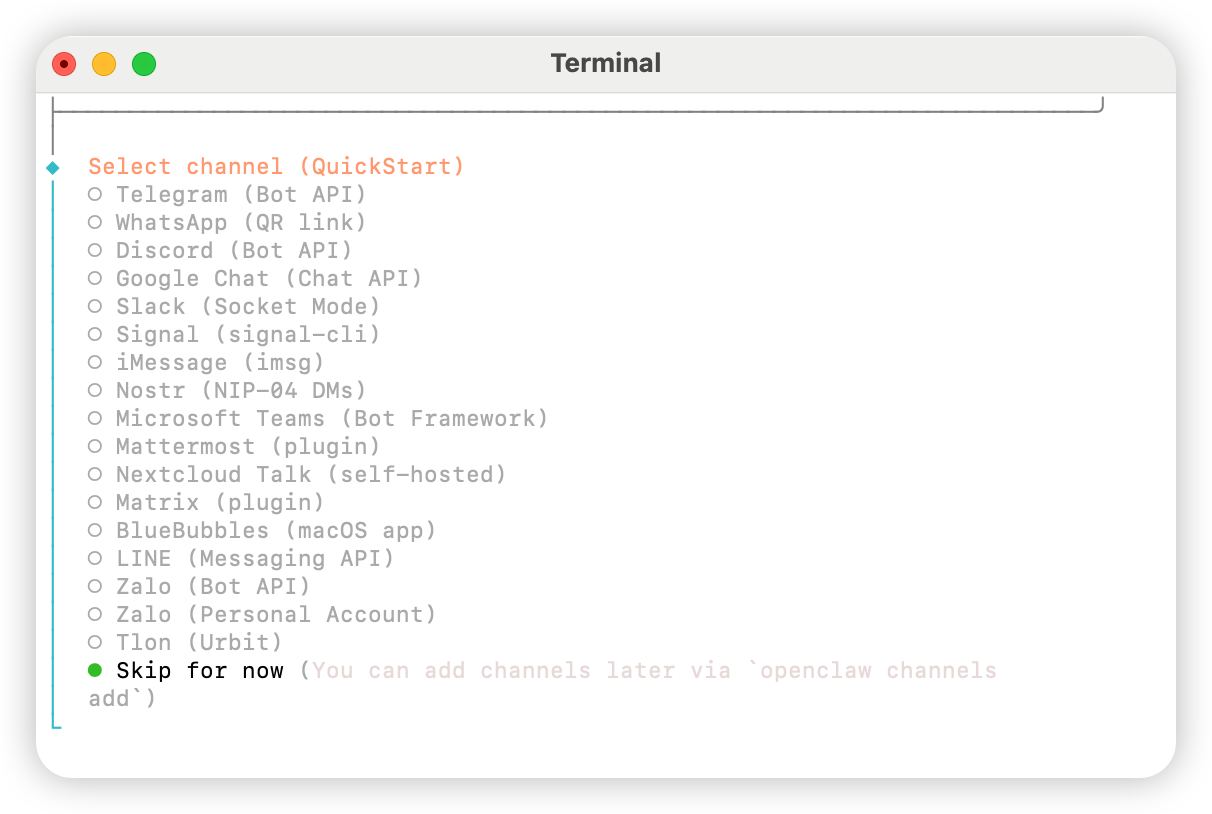
 Reliez votre compte personnel si nécessaire ; sinon, sélectionnez `Skip for now`.
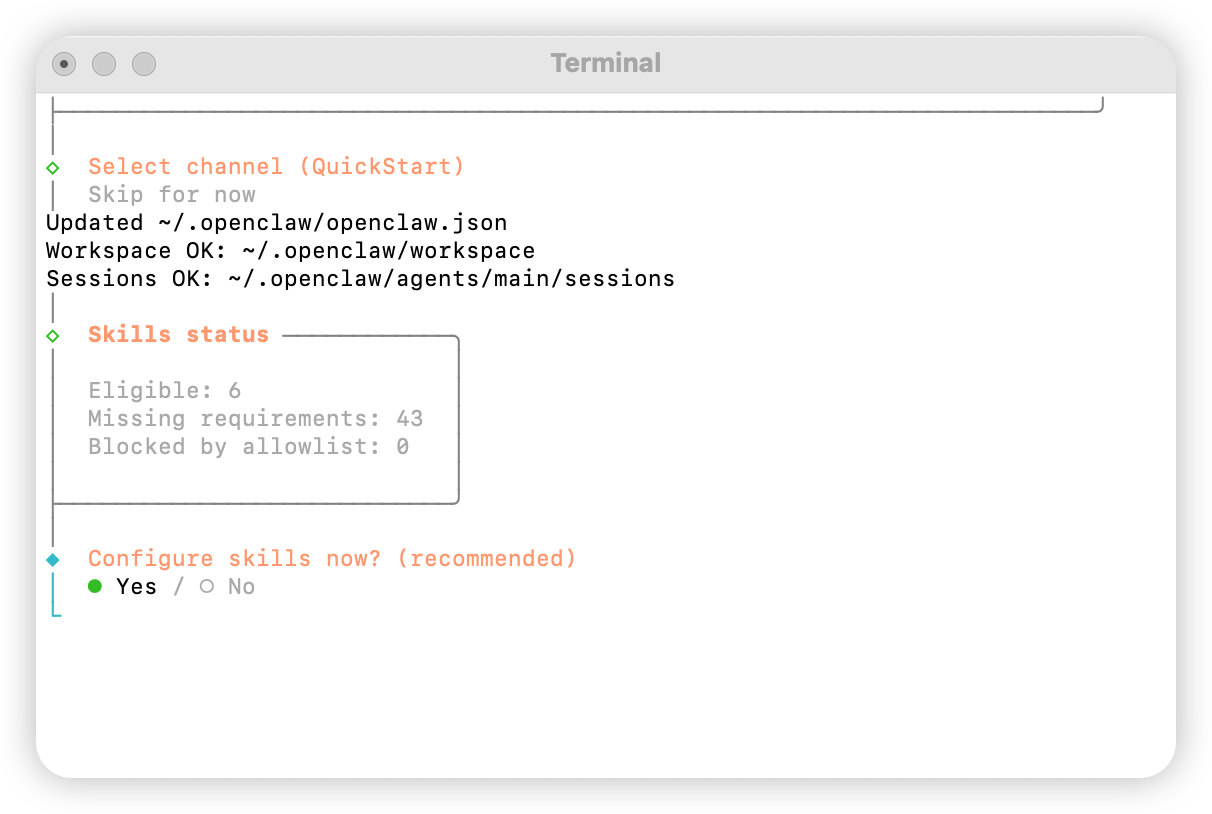
 Configurez les compétences en sélectionnant `Yes`.
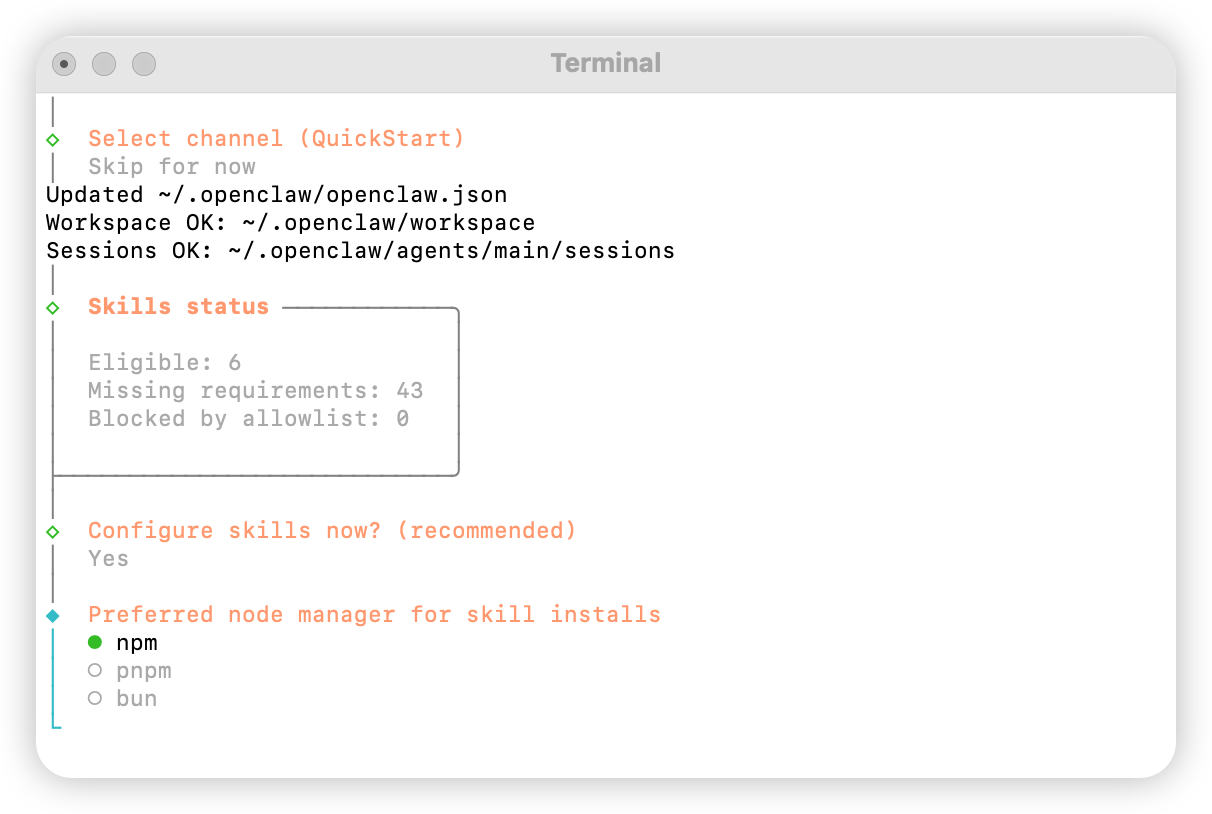
 Sélectionnez `npm`
 Configurez la sélection des compétences selon vos besoins.
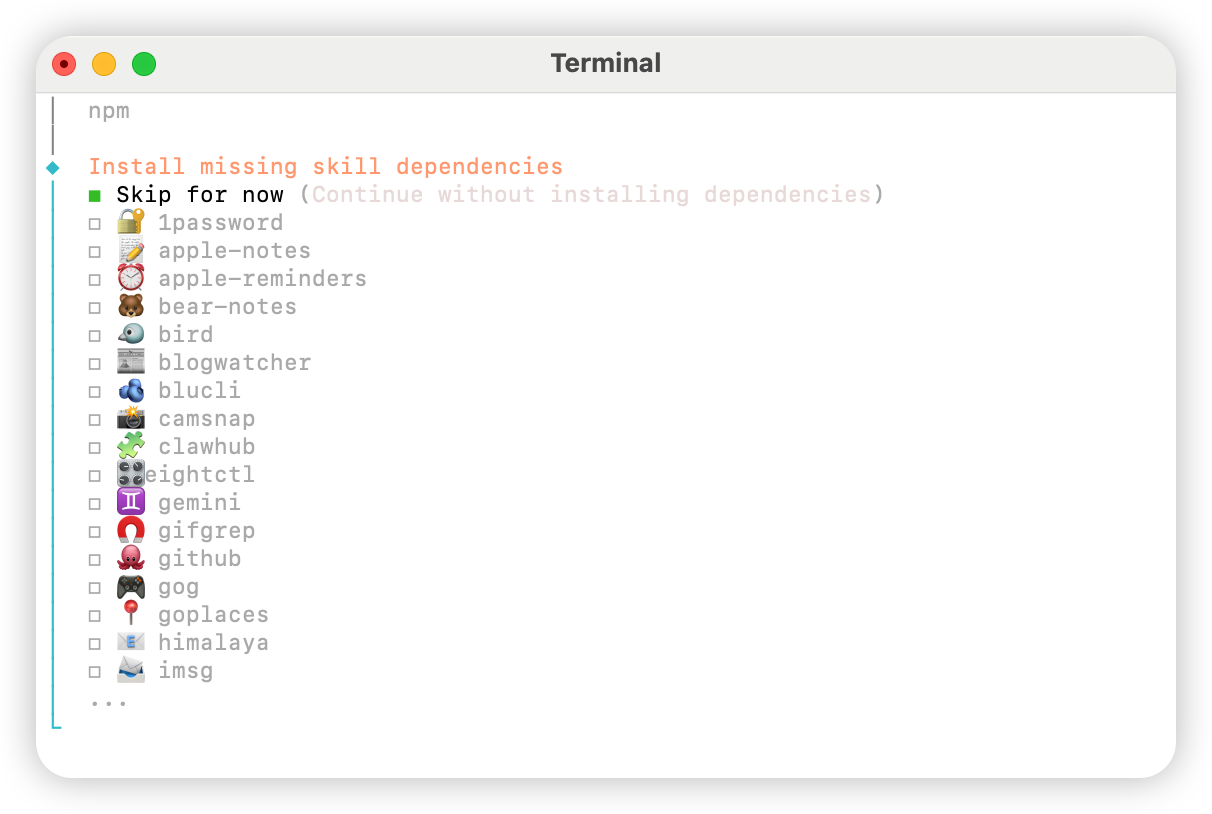 Sélectionnez `No` pour toutes les options.
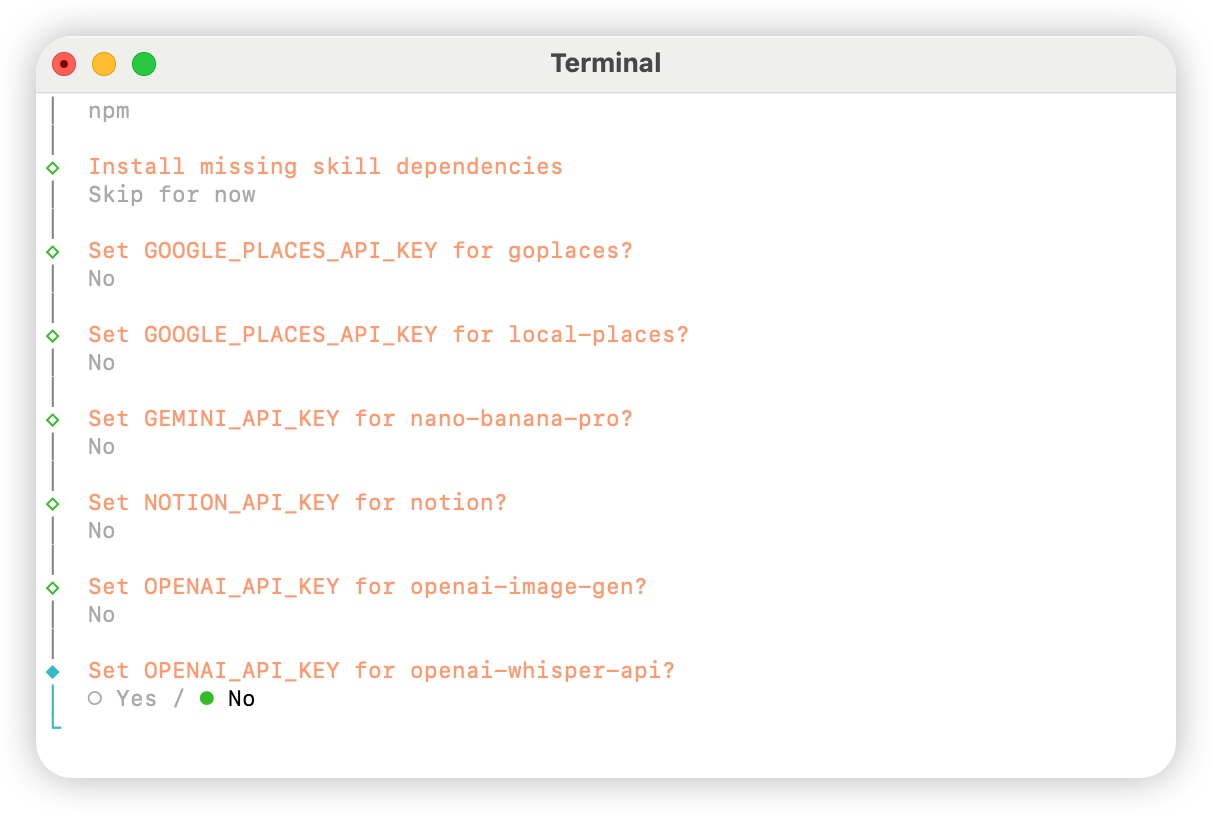 Sélectionnez `Skip for now`.
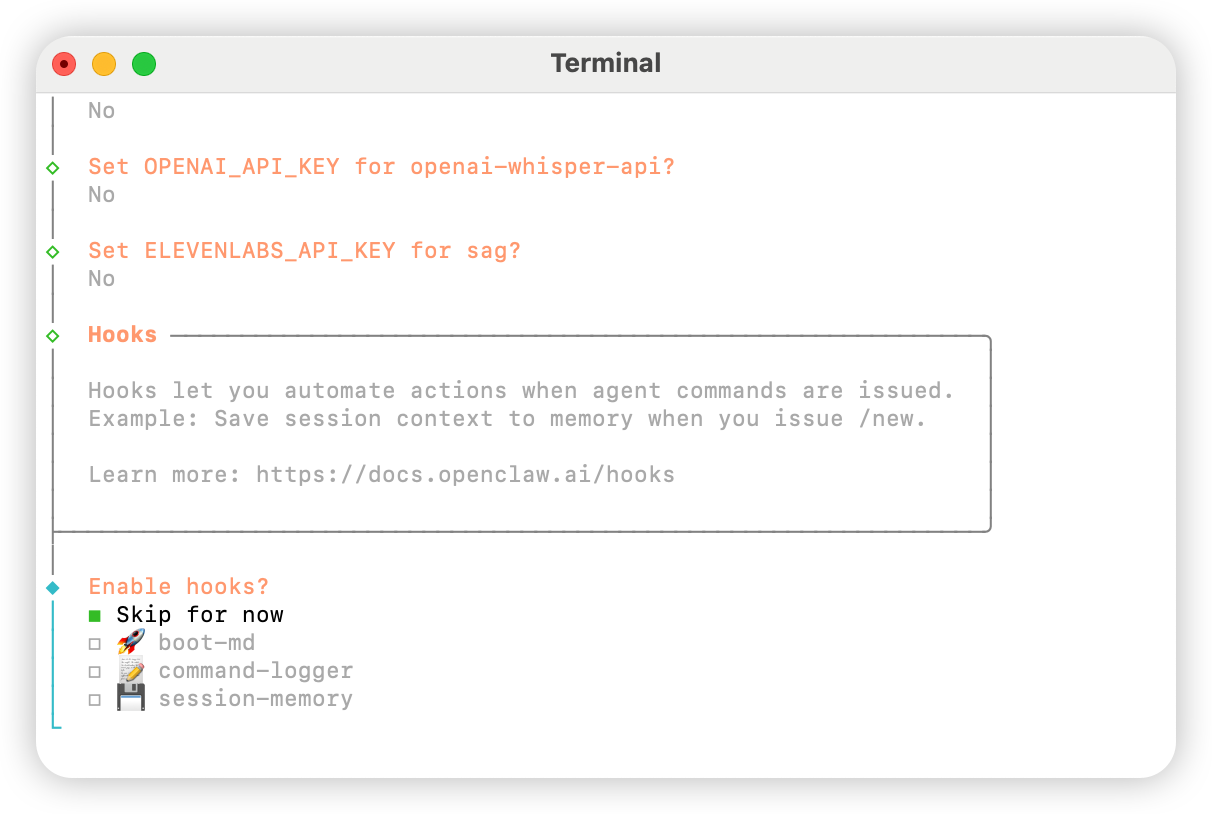 Sélectionnez `Hatch in UI`.
## Configurer AIHubMix
### Méthode 1 : configuration rapide via plugin (recommandée)
Code source du plugin : [aihubmix-auth](https://github.com/akakenle/aihubmix-auth)
Installez le plugin d'authentification AIHubMix et redémarrez la Gateway :
```shellscript theme={null}
openclaw plugins install @akakenle/aihubmix-auth
openclaw gateway restart
```
Exécutez la commande d'authentification. Saisissez votre clé API AIHubMix lorsque vous y êtes invité. Vous n'avez besoin d'exécuter la commande ci-dessous qu'une seule fois pour l'un des quatre providers — le plugin utilise `providerAuthAliases` pour rendre la même clé valide pour tous les transports :
```shellscript theme={null}
openclaw models auth login --provider aihubmix-openai --method api-key --set-default
```
Le plugin organise les modèles dans les groupes suivants :
* **aihubmix-openai** — `gpt-*` / `o1-*` / `o3-*` / `o4-*`, `https://aihubmix.com/v1` (`openai-completions`)
* **aihubmix-anthropic** — `claude-*`, `https://aihubmix.com` (`anthropic-messages`)
* **aihubmix-google** — `gemini-*`, `https://aihubmix.com/gemini/v1beta` (`google-generative-ai`)
* **aihubmix-other** — autres modèles, `https://aihubmix.com/v1` (`openai-completions`)
Les identifiants de modèle courts (p. ex. `claude-sonnet-4-5`) sont automatiquement routés vers le bon transport par le hook `resolveDynamicModel` du plugin — pas besoin d'écrire le format complet `provider/model`.
> Vous préférez éviter la connexion interactive ? Définissez `export AIHUBMIX_API_KEY=sk-...` avant l'installation — le plugin écrira la clé en tant que `apiKey` inline dans la configuration du provider (la connexion interactive la stocke plutôt dans le auth-profile).
Une fois configuré, passez à la section [Démarrage](#démarrage) pour commencer à l'utiliser.
### Méthode 2 : configuration manuelle
Ouvrez le fichier `~/.openclaw/openclaw.json` et ajoutez la configuration suivante :
```json theme={null}
{
"models": {
"mode": "merge",
"providers": {
"aihubmix-openai": {
"baseUrl": "https://aihubmix.com/v1",
"api": "openai-completions",
"models": [
{
"id": "gpt-4o",
"name": "gpt-4o",
"reasoning": false,
"input": ["text"],
"cost": {
"input": 0,
"output": 0,
"cacheRead": 0,
"cacheWrite": 0
},
"contextWindow": 128000,
"maxTokens": 16384
}
]
},
"aihubmix-anthropic": {
"baseUrl": "https://aihubmix.com",
"api": "anthropic-messages",
"models": [
{
"id": "claude-sonnet-4-5",
"name": "claude-sonnet-4-5",
"reasoning": false,
"input": ["text"],
"cost": {
"input": 0,
"output": 0,
"cacheRead": 0,
"cacheWrite": 0
},
"contextWindow": 200000,
"maxTokens": 64000
}
]
},
"aihubmix-google": {
"baseUrl": "https://aihubmix.com/gemini/v1beta",
"api": "google-generative-ai",
"models": []
},
"aihubmix-other": {
"baseUrl": "https://aihubmix.com/v1",
"api": "openai-completions",
"models": []
}
}
},
"agents": {
"defaults": {
"model": {
"primary": "aihubmix-anthropic/claude-sonnet-4-5"
},
"workspace": "your_workspace_path",
"compaction": {
"mode": "safeguard"
},
"maxConcurrent": 4,
"subagents": {
"maxConcurrent": 8
}
}
}
}
```
### Méthode 3 : changer le modèle par défaut avec les commandes de modèle dynamiques
Le plugin AIHubMix pour OpenClaw prend en charge le routage dynamique des modèles. Dès qu'un modèle est disponible dans votre compte AIHubMix, vous pouvez l'appeler au format `provider/model-id`. La disponibilité réelle dépend de la console AIHubMix et de la réponse de l'API.
Règles courantes pour choisir le provider :
* `aihubmix-openai` : modèles compatibles OpenAI, par exemple `gpt-*`, `o1-*`, `o3-*` et `o4-*`
* `aihubmix-anthropic` : modèles Claude, par exemple `claude-*`
* `aihubmix-google` : modèles Gemini, par exemple `gemini-*`
* `aihubmix-other` : autres modèles appelés via un endpoint compatible OpenAI, par exemple `glm-5.2`
Exemple : définir `gpt-5.4` comme modèle par défaut d'OpenClaw :
```powershell theme={null}
openclaw models set aihubmix-openai/gpt-5.4
```
Si Windows ne trouve pas `openclaw`, utilisez la forme avec le chemin local :
```powershell theme={null}
& "votre-chemin-installation\OpenClaw\openclaw.cmd" models set aihubmix-openai/gpt-5.4
```
Vérifier le modèle par défaut actuel et l'état d'authentification :
```powershell theme={null}
openclaw models status
```
Lancer un véritable appel de vérification :
```powershell theme={null}
openclaw infer model run --local --json --model aihubmix-openai/gpt-5.4 --prompt "Reply only OK"
```
Pour appeler un modèle en dehors des groupes OpenAI / Claude / Gemini, utilisez `aihubmix-other`, par exemple :
```powershell theme={null}
openclaw infer model run --local --json --model aihubmix-other/glm-5.2 --prompt "Reply only OK"
```
Afficher le catalogue de modèles actuellement chargé par OpenClaw :
```powershell theme={null}
openclaw infer model list --json
```
## Démarrage
```shellscript theme={null}
openclaw gateway
```
## Test
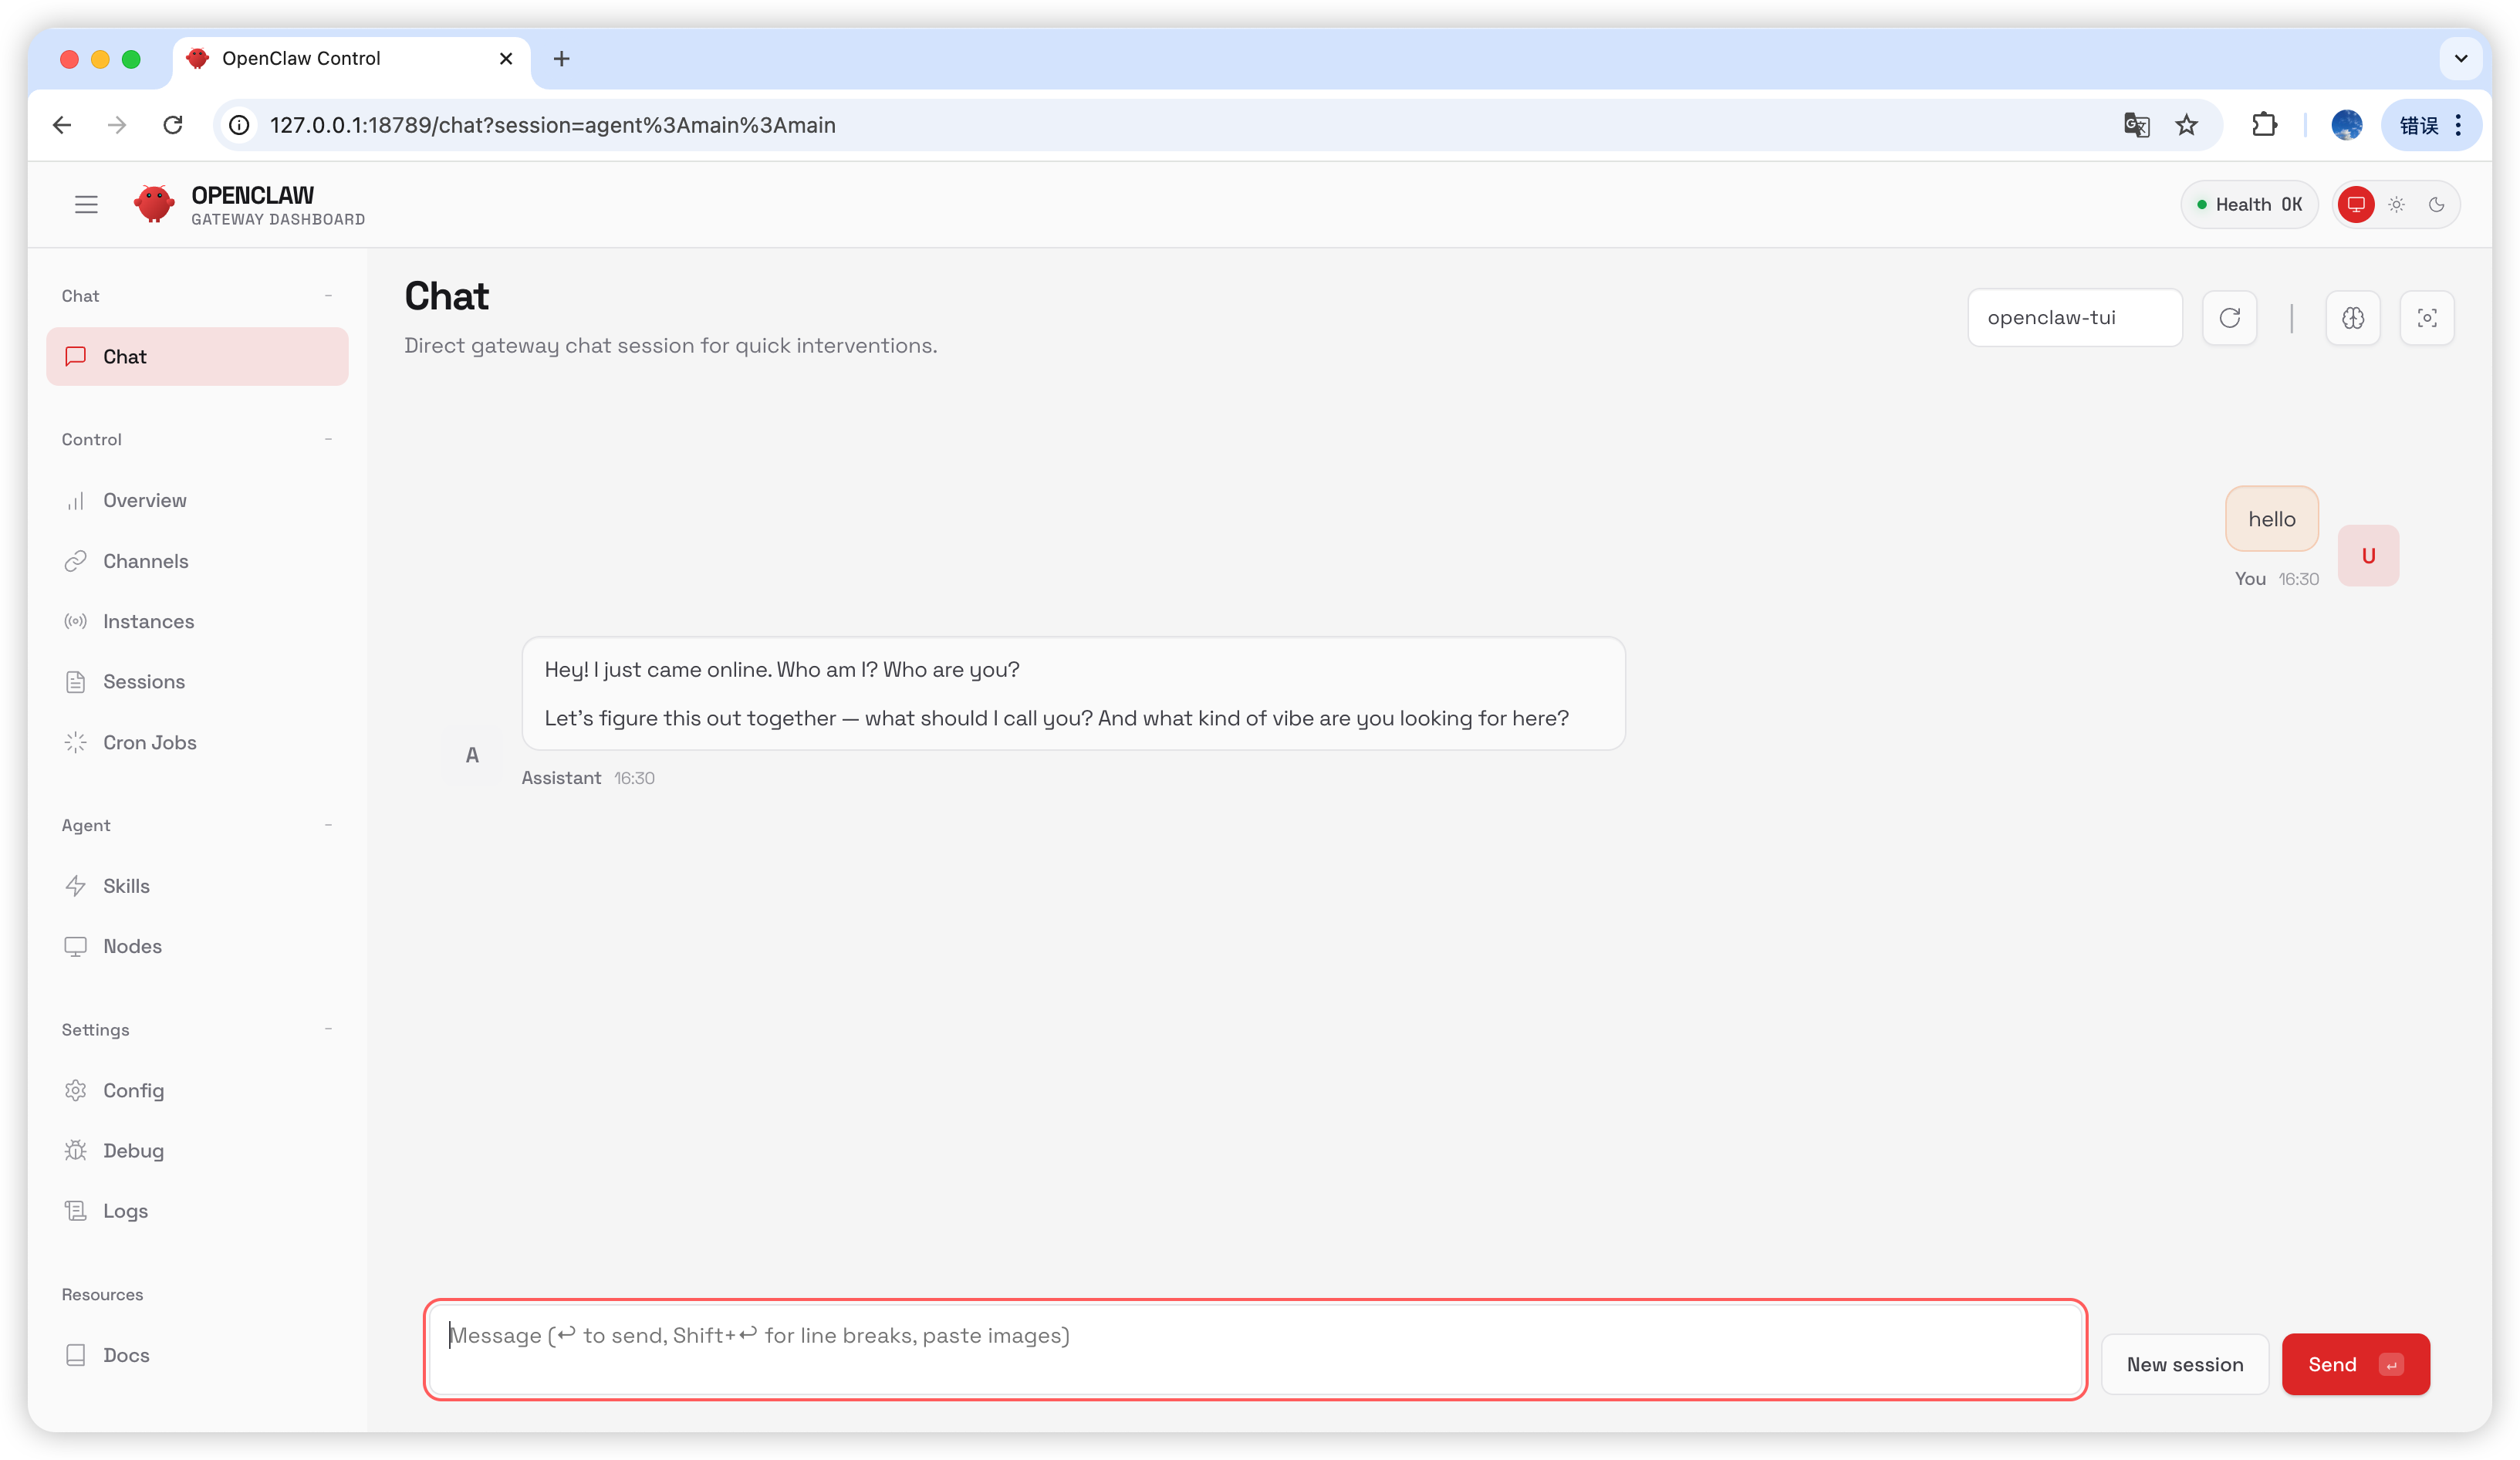
Tapez `hello` sur la page de chat ; si vous recevez une réponse, la configuration est réussie.
Sélectionnez `Hatch in UI`.
## Configurer AIHubMix
### Méthode 1 : configuration rapide via plugin (recommandée)
Code source du plugin : [aihubmix-auth](https://github.com/akakenle/aihubmix-auth)
Installez le plugin d'authentification AIHubMix et redémarrez la Gateway :
```shellscript theme={null}
openclaw plugins install @akakenle/aihubmix-auth
openclaw gateway restart
```
Exécutez la commande d'authentification. Saisissez votre clé API AIHubMix lorsque vous y êtes invité. Vous n'avez besoin d'exécuter la commande ci-dessous qu'une seule fois pour l'un des quatre providers — le plugin utilise `providerAuthAliases` pour rendre la même clé valide pour tous les transports :
```shellscript theme={null}
openclaw models auth login --provider aihubmix-openai --method api-key --set-default
```
Le plugin organise les modèles dans les groupes suivants :
* **aihubmix-openai** — `gpt-*` / `o1-*` / `o3-*` / `o4-*`, `https://aihubmix.com/v1` (`openai-completions`)
* **aihubmix-anthropic** — `claude-*`, `https://aihubmix.com` (`anthropic-messages`)
* **aihubmix-google** — `gemini-*`, `https://aihubmix.com/gemini/v1beta` (`google-generative-ai`)
* **aihubmix-other** — autres modèles, `https://aihubmix.com/v1` (`openai-completions`)
Les identifiants de modèle courts (p. ex. `claude-sonnet-4-5`) sont automatiquement routés vers le bon transport par le hook `resolveDynamicModel` du plugin — pas besoin d'écrire le format complet `provider/model`.
> Vous préférez éviter la connexion interactive ? Définissez `export AIHUBMIX_API_KEY=sk-...` avant l'installation — le plugin écrira la clé en tant que `apiKey` inline dans la configuration du provider (la connexion interactive la stocke plutôt dans le auth-profile).
Une fois configuré, passez à la section [Démarrage](#démarrage) pour commencer à l'utiliser.
### Méthode 2 : configuration manuelle
Ouvrez le fichier `~/.openclaw/openclaw.json` et ajoutez la configuration suivante :
```json theme={null}
{
"models": {
"mode": "merge",
"providers": {
"aihubmix-openai": {
"baseUrl": "https://aihubmix.com/v1",
"api": "openai-completions",
"models": [
{
"id": "gpt-4o",
"name": "gpt-4o",
"reasoning": false,
"input": ["text"],
"cost": {
"input": 0,
"output": 0,
"cacheRead": 0,
"cacheWrite": 0
},
"contextWindow": 128000,
"maxTokens": 16384
}
]
},
"aihubmix-anthropic": {
"baseUrl": "https://aihubmix.com",
"api": "anthropic-messages",
"models": [
{
"id": "claude-sonnet-4-5",
"name": "claude-sonnet-4-5",
"reasoning": false,
"input": ["text"],
"cost": {
"input": 0,
"output": 0,
"cacheRead": 0,
"cacheWrite": 0
},
"contextWindow": 200000,
"maxTokens": 64000
}
]
},
"aihubmix-google": {
"baseUrl": "https://aihubmix.com/gemini/v1beta",
"api": "google-generative-ai",
"models": []
},
"aihubmix-other": {
"baseUrl": "https://aihubmix.com/v1",
"api": "openai-completions",
"models": []
}
}
},
"agents": {
"defaults": {
"model": {
"primary": "aihubmix-anthropic/claude-sonnet-4-5"
},
"workspace": "your_workspace_path",
"compaction": {
"mode": "safeguard"
},
"maxConcurrent": 4,
"subagents": {
"maxConcurrent": 8
}
}
}
}
```
### Méthode 3 : changer le modèle par défaut avec les commandes de modèle dynamiques
Le plugin AIHubMix pour OpenClaw prend en charge le routage dynamique des modèles. Dès qu'un modèle est disponible dans votre compte AIHubMix, vous pouvez l'appeler au format `provider/model-id`. La disponibilité réelle dépend de la console AIHubMix et de la réponse de l'API.
Règles courantes pour choisir le provider :
* `aihubmix-openai` : modèles compatibles OpenAI, par exemple `gpt-*`, `o1-*`, `o3-*` et `o4-*`
* `aihubmix-anthropic` : modèles Claude, par exemple `claude-*`
* `aihubmix-google` : modèles Gemini, par exemple `gemini-*`
* `aihubmix-other` : autres modèles appelés via un endpoint compatible OpenAI, par exemple `glm-5.2`
Exemple : définir `gpt-5.4` comme modèle par défaut d'OpenClaw :
```powershell theme={null}
openclaw models set aihubmix-openai/gpt-5.4
```
Si Windows ne trouve pas `openclaw`, utilisez la forme avec le chemin local :
```powershell theme={null}
& "votre-chemin-installation\OpenClaw\openclaw.cmd" models set aihubmix-openai/gpt-5.4
```
Vérifier le modèle par défaut actuel et l'état d'authentification :
```powershell theme={null}
openclaw models status
```
Lancer un véritable appel de vérification :
```powershell theme={null}
openclaw infer model run --local --json --model aihubmix-openai/gpt-5.4 --prompt "Reply only OK"
```
Pour appeler un modèle en dehors des groupes OpenAI / Claude / Gemini, utilisez `aihubmix-other`, par exemple :
```powershell theme={null}
openclaw infer model run --local --json --model aihubmix-other/glm-5.2 --prompt "Reply only OK"
```
Afficher le catalogue de modèles actuellement chargé par OpenClaw :
```powershell theme={null}
openclaw infer model list --json
```
## Démarrage
```shellscript theme={null}
openclaw gateway
```
## Test
Tapez `hello` sur la page de chat ; si vous recevez une réponse, la configuration est réussie.
 ## Questions fréquentes
### Mise à jour de version
```shellscript theme={null}
openclaw plugins update @akakenle/aihubmix-auth
openclaw gateway restart
```
### Processus Gateway occupé
```shellscript theme={null}
openclaw gateway stop
openclaw gateway
```
***
Dernière mise à jour : 2026-07-03
## Questions fréquentes
### Mise à jour de version
```shellscript theme={null}
openclaw plugins update @akakenle/aihubmix-auth
openclaw gateway restart
```
### Processus Gateway occupé
```shellscript theme={null}
openclaw gateway stop
openclaw gateway
```
***
Dernière mise à jour : 2026-07-03