> ## Documentation Index
> Fetch the complete documentation index at: https://docs.aihubmix.com/llms.txt
> Use this file to discover all available pages before exploring further.
# Chatbox
> Configure AIHubMix's OpenAI-compatible API in Chatbox, then add and use AIHubMix models.
Chatbox is an open-source desktop AI client. Configure AIHubMix through its OpenAI provider to use models supported by AIHubMix.
Download: [Chatbox GitHub Releases](https://github.com/Bin-Huang/chatbox/releases)
## Before you start
* Install and open Chatbox. This guide uses Chatbox `1.21.1`.
* Create an API key in the [AIHubMix Console](https://aihubmix.com/token). It usually starts with `sk-***`.
* Copy the model ID you want to use from the AIHubMix model list, for example `gpt-5.6-terra`.
## Configure AIHubMix in the interface
### 1. Open Model Provider settings
Click **Settings** in the lower-left corner of Chatbox, then select **Model Provider**.
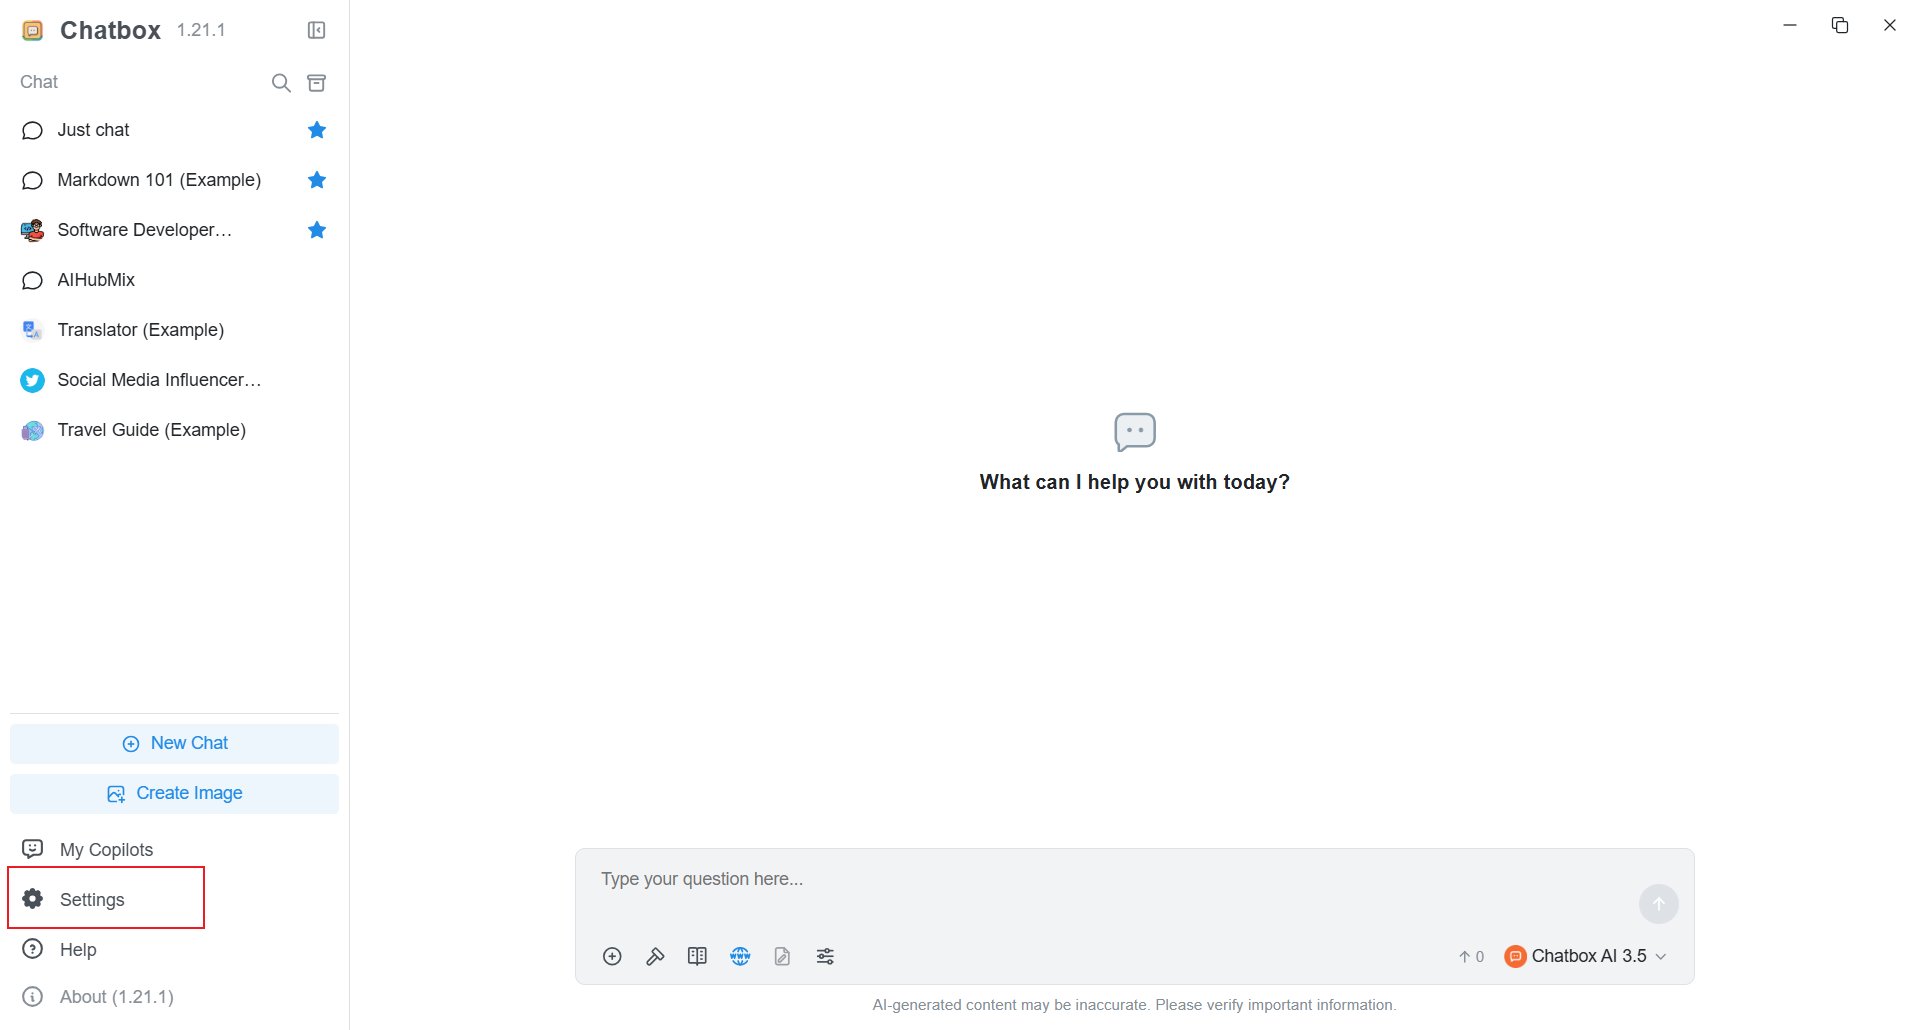 Choose **OpenAI** in the middle column.
### 2. Enter the API Key and API Host
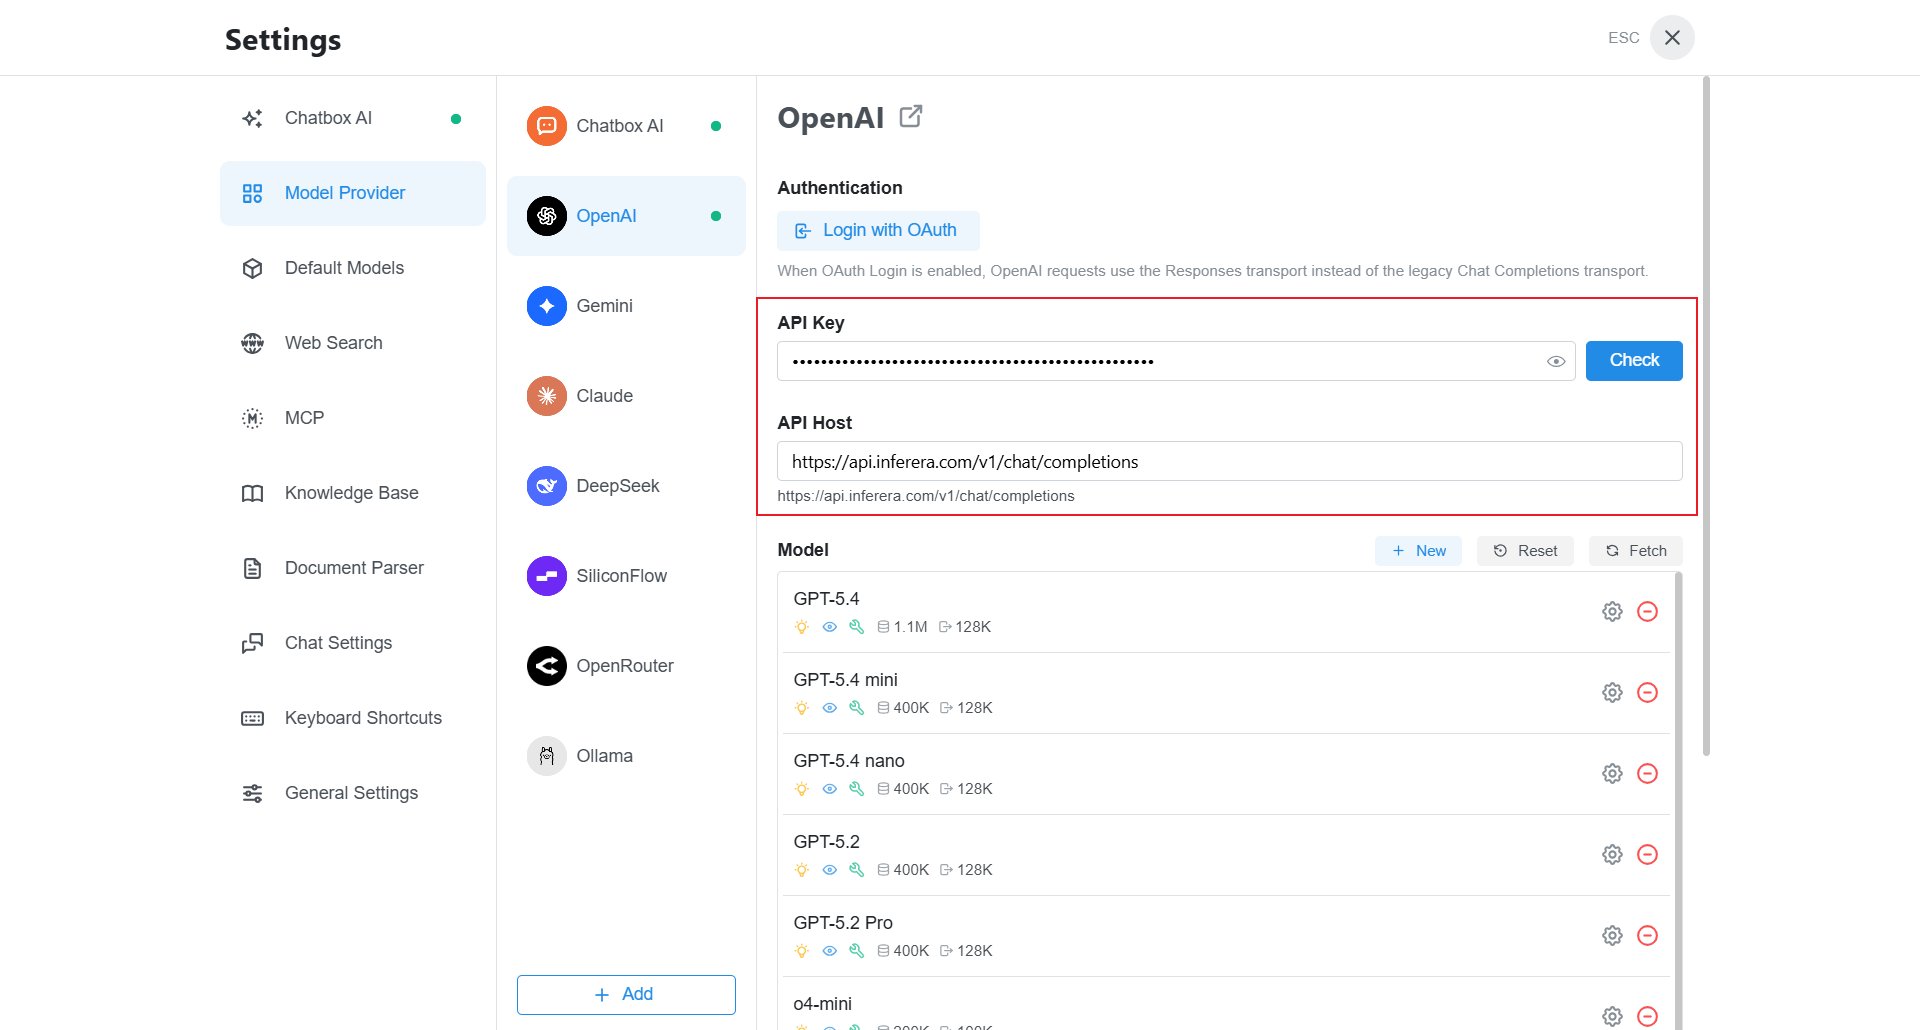
Enter the API key created in the AIHubMix Console. Set **API Host** to the full Chat Completions URL:
```text theme={null}
https://aihubmix.com/v1/chat/completions
```
If the primary address is temporarily unavailable, use:
```text theme={null}
https://api.inferera.com/v1/chat/completions
```
Click **Check** to test connectivity.
Choose **OpenAI** in the middle column.
### 2. Enter the API Key and API Host
Enter the API key created in the AIHubMix Console. Set **API Host** to the full Chat Completions URL:
```text theme={null}
https://aihubmix.com/v1/chat/completions
```
If the primary address is temporarily unavailable, use:
```text theme={null}
https://api.inferera.com/v1/chat/completions
```
Click **Check** to test connectivity.
 ### 3. Add a model
Click **New** in the **Model** section. Existing models are listed here, and the gear icon opens their settings.
### 3. Add a model
Click **New** in the **Model** section. Existing models are listed here, and the gear icon opens their settings.
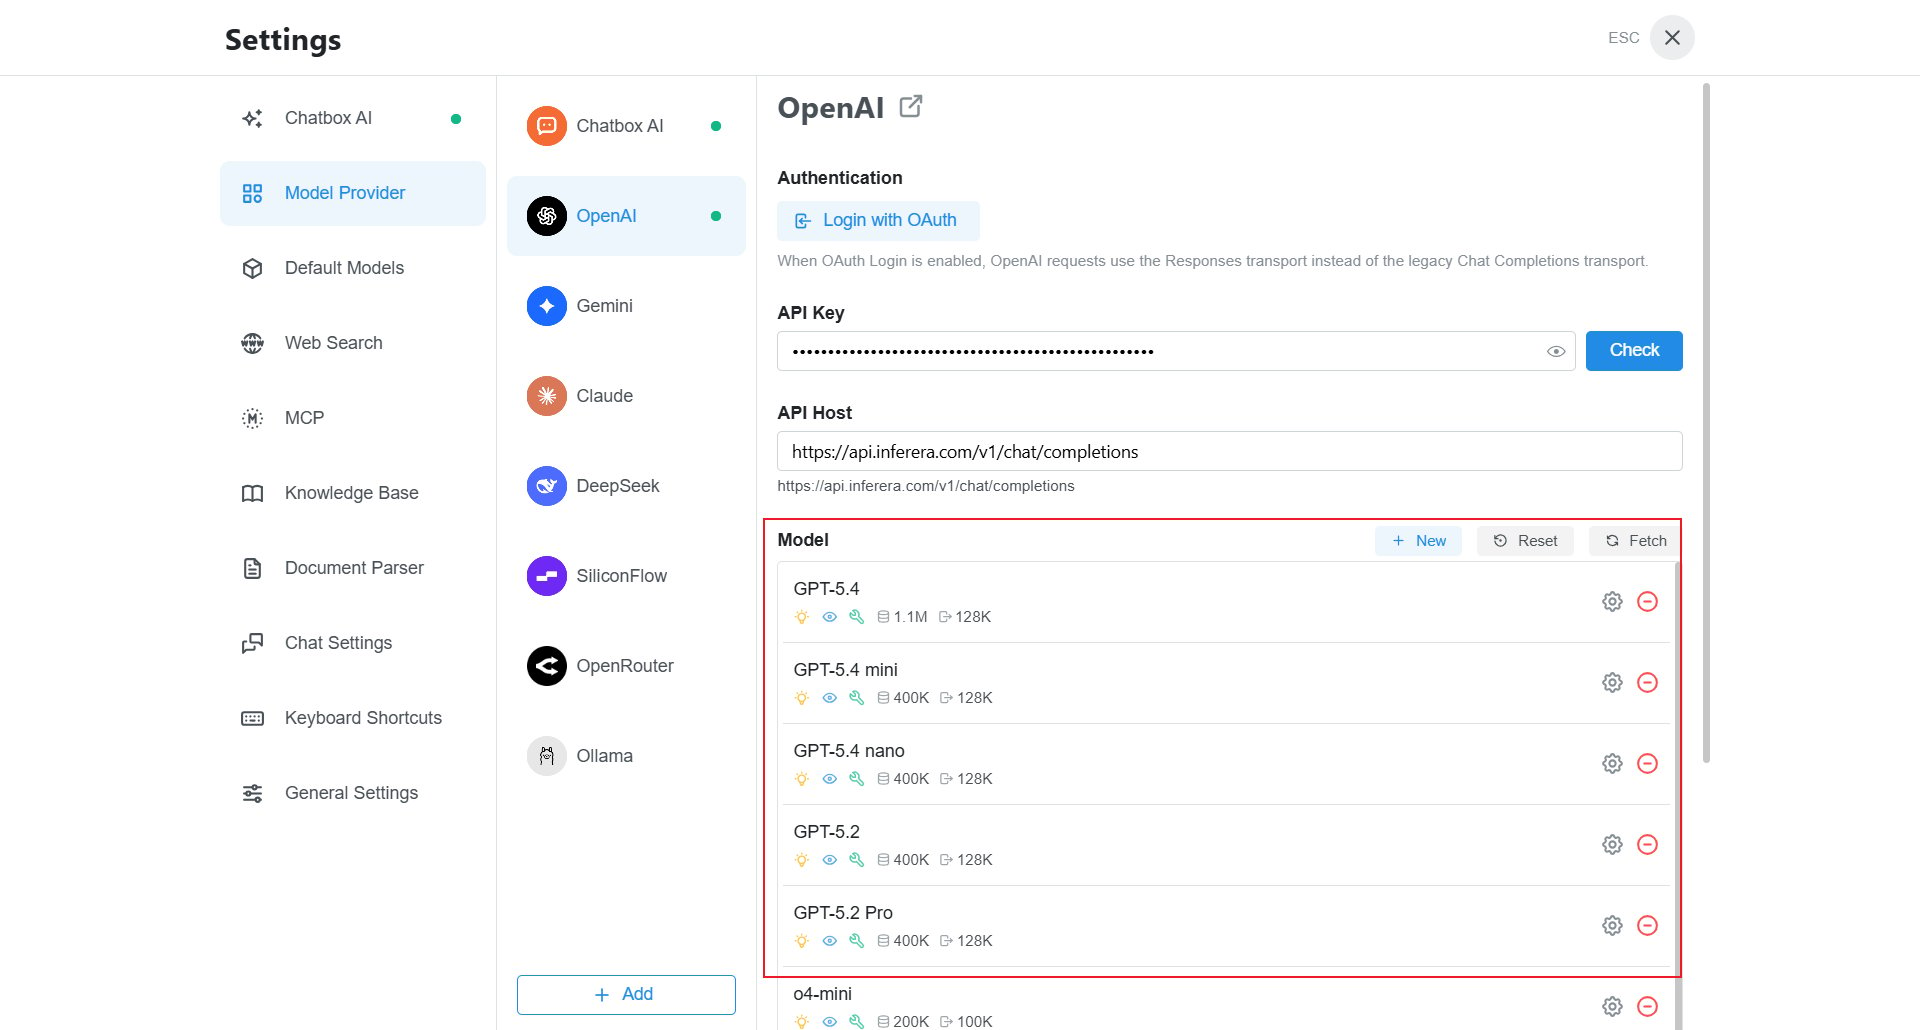 In the dialog, enter the following:
* **Model ID**: an AIHubMix model ID, such as `gpt-5.6-terra`.
* **Nickname**: a recognizable label, such as `gpt-5.6-terra-aihubmix`.
* **Model Type**: select **Chat**.
* **Capabilities**: enable **Vision**, **Tool use**, and **Reasoning** only when the model supports them.
* **Context Window** and **Max Output Tokens**: leave blank to use the default values unless you need custom limits.
Click **Test Model**, then click **Save** after the test succeeds.
In the dialog, enter the following:
* **Model ID**: an AIHubMix model ID, such as `gpt-5.6-terra`.
* **Nickname**: a recognizable label, such as `gpt-5.6-terra-aihubmix`.
* **Model Type**: select **Chat**.
* **Capabilities**: enable **Vision**, **Tool use**, and **Reasoning** only when the model supports them.
* **Context Window** and **Max Output Tokens**: leave blank to use the default values unless you need custom limits.
Click **Test Model**, then click **Save** after the test succeeds.
 ### 4. Select the model and chat
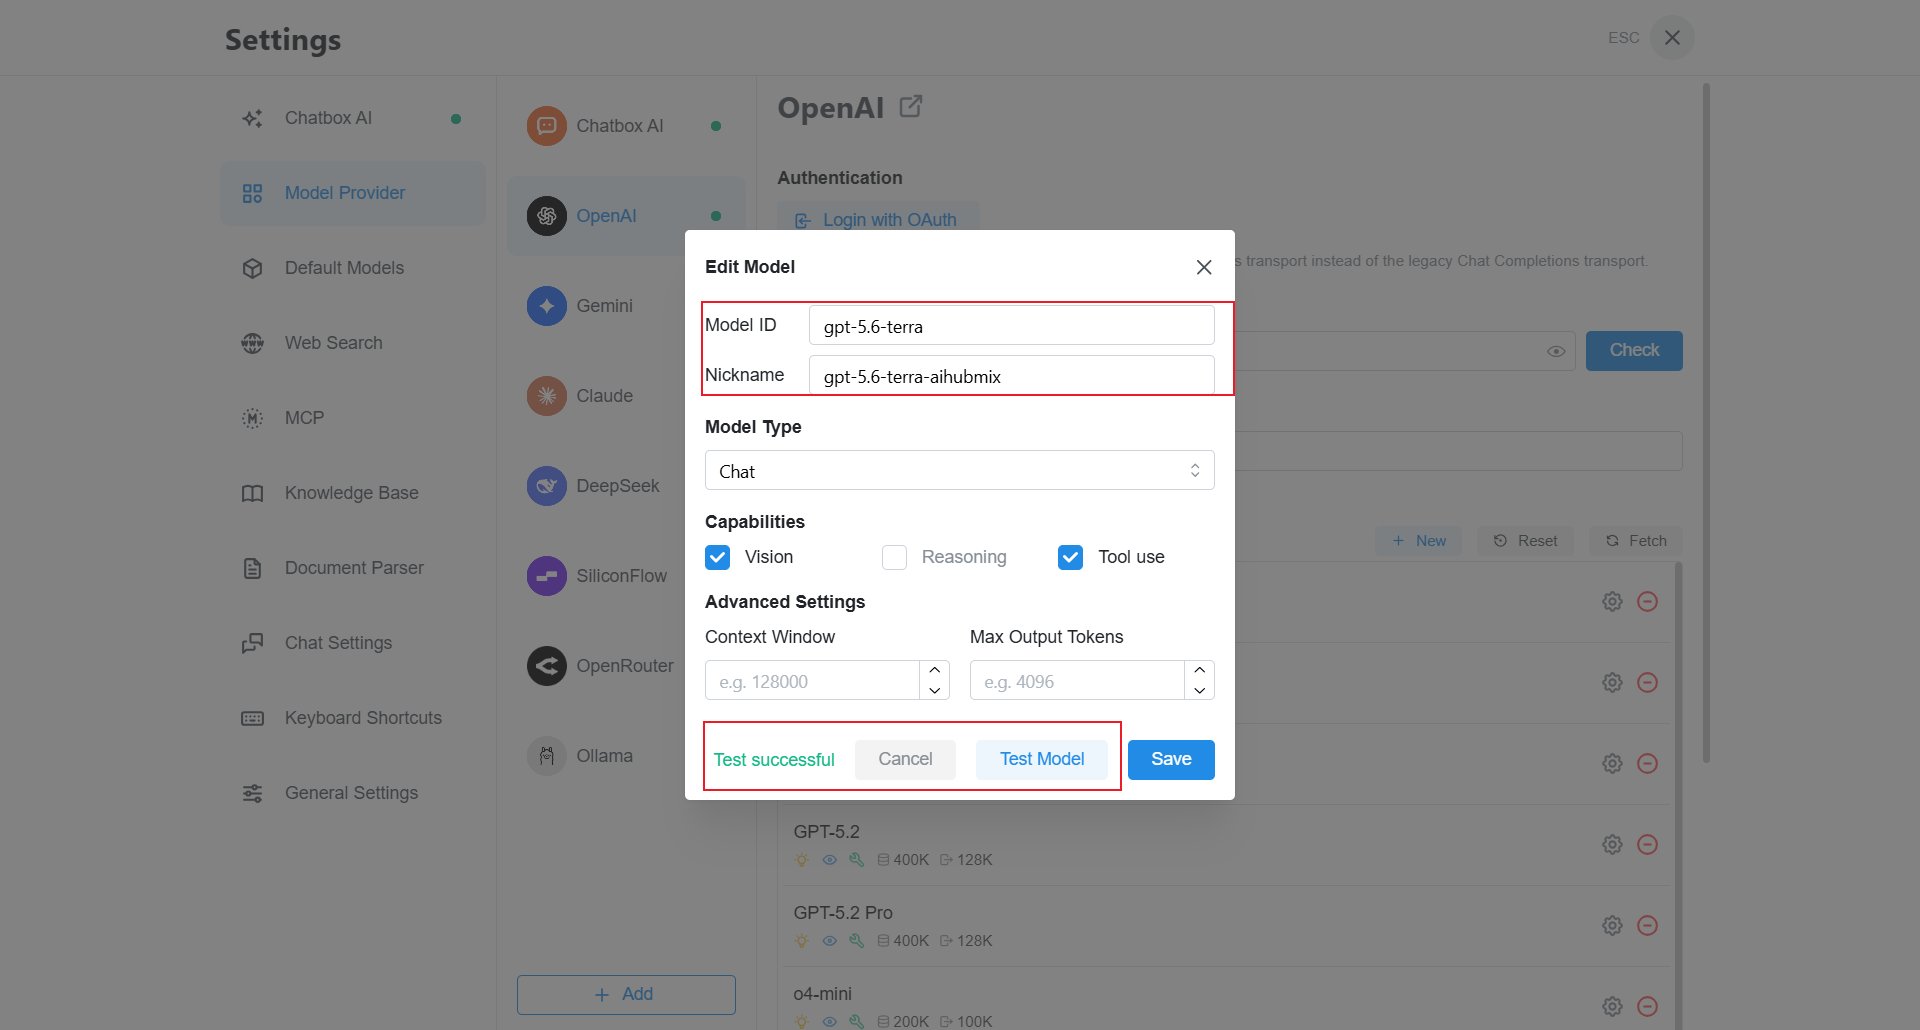
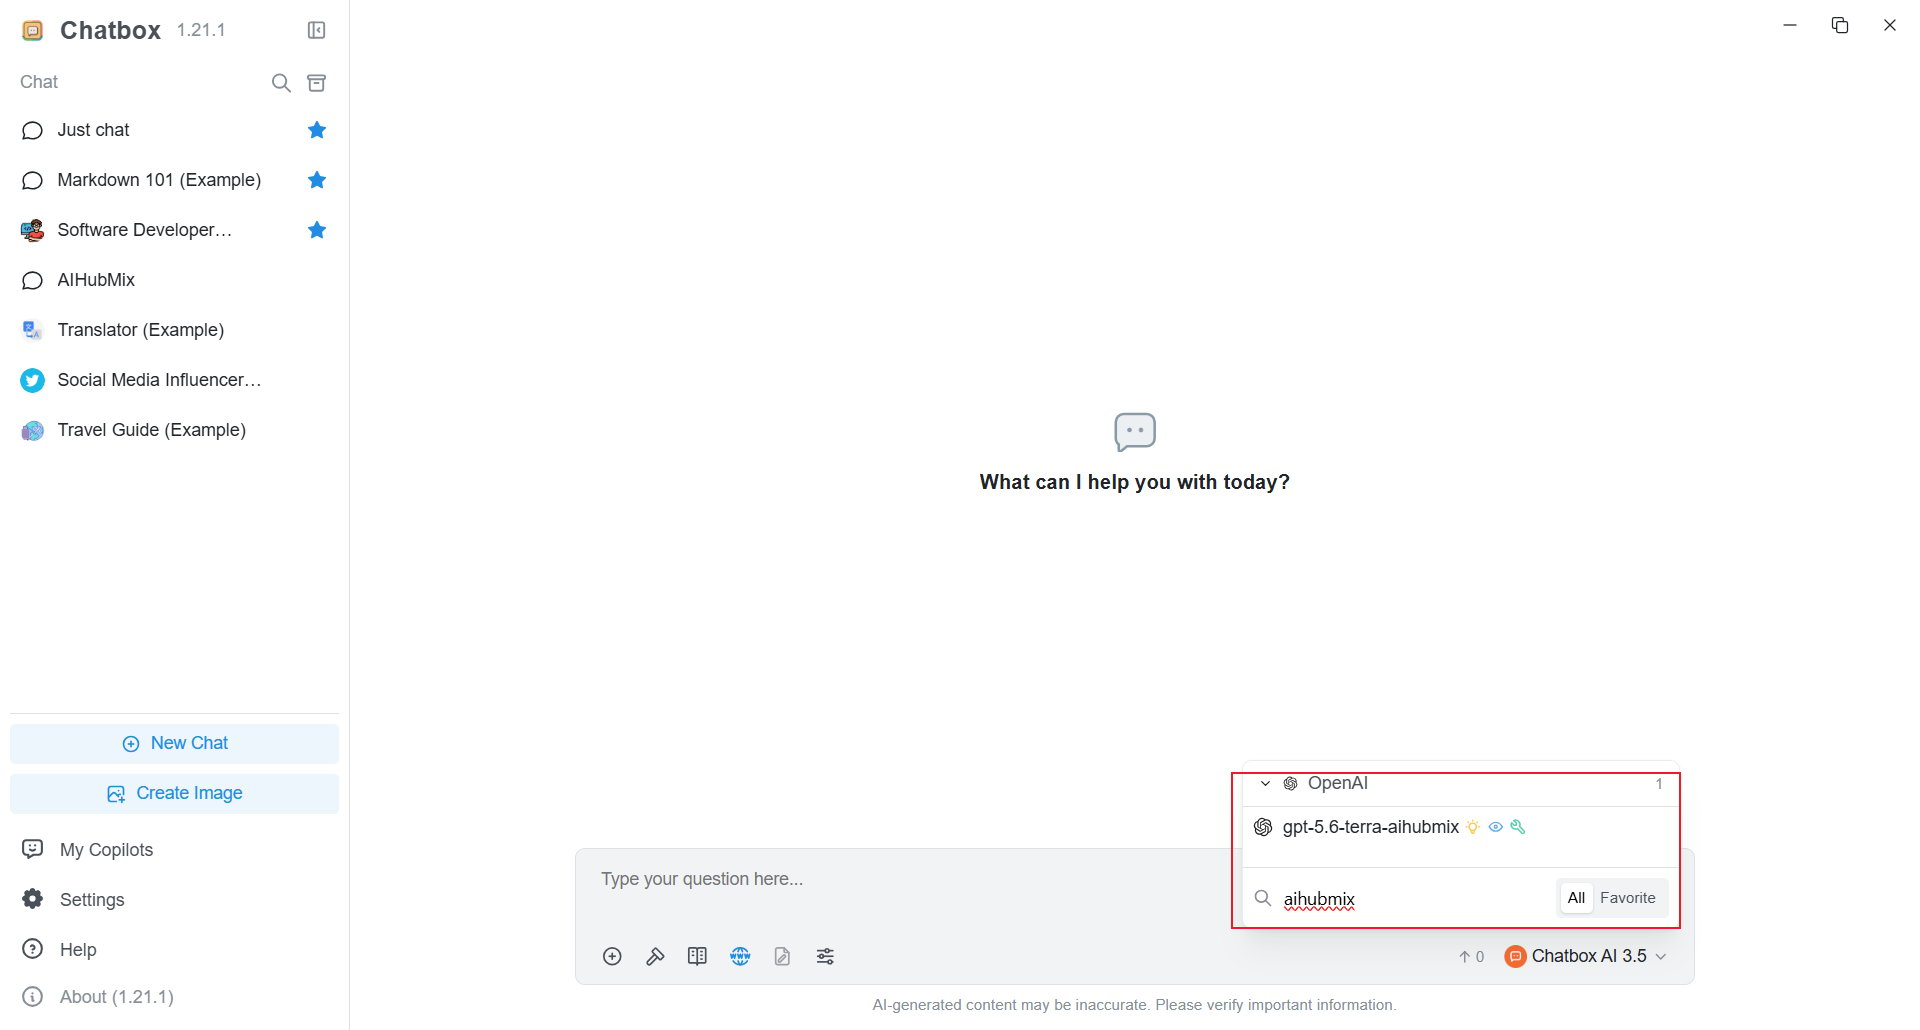
Return to the main page and click the model name in the lower-right corner of the input box. Search for and select the nickname you added.
### 4. Select the model and chat
Return to the main page and click the model name in the lower-right corner of the input box. Search for and select the nickname you added.
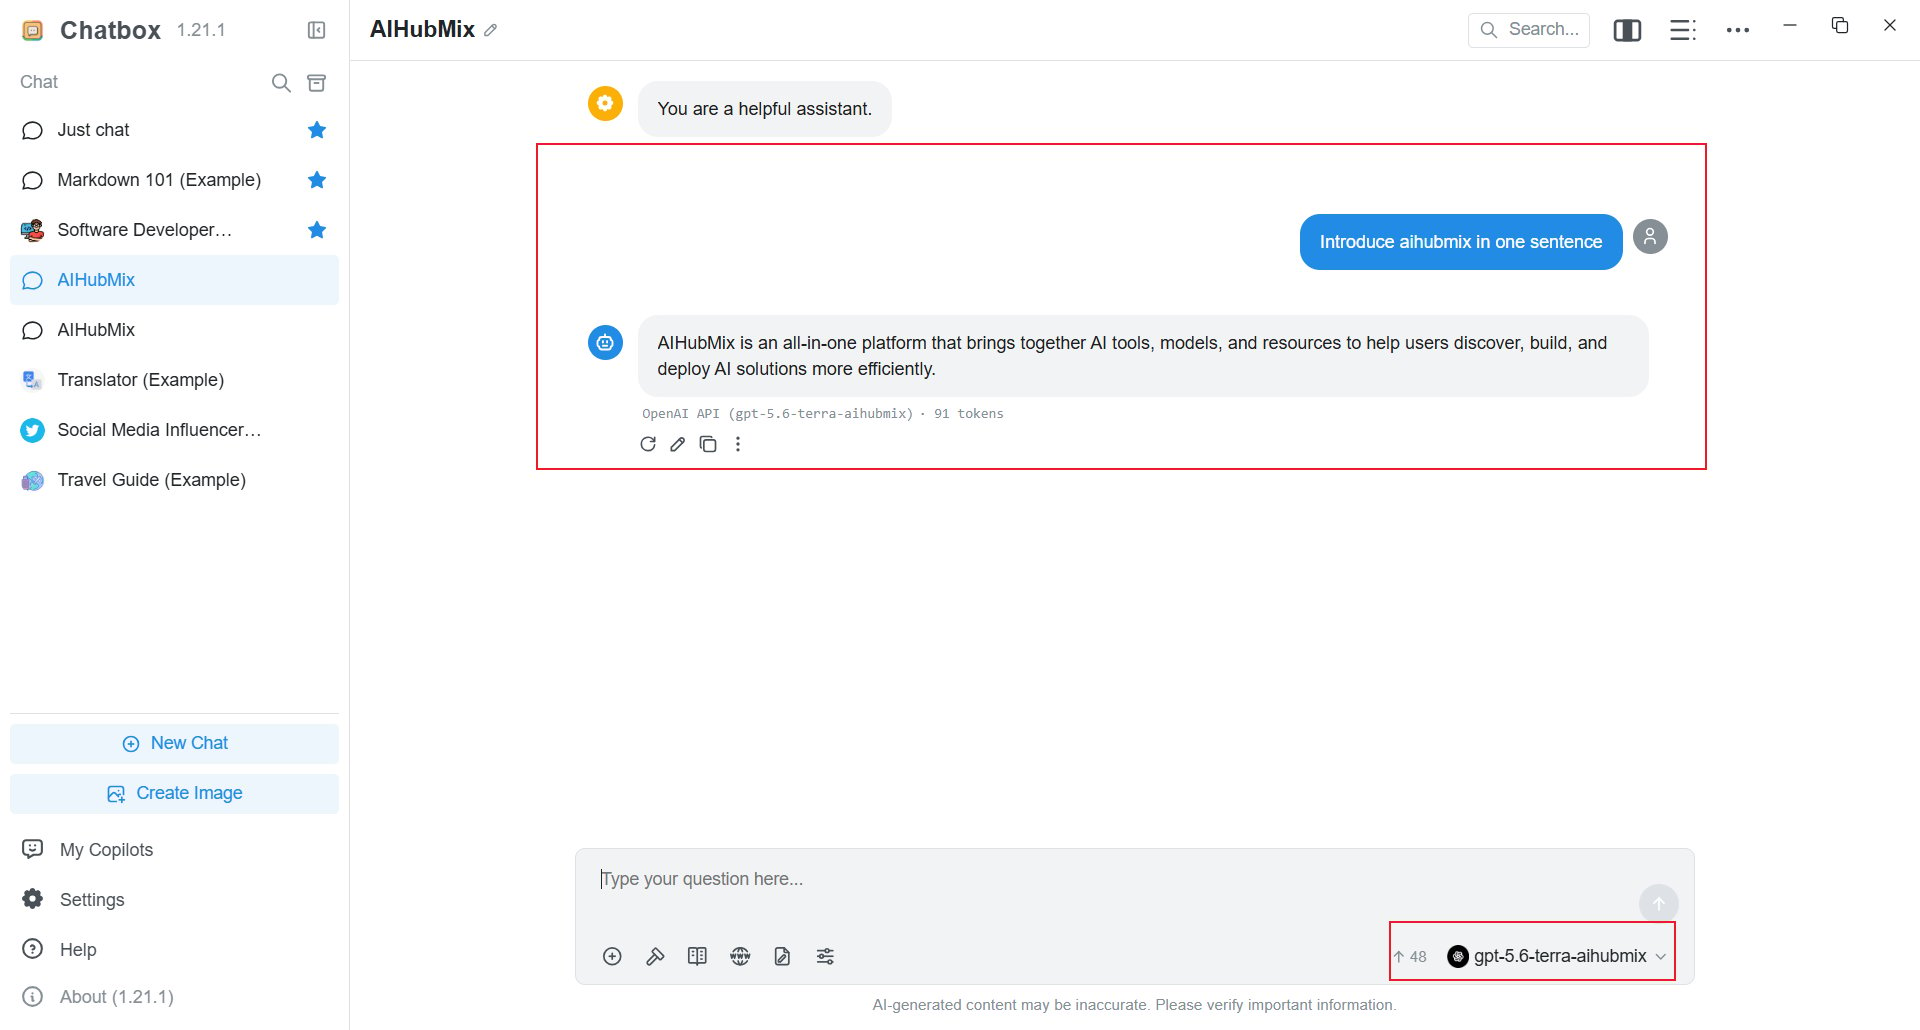
 Send a short message. A successful reply confirms that the configuration works.
 ## Import a model configuration
Chatbox `1.15.1` and later supports importing JSON model-provider configurations. To add a preset model in one step, copy the following OpenAI-compatible configuration and import it in Chatbox:
```json theme={null}
{
"id": "aihubmix",
"name": "AIHubMix",
"type": "openai",
"iconUrl": "https://assets.aihubmix.com/docs/favicon.svg",
"urls": {
"website": "https://aihubmix.com/",
"getApiKey": "https://aihubmix.com/token",
"docs": "https://docs.aihubmix.com/",
"models": "https://aihubmix.com/models"
},
"settings": {
"apiHost": "https://aihubmix.com/",
"apiPath": "/v1/chat/completions",
"models": [
{
"modelId": "gpt-5.6-terra",
"nickname": "gpt-5.6-terra-aihubmix",
"type": "chat",
"capabilities": ["vision", "reasoning", "tool_use"],
"contextWindow": 1050000,
"maxOutput": 128000
}
]
}
}
```
After importing, enter your own API key in Chatbox. To add more models, use the interface configuration above so each model's capabilities can be selected individually.
## FAQ
**What should I enter for API Host?**
Chatbox's OpenAI provider requires the full URL `https://aihubmix.com/v1/chat/completions`, not only the domain or `/v1`.
**What should I check when the model test fails?**
Confirm that the API key is complete, API Host is the full Chat Completions URL, and Model ID matches the AIHubMix model list. If needed, use `https://api.inferera.com/v1/chat/completions`.
**Why is the model missing after import?**
Reopen the model picker and search for the model nickname. If it is still missing, add the model through the interface.
Last updated: 2026-07-15
## Import a model configuration
Chatbox `1.15.1` and later supports importing JSON model-provider configurations. To add a preset model in one step, copy the following OpenAI-compatible configuration and import it in Chatbox:
```json theme={null}
{
"id": "aihubmix",
"name": "AIHubMix",
"type": "openai",
"iconUrl": "https://assets.aihubmix.com/docs/favicon.svg",
"urls": {
"website": "https://aihubmix.com/",
"getApiKey": "https://aihubmix.com/token",
"docs": "https://docs.aihubmix.com/",
"models": "https://aihubmix.com/models"
},
"settings": {
"apiHost": "https://aihubmix.com/",
"apiPath": "/v1/chat/completions",
"models": [
{
"modelId": "gpt-5.6-terra",
"nickname": "gpt-5.6-terra-aihubmix",
"type": "chat",
"capabilities": ["vision", "reasoning", "tool_use"],
"contextWindow": 1050000,
"maxOutput": 128000
}
]
}
}
```
After importing, enter your own API key in Chatbox. To add more models, use the interface configuration above so each model's capabilities can be selected individually.
## FAQ
**What should I enter for API Host?**
Chatbox's OpenAI provider requires the full URL `https://aihubmix.com/v1/chat/completions`, not only the domain or `/v1`.
**What should I check when the model test fails?**
Confirm that the API key is complete, API Host is the full Chat Completions URL, and Model ID matches the AIHubMix model list. If needed, use `https://api.inferera.com/v1/chat/completions`.
**Why is the model missing after import?**
Reopen the model picker and search for the model nickname. If it is still missing, add the model through the interface.
Last updated: 2026-07-15