> ## Documentation Index
> Fetch the complete documentation index at: https://docs.aihubmix.com/llms.txt
> Use this file to discover all available pages before exploring further.
# OpenCode
OpenCode now supports major model families such as GPT, Claude, DeepSeek, Gemini, and Qwen. For OpenCode usage scenarios, the following models are recommended:
* `coding-minimax-m2.1-free`
* `coding-glm-4.7-free`
* `claude-sonnet-4-5`
* `gpt-5`
* `gpt-5-codex`
This document explains how to install, configure, and launch OpenCode on different operating systems, and how to integrate the AIHubMix API.
***
Before installation, ensure that your system meets the following requirements:
* **Node.js ≥ 18.0.0**
* Optional package managers for your operating system:
* macOS / Linux: `brew`
* Arch Linux: `paru`
* Windows: `choco`, `winget`, or `scoop`
***
## 1. Installing OpenCode
Choose any of the following installation methods based on your operating system and tooling preferences.
### 1. Install via Node.js
```bash theme={null}
# Quick install using a CURL script
curl -fsSL https://opencode.ai/install | bash
# Using NPM
npm install -g opencode-ai
# Using Bun
bun install -g opencode-ai
# Using PNPM
pnpm install -g opencode-ai
# Using Yarn
yarn global add opencode-ai
```
### 2. Install via Homebrew (macOS / Linux)
```bash theme={null}
brew install sst/tap/opencode
```
### 3. Install via Paru (Arch Linux)
```bash theme={null}
paru -S opencode-bin
```
### 4. Windows Installation
```bash theme={null}
# Chocolatey
choco install opencode
# WinGet
winget install opencode
# Scoop
scoop bucket add extras
scoop install extras/opencode
# Or install via NPM (Node.js required)
# Note: Administrator privileges are required
npm install -g opencode-ai
```
## 2. Launching and Logging in to OpenCode
After installation, follow the steps below to complete authentication and configuration.
### 1. Log in to OpenCode
Run the following command in your terminal:
```bash theme={null}
opencode auth login
```
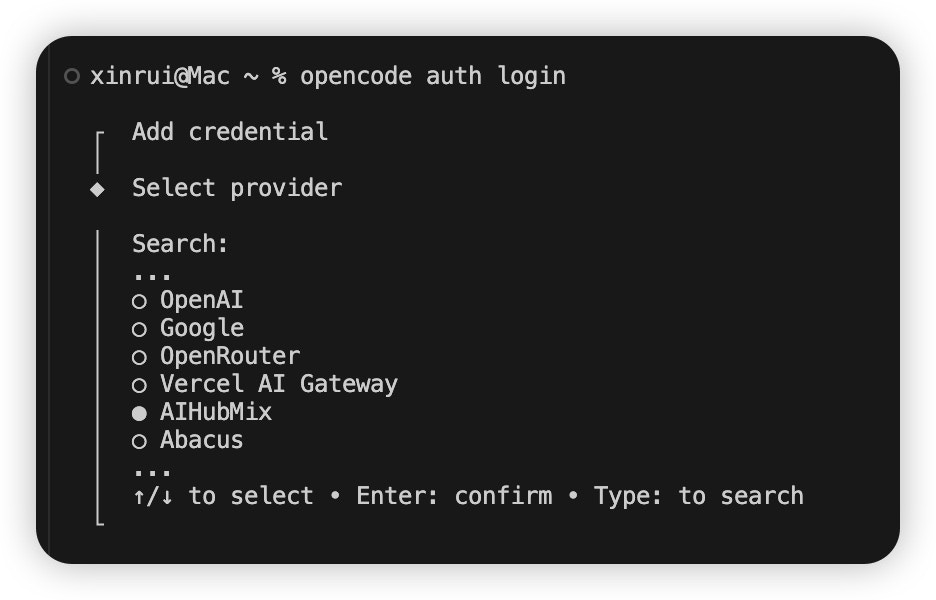
### 2. Select the AI Provider
On the login screen, select **AiHubMix** as the model provider.
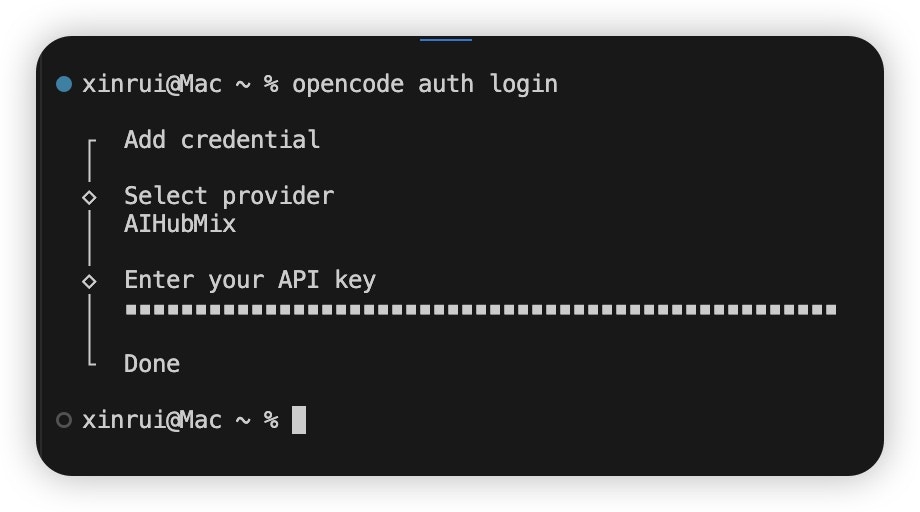
 ### 3. API Key Authorization
Enter your AiHubMix API Key on the OpenCode login page to complete authorization.
### 3. API Key Authorization
Enter your AiHubMix API Key on the OpenCode login page to complete authorization.
 ***
## 3. Using Models
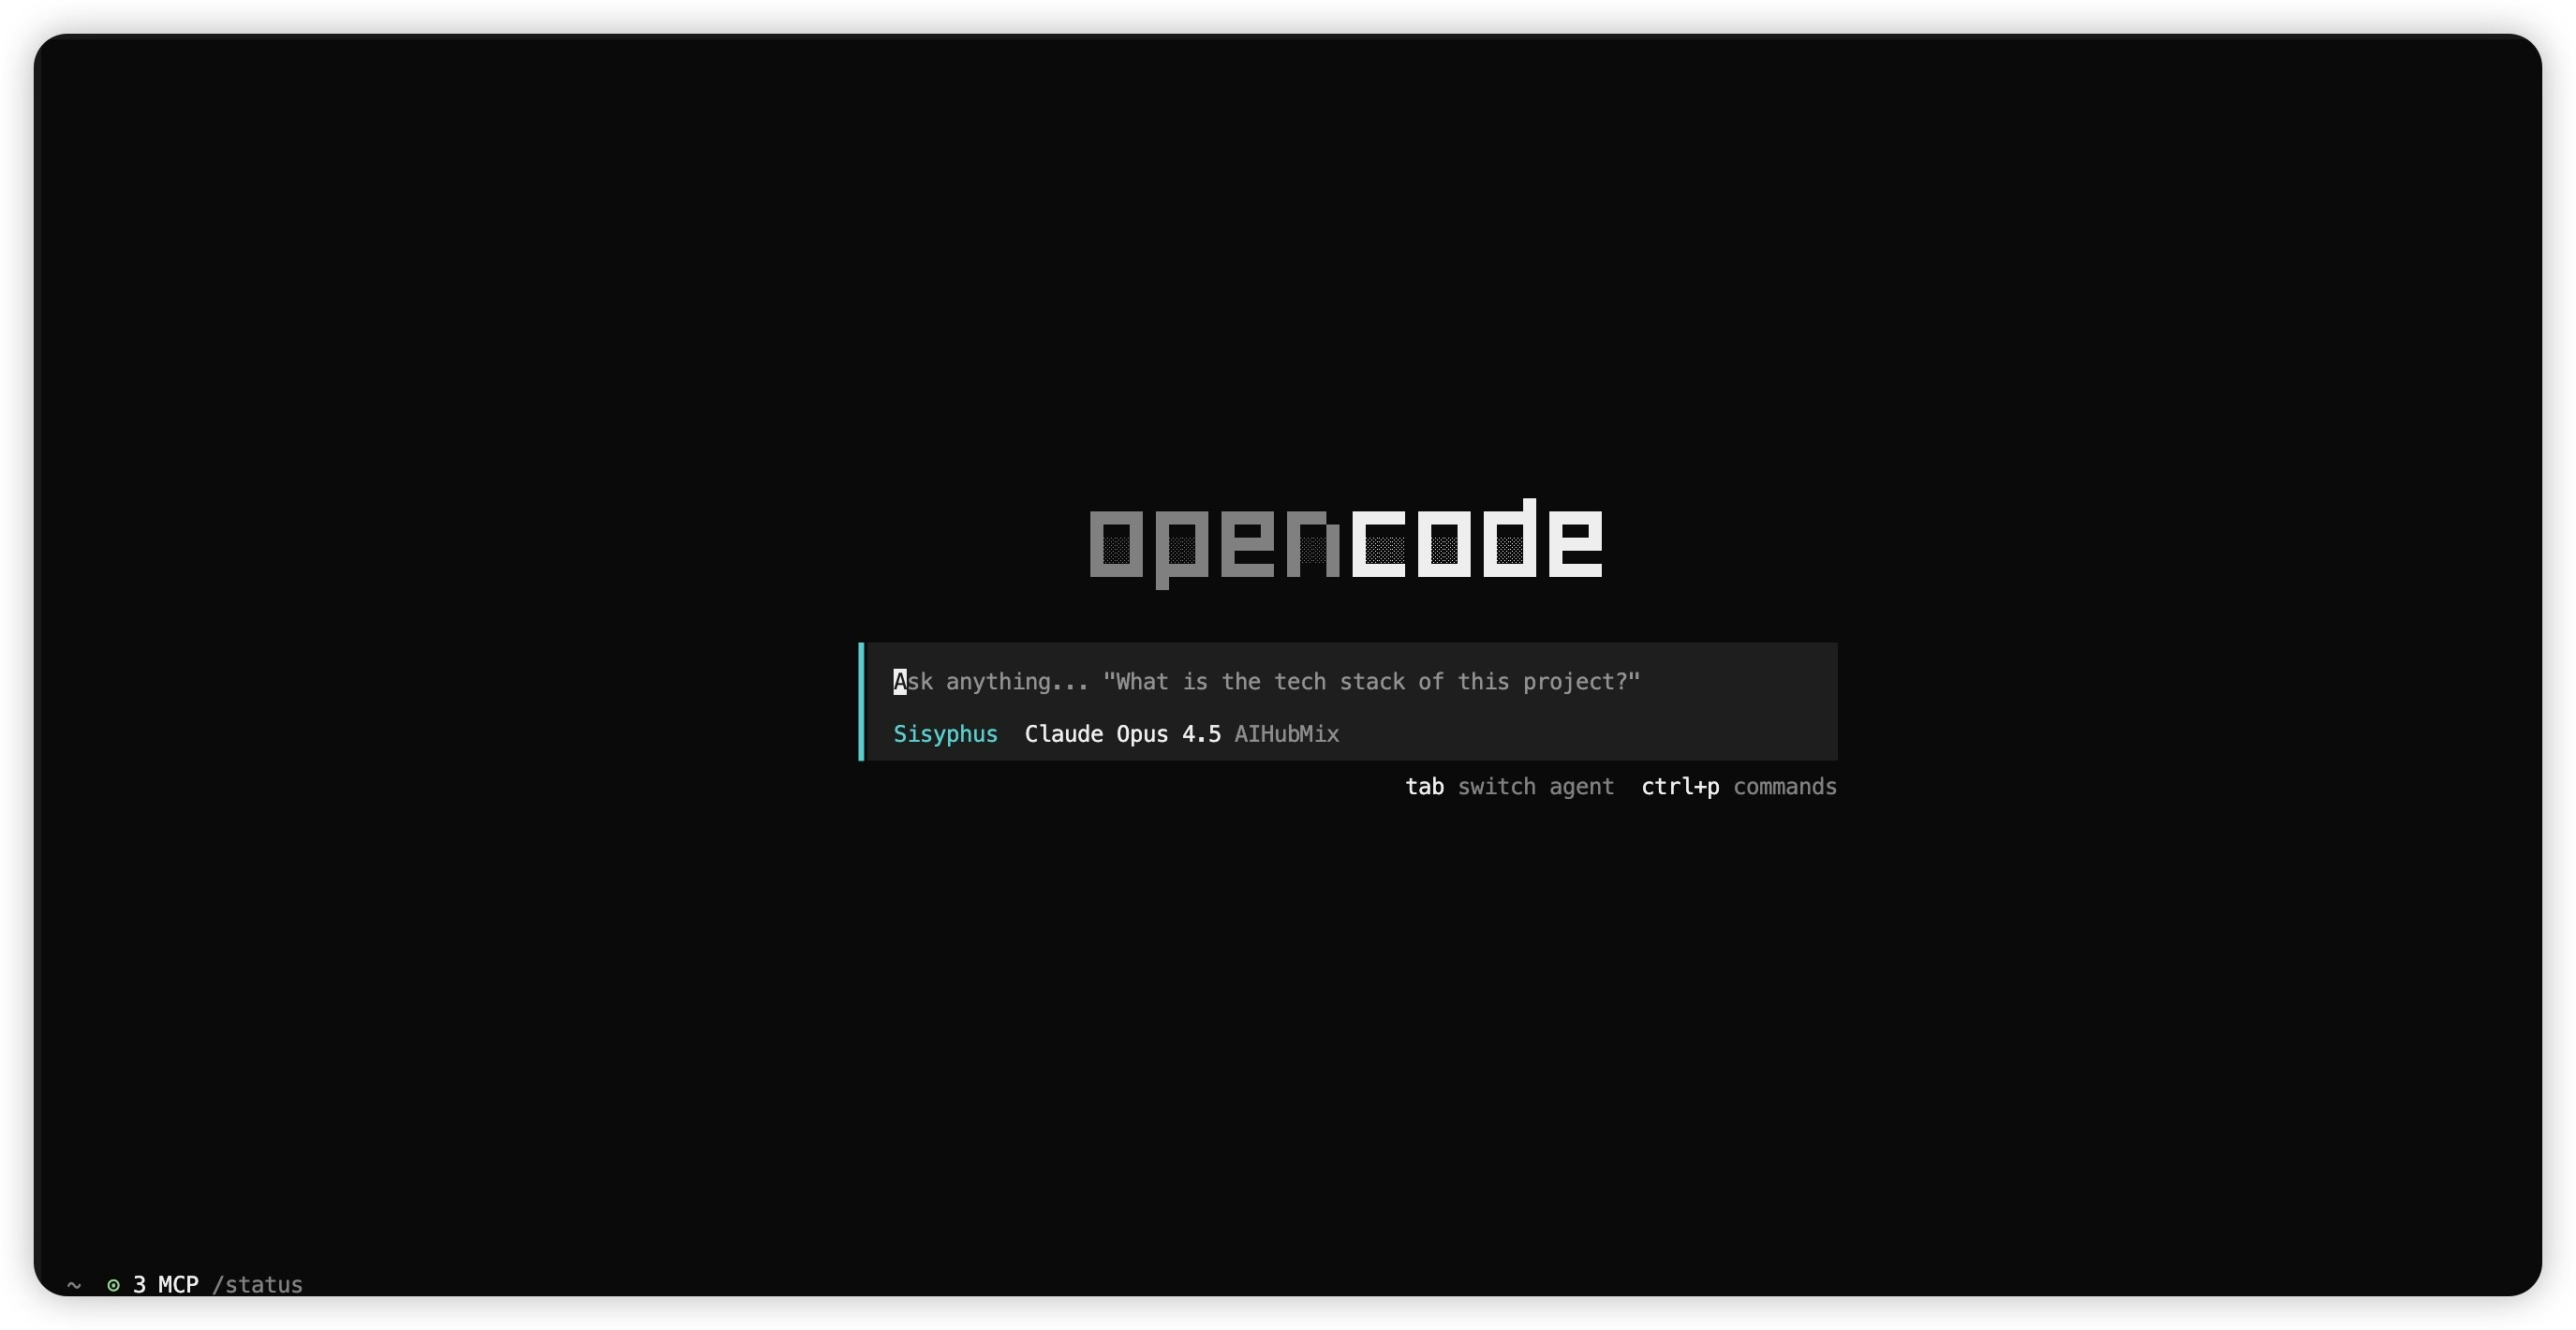
### 1. Installation Verification
Run the following command to verify that OpenCode is installed and configured correctly:
```bash theme={null}
opencode
```
***
## 3. Using Models
### 1. Installation Verification
Run the following command to verify that OpenCode is installed and configured correctly:
```bash theme={null}
opencode
```
 ***
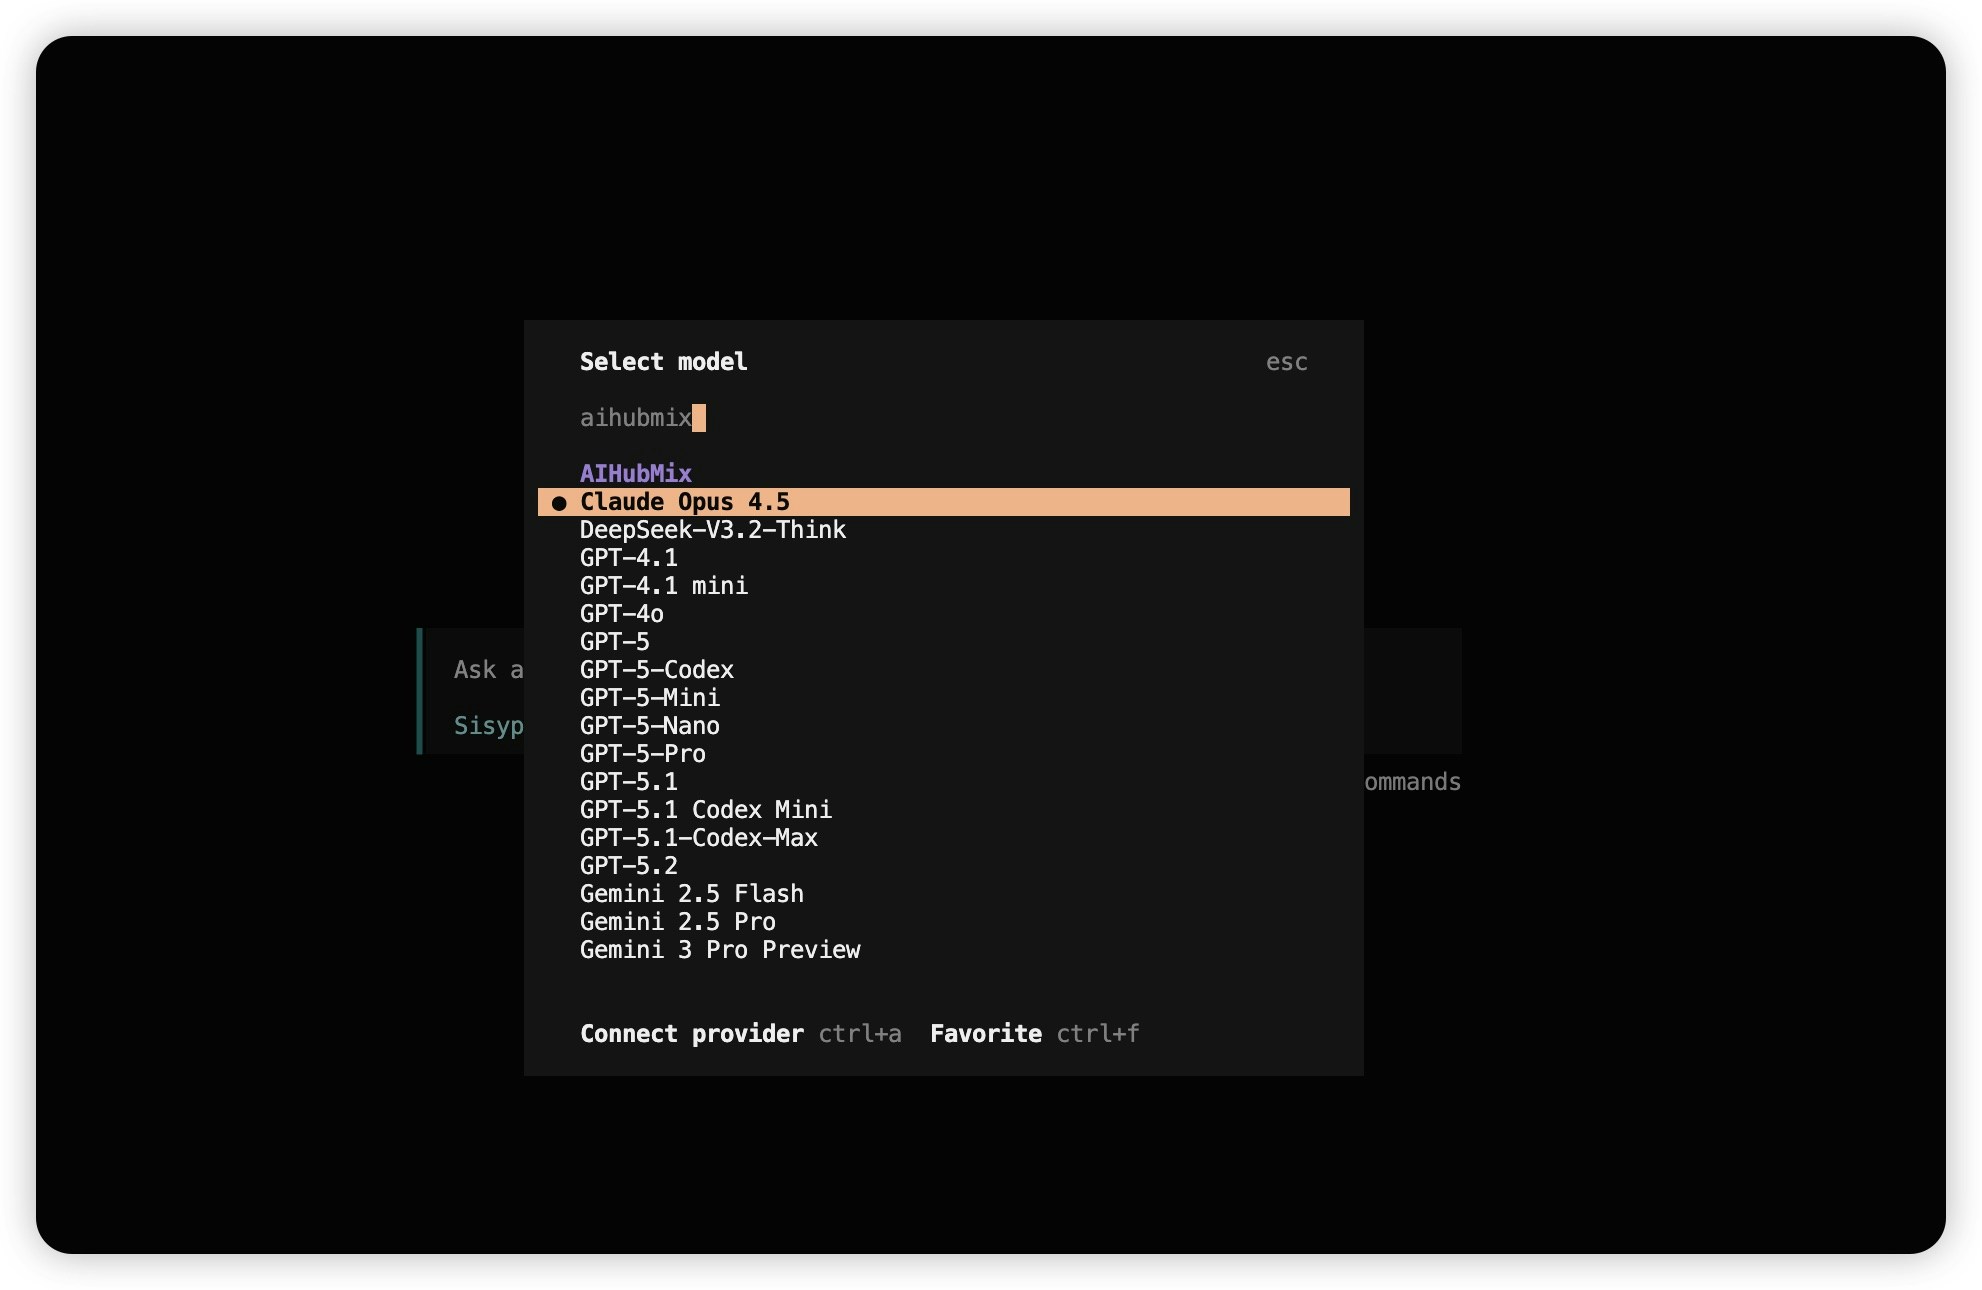
### 2. Select a Model
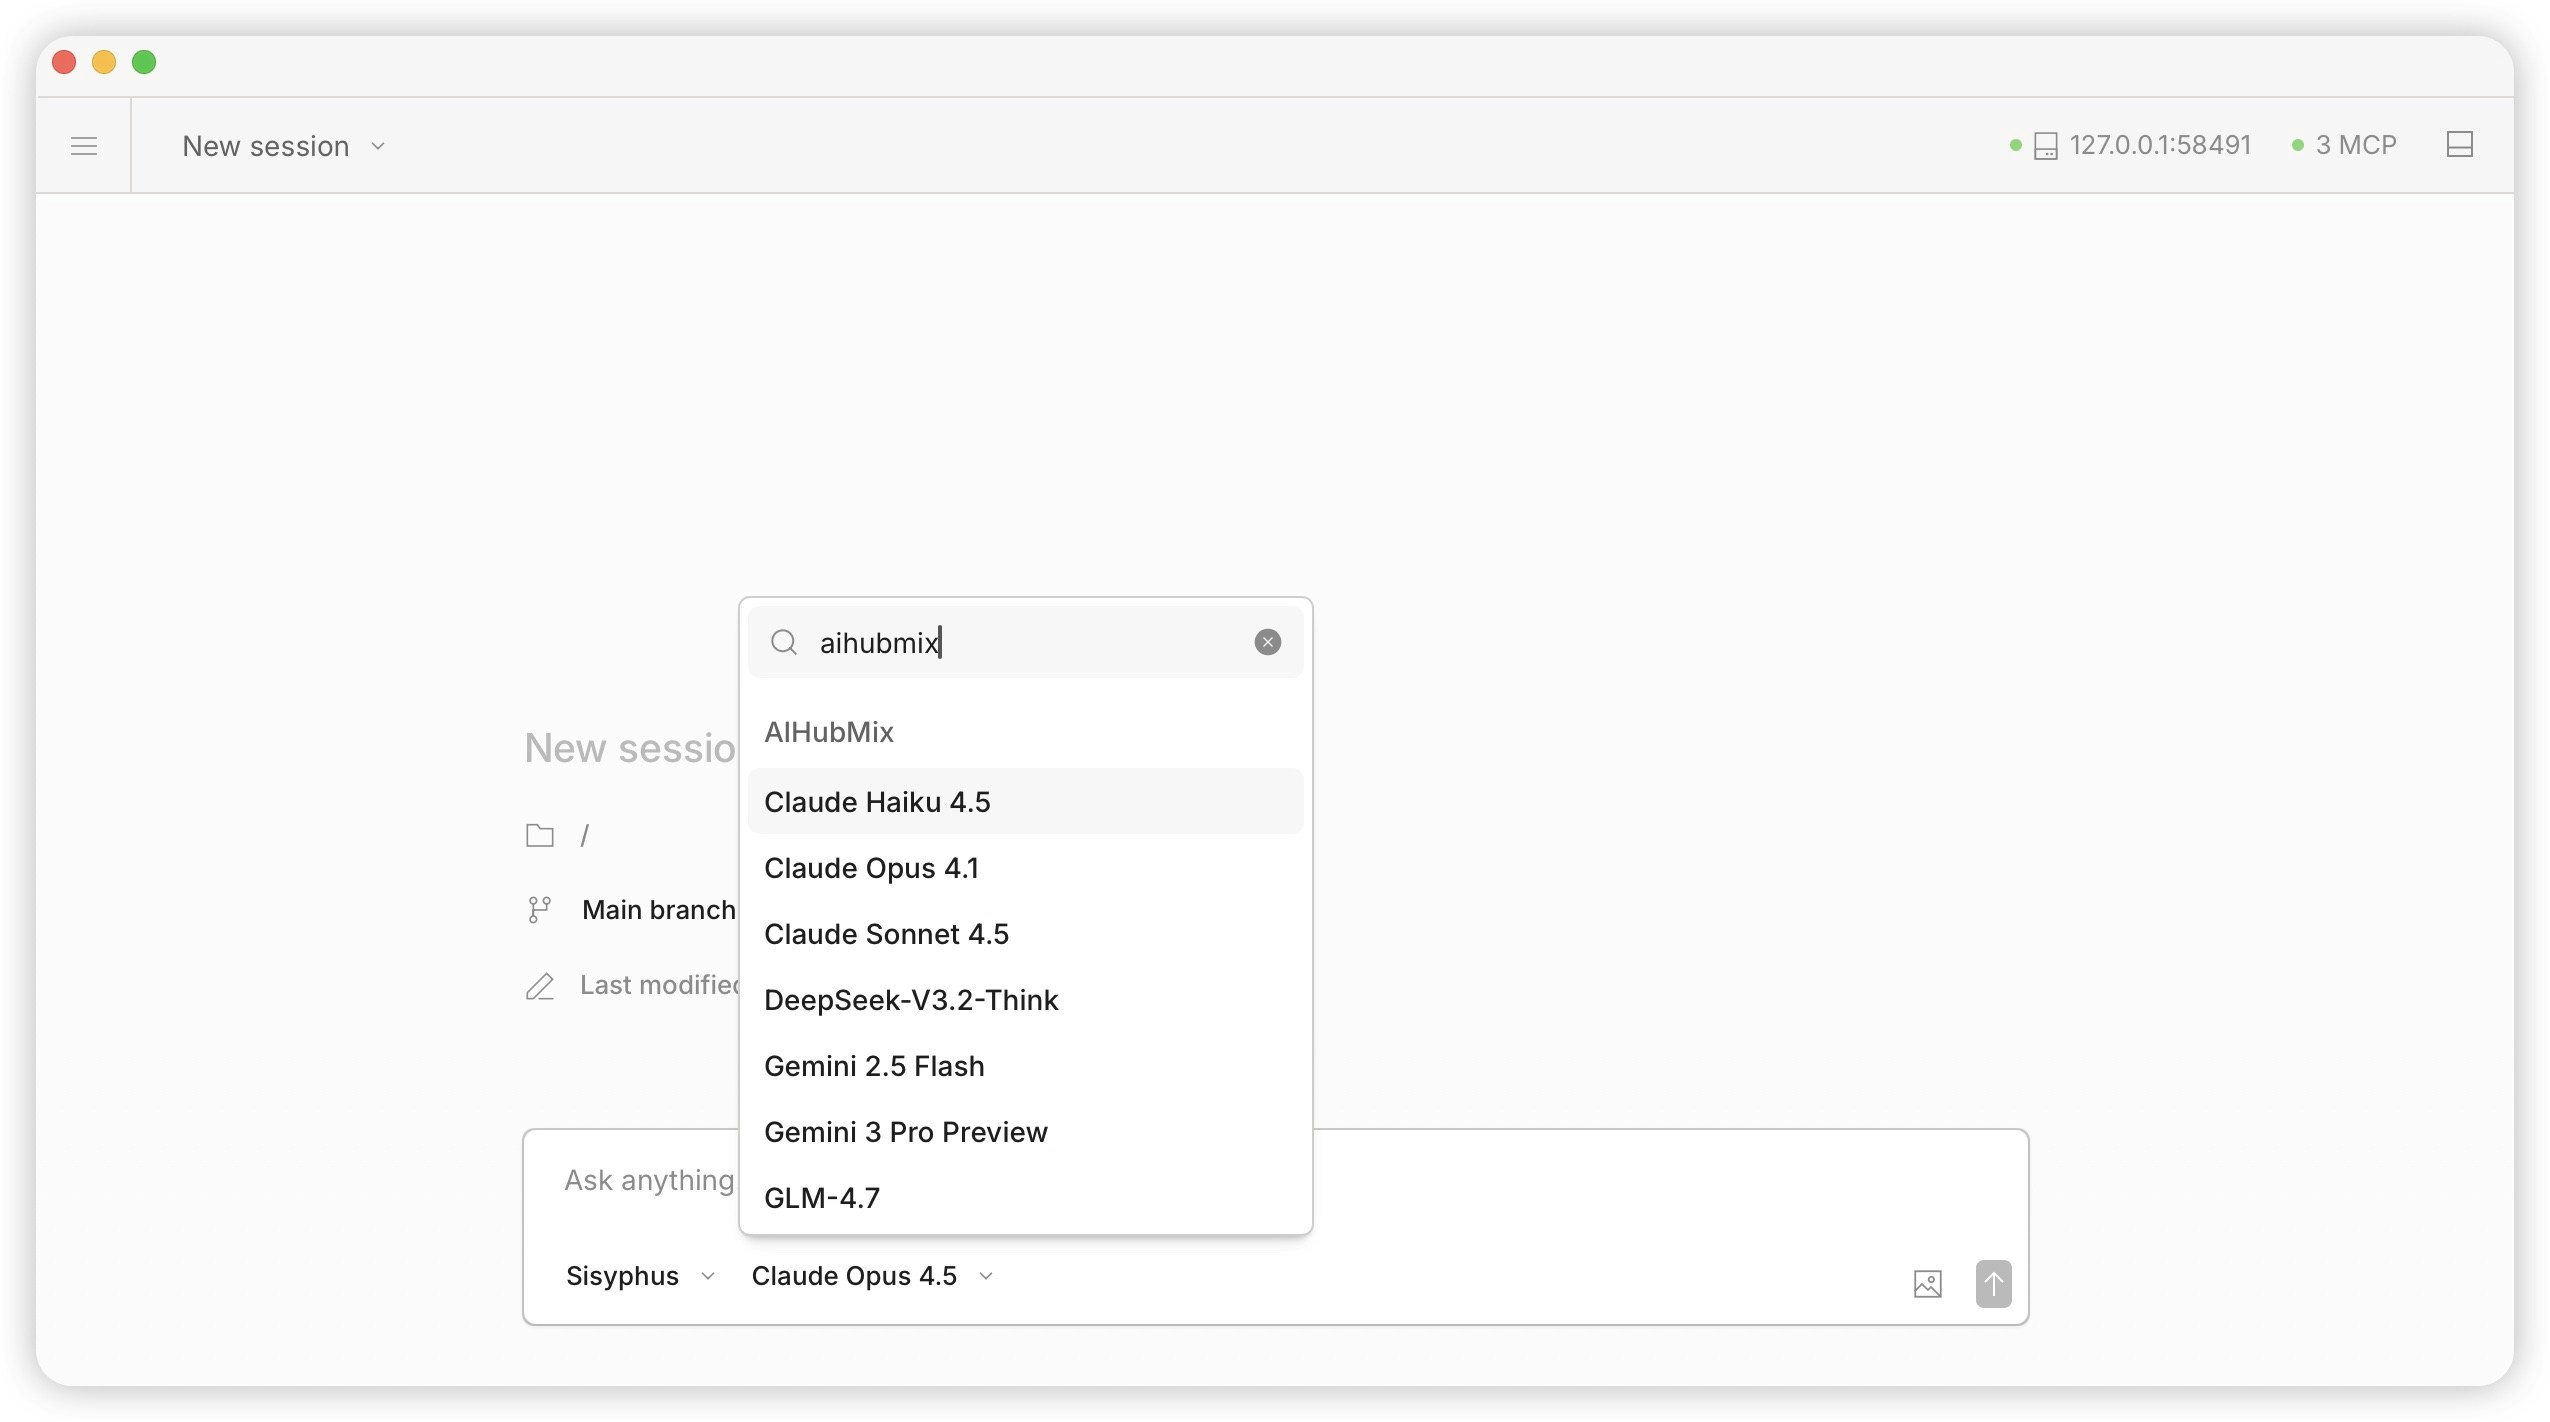
Type `/models`, search for `aihubmix`, and select the desired model.
***
### 2. Select a Model
Type `/models`, search for `aihubmix`, and select the desired model.
 ***
## 4. Using AiHubMix in the OpenCode Desktop Client
1. Download the OpenCode desktop application: [https://opencode.ai/download](https://opencode.ai/download) .
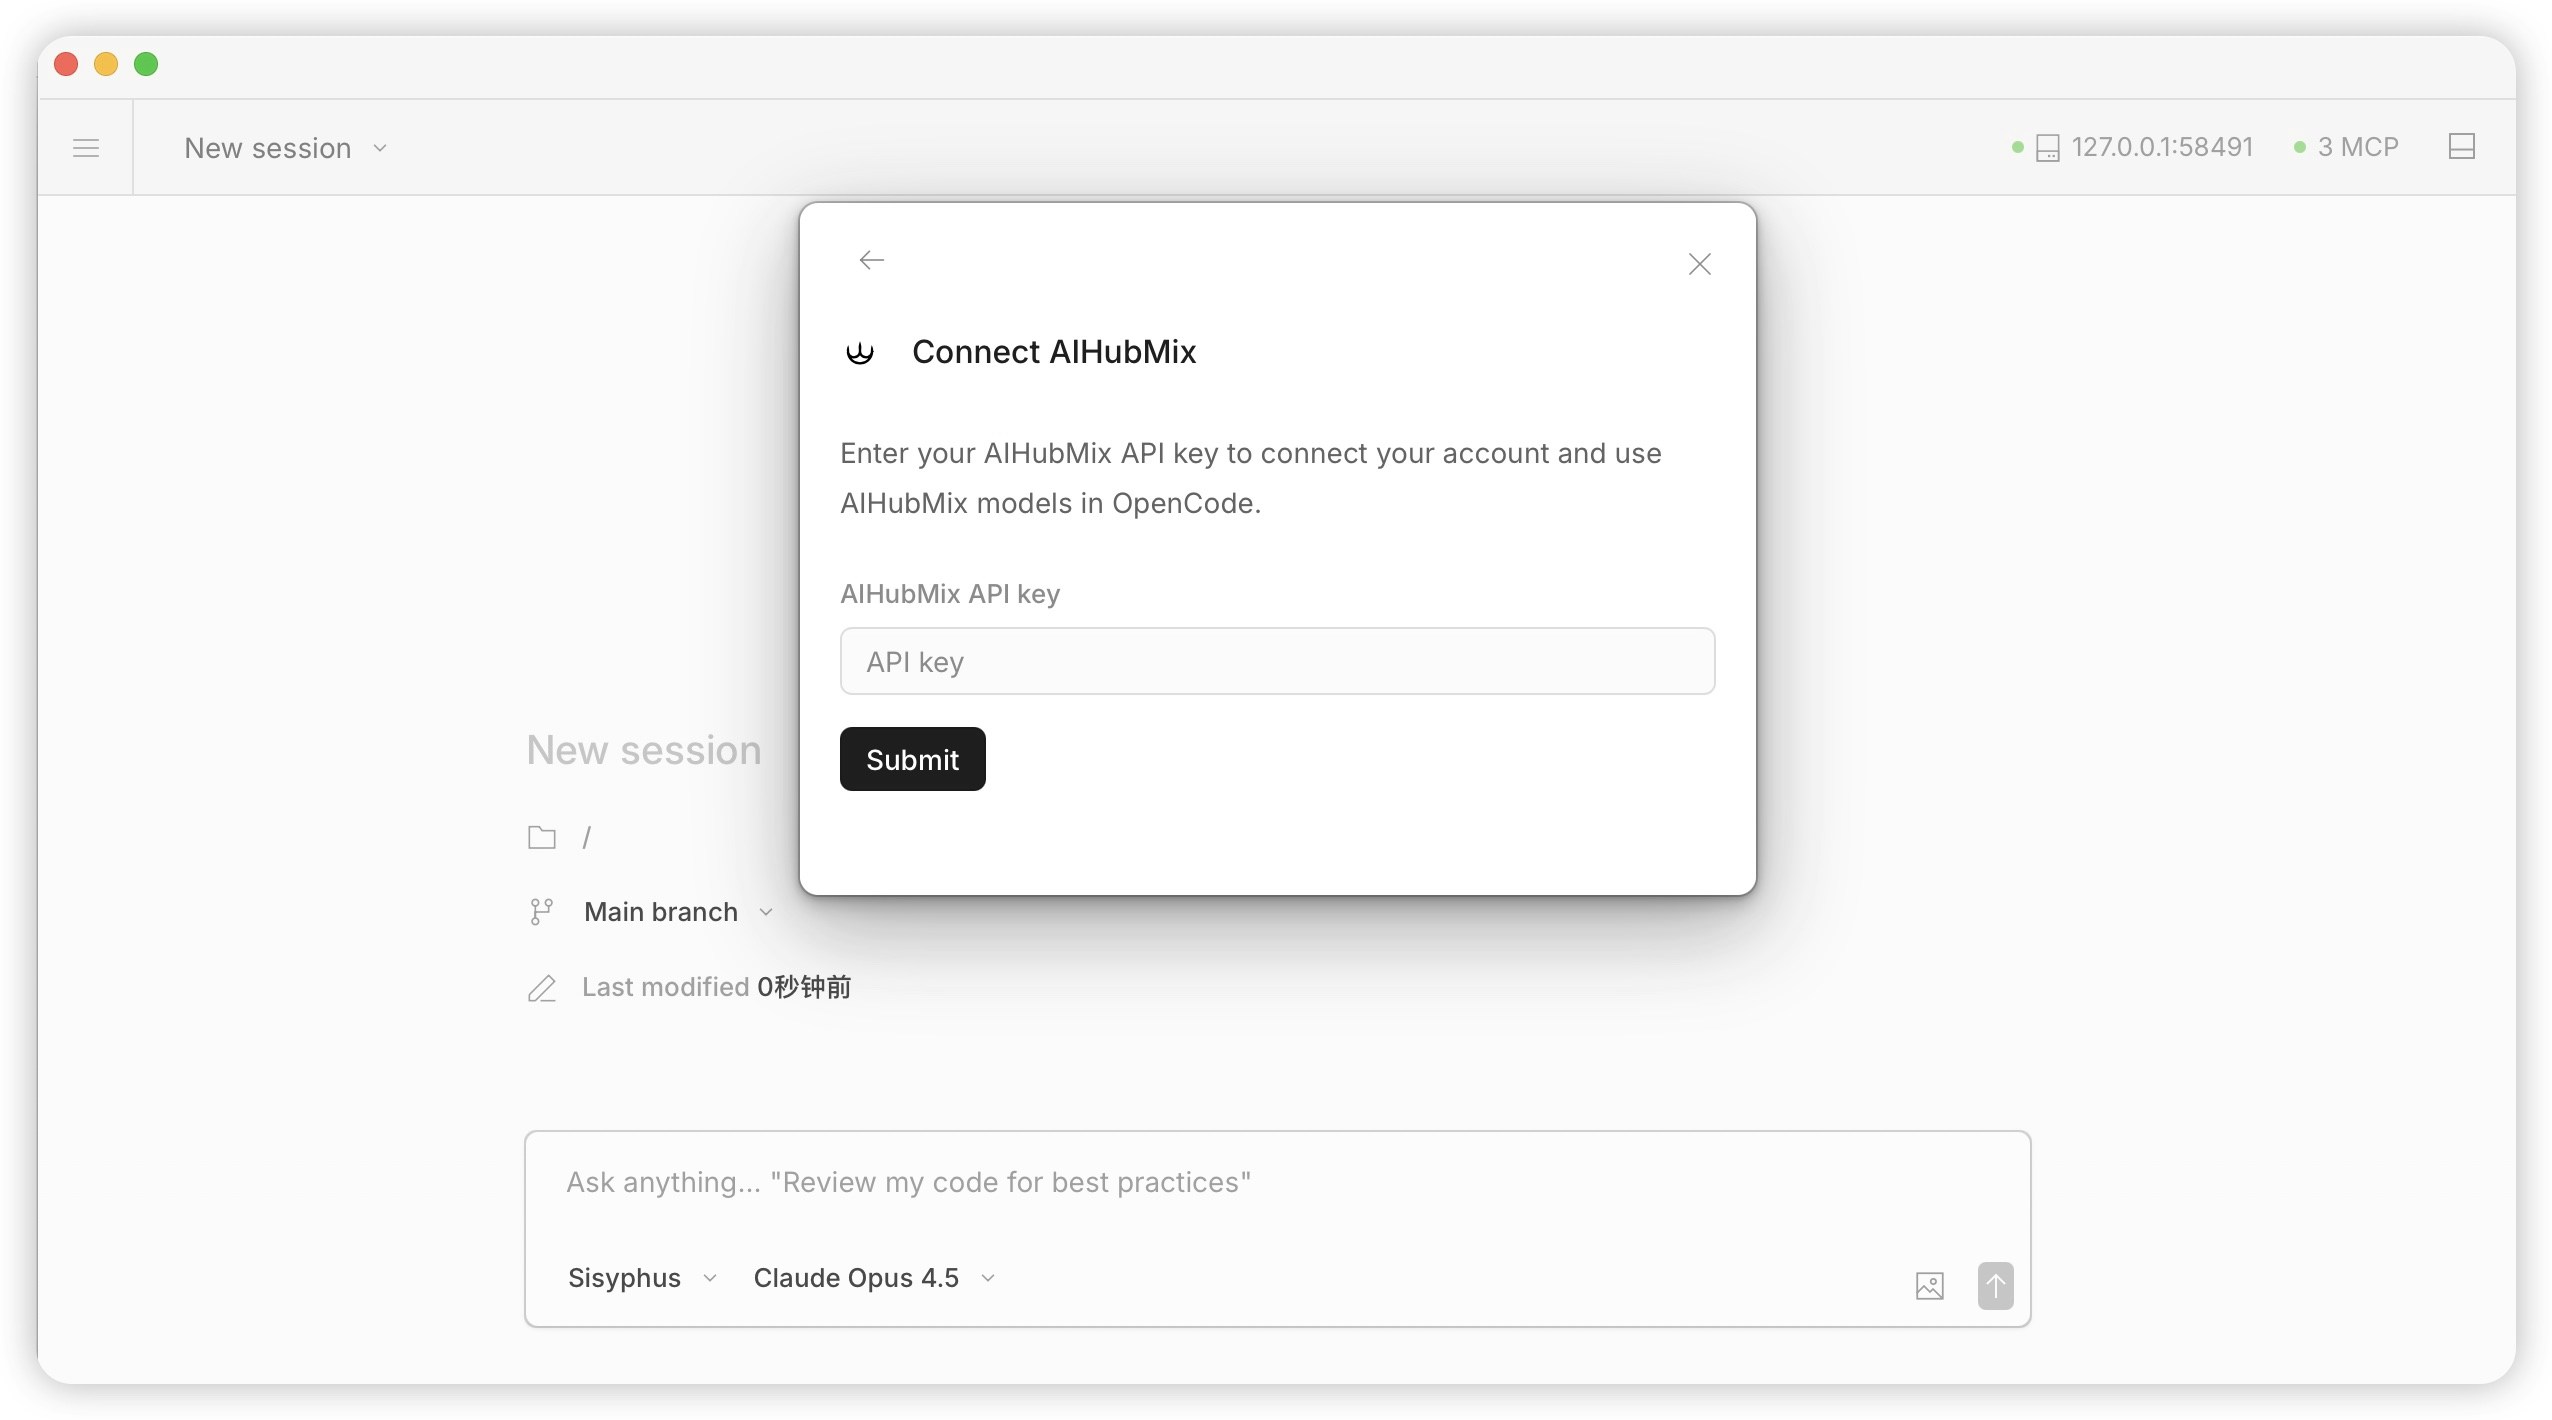
2. Open OpenCode and follow the steps:`/model` → `Connect provider` → search for `aihubmix` → enter your API Key → `Submit`.
***
## 4. Using AiHubMix in the OpenCode Desktop Client
1. Download the OpenCode desktop application: [https://opencode.ai/download](https://opencode.ai/download) .
2. Open OpenCode and follow the steps:`/model` → `Connect provider` → search for `aihubmix` → enter your API Key → `Submit`.
 3. In the model selection panel, search for `aihubmix` and select the model you want to use.
 ***
***
5. Custom Base URL
By default, OpenCode sends AIHubMix requests to `https://aihubmix.com/v1`. If you need requests to go through a self-hosted gateway, an enterprise proxy, or an acceleration node, you can override this in the configuration file via `options.baseURL`, **without modifying the OpenCode source code or reinstalling**.
#### Step 1: Open the configuration file
Open `~/.config/opencode/opencode.json` (on Windows, `%USERPROFILE%\.config\opencode\opencode.json`).
#### Step 2: Add `options.baseURL`
Add `options.baseURL` under the `aihubmix` provider. You only need to write this single field—OpenCode will automatically deep-merge it with the built-in configuration, so there's no need to rewrite the entire provider:
```json theme={null}
{
"$schema": "https://opencode.ai/config.json",
"provider": {
"aihubmix": {
"options": {
"baseURL": "https://api.inferera.com"
}
}
}
}
```
> **Note**: `baseURL` only needs to be specified at the domain level (e.g., `https://api.inferera.com`). Paths such as `/v1` and `/chat/completions` are appended automatically by the SDK. Do not add `/v1` yourself (e.g., `https://api.inferera.com/v1`), otherwise it will be concatenated into `/v1/v1/` and result in a 404.
#### Step 3: Restart and verify
Fully quit OpenCode and restart it. You can run the following command to confirm that the configuration has taken effect:
```bash theme={null}
opencode debug config
```
You should see the address you entered in the output under `provider.aihubmix.options.baseURL`; from then on, every model request will be sent to that address.
**Field reference:**
| Field | Description |
| ----------------- | ------------------------------------------------------------------------------------------------------------------------------------- |
| `options.baseURL` | Custom request address; takes priority over the default address. Specify it at the domain level only—paths are appended automatically |
***
## 6. FAQ and Tips
* If the API Key fails validation, log back into the AiHubMix Console and verify that the key is valid: [https://console.aihubmix.com/token](https://console.aihubmix.com/token)
* View the built-in help documentation: `opencode` → `/help`
* OpenCode official documentation: [https://opencode.ai/docs/](https://opencode.ai/docs/)
***
Last updated: 2026-06-01