> ## Documentation Index
> Fetch the complete documentation index at: https://docs.aihubmix.com/llms.txt
> Use this file to discover all available pages before exploring further.
# LiteLLM
> 用 LiteLLM 接入 AIHubMix:通过统一代理层一行代码切换模型,覆盖流式输出与多轮对话。
## LiteLLM 项目简介
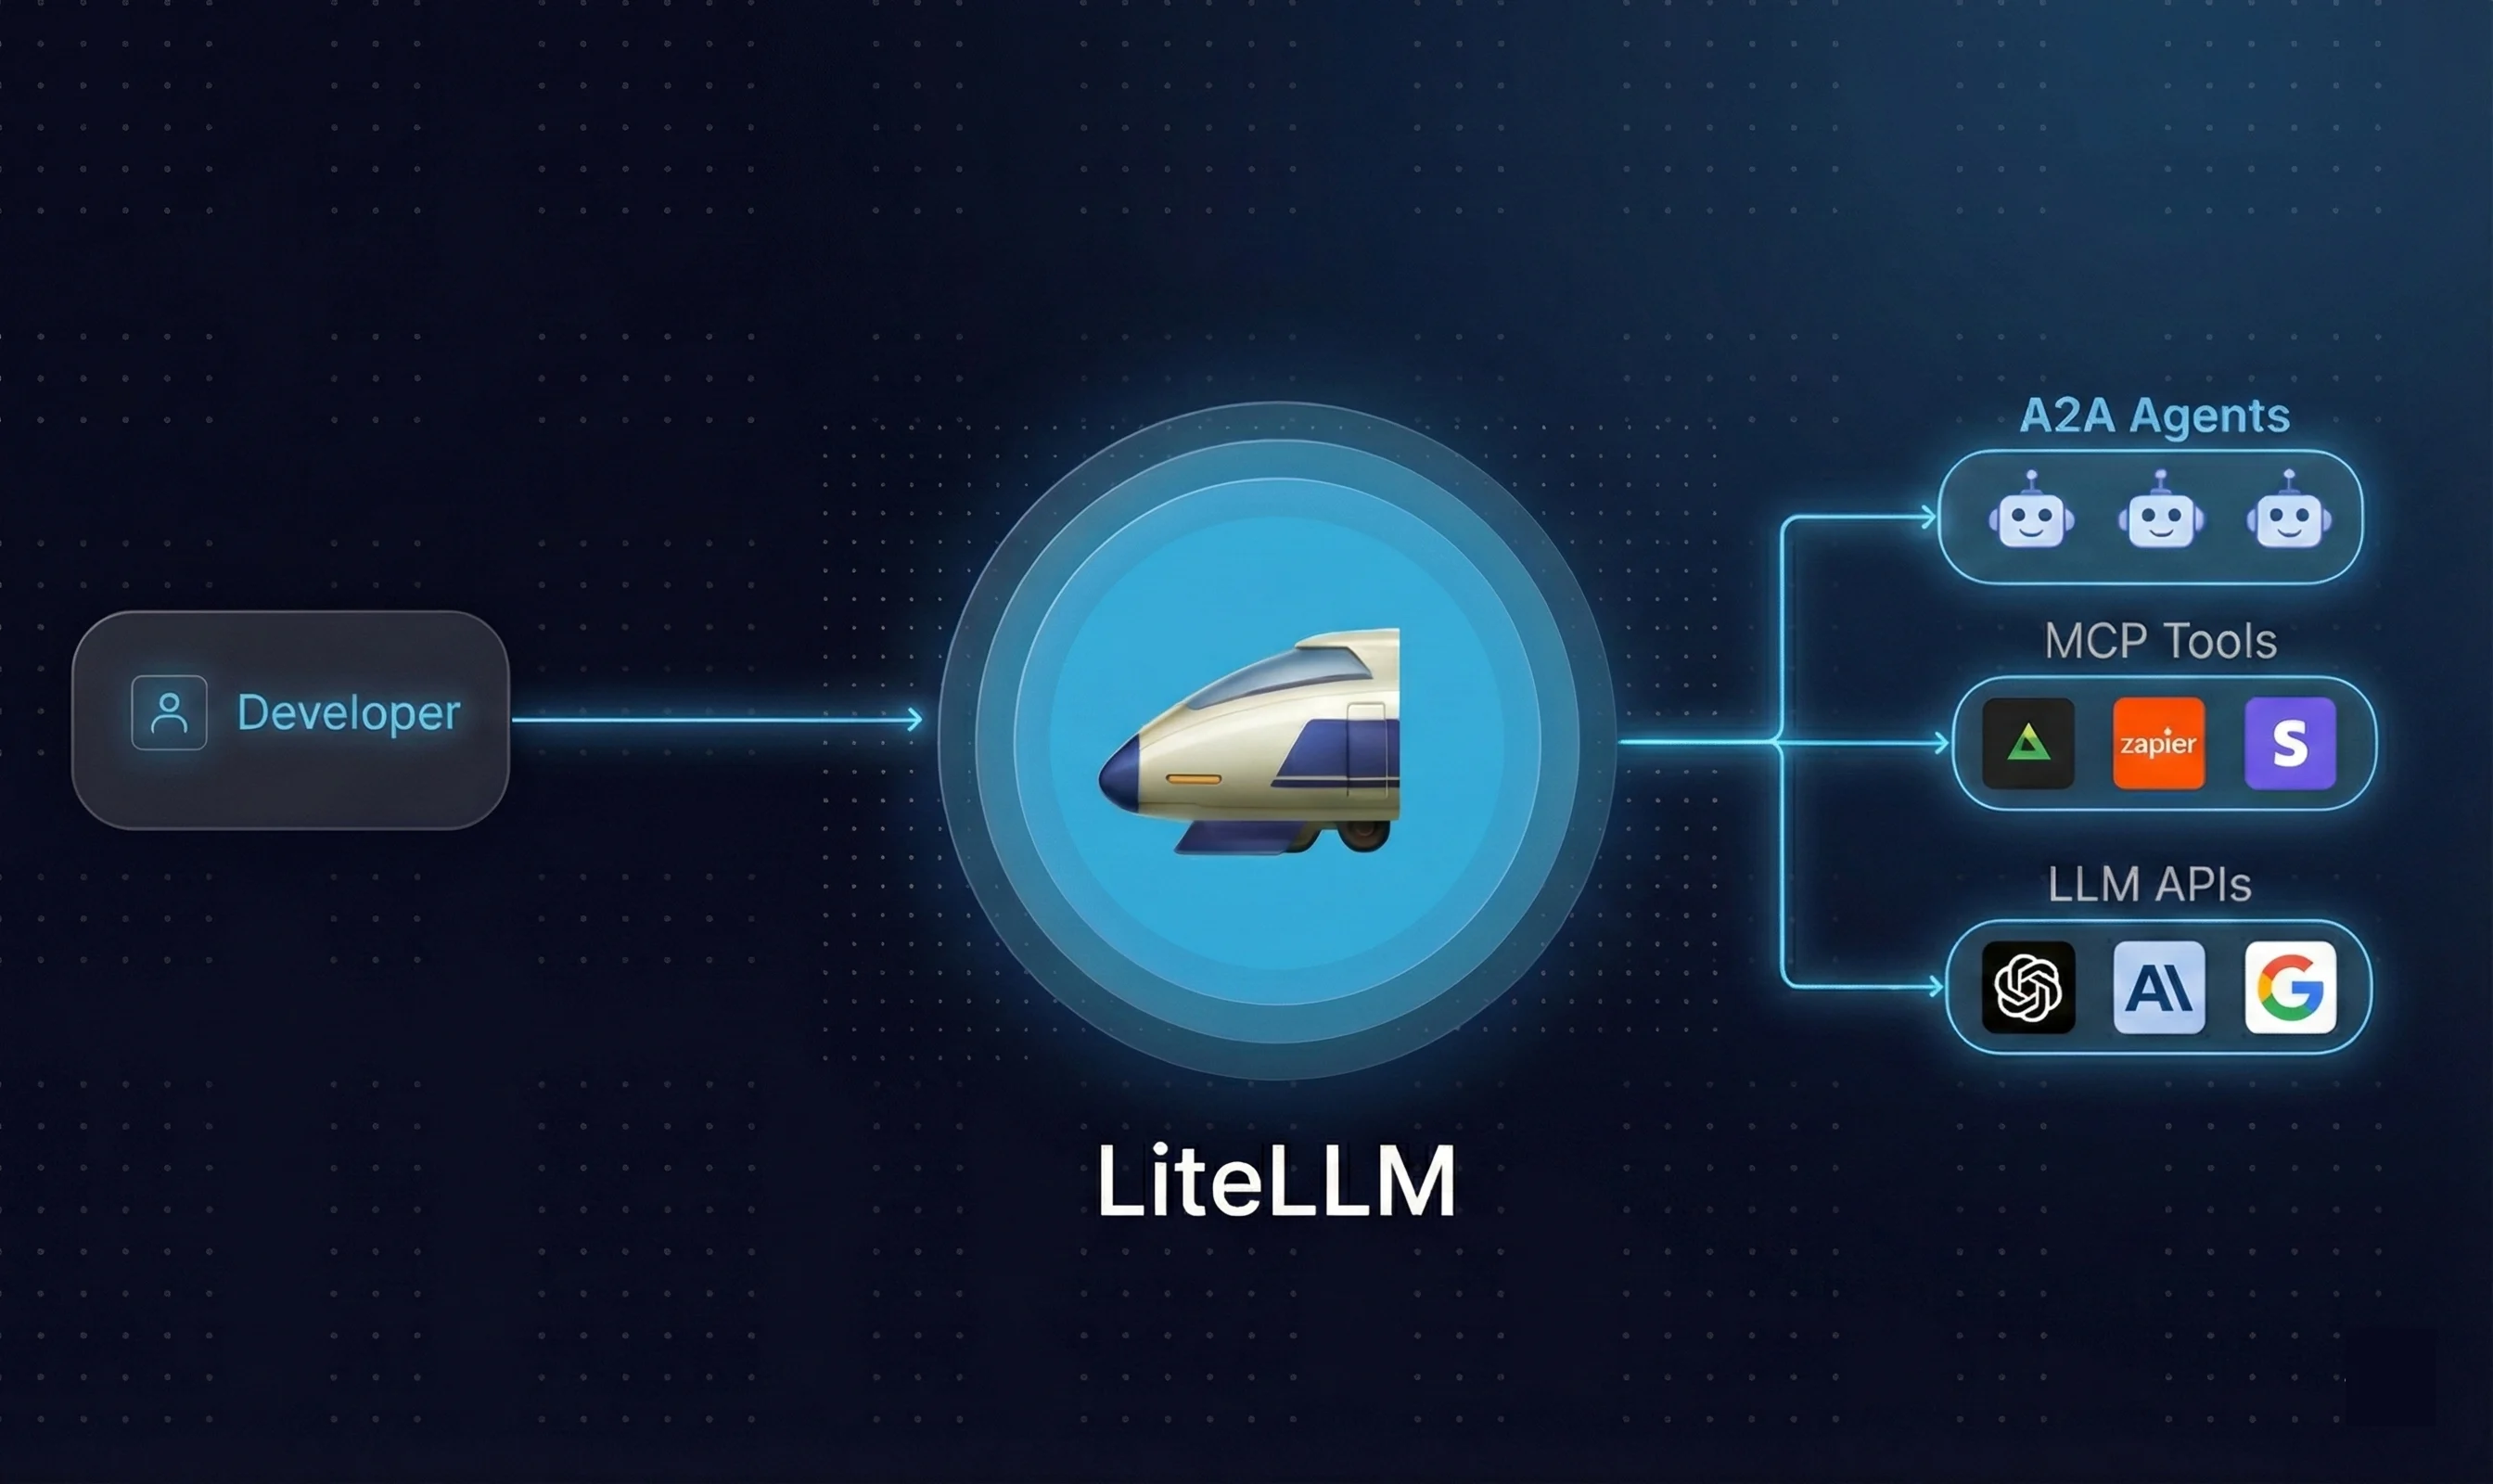
LiteLLM 是一个开源的 **AI 统一网关**,由 [BerriAI](https://github.com/BerriAI/litellm) 开发,目标是用一套标准接口调用市面上几乎所有主流大模型。项目仓库见:[https://github.com/BerriAI/litellm](https://github.com/BerriAI/litellm)
每个 LLM 提供商都有自己的 SDK 和 API 格式,OpenAI、Anthropic、Google 各不相同。一旦需要切换模型或同时使用多个模型,就要维护多套代码。LiteLLM 可以实现——**写一次代码,换一个参数,即可调用任意模型**。
 ### 两种使用形态
| 形态 | 说明 | 适合场景 |
| :--------------- | :----------------------------- | :-------- |
| **Python SDK** | `pip install litellm`,直接在代码中调用 | 个人开发、快速原型 |
| **Proxy Server** | 独立部署的 AI 网关服务 | 团队共用、企业管控 |
### 核心能力
* **统一 OpenAI 格式**:支持 100+ 个 Provider,包括 OpenAI、Anthropic、Gemini、Bedrock、Azure 等
* **虚拟密钥管理**:统一管控团队 API Key,无需暴露原始密钥
* **成本追踪**:按用户/项目统计 Token 消耗和费用
* **负载均衡**:跨多个模型或部署自动分流,支持故障转移
* **高性能**:1000 RPS 下 P95 延迟约 8ms
## 安装指南
### 环境要求
Python 3.8+
**macOS**
推荐使用 [Homebrew](https://brew.sh/) 安装:
```text theme={null}
brew install python
```
验证:
```text theme={null}
python3 --version
```
**Windows**
前往 [python.org/downloads](https://www.python.org/downloads/) 下载安装包,安装时勾选 **"Add Python to PATH"**。
验证:
```text theme={null}
python --version
```
**Linux(Ubuntu/Debian)**
```text theme={null}
sudo apt update
sudo apt install python3 python3-pip
```
***
#### pip
pip 通常随 Python 一起安装,验证是否可用:
```text theme={null}
pip --version
# 或
pip3 --version
```
如果提示未找到,手动安装:
```text theme={null}
# 通用方式
python3 -m ensurepip --upgrade
# Ubuntu/Debian
sudo apt install python3-pip
# 升级到最新版
pip install --upgrade pip
```
***
### 安装 LiteLLM
环境就绪后,执行:
```text theme={null}
python3 -m pip install litellm
```
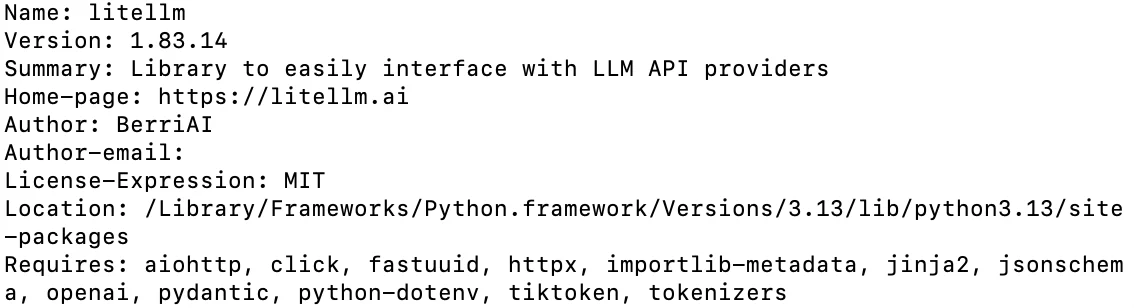
验证安装成功,在终端运行:
```text theme={null}
python3 -m pip show litellm
```
这已经包含了调用所有主流 Provider 的能力。
### 按需安装额外依赖
部分 Provider 需要额外的依赖包:
```text theme={null}
# AWS Bedrock
pip install litellm[bedrock]
# Google Vertex AI
pip install litellm[vertex]
# 全部依赖(体积较大,不推荐生产环境)
pip install litellm[all]
```
### 安装 Proxy Server
如果需要部署独立的网关服务,安装带 proxy 的版本:
```text theme={null}
pip install 'litellm[proxy]'
```
### 验证安装
```python theme={null}
import litellm
print(litellm.__version__)
```
### Docker 安装(可选)
如果你更倾向于容器化部署:
```text theme={null}
docker pull ghcr.io/berriai/litellm:main-latest
```
***
> **推荐做法**:个人开发直接 `pip install litellm`,团队部署选 Proxy + Docker。
### 两种使用形态
| 形态 | 说明 | 适合场景 |
| :--------------- | :----------------------------- | :-------- |
| **Python SDK** | `pip install litellm`,直接在代码中调用 | 个人开发、快速原型 |
| **Proxy Server** | 独立部署的 AI 网关服务 | 团队共用、企业管控 |
### 核心能力
* **统一 OpenAI 格式**:支持 100+ 个 Provider,包括 OpenAI、Anthropic、Gemini、Bedrock、Azure 等
* **虚拟密钥管理**:统一管控团队 API Key,无需暴露原始密钥
* **成本追踪**:按用户/项目统计 Token 消耗和费用
* **负载均衡**:跨多个模型或部署自动分流,支持故障转移
* **高性能**:1000 RPS 下 P95 延迟约 8ms
## 安装指南
### 环境要求
Python 3.8+
**macOS**
推荐使用 [Homebrew](https://brew.sh/) 安装:
```text theme={null}
brew install python
```
验证:
```text theme={null}
python3 --version
```
**Windows**
前往 [python.org/downloads](https://www.python.org/downloads/) 下载安装包,安装时勾选 **"Add Python to PATH"**。
验证:
```text theme={null}
python --version
```
**Linux(Ubuntu/Debian)**
```text theme={null}
sudo apt update
sudo apt install python3 python3-pip
```
***
#### pip
pip 通常随 Python 一起安装,验证是否可用:
```text theme={null}
pip --version
# 或
pip3 --version
```
如果提示未找到,手动安装:
```text theme={null}
# 通用方式
python3 -m ensurepip --upgrade
# Ubuntu/Debian
sudo apt install python3-pip
# 升级到最新版
pip install --upgrade pip
```
***
### 安装 LiteLLM
环境就绪后,执行:
```text theme={null}
python3 -m pip install litellm
```
验证安装成功,在终端运行:
```text theme={null}
python3 -m pip show litellm
```
这已经包含了调用所有主流 Provider 的能力。
### 按需安装额外依赖
部分 Provider 需要额外的依赖包:
```text theme={null}
# AWS Bedrock
pip install litellm[bedrock]
# Google Vertex AI
pip install litellm[vertex]
# 全部依赖(体积较大,不推荐生产环境)
pip install litellm[all]
```
### 安装 Proxy Server
如果需要部署独立的网关服务,安装带 proxy 的版本:
```text theme={null}
pip install 'litellm[proxy]'
```
### 验证安装
```python theme={null}
import litellm
print(litellm.__version__)
```
### Docker 安装(可选)
如果你更倾向于容器化部署:
```text theme={null}
docker pull ghcr.io/berriai/litellm:main-latest
```
***
> **推荐做法**:个人开发直接 `pip install litellm`,团队部署选 Proxy + Docker。
 ## 配置 API Key 并调用
### 获取 AiHubMix API Key
前往 [aihubmix.com](http://aihubmix.com) 控制台,创建一个 API Key。
### 设置环境变量
```text theme={null}
export AIHUBMIX_API_KEY="your-aihubmix-key"
```
### 发起第一次调用
```python theme={null}
import os
from litellm import completion
response = completion(
model='openai/gpt-4o-mini',
api_base='https://aihubmix.com/v1',
api_key=os.environ.get('AIHUBMIX_API_KEY'),
messages=[{'role': 'user', 'content': 'What is the meaning of life?'}]
)
print(response.choices[0].message.content)
```
# **基础用法**
## 1. 切换不同模型
AiHubMix 支持主流模型,切换只需改 `model` 参数:
```python theme={null}
import os
from litellm import completion
response = completion(
model='openai/claude-sonnet-4-6', # 换这里
api_base='https://aihubmix.com/v1',
api_key=os.environ.get('AIHUBMIX_API_KEY'),
messages=[{'role': 'user', 'content': 'What is the meaning of life?'}]
)
print(response.choices[0].message.content)
```
***
## 2. 流式输出(Streaming)
加一个 `stream=True`,模型会像打字机一样逐字输出:
```python theme={null}
import os
from litellm import completion
response = completion(
model='openai/claude-sonnet-4-6',
api_base='https://aihubmix.com/v1',
api_key=os.environ.get('AIHUBMIX_API_KEY'),
messages=[{'role': 'user', 'content': 'Explain Python in 100 words'}],
stream=True
)
for chunk in response:
print(chunk.choices[0].delta.content or '', end='', flush=True)
print()
```
***
## 3. 多轮对话
把历史消息拼进 `messages` 列表,模型就能记住上下文:
```python theme={null}
import os
from litellm import completion
messages = [
{'role': 'user', 'content': 'My name is John'},
{'role': 'assistant', 'content': 'Hello, John!'},
{'role': 'user', 'content': 'What is my name?'}
]
response = completion(
model='openai/claude-sonnet-4-6',
api_base='https://aihubmix.com/v1',
api_key=os.environ.get('AIHUBMIX_API_KEY'),
messages=messages
)
print(response.choices[0].message.content)
```
***
## 4. 异步调用
适合需要同时发多个请求的场景,不用等一个完成再发下一个:
```python theme={null}
import os
import asyncio
from litellm import acompletion
async def ask(question):
response = await acompletion(
model='openai/claude-sonnet-4-6',
api_base='https://aihubmix.com/v1',
api_key=os.environ.get('AIHUBMIX_API_KEY'),
messages=[{'role': 'user', 'content': question}]
)
return response.choices[0].message.content
async def main():
questions = ['What color are apples?', 'What color is the sky?', 'What color is grass?']
results = await asyncio.gather(*[ask(q) for q in questions])
for q, r in zip(questions, results):
print(f'Q: {q}')
print(f'A: {r}')
print()
asyncio.run(main())
```
***
## 5. 设置超时与重试
避免请求卡住或因网络抖动失败:
```python theme={null}
import os
from litellm import completion
response = completion(
model='openai/claude-sonnet-4-6',
api_base='https://aihubmix.com/v1',
api_key=os.environ.get('AIHUBMIX_API_KEY'),
messages=[{'role': 'user', 'content': 'What is the meaning of life?'}],
timeout=10, # 超过 10 秒自动报错
num_retries=3 # 失败自动重试 3 次
)
print(response.choices[0].message.content)
```
> `timeout` 单位是秒,`num_retries` 建议设 2~3,太高会拖慢响应。
## 6. 统计 Token 用量和费用
每次调用的返回结果里自带 Token 用量信息:
```python theme={null}
import os
from litellm import completion
response = completion(
model='openai/claude-sonnet-4-6',
api_base='https://aihubmix.com/v1',
api_key=os.environ.get('AIHUBMIX_API_KEY'),
messages=[{'role': 'user', 'content': 'Explain Python in 100 words'}]
)
print(response.choices[0].message.content)
print()
print('Token usage:')
print(f' Input: {response.usage.prompt_tokens}')
print(f' Output: {response.usage.completion_tokens}')
print(f' Total: {response.usage.total_tokens}')
```
***
统计多次调用的累计费用:
```python theme={null}
import os
from litellm import completion, completion_cost
response = completion(
model='openai/claude-sonnet-4-6',
api_base='https://aihubmix.com/v1',
api_key=os.environ.get('AIHUBMIX_API_KEY'),
messages=[{'role': 'user', 'content': 'Explain Python in 100 words'}]
)
cost = completion_cost(completion_response=response)
print(f'Cost: ${cost:.6f}')
```
***
## 7. 负载均衡 / 故障转移
配置多个模型,自动分流或在某个模型失败时切换到备用模型:
```python theme={null}
import os
from litellm import Router
router = Router(
model_list=[
{
'model_name': 'my-model',
'litellm_params': {
'model': 'openai/claude-sonnet-4-6',
'api_base': 'https://aihubmix.com/v1',
'api_key': os.environ.get('AIHUBMIX_API_KEY'),
}
},
{
'model_name': 'my-model',
'litellm_params': {
'model': 'openai/gpt-4o',
'api_base': 'https://aihubmix.com/v1',
'api_key': os.environ.get('AIHUBMIX_API_KEY'),
}
}
]
)
response = router.completion(
model='my-model',
messages=[{'role': 'user', 'content': 'What is the meaning of life?'}]
)
print(response.choices[0].message.content)
```
> 两个模型共用同一个 `model_name`,LiteLLM 会自动轮询;若其中一个报错,自动切换到另一个。
## 8. 部署 Proxy Server
Proxy Server 是一个独立运行的网关服务,团队成员统一通过它访问模型,无需每个人单独配置 API Key。
### 安装
```text theme={null}
python3 -m pip install 'litellm[proxy]'
```
### 创建配置文件
新建 `config.yaml`:
```yaml theme={null}
model_list:
- model_name: gpt-4o
litellm_params:
model: openai/gpt-4o
api_base: https://aihubmix.com/v1
api_key: os.environ/AIHUBMIX_API_KEY
- model_name: claude-sonnet
litellm_params:
model: openai/claude-sonnet-4-6
api_base: https://aihubmix.com/v1
api_key: os.environ/AIHUBMIX_API_KEY
- model_name: gemini-flash
litellm_params:
model: openai/gemini-2.0-flash
api_base: https://aihubmix.com/v1
api_key: os.environ/AIHUBMIX_API_KEY
```
### 启动服务
```text theme={null}
litellm --config config.yaml --port 4000
```
看到以下输出说明启动成功:
```text theme={null}
LiteLLM: Proxy running on http://0.0.0.0:4000
```
### 调用本地服务
服务启动后,把 `api_base` 换成本地地址即可:
```python theme={null}
import os
from litellm import completion
response = completion(
model='gpt-4o',
api_base='http://localhost:4000',
api_key='any-string',
messages=[{'role': 'user', 'content': 'What is the meaning of life?'}]
)
print(response.choices[0].message.content)
```
> `api_key` 此时可以填任意字符串,真实的 AiHubMix Key 由 Proxy 统一管
## 9. 虚拟密钥管理
虚拟密钥让你可以给不同成员或项目分配独立的 Key,统一管控权限和用量,而不暴露真实的 AiHubMix API Key。
### 前置条件
虚拟密钥需要数据库支持,先启动一个 PostgreSQL:
```text theme={null}
docker run -d \
--name litellm-db \
-e POSTGRES_USER=litellm \
-e POSTGRES_PASSWORD=litellm \
-e POSTGRES_DB=litellm \
-p 5432:5432 \
postgres
```
### 更新配置文件
在 `config.yaml` 中加入数据库配置:
```yaml theme={null}
model_list:
- model_name: gpt-4o
litellm_params:
model: openai/gpt-4o
api_base: https://aihubmix.com/v1
api_key: os.environ/AIHUBMIX_API_KEY
- model_name: claude-sonnet
litellm_params:
model: openai/claude-sonnet-4-6
api_base: https://aihubmix.com/v1
api_key: os.environ/AIHUBMIX_API_KEY
general_settings:
master_key: sk-my-master-key
database_url: postgresql://litellm:litellm@localhost:5432/litellm
```
### 重启服务
```text theme={null}
litellm --config config.yaml --port 4000
```
### 创建虚拟密钥
用 `master_key` 创建一个新的虚拟 Key:
```bash theme={null}
curl -X POST http://localhost:4000/key/generate \
-H "Authorization: Bearer sk-my-master-key" \
-H "Content-Type: application/json" \
-d '{
"key_alias": "team-a",
"max_budget": 10,
"models": ["gpt-4o", "claude-sonnet"]
}'
```
返回结果中的 `key` 字段就是虚拟密钥,例如 `sk-xxxxxx`。
### 使用虚拟密钥调用
```python theme={null}
from litellm import completion
response = completion(
model='claude-sonnet',
api_base='http://localhost:4000',
api_key='sk-xxxxxx',
messages=[{'role': 'user', 'content': 'What is the meaning of life?'}]
)
print(response.choices[0].message.content)
```
### 查看用量
```bash theme={null}
curl http://localhost:4000/key/info \
-H "Authorization: Bearer sk-my-master-key" \
-H "Content-Type: application/json" \
-d '{"key": "sk-xxxxxx"}'
```
> 每个虚拟 Key 可以单独设置可用模型、预算上限、过期时间,适合团队多人协作场景。
先设置环境变量:
```text theme={null}
export AIHUBMIX_API_KEY="your-key"
```
## 实战:多模型对比测试
同一个问题同时发给多个模型,对比输出质量、速度和 Token 消耗。
### 设置 API Key
```text theme={null}
export AIHUBMIX_API_KEY="your-key"
```
### 运行对比测试
```text theme={null}
python3 -c "
import os
import time
import asyncio
from litellm import acompletion
MODELS = [
'gpt-5.5',
'claude-opus-4-7',
'deepseek-v4-flash',
'coding-glm-5.1-free',
]
QUESTION = 'If you could give a programmer only one piece of advice, what would it be?'
async def ask_model(model, question):
start = time.time()
try:
response = await acompletion(
model=f'openai/{model}',
api_base='https://aihubmix.com/v1',
api_key=os.environ.get('AIHUBMIX_API_KEY'),
messages=[{'role': 'user', 'content': question}]
)
return {
'model': model,
'answer': response.choices[0].message.content.strip(),
'tokens': response.usage.total_tokens,
'time': round(time.time() - start, 2),
'error': None
}
except Exception as e:
return {
'model': model,
'answer': None,
'tokens': 0,
'time': round(time.time() - start, 2),
'error': str(e)
}
async def main():
print(f'Question: {QUESTION}')
print('=' * 60)
tasks = [ask_model(m, QUESTION) for m in MODELS]
results = await asyncio.gather(*tasks)
for r in results:
print(f'\nModel: {r[\"model\"]}')
print(f'Time: {r[\"time\"]}s | Tokens: {r[\"tokens\"]}')
print('-' * 40)
if r['error']:
print(f'Error: {r[\"error\"]}')
else:
print(r['answer'])
print('\n' + '=' * 60)
print(f'{\"Model\":<30} {\"Time\":>8} {\"Tokens\":>8}')
print('-' * 50)
for r in sorted(results, key=lambda x: x['time']):
status = f'{r[\"time\"]}s' if not r['error'] else 'failed'
print(f'{r[\"model\"]:<30} {status:>8} {r[\"tokens\"]:>8}')
asyncio.run(main())
"
```
***
## 配置 API Key 并调用
### 获取 AiHubMix API Key
前往 [aihubmix.com](http://aihubmix.com) 控制台,创建一个 API Key。
### 设置环境变量
```text theme={null}
export AIHUBMIX_API_KEY="your-aihubmix-key"
```
### 发起第一次调用
```python theme={null}
import os
from litellm import completion
response = completion(
model='openai/gpt-4o-mini',
api_base='https://aihubmix.com/v1',
api_key=os.environ.get('AIHUBMIX_API_KEY'),
messages=[{'role': 'user', 'content': 'What is the meaning of life?'}]
)
print(response.choices[0].message.content)
```
# **基础用法**
## 1. 切换不同模型
AiHubMix 支持主流模型,切换只需改 `model` 参数:
```python theme={null}
import os
from litellm import completion
response = completion(
model='openai/claude-sonnet-4-6', # 换这里
api_base='https://aihubmix.com/v1',
api_key=os.environ.get('AIHUBMIX_API_KEY'),
messages=[{'role': 'user', 'content': 'What is the meaning of life?'}]
)
print(response.choices[0].message.content)
```
***
## 2. 流式输出(Streaming)
加一个 `stream=True`,模型会像打字机一样逐字输出:
```python theme={null}
import os
from litellm import completion
response = completion(
model='openai/claude-sonnet-4-6',
api_base='https://aihubmix.com/v1',
api_key=os.environ.get('AIHUBMIX_API_KEY'),
messages=[{'role': 'user', 'content': 'Explain Python in 100 words'}],
stream=True
)
for chunk in response:
print(chunk.choices[0].delta.content or '', end='', flush=True)
print()
```
***
## 3. 多轮对话
把历史消息拼进 `messages` 列表,模型就能记住上下文:
```python theme={null}
import os
from litellm import completion
messages = [
{'role': 'user', 'content': 'My name is John'},
{'role': 'assistant', 'content': 'Hello, John!'},
{'role': 'user', 'content': 'What is my name?'}
]
response = completion(
model='openai/claude-sonnet-4-6',
api_base='https://aihubmix.com/v1',
api_key=os.environ.get('AIHUBMIX_API_KEY'),
messages=messages
)
print(response.choices[0].message.content)
```
***
## 4. 异步调用
适合需要同时发多个请求的场景,不用等一个完成再发下一个:
```python theme={null}
import os
import asyncio
from litellm import acompletion
async def ask(question):
response = await acompletion(
model='openai/claude-sonnet-4-6',
api_base='https://aihubmix.com/v1',
api_key=os.environ.get('AIHUBMIX_API_KEY'),
messages=[{'role': 'user', 'content': question}]
)
return response.choices[0].message.content
async def main():
questions = ['What color are apples?', 'What color is the sky?', 'What color is grass?']
results = await asyncio.gather(*[ask(q) for q in questions])
for q, r in zip(questions, results):
print(f'Q: {q}')
print(f'A: {r}')
print()
asyncio.run(main())
```
***
## 5. 设置超时与重试
避免请求卡住或因网络抖动失败:
```python theme={null}
import os
from litellm import completion
response = completion(
model='openai/claude-sonnet-4-6',
api_base='https://aihubmix.com/v1',
api_key=os.environ.get('AIHUBMIX_API_KEY'),
messages=[{'role': 'user', 'content': 'What is the meaning of life?'}],
timeout=10, # 超过 10 秒自动报错
num_retries=3 # 失败自动重试 3 次
)
print(response.choices[0].message.content)
```
> `timeout` 单位是秒,`num_retries` 建议设 2~3,太高会拖慢响应。
## 6. 统计 Token 用量和费用
每次调用的返回结果里自带 Token 用量信息:
```python theme={null}
import os
from litellm import completion
response = completion(
model='openai/claude-sonnet-4-6',
api_base='https://aihubmix.com/v1',
api_key=os.environ.get('AIHUBMIX_API_KEY'),
messages=[{'role': 'user', 'content': 'Explain Python in 100 words'}]
)
print(response.choices[0].message.content)
print()
print('Token usage:')
print(f' Input: {response.usage.prompt_tokens}')
print(f' Output: {response.usage.completion_tokens}')
print(f' Total: {response.usage.total_tokens}')
```
***
统计多次调用的累计费用:
```python theme={null}
import os
from litellm import completion, completion_cost
response = completion(
model='openai/claude-sonnet-4-6',
api_base='https://aihubmix.com/v1',
api_key=os.environ.get('AIHUBMIX_API_KEY'),
messages=[{'role': 'user', 'content': 'Explain Python in 100 words'}]
)
cost = completion_cost(completion_response=response)
print(f'Cost: ${cost:.6f}')
```
***
## 7. 负载均衡 / 故障转移
配置多个模型,自动分流或在某个模型失败时切换到备用模型:
```python theme={null}
import os
from litellm import Router
router = Router(
model_list=[
{
'model_name': 'my-model',
'litellm_params': {
'model': 'openai/claude-sonnet-4-6',
'api_base': 'https://aihubmix.com/v1',
'api_key': os.environ.get('AIHUBMIX_API_KEY'),
}
},
{
'model_name': 'my-model',
'litellm_params': {
'model': 'openai/gpt-4o',
'api_base': 'https://aihubmix.com/v1',
'api_key': os.environ.get('AIHUBMIX_API_KEY'),
}
}
]
)
response = router.completion(
model='my-model',
messages=[{'role': 'user', 'content': 'What is the meaning of life?'}]
)
print(response.choices[0].message.content)
```
> 两个模型共用同一个 `model_name`,LiteLLM 会自动轮询;若其中一个报错,自动切换到另一个。
## 8. 部署 Proxy Server
Proxy Server 是一个独立运行的网关服务,团队成员统一通过它访问模型,无需每个人单独配置 API Key。
### 安装
```text theme={null}
python3 -m pip install 'litellm[proxy]'
```
### 创建配置文件
新建 `config.yaml`:
```yaml theme={null}
model_list:
- model_name: gpt-4o
litellm_params:
model: openai/gpt-4o
api_base: https://aihubmix.com/v1
api_key: os.environ/AIHUBMIX_API_KEY
- model_name: claude-sonnet
litellm_params:
model: openai/claude-sonnet-4-6
api_base: https://aihubmix.com/v1
api_key: os.environ/AIHUBMIX_API_KEY
- model_name: gemini-flash
litellm_params:
model: openai/gemini-2.0-flash
api_base: https://aihubmix.com/v1
api_key: os.environ/AIHUBMIX_API_KEY
```
### 启动服务
```text theme={null}
litellm --config config.yaml --port 4000
```
看到以下输出说明启动成功:
```text theme={null}
LiteLLM: Proxy running on http://0.0.0.0:4000
```
### 调用本地服务
服务启动后,把 `api_base` 换成本地地址即可:
```python theme={null}
import os
from litellm import completion
response = completion(
model='gpt-4o',
api_base='http://localhost:4000',
api_key='any-string',
messages=[{'role': 'user', 'content': 'What is the meaning of life?'}]
)
print(response.choices[0].message.content)
```
> `api_key` 此时可以填任意字符串,真实的 AiHubMix Key 由 Proxy 统一管
## 9. 虚拟密钥管理
虚拟密钥让你可以给不同成员或项目分配独立的 Key,统一管控权限和用量,而不暴露真实的 AiHubMix API Key。
### 前置条件
虚拟密钥需要数据库支持,先启动一个 PostgreSQL:
```text theme={null}
docker run -d \
--name litellm-db \
-e POSTGRES_USER=litellm \
-e POSTGRES_PASSWORD=litellm \
-e POSTGRES_DB=litellm \
-p 5432:5432 \
postgres
```
### 更新配置文件
在 `config.yaml` 中加入数据库配置:
```yaml theme={null}
model_list:
- model_name: gpt-4o
litellm_params:
model: openai/gpt-4o
api_base: https://aihubmix.com/v1
api_key: os.environ/AIHUBMIX_API_KEY
- model_name: claude-sonnet
litellm_params:
model: openai/claude-sonnet-4-6
api_base: https://aihubmix.com/v1
api_key: os.environ/AIHUBMIX_API_KEY
general_settings:
master_key: sk-my-master-key
database_url: postgresql://litellm:litellm@localhost:5432/litellm
```
### 重启服务
```text theme={null}
litellm --config config.yaml --port 4000
```
### 创建虚拟密钥
用 `master_key` 创建一个新的虚拟 Key:
```bash theme={null}
curl -X POST http://localhost:4000/key/generate \
-H "Authorization: Bearer sk-my-master-key" \
-H "Content-Type: application/json" \
-d '{
"key_alias": "team-a",
"max_budget": 10,
"models": ["gpt-4o", "claude-sonnet"]
}'
```
返回结果中的 `key` 字段就是虚拟密钥,例如 `sk-xxxxxx`。
### 使用虚拟密钥调用
```python theme={null}
from litellm import completion
response = completion(
model='claude-sonnet',
api_base='http://localhost:4000',
api_key='sk-xxxxxx',
messages=[{'role': 'user', 'content': 'What is the meaning of life?'}]
)
print(response.choices[0].message.content)
```
### 查看用量
```bash theme={null}
curl http://localhost:4000/key/info \
-H "Authorization: Bearer sk-my-master-key" \
-H "Content-Type: application/json" \
-d '{"key": "sk-xxxxxx"}'
```
> 每个虚拟 Key 可以单独设置可用模型、预算上限、过期时间,适合团队多人协作场景。
先设置环境变量:
```text theme={null}
export AIHUBMIX_API_KEY="your-key"
```
## 实战:多模型对比测试
同一个问题同时发给多个模型,对比输出质量、速度和 Token 消耗。
### 设置 API Key
```text theme={null}
export AIHUBMIX_API_KEY="your-key"
```
### 运行对比测试
```text theme={null}
python3 -c "
import os
import time
import asyncio
from litellm import acompletion
MODELS = [
'gpt-5.5',
'claude-opus-4-7',
'deepseek-v4-flash',
'coding-glm-5.1-free',
]
QUESTION = 'If you could give a programmer only one piece of advice, what would it be?'
async def ask_model(model, question):
start = time.time()
try:
response = await acompletion(
model=f'openai/{model}',
api_base='https://aihubmix.com/v1',
api_key=os.environ.get('AIHUBMIX_API_KEY'),
messages=[{'role': 'user', 'content': question}]
)
return {
'model': model,
'answer': response.choices[0].message.content.strip(),
'tokens': response.usage.total_tokens,
'time': round(time.time() - start, 2),
'error': None
}
except Exception as e:
return {
'model': model,
'answer': None,
'tokens': 0,
'time': round(time.time() - start, 2),
'error': str(e)
}
async def main():
print(f'Question: {QUESTION}')
print('=' * 60)
tasks = [ask_model(m, QUESTION) for m in MODELS]
results = await asyncio.gather(*tasks)
for r in results:
print(f'\nModel: {r[\"model\"]}')
print(f'Time: {r[\"time\"]}s | Tokens: {r[\"tokens\"]}')
print('-' * 40)
if r['error']:
print(f'Error: {r[\"error\"]}')
else:
print(r['answer'])
print('\n' + '=' * 60)
print(f'{\"Model\":<30} {\"Time\":>8} {\"Tokens\":>8}')
print('-' * 50)
for r in sorted(results, key=lambda x: x['time']):
status = f'{r[\"time\"]}s' if not r['error'] else 'failed'
print(f'{r[\"model\"]:<30} {status:>8} {r[\"tokens\"]:>8}')
asyncio.run(main())
"
```
***
 最新更新日期:2026年4月29日