> ## Documentation Index
> Fetch the complete documentation index at: https://docs.aihubmix.com/llms.txt
> Use this file to discover all available pages before exploring further.
# OpenClaw
吉祥物是一只小龙虾(lobster),名字里的「Claw」来自此。
OpenClaw 的核心交互界面是**用户已经在使用的即时通讯平台**——把 AI 助手以聊天机器人的形态嵌入 WhatsApp、Telegram、Slack、Discord、飞书、钉钉、企业微信、iMessage、LINE 等 20+ IM,作为一个 7×24 小时在线的私人助理存在。
## 安装
安装前请确保 Node>=22
执行安装指令
```bash theme={null}
npm install -g openclaw@latest
```
安装完成后,后续命令可以在任意目录执行,不需要先切换到 OpenClaw 安装目录。如果终端能识别 `openclaw`,直接复制文档中的命令即可。
```powershell theme={null}
openclaw models status
```
如果 Windows 终端提示找不到 `openclaw`,请把命令开头的 `openclaw` 替换成你的本地可执行文件路径:
```powershell theme={null}
& "你的安装路径\OpenClaw\openclaw.cmd" models status
```
`你的安装路径` 是占位符,请替换为你实际安装 OpenClaw 的上级目录。例如 OpenClaw 位于 `D:\Apps\OpenClaw` 时,应写成 `& "D:\Apps\OpenClaw\openclaw.cmd" models status`。
### 终端配置
打开终端,运行以下指令开始配置
```powershell theme={null}
openclaw onboard
```
选择 `Yes`
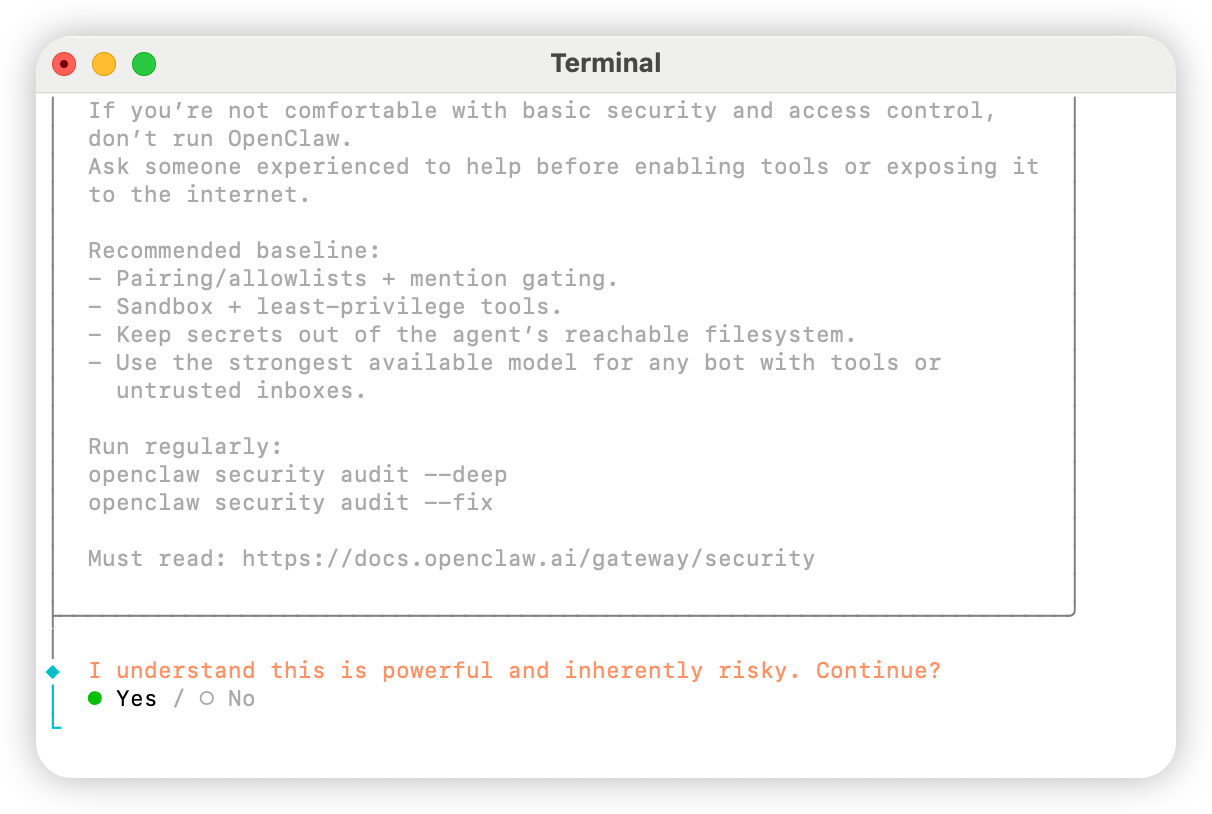 选择 `QuickStart`
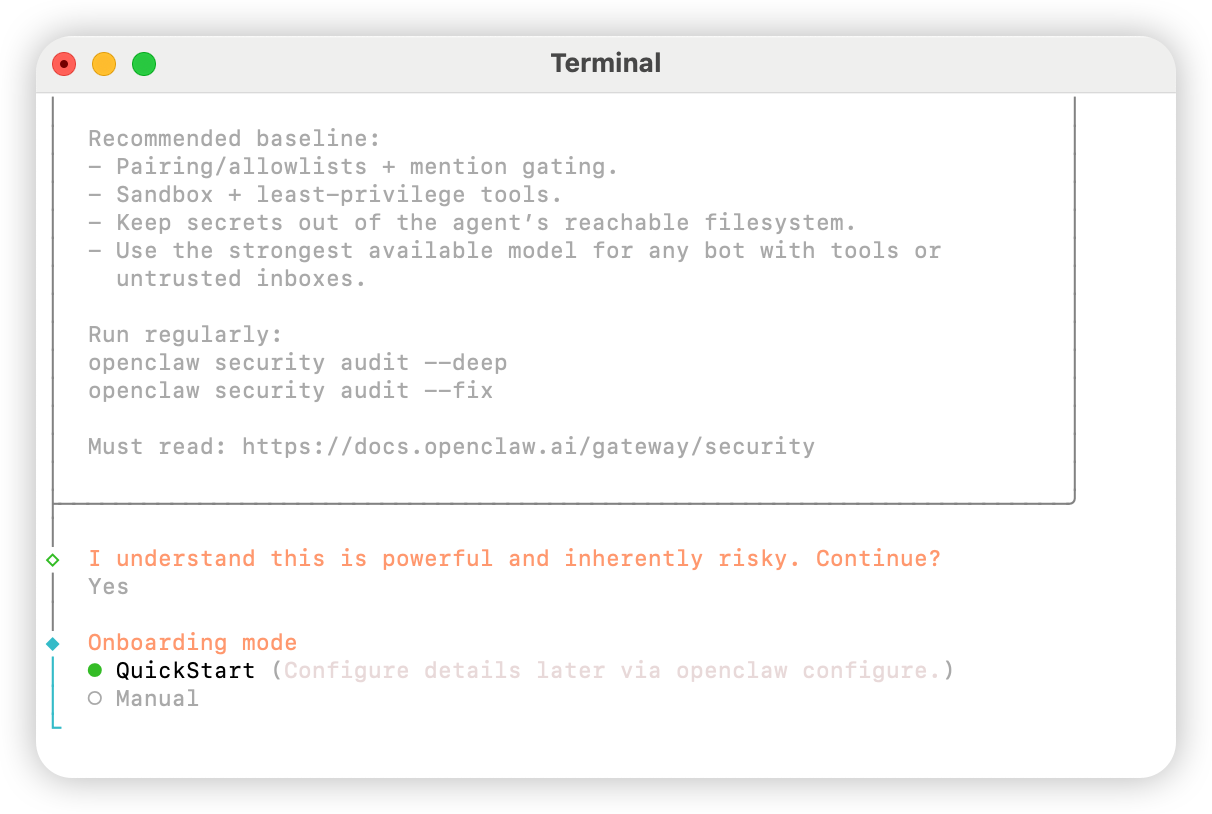 选择 `Skip for now`
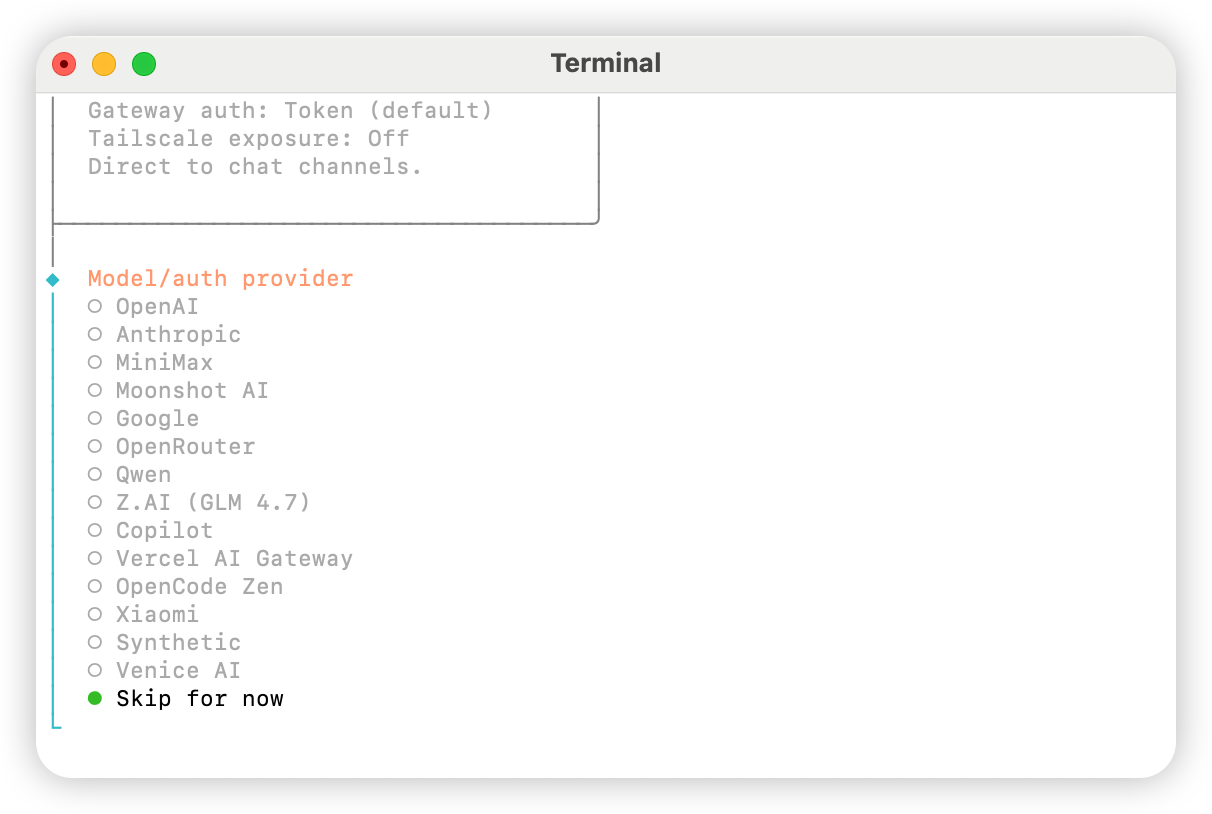 选择 `All providers`
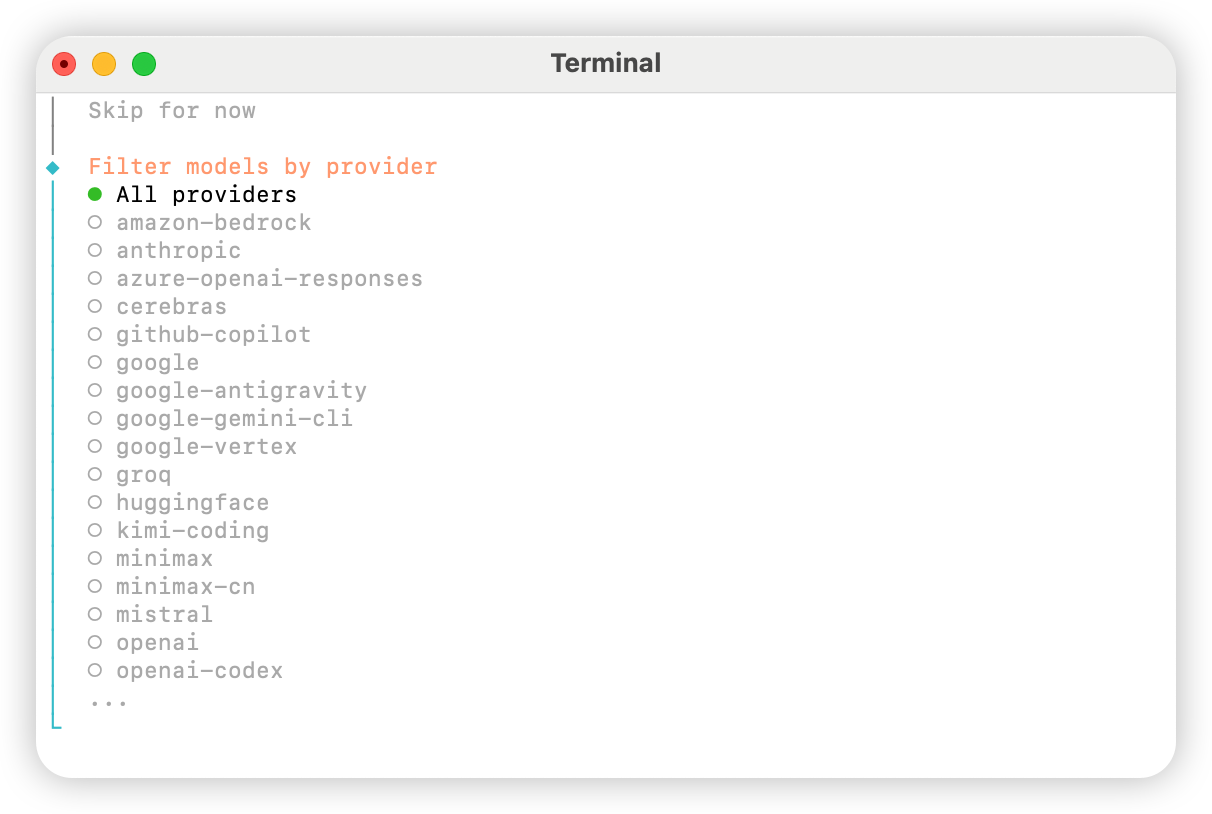 根据需求选择默认模型,可以先选择 `Keep current`(如使用「方法二:手动修改配置文件」,下一步会在配置文件中修改)
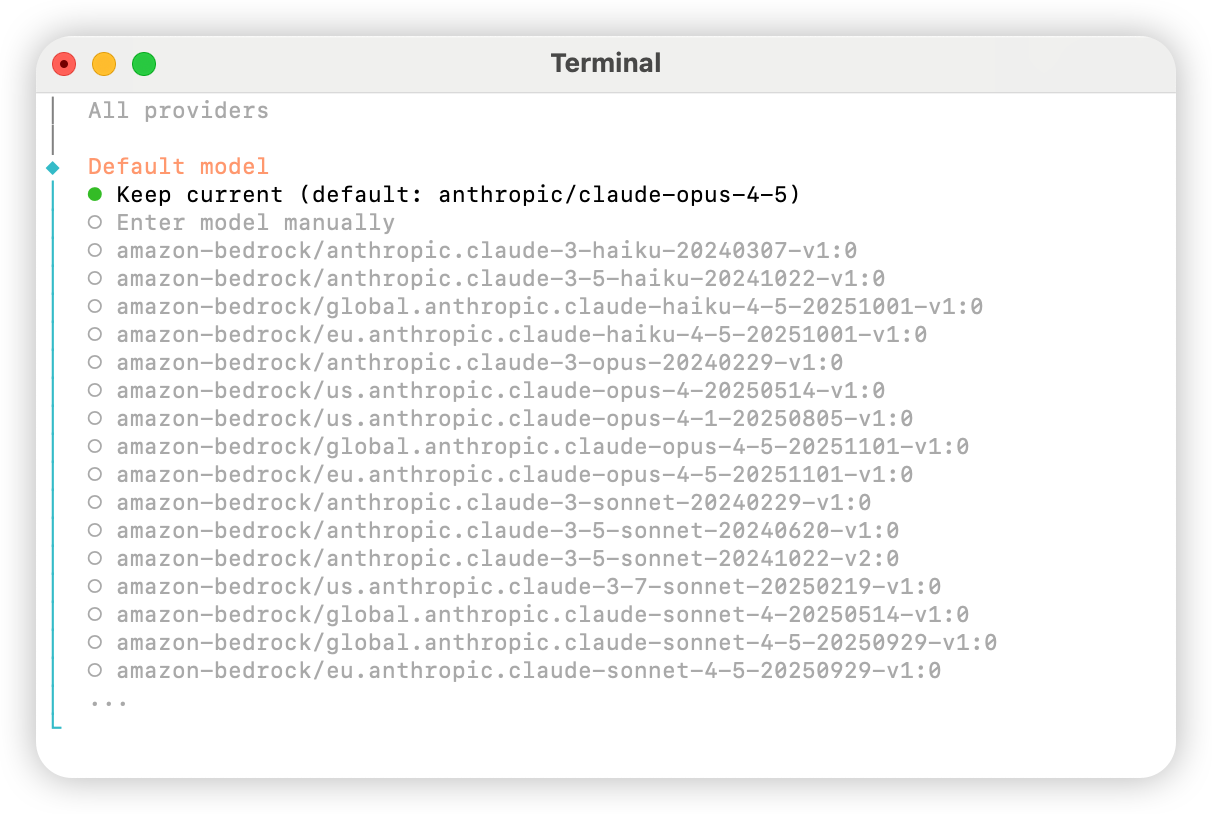 根据需求关联个人账户,如无相关需求请选择 `Skip for now`
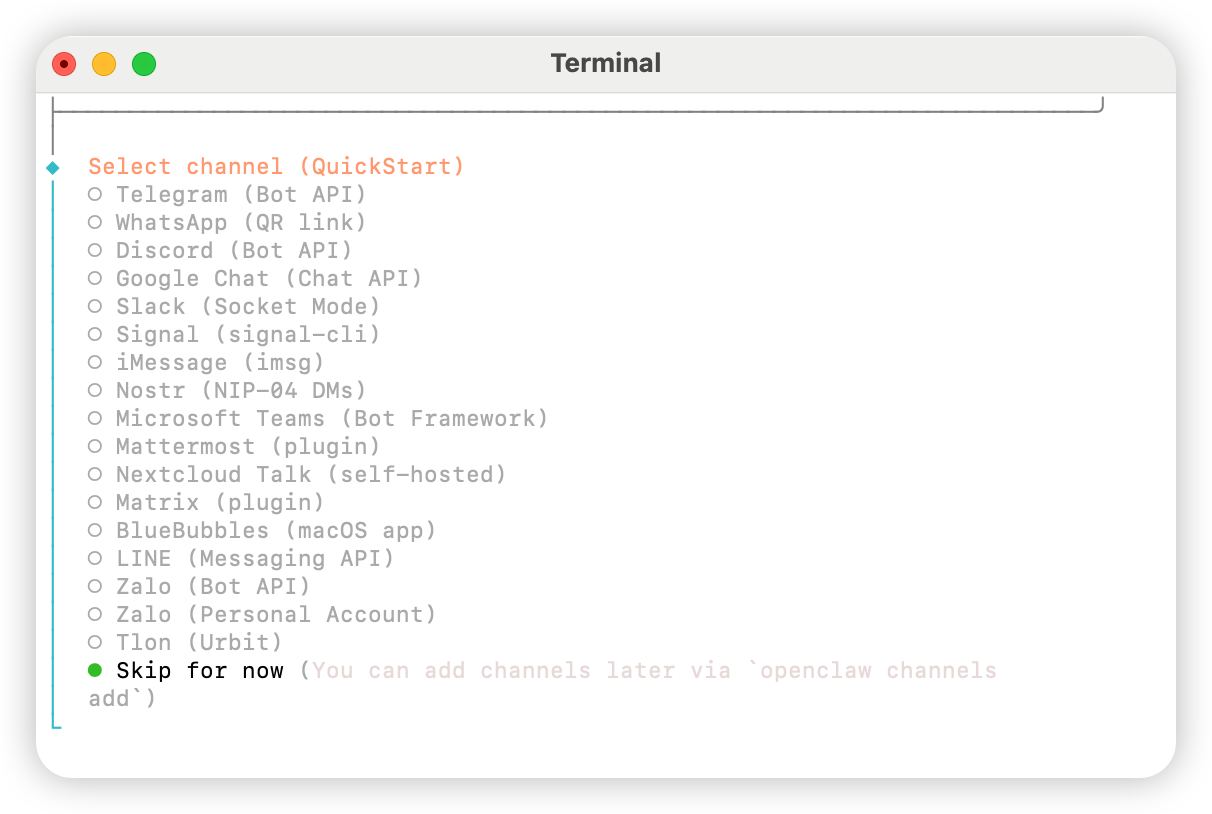 配置技能,选择 `Yes`
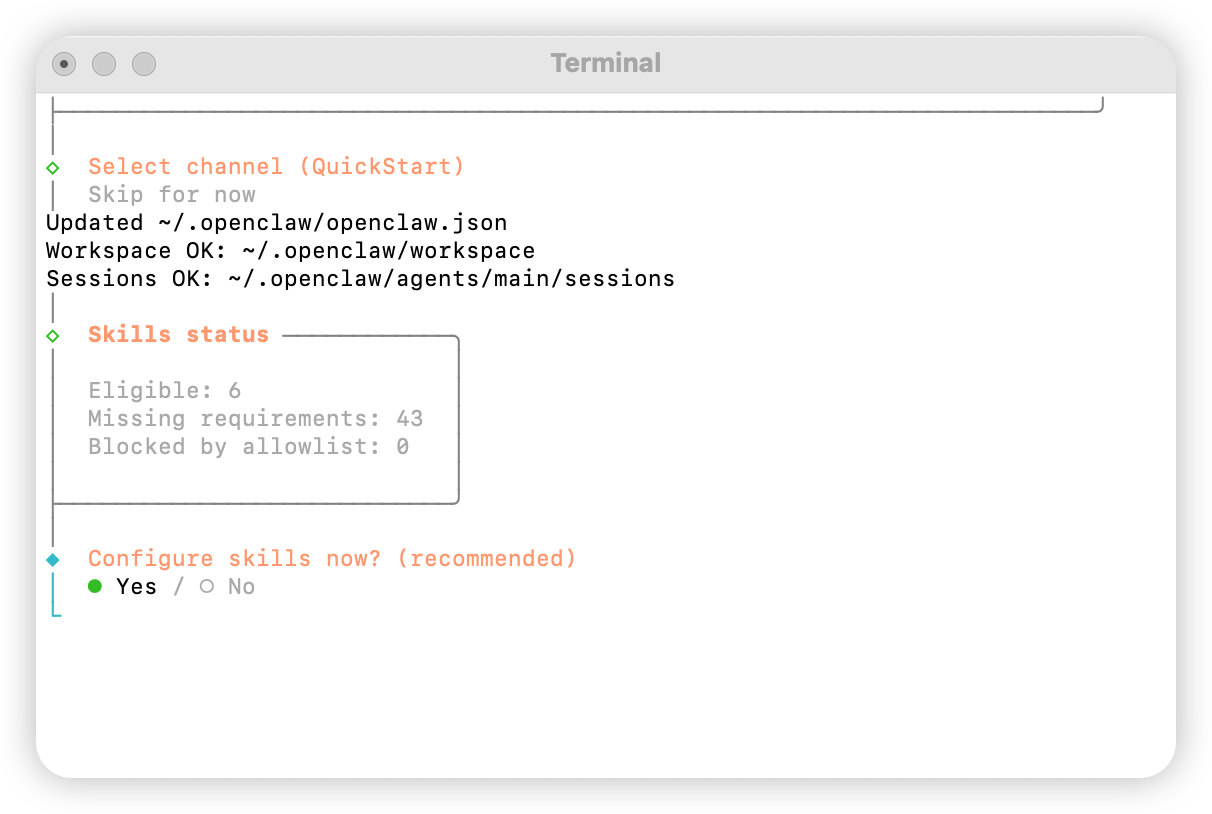 选择 `npm`
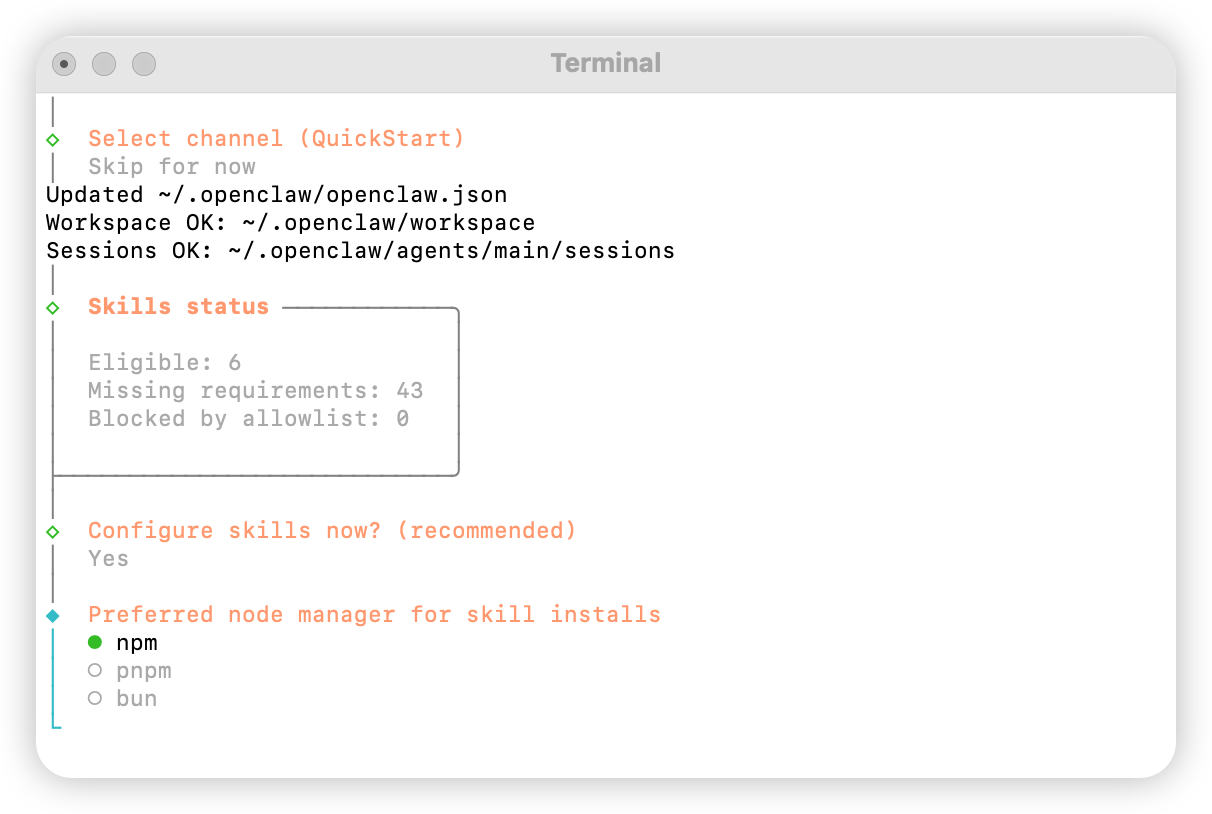 根据需求配置技能选择
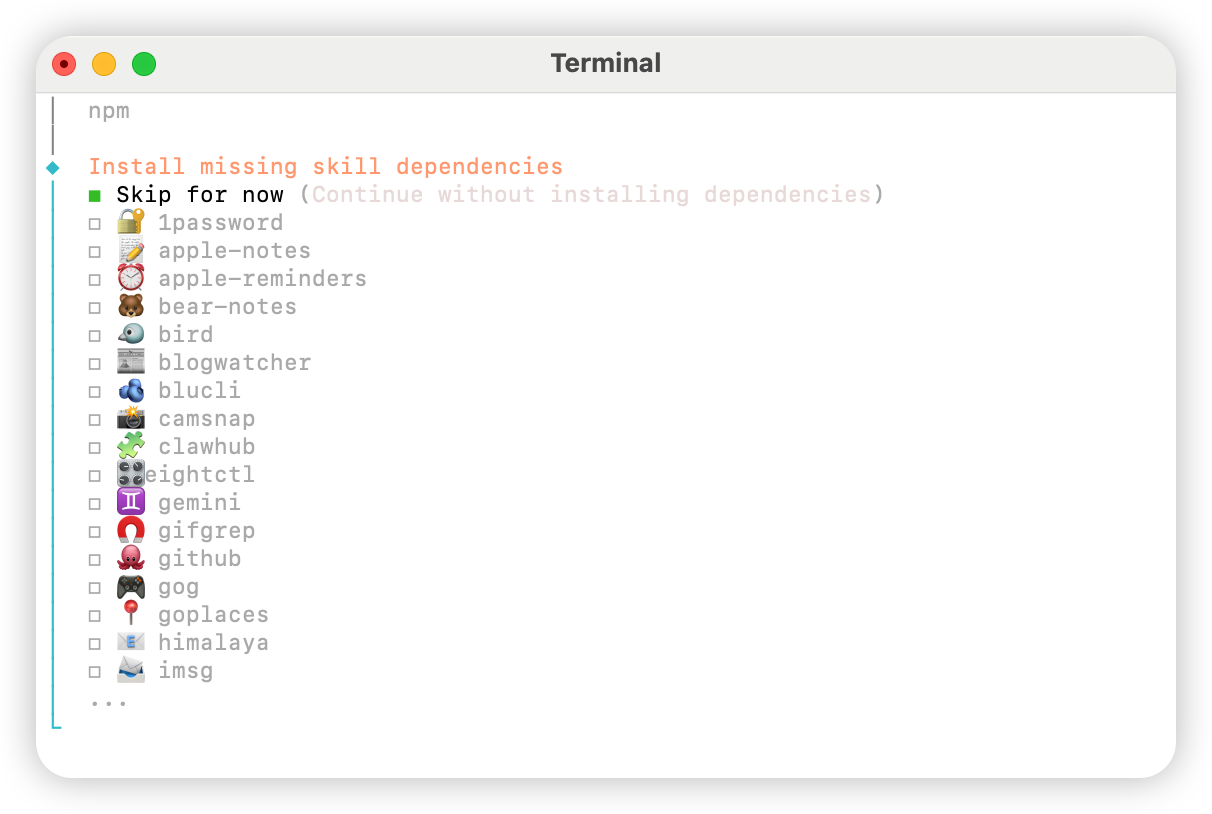 全部选择 `No`
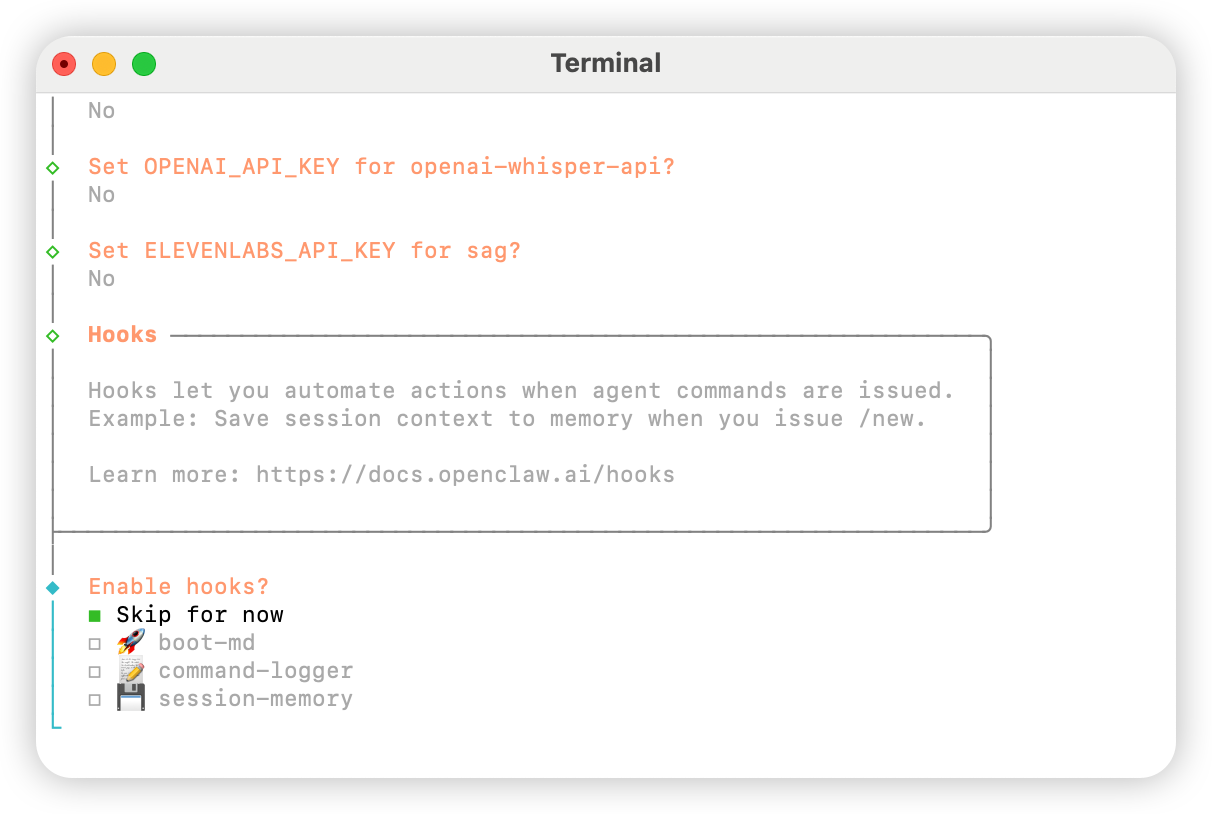
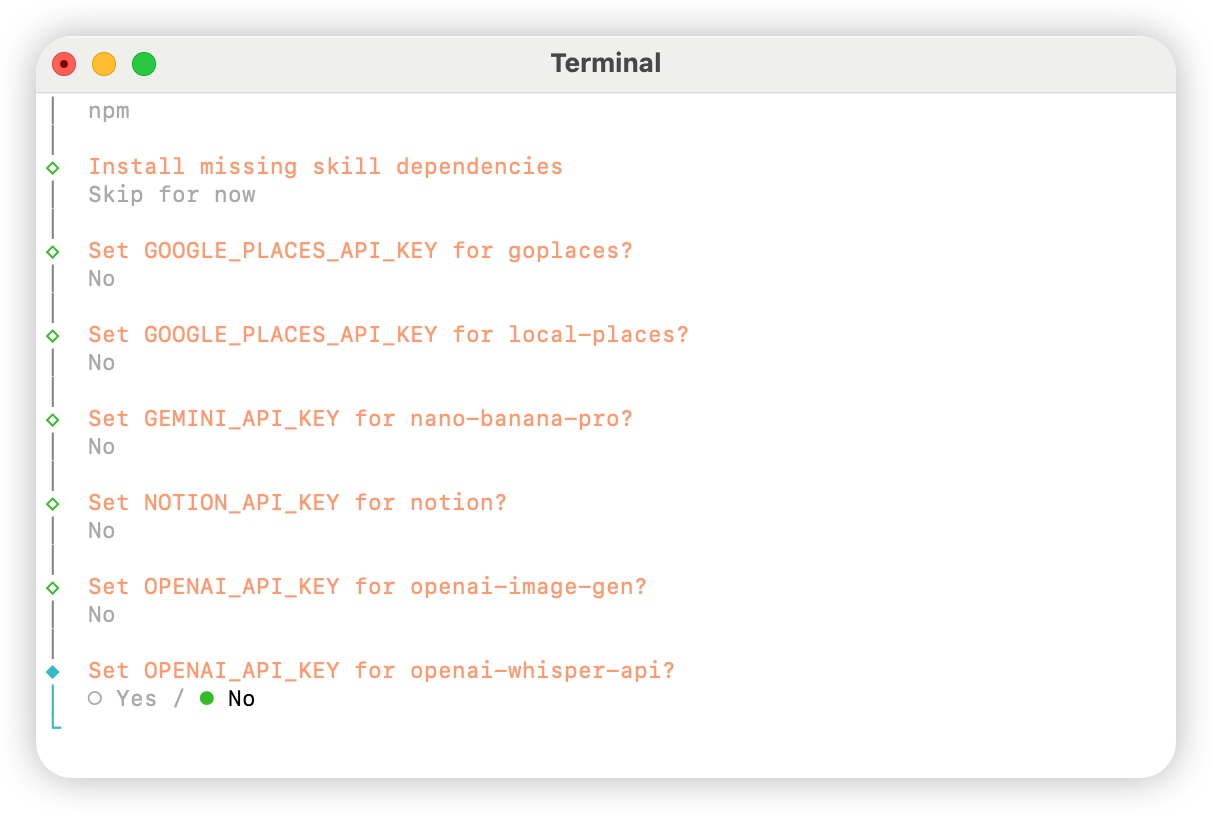 选择 `Skip for now`
 选择 `Hatch in UI`
## 配置 AIHubMix
### 方法一:使用插件快速配置(推荐)
插件开源地址:[aihubmix-auth](https://github.com/akakenle/aihubmix-auth)
安装 AIHubMix 认证插件并重启 Gateway:
```powershell theme={null}
openclaw plugins install @akakenle/aihubmix-auth
openclaw gateway restart
```
执行认证指令,按提示输入你的 AIHubMix API Key。下面这条命令对四个 provider 任选其一执行一次即可——插件通过 `providerAuthAliases` 让同一把 key 同时生效到全部 transport:
```powershell theme={null}
openclaw models auth login --provider aihubmix-openai --method api-key --set-default
```
插件会将模型自动归类为以下分组:
* **aihubmix-openai** — `gpt-*` / `o1-*` / `o3-*` / `o4-*`,`https://aihubmix.com/v1`(`openai-completions`)
* **aihubmix-anthropic** — `claude-*`,`https://aihubmix.com`(`anthropic-messages`)
* **aihubmix-google** — `gemini-*`,`https://aihubmix.com/gemini/v1beta`(`google-generative-ai`)
* **aihubmix-other** — 其他模型,`https://aihubmix.com/v1`(`openai-completions`)
简写 id(如 `claude-sonnet-4-5`)会由插件的 `resolveDynamicModel` hook 自动路由到对应 transport,不需要写完整 `provider/model`。
> 不想走交互式登录:先 `export AIHUBMIX_API_KEY=sk-...` 再 install,插件会把 key 作为 inline `apiKey` 写入 provider 配置(交互式登录则由 SDK 存入 auth-profile)。
配置完成后,跳转到[启动](#启动)步骤即可开始使用。
### 方法二:手动修改配置文件
如果不使用插件,或需要为少量模型固定上下文长度、输入类型等元数据,可以打开 `~/.openclaw/openclaw.json` 文件手动增加配置。使用插件时,优先按方法三的命令行方式选择模型:
```json theme={null}
{
"models": {
"mode": "merge",
"providers": {
"aihubmix-openai": {
"baseUrl": "https://aihubmix.com/v1",
"api": "openai-completions",
"models": [
{
"id": "gpt-4o",
"name": "gpt-4o",
"reasoning": false,
"input": ["text"],
"cost": {
"input": 0,
"output": 0,
"cacheRead": 0,
"cacheWrite": 0
},
"contextWindow": 128000,
"maxTokens": 16384
}
]
},
"aihubmix-anthropic": {
"baseUrl": "https://aihubmix.com",
"api": "anthropic-messages",
"models": [
{
"id": "claude-sonnet-4-5",
"name": "claude-sonnet-4-5",
"reasoning": false,
"input": ["text"],
"cost": {
"input": 0,
"output": 0,
"cacheRead": 0,
"cacheWrite": 0
},
"contextWindow": 200000,
"maxTokens": 64000
}
]
},
"aihubmix-google": {
"baseUrl": "https://aihubmix.com/gemini/v1beta",
"api": "google-generative-ai",
"models": []
},
"aihubmix-other": {
"baseUrl": "https://aihubmix.com/v1",
"api": "openai-completions",
"models": []
}
}
},
"agents": {
"defaults": {
"model": {
"primary": "aihubmix-anthropic/claude-sonnet-4-5"
},
"workspace": "your_workspace_path",
"compaction": {
"mode": "safeguard"
},
"maxConcurrent": 4,
"subagents": {
"maxConcurrent": 8
}
}
}
}
```
### 方法三:使用动态模型命令切换默认模型
AIHubMix OpenClaw 插件支持动态模型路由。只要模型在你的 AIHubMix 账号中可用,就可以按 `provider/model-id` 的格式直接调用;模型可用性以 AIHubMix 控制台和 API 实际返回为准。
常用 provider 选择规则如下:
* `aihubmix-openai`:OpenAI 兼容模型,例如 `gpt-*`、`o1-*`、`o3-*`、`o4-*`
* `aihubmix-anthropic`:Claude 模型,例如 `claude-*`
* `aihubmix-google`:Gemini 模型,例如 `gemini-*`
* `aihubmix-other`:其他通过 OpenAI 兼容接口调用的模型,例如 `glm-5.2`
下面以将 `gpt-5.4` 设置为 OpenClaw 默认模型为例:
```powershell theme={null}
openclaw models set aihubmix-openai/gpt-5.4
```
如果 Windows 终端提示找不到 `openclaw`,使用本地路径写法:
```powershell theme={null}
& "你的安装路径\OpenClaw\openclaw.cmd" models set aihubmix-openai/gpt-5.4
```
查看当前默认模型和认证状态:
```powershell theme={null}
openclaw models status
```
真实调用测试:
```powershell theme={null}
openclaw infer model run --local --json --model aihubmix-openai/gpt-5.4 --prompt "只回复 OK"
```
如果需要调用非 OpenAI / Claude / Gemini 分组的模型,可使用 `aihubmix-other`,例如:
```powershell theme={null}
openclaw infer model run --local --json --model aihubmix-other/glm-5.2 --prompt "只回复 OK"
```
查看 OpenClaw 当前已加载的模型目录:
```powershell theme={null}
openclaw infer model list --json
```
## 启动
```powershell theme={null}
openclaw gateway
```
## 测试
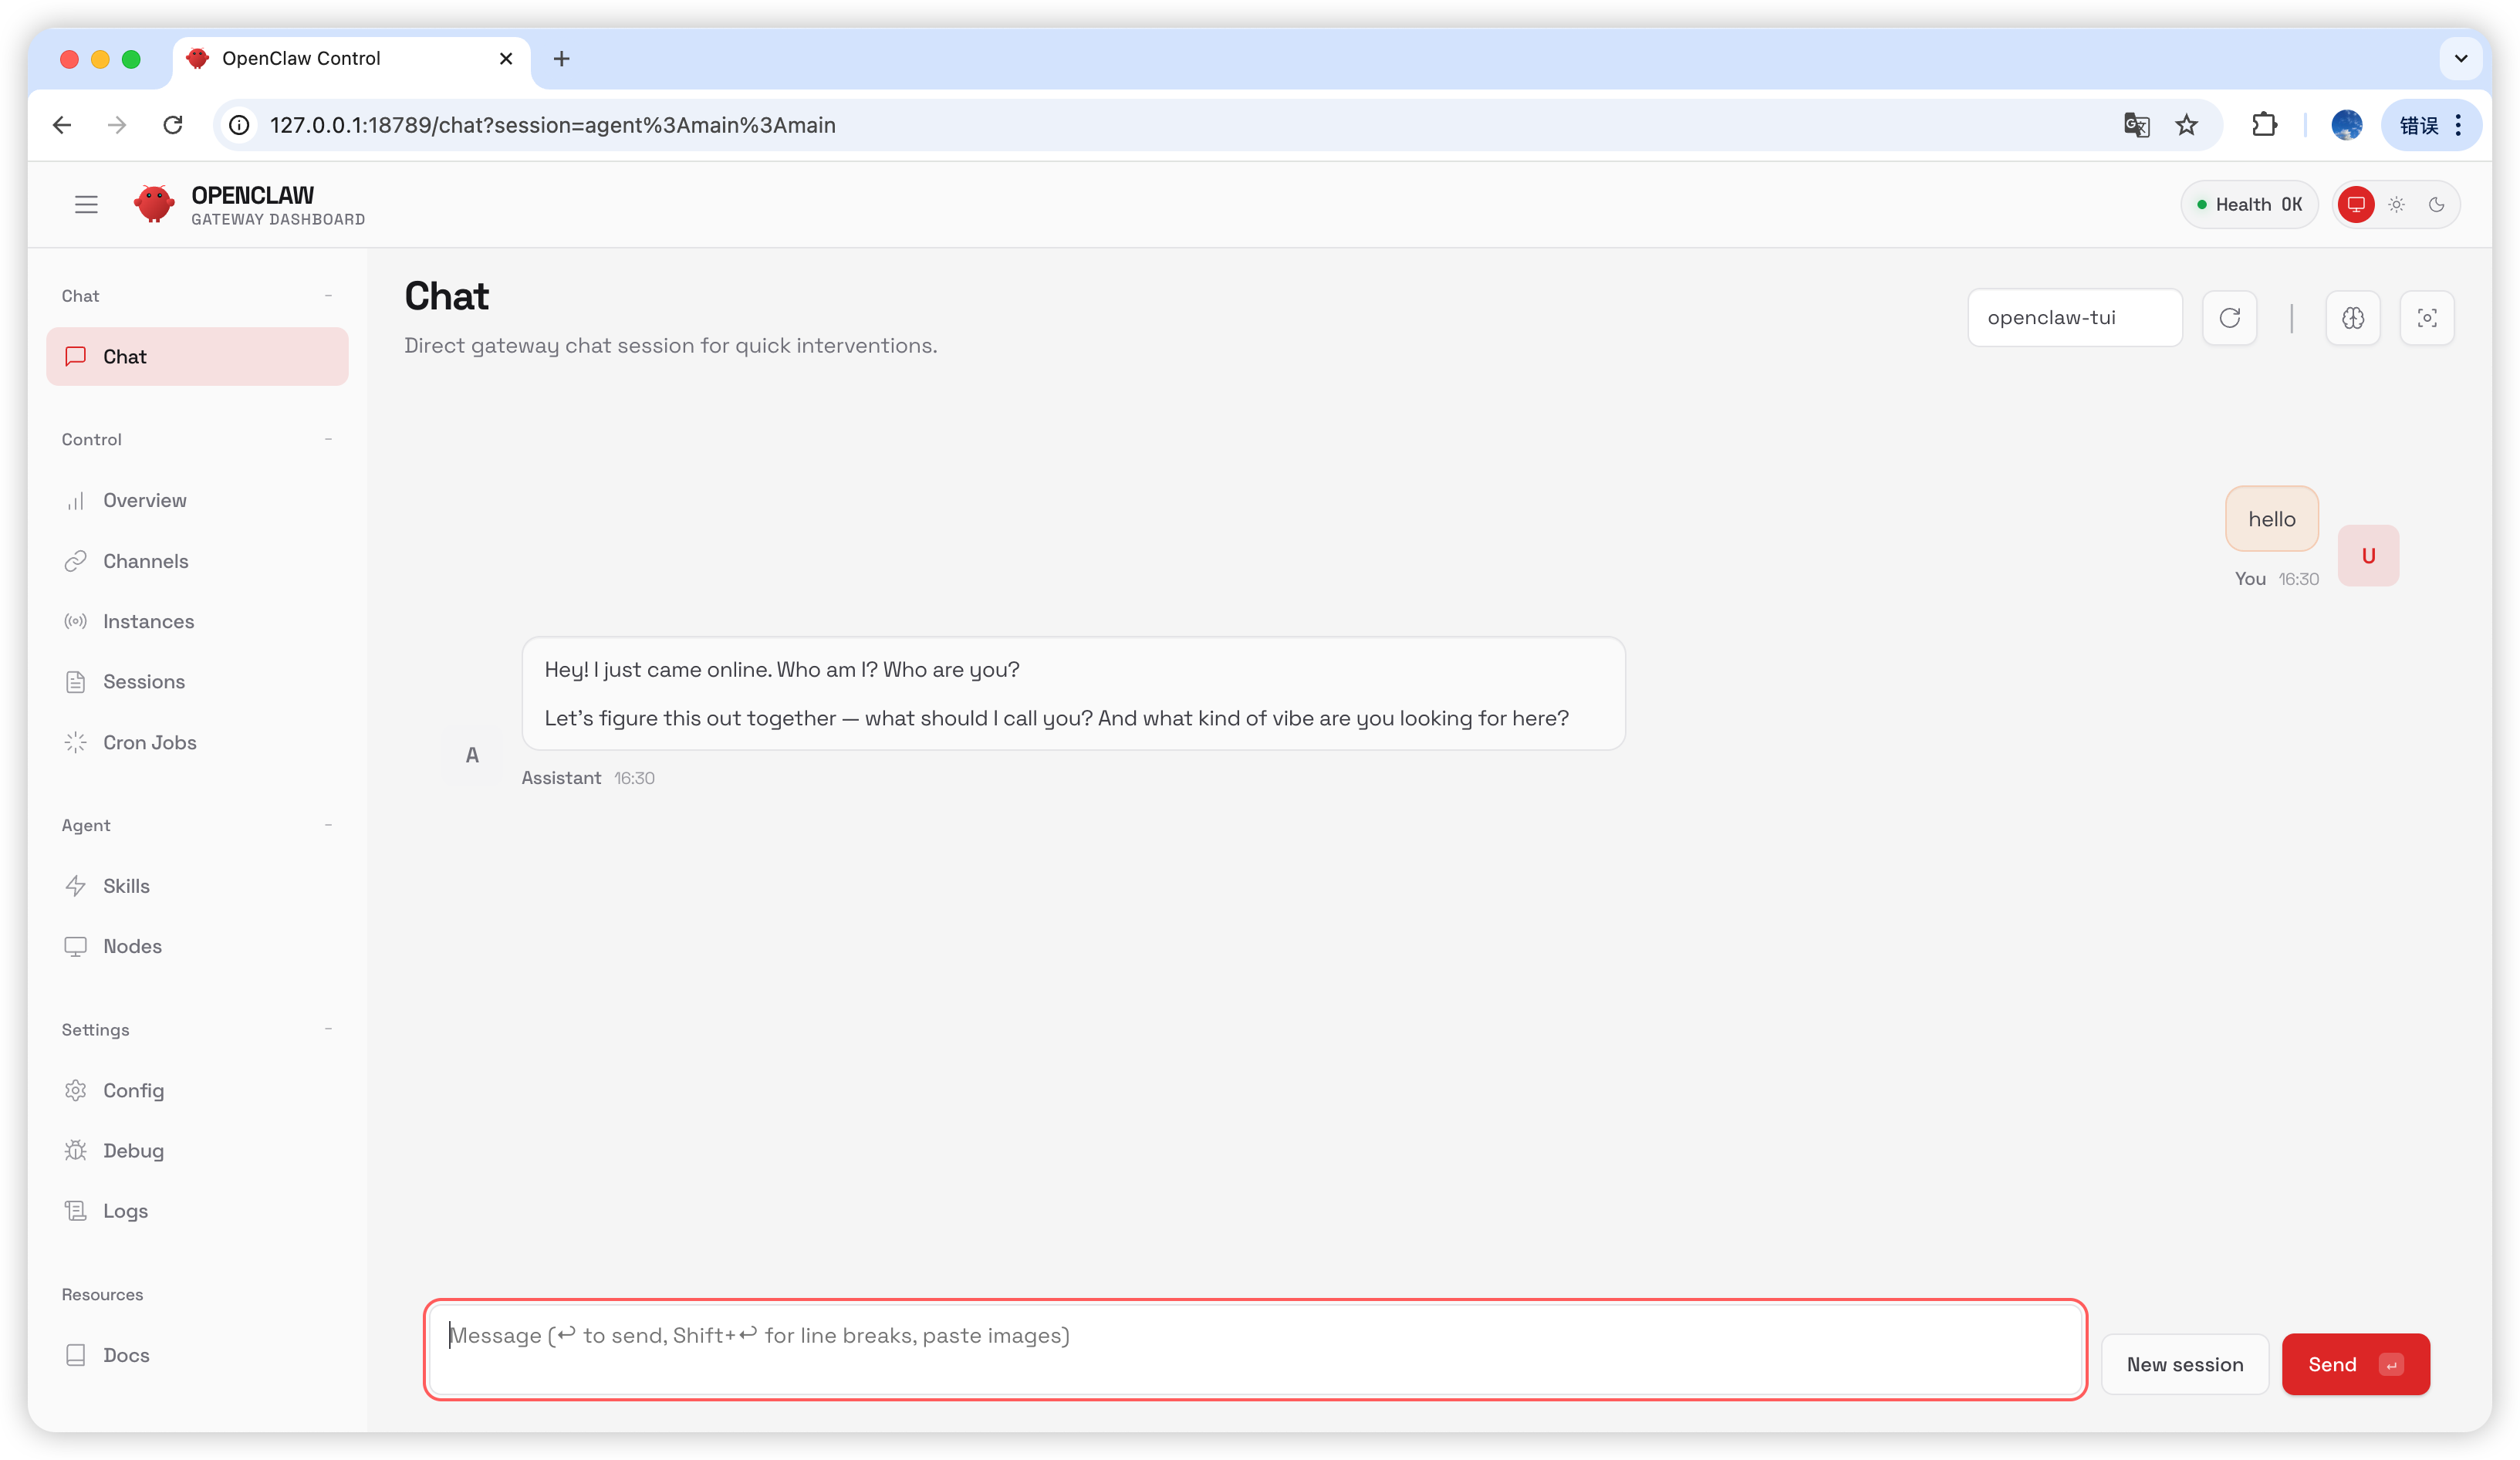
在聊天页面输入 `hello`,如收到回复则说明配置成功。
选择 `Hatch in UI`
## 配置 AIHubMix
### 方法一:使用插件快速配置(推荐)
插件开源地址:[aihubmix-auth](https://github.com/akakenle/aihubmix-auth)
安装 AIHubMix 认证插件并重启 Gateway:
```powershell theme={null}
openclaw plugins install @akakenle/aihubmix-auth
openclaw gateway restart
```
执行认证指令,按提示输入你的 AIHubMix API Key。下面这条命令对四个 provider 任选其一执行一次即可——插件通过 `providerAuthAliases` 让同一把 key 同时生效到全部 transport:
```powershell theme={null}
openclaw models auth login --provider aihubmix-openai --method api-key --set-default
```
插件会将模型自动归类为以下分组:
* **aihubmix-openai** — `gpt-*` / `o1-*` / `o3-*` / `o4-*`,`https://aihubmix.com/v1`(`openai-completions`)
* **aihubmix-anthropic** — `claude-*`,`https://aihubmix.com`(`anthropic-messages`)
* **aihubmix-google** — `gemini-*`,`https://aihubmix.com/gemini/v1beta`(`google-generative-ai`)
* **aihubmix-other** — 其他模型,`https://aihubmix.com/v1`(`openai-completions`)
简写 id(如 `claude-sonnet-4-5`)会由插件的 `resolveDynamicModel` hook 自动路由到对应 transport,不需要写完整 `provider/model`。
> 不想走交互式登录:先 `export AIHUBMIX_API_KEY=sk-...` 再 install,插件会把 key 作为 inline `apiKey` 写入 provider 配置(交互式登录则由 SDK 存入 auth-profile)。
配置完成后,跳转到[启动](#启动)步骤即可开始使用。
### 方法二:手动修改配置文件
如果不使用插件,或需要为少量模型固定上下文长度、输入类型等元数据,可以打开 `~/.openclaw/openclaw.json` 文件手动增加配置。使用插件时,优先按方法三的命令行方式选择模型:
```json theme={null}
{
"models": {
"mode": "merge",
"providers": {
"aihubmix-openai": {
"baseUrl": "https://aihubmix.com/v1",
"api": "openai-completions",
"models": [
{
"id": "gpt-4o",
"name": "gpt-4o",
"reasoning": false,
"input": ["text"],
"cost": {
"input": 0,
"output": 0,
"cacheRead": 0,
"cacheWrite": 0
},
"contextWindow": 128000,
"maxTokens": 16384
}
]
},
"aihubmix-anthropic": {
"baseUrl": "https://aihubmix.com",
"api": "anthropic-messages",
"models": [
{
"id": "claude-sonnet-4-5",
"name": "claude-sonnet-4-5",
"reasoning": false,
"input": ["text"],
"cost": {
"input": 0,
"output": 0,
"cacheRead": 0,
"cacheWrite": 0
},
"contextWindow": 200000,
"maxTokens": 64000
}
]
},
"aihubmix-google": {
"baseUrl": "https://aihubmix.com/gemini/v1beta",
"api": "google-generative-ai",
"models": []
},
"aihubmix-other": {
"baseUrl": "https://aihubmix.com/v1",
"api": "openai-completions",
"models": []
}
}
},
"agents": {
"defaults": {
"model": {
"primary": "aihubmix-anthropic/claude-sonnet-4-5"
},
"workspace": "your_workspace_path",
"compaction": {
"mode": "safeguard"
},
"maxConcurrent": 4,
"subagents": {
"maxConcurrent": 8
}
}
}
}
```
### 方法三:使用动态模型命令切换默认模型
AIHubMix OpenClaw 插件支持动态模型路由。只要模型在你的 AIHubMix 账号中可用,就可以按 `provider/model-id` 的格式直接调用;模型可用性以 AIHubMix 控制台和 API 实际返回为准。
常用 provider 选择规则如下:
* `aihubmix-openai`:OpenAI 兼容模型,例如 `gpt-*`、`o1-*`、`o3-*`、`o4-*`
* `aihubmix-anthropic`:Claude 模型,例如 `claude-*`
* `aihubmix-google`:Gemini 模型,例如 `gemini-*`
* `aihubmix-other`:其他通过 OpenAI 兼容接口调用的模型,例如 `glm-5.2`
下面以将 `gpt-5.4` 设置为 OpenClaw 默认模型为例:
```powershell theme={null}
openclaw models set aihubmix-openai/gpt-5.4
```
如果 Windows 终端提示找不到 `openclaw`,使用本地路径写法:
```powershell theme={null}
& "你的安装路径\OpenClaw\openclaw.cmd" models set aihubmix-openai/gpt-5.4
```
查看当前默认模型和认证状态:
```powershell theme={null}
openclaw models status
```
真实调用测试:
```powershell theme={null}
openclaw infer model run --local --json --model aihubmix-openai/gpt-5.4 --prompt "只回复 OK"
```
如果需要调用非 OpenAI / Claude / Gemini 分组的模型,可使用 `aihubmix-other`,例如:
```powershell theme={null}
openclaw infer model run --local --json --model aihubmix-other/glm-5.2 --prompt "只回复 OK"
```
查看 OpenClaw 当前已加载的模型目录:
```powershell theme={null}
openclaw infer model list --json
```
## 启动
```powershell theme={null}
openclaw gateway
```
## 测试
在聊天页面输入 `hello`,如收到回复则说明配置成功。
 ## 常见问题
### 版本升级
```powershell theme={null}
openclaw plugins update @akakenle/aihubmix-auth
openclaw gateway restart
```
### Gateway 进程被占用
```powershell theme={null}
openclaw gateway stop
openclaw gateway
```
## 相关资源
* 官方仓库:[github.com/openclaw/openclaw](https://github.com/openclaw/openclaw)
* 官方文档:[docs.openclaw.ai](http://docs.openclaw.ai)
* 中文指南:[liyupi/openclaw-guide](https://github.com/liyupi/openclaw-guide)
* 阿里云部署:[help.aliyun.com](http://help.aliyun.com)[ 部署 OpenClaw](https://help.aliyun.com/zh/simple-application-server/use-cases/quickly-deploy-and-use-openclaw)
* NVIDIA NemoClaw 集成:[NVIDIA Technical Blog](https://developer.nvidia.com/blog/build-a-secure-always-on-local-ai-agent-with-nvidia-nemoclaw-and-openclaw/)
***
更新时间:2026-07-03
## 常见问题
### 版本升级
```powershell theme={null}
openclaw plugins update @akakenle/aihubmix-auth
openclaw gateway restart
```
### Gateway 进程被占用
```powershell theme={null}
openclaw gateway stop
openclaw gateway
```
## 相关资源
* 官方仓库:[github.com/openclaw/openclaw](https://github.com/openclaw/openclaw)
* 官方文档:[docs.openclaw.ai](http://docs.openclaw.ai)
* 中文指南:[liyupi/openclaw-guide](https://github.com/liyupi/openclaw-guide)
* 阿里云部署:[help.aliyun.com](http://help.aliyun.com)[ 部署 OpenClaw](https://help.aliyun.com/zh/simple-application-server/use-cases/quickly-deploy-and-use-openclaw)
* NVIDIA NemoClaw 集成:[NVIDIA Technical Blog](https://developer.nvidia.com/blog/build-a-secure-always-on-local-ai-agent-with-nvidia-nemoclaw-and-openclaw/)
***
更新时间:2026-07-03