> ## Documentation Index
> Fetch the complete documentation index at: https://docs.aihubmix.com/llms.txt
> Use this file to discover all available pages before exploring further.
# Quickstart
> Start building modern documentation in under five minutes
 ## Getting Started
Welcome! Follow the instructions below to learn how to deploy, update and
supercharge your documentation with Mintlify.
### Creating the Repository
Mintlify docs are rendered from MDX files and configurations defined in our
[starter kit](https://github.com/mintlify/starter). We use GitHub to integrate
your docs with your code, and make source control effortless. Onboard through the [dashboard](https://dashboard.mintlify.com) or clone our [starter kit](https://github.com/mintlify/starter) to get started.
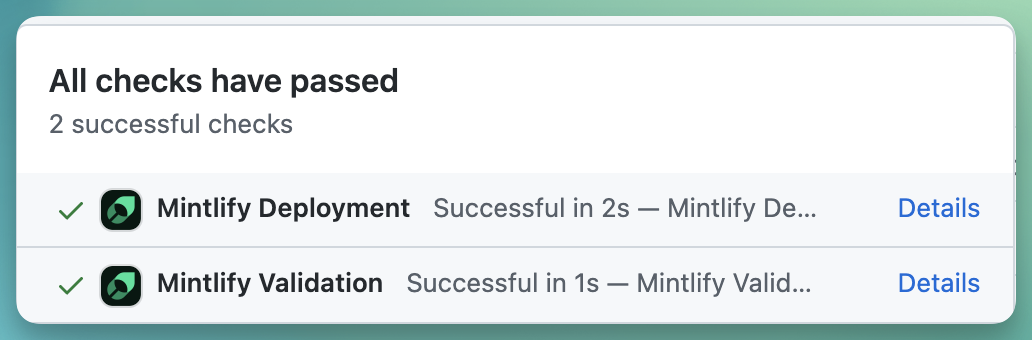
Install our GitHub app to ensure that your updates are automatically deployed when you push changes. You can find the installation link in the [dashboard](https://dashboard.mintlify.com/settings), on the Settings page. Upon successful installation, a check mark will appear next to the commit hash of the repository.
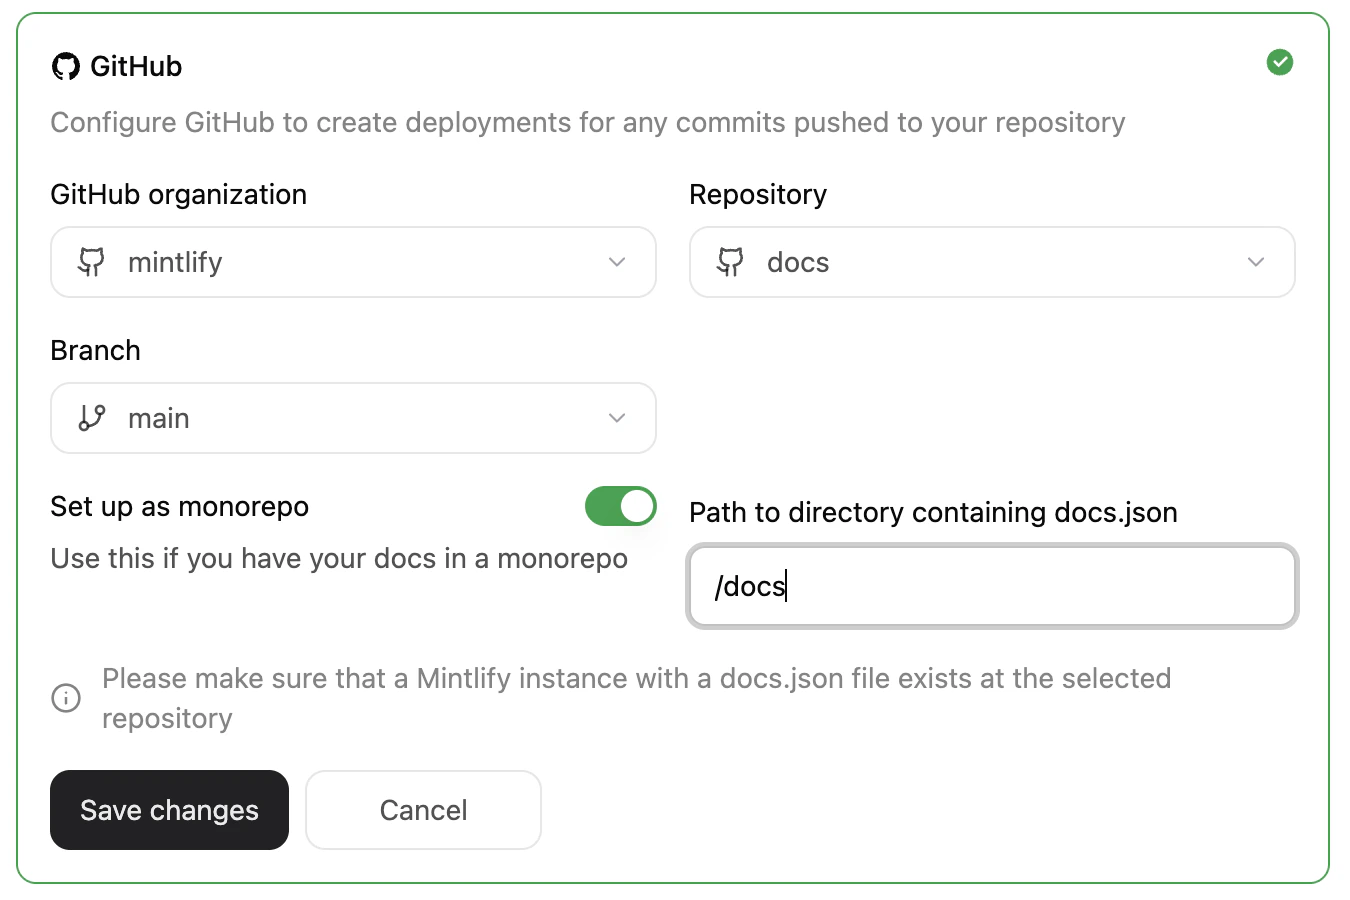
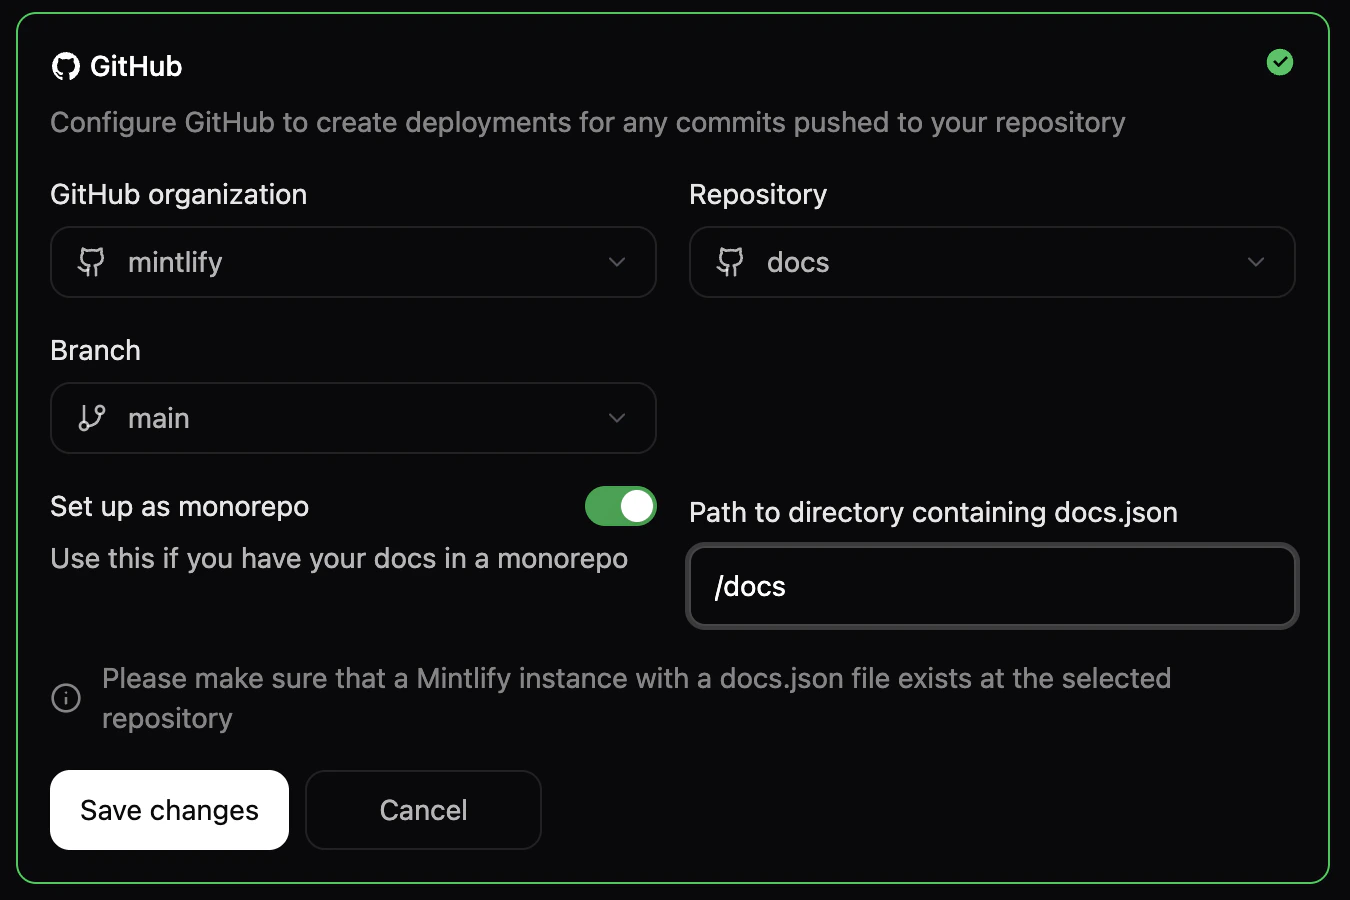
If you want your docs to live alongside your code as a monorepo setup, you
can: 1. Move your docs content to your monorepo. 2. Specify the path to your
`docs.json` in the
[dashboard](https://dashboard.mintlify.com/settings/deployment/git-settings)
## Getting Started
Welcome! Follow the instructions below to learn how to deploy, update and
supercharge your documentation with Mintlify.
### Creating the Repository
Mintlify docs are rendered from MDX files and configurations defined in our
[starter kit](https://github.com/mintlify/starter). We use GitHub to integrate
your docs with your code, and make source control effortless. Onboard through the [dashboard](https://dashboard.mintlify.com) or clone our [starter kit](https://github.com/mintlify/starter) to get started.
Install our GitHub app to ensure that your updates are automatically deployed when you push changes. You can find the installation link in the [dashboard](https://dashboard.mintlify.com/settings), on the Settings page. Upon successful installation, a check mark will appear next to the commit hash of the repository.

If you want your docs to live alongside your code as a monorepo setup, you
can: 1. Move your docs content to your monorepo. 2. Specify the path to your
`docs.json` in the
[dashboard](https://dashboard.mintlify.com/settings/deployment/git-settings)
 ### Updating the Content
Mintlify enables you to easily customize the style, structure, and content of
your docs.
1. Install [git](https://git-scm.com/book/en/v2/Getting-Started-Installing-Git).
2. Once git is installed, clone your docs repository using `git clone `. If you haven't set it up yet, now would be a good time to do so with these [SSH keys](https://docs.github.com/en/authentication/connecting-to-github-with-ssh/generating-a-new-ssh-key-and-adding-it-to-the-ssh-agent).
3. Use your favorite IDE to open the repository.
4. Install our Mintlify CLI to preview changes with `npm i -g mintlify`.
Learn more about this in our [local development guide](/development).
Learn more about how to use the web editor on our [guide](/web-editor).
Easily customize colors, logos and buttons among other configurations in our `docs.json` file. Start with these basic configurations:
```json theme={null}
"name": "Your Company"
"logo": {
"light": "/logo/light.svg",
"dark": "/logo/dark.svg",
"href": "https://yourcompany.com"
},
"favicon": "/favicon.svg",
"colors": {
"primary": "#2AB673",
"light": "#55D799",
"dark": "#117866",
},
```
A full list of supported configurations can be found at [global settings](/settings/global).
Add content with simple MDX files. Initiate your pages with this template:
```md theme={null}
---
title: "Page Title"
sidebarTitle: "Sidebar title (optional - if different from page title)"
description: "Subtitle (optional)"
---
```
Learn more about adding images, tables, lists, and more using the [MDX syntax](/text). We also offer a [wide array of components](/content/components).
Once ready, commit and push your changes to update your docs site. Here is a [guide](https://docs.github.com/en/get-started/using-git/pushing-commits-to-a-remote-repository#about-git-push) on how to do that. If the GitHub app is unable to successfully deploy your changes, you can manually update your docs through our [dashboard](https://dashboard.mintlify.com).

You can easily set up your API references using an OpenAPI document.
1. Add your `openapi.yaml` or `openapi.json` file into your docs repository or define the `openapi` field in `docs.json` with a URL.
```json theme={null}
"openapi": "link-to-your-openapi-file"
```
2. Use our [scraper](/api-playground/openapi/setup#autogenerate-files-recommended) to autogenerate your OpenAPI endpoints files as:
```bash theme={null}
npx @mintlify/scraping@latest openapi-file
```
3. Finally, include the generated endpoint MDX files to your `docs.json` under `navigation`.
For a complete guide on using Mintlify with OpenAPI, check out [this guide](/api-playground/openapi/setup). [This guide](/api-playground/openapi/writing-openapi) explains how to configure your API authentication methods. For manual API references definition, explore [our syntax](/api-playground/overview).
Our in-house analytics give you insights into page views, search analytics, session recordings and more. Access these on your [dashboard](https://dashboard.mintlify.com/analytics).
We also support integrations with a range of analytics providers. You can find the list of providers [here](/integrations/analytics/overview).
We provide a white-glove migration service as part of our Enterprise plan.
Interested? You can request it by [contacting us](mailto:sales@mintlify.com).
### Publishing
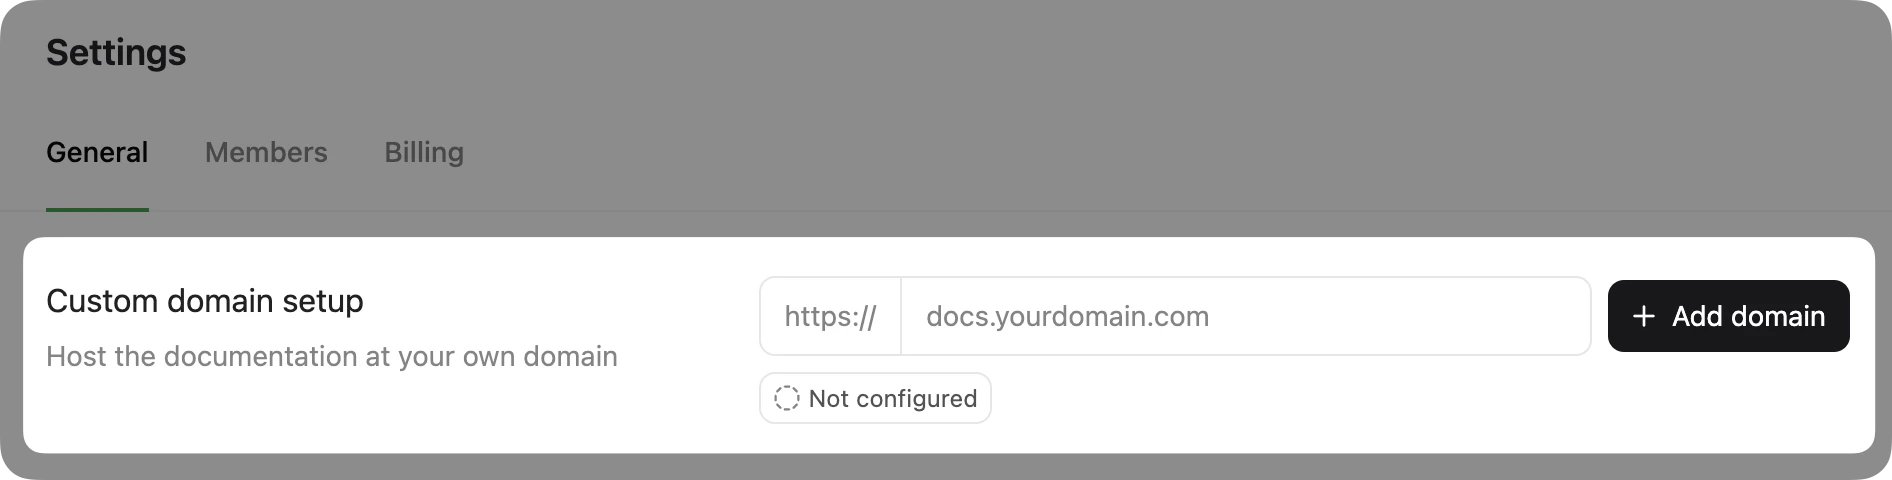
Integrate your docs into your website by hosting them on a custom domain. This is included in the free plan.
Navigate to your [dashboard settings](https://dashboard.mintlify.com/settings) to add a custom domain.
### Updating the Content
Mintlify enables you to easily customize the style, structure, and content of
your docs.
1. Install [git](https://git-scm.com/book/en/v2/Getting-Started-Installing-Git).
2. Once git is installed, clone your docs repository using `git clone `. If you haven't set it up yet, now would be a good time to do so with these [SSH keys](https://docs.github.com/en/authentication/connecting-to-github-with-ssh/generating-a-new-ssh-key-and-adding-it-to-the-ssh-agent).
3. Use your favorite IDE to open the repository.
4. Install our Mintlify CLI to preview changes with `npm i -g mintlify`.
Learn more about this in our [local development guide](/development).
Learn more about how to use the web editor on our [guide](/web-editor).
Easily customize colors, logos and buttons among other configurations in our `docs.json` file. Start with these basic configurations:
```json theme={null}
"name": "Your Company"
"logo": {
"light": "/logo/light.svg",
"dark": "/logo/dark.svg",
"href": "https://yourcompany.com"
},
"favicon": "/favicon.svg",
"colors": {
"primary": "#2AB673",
"light": "#55D799",
"dark": "#117866",
},
```
A full list of supported configurations can be found at [global settings](/settings/global).
Add content with simple MDX files. Initiate your pages with this template:
```md theme={null}
---
title: "Page Title"
sidebarTitle: "Sidebar title (optional - if different from page title)"
description: "Subtitle (optional)"
---
```
Learn more about adding images, tables, lists, and more using the [MDX syntax](/text). We also offer a [wide array of components](/content/components).
Once ready, commit and push your changes to update your docs site. Here is a [guide](https://docs.github.com/en/get-started/using-git/pushing-commits-to-a-remote-repository#about-git-push) on how to do that. If the GitHub app is unable to successfully deploy your changes, you can manually update your docs through our [dashboard](https://dashboard.mintlify.com).

You can easily set up your API references using an OpenAPI document.
1. Add your `openapi.yaml` or `openapi.json` file into your docs repository or define the `openapi` field in `docs.json` with a URL.
```json theme={null}
"openapi": "link-to-your-openapi-file"
```
2. Use our [scraper](/api-playground/openapi/setup#autogenerate-files-recommended) to autogenerate your OpenAPI endpoints files as:
```bash theme={null}
npx @mintlify/scraping@latest openapi-file
```
3. Finally, include the generated endpoint MDX files to your `docs.json` under `navigation`.
For a complete guide on using Mintlify with OpenAPI, check out [this guide](/api-playground/openapi/setup). [This guide](/api-playground/openapi/writing-openapi) explains how to configure your API authentication methods. For manual API references definition, explore [our syntax](/api-playground/overview).
Our in-house analytics give you insights into page views, search analytics, session recordings and more. Access these on your [dashboard](https://dashboard.mintlify.com/analytics).
We also support integrations with a range of analytics providers. You can find the list of providers [here](/integrations/analytics/overview).
We provide a white-glove migration service as part of our Enterprise plan.
Interested? You can request it by [contacting us](mailto:sales@mintlify.com).
### Publishing
Integrate your docs into your website by hosting them on a custom domain. This is included in the free plan.
Navigate to your [dashboard settings](https://dashboard.mintlify.com/settings) to add a custom domain.
 Congrats! You've set up your Mintlify Docs and it's looking amazing! Need
support or want to give some feedback? You can join our
[community](https://mintlify.com/community) or drop us an email at
[support@mintlify.com](mailto:support@mintlify.com).
Congrats! You've set up your Mintlify Docs and it's looking amazing! Need
support or want to give some feedback? You can join our
[community](https://mintlify.com/community) or drop us an email at
[support@mintlify.com](mailto:support@mintlify.com).